How to Make Polymer Clay Earrings
This post and the photos within it may contain affiliate links. As an Amazon associate I earn from qualifying purchases. If you make a purchase through one or more of the links, I may receive a small commission at no extra cost to you.
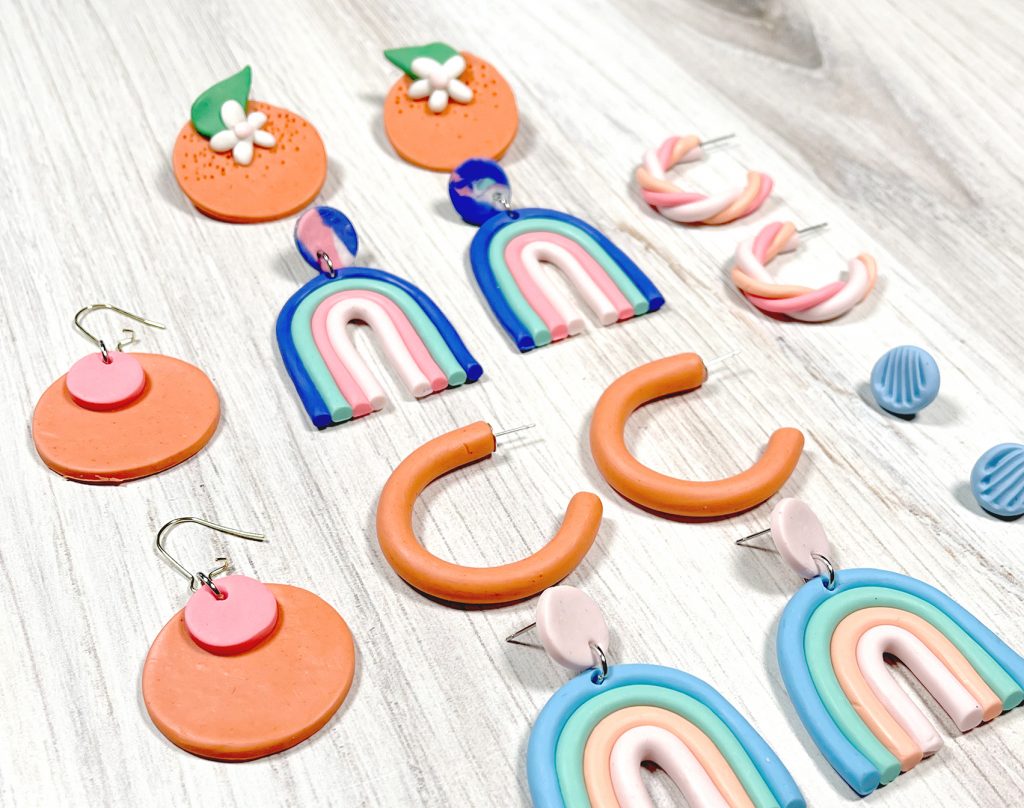
Polymer Clay Earrings are a really fun and easy craft to make! Clay Earrings are so popular and trendy that everyone will want to know how you made them. Keep reading to see how to make easy polymer clay earrings in all different shapes and colors, including arch shape, rainbow, floral, geometrical, textured, and more! I have included 10+ Polymer Clay Ideas for Earrings that you can make at home!

Clay Earrings are starting to pop up ALL over the internet and social media, including Etsy and TikTok. I am totally obsessed with watching how they are made (it’s a huge rabbit hole of videos haha) and I couldn’t wait to try making some of my own to wear! I will show you all of the different techniques I have learned so that you can make your own DIY polymer clay earrings to match all of your outfits.
RELATED POST: 10+ Tie Dye Shirt Patterns & Folding Techniques

What is Polymer Clay?
Polymer Clay is a plastic (vinyl) based modeling compound that is used for arts and crafts such as earrings, jewelry, beads, and small figurines. It is flexible and used for a wide variety of crafts. It is also readily available at your local craft store or online. It is perfect for crafting because it stays soft until it is baked in a home oven. You can blend colors of clay together to create custom colors, and once it is cured in the oven you can even paint it.
What is the Best Clay for Earrings?
Different polymer clay brands that are readily available, high quality, and perfect for making your own clay earrings include:
Sculpey Premo: Premo is one of my favorite brands because it is soft and blends easily so I can mix colors, yet firm enough to hold small details like texture or tiny designs. Once cured it is very durable, which makes it perfect for making earrings and jewelry. It comes in a ton of bright colors and is even available in glitter and metallic colors! Premo Sculpey Polymer Clay is a great way to learn polymer clay techniques because it is so easy to work with.
Sculpey Souffle: Souffle is a lightweight and soft clay that maintains flexibility once it is cured in the oven. It has a desirable matte finish and you can even cut it to give sharp edges or sew it after it is baked. It doesn’t come in as many colors as Premo, but there is still a nice variety.
FIMO Professional: this polymer is more firm and is great for detailed work. I find it slightly harder to work with (I prefer softer clay) but I love the colors of FIMO Professional. You can mix exact colors and the colors are bright and highly pigmented.
There are tons of other brands out there, and the texture and pliability of each brand may vary. For instance, Sculpey Premo or Souffle are great, but Sculpey III is totally different! I really think the above brands are the best polymer clay you can buy as an amateur crafter. I would be cautious of ordering cheap multipack boxes of clay. The prices are great, but it is usually of low quality.
Can you air dry polymer clay? There are a few kinds of high quality clay that can be air-dried. The advantage to air dry clay is that some can be quick processed in the microwave (FIMO air, for example). This make air-drying clay perfect for summer camps or small crafts with your kids, but it has a limited working time. I would not recommend it for jewelry making, especially for sets of earrings that you intend to sell in an online store or at a craft show.
Polymer Clay Tools and Supplies
If you are just getting started with polymer clay jewelry, you really only need a few supplies to make beautiful earrings!
- Polymer Clay (in lots of colors!)
- Jump Rings
- Earring Posts and/or Earring Hooks (you can buy earring finding in a variety pack that is really useful!)
- Jewelry Pliers
- Flexible Super Glue
- Cookie Cutters or a Clay Cutter
- Exacto Knife (X-acto Knife) or Craft Knife
- Toothpick or Paper Clip
- Acrylic Rolling Pin
Optional Supplies:
- Clay Extruder
- Pasta Machine (to evenly roll sheets of clay)
- Modeling Tools
Although all of those tools are suggested, I have found that the best part about working with clay pieces is that you can use household items! Anything to make designs or roll out your clay will work. If you don’t want to run out and buy a ton of supplies just to try working with polymer clay, don’t! If you decide you want to make more sets of earrings or start selling them, then invest in a couple of small tools to make your results more professional.
I used circle cutters to create a lot of these earrings because they are simple and you can make tons of designs with just one set of cutters. But if you are looking to upgrade your own polymer clay earrings, you can get a variety of cutters that are specific for clay. Etsy is a great place to find cutters like this arched earring shape cutter, or this amazing set of clay earring cutters.
How to Prep Your Work Surface for Polymer Clay
Polymer clay is pretty harmless to craft surfaces, but it can stain your surface depending on the colors you are using. I have a white desk surface that I use for crafting, so I cover mine with a piece of parchment paper or a cutting mat when I am using clay. You can also use a silicone mat, wax paper, a baking sheet, or another smooth surface like a piece of glass or tile.
A really important thing to remember when working with polymer clay is that it LOVES dust and lint particles that may be on your hands or work surface. Wipe down your surface to remove any stray dust, hair, or small pieces of lint that you don’t want to end up in your finished piece.
How to Prep Your Polymer Clay to Make Your Own Jewelry
Before you start designing the earring pieces, you first need to get the clay ready to be rolled and mixed.
What Does It Mean to Condition your Polymer Clay?
Conditioning your clay sounds really fancy, but it is just a way of saying that you need to knead the clay with your fingers. Kneading the clay makes it softer and easier to work with, and also prevents cracking when you roll it.
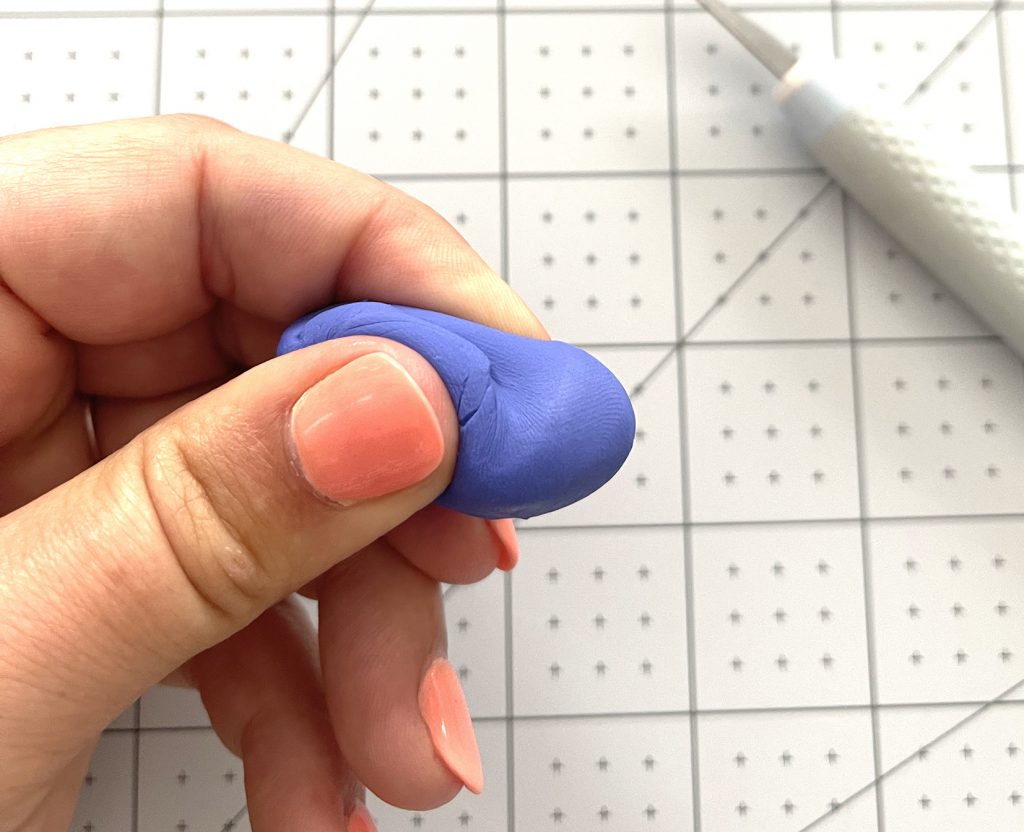
Make sure that you clean your hands with baby wipes in between conditioning the different colors of clay. Wiping your hands will ensure that you don’t transfer the clay pigment between colors. You definitely do not want to be kneading red clay and then move right to white clay!
How to Make Clay Earrings
How thick should you roll clay for earrings? For most clay earrings, roll the clay to approximately 1/8″ thick. Depending on the design, you may want them a little thicker. You want them thick enough to hold their shape after being cured in the oven. I use an acrylic rolling pin to roll the clay, but you can also use a pasta maker. If you see any small air bubbles, make sure you pop them with your craft knife or a needle.
After you roll it into a slab, you can cut the clay into any earring design you want! You can cut earrings with cutters or a knife. Alternatively you can also roll or shape the clay to make different patterns and shapes. Use your imagination!
You can also add a distinct texture to your earrings shapes, or build up additional pieces of clay to create a design feature.
Once your earrings are cut, make sure you poke small holes in the area of the earrings where your jump rings or earring hooks will need to fit. You can use a small tool, large needle, or a toothpick to put holes in your piece of clay.
The next step is to bake your clay earrings!
How to Bake Polymer Clay Earrings
Before you bake, smooth out any fingerprints or remove any dust or lint that you notice. Once the clay is cured it is difficult to remove imperfections, so give your earrings a good look over. In addition, you want to remove any rough edges or design flaws before you bake. You can sand the edges slightly after the earrings are baked, but it is easier to look for mistakes or rough areas from cutting before you pop them in the oven.
What temperature do you bake polymer clay earrings? Different types of clay will have different baking temperatures. Make sure you read the back of the package. It will usually give you a temperature as well as an approximate time based on thickness of the clay. (For example, 30 minutes for each 1/4″ of clay.)
Where Do You Bake Clay Earrings? You can bake polymer clay in your home oven or even in a countertop toaster oven. Place aluminum foil on a cookie sheet and lay out your designs on the sheet. Polymer clay will not expand, so you can place them close together without touching. Preheat your oven, and then place your tray inside. You can also tent with aluminum foil if you are using light colors and are concerned about the clay browning in the oven.

How Do You Know if Polymer Clay Has Been Baked Long Enough? Learning how to bake clay earrings can be a process of trial and error. Home ovens can run slightly warm or cool, so you will possibly need to test various baking times and temperatures. Fully baked clay will be quite strong – it will retain its shape as well as resist cracking and breaking while still being slightly flexible. If clay has not been baked long enough, it will break easily.
Can You Sand Baked Clay Earrings? Yes! Polymer clay that has been cured properly in the oven can be sanded with fine grit sand paper. It’s a great way to touch up any rough edges that you may have missed before they were baked.
Oh No! I Forgot to Put Holes in My Clay! Although it is much easier to place holes for earring findings BEFORE you bake, you can also add them after they are cured if you need to. Just use a small precision drill and carefully drill a hole in the earrings.
Polymer Clay Earring Designs
I’m going to share a brief step by step guide for each of the following earring types. All of these earring designs are quite easy to make. There are tons of different ways to make earrings, and these are some of my favorite earring shapes and patterns!
- Arch Earrings
- Rainbow Earrings (rope arch)
- Simple Stud Earrings
- Easy Clay Hoop Earrings
- Twist Hoop Earrings
- Floral Pattern Slab Earrings
- Abstract Marble Pattern
- Simple Drop Circles
- Orange Shaped Clay Statement Earrings
- Cutout Clay Earrings
- Leopard Print Earrings
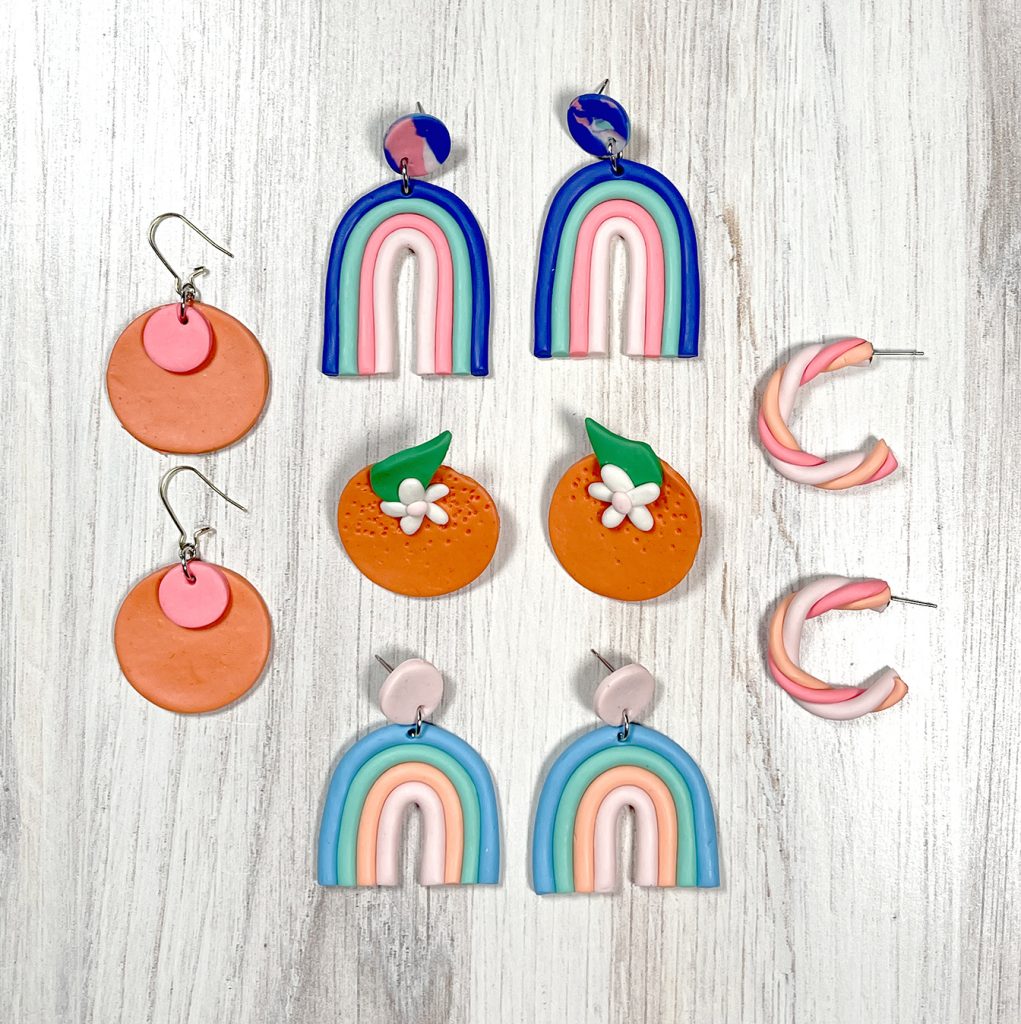
Once you get started, you’ll be amazed at all of the polymer clay designs that you can make! I created this whole set in just a couple of hours, but if you were cutting from whole slabs they will even go faster! They make perfect gifts for everyone in your family and they will be a big hit at craft shows.
Polymer Clay Earring Ideas
Arch Earrings
You can make these simple shapes either by cutting with a knife or with a small cutter made for clay. I used my craft knife to cut simple shapes because I didn’t care if they were perfect. Abstract shapes are SO popular right now!
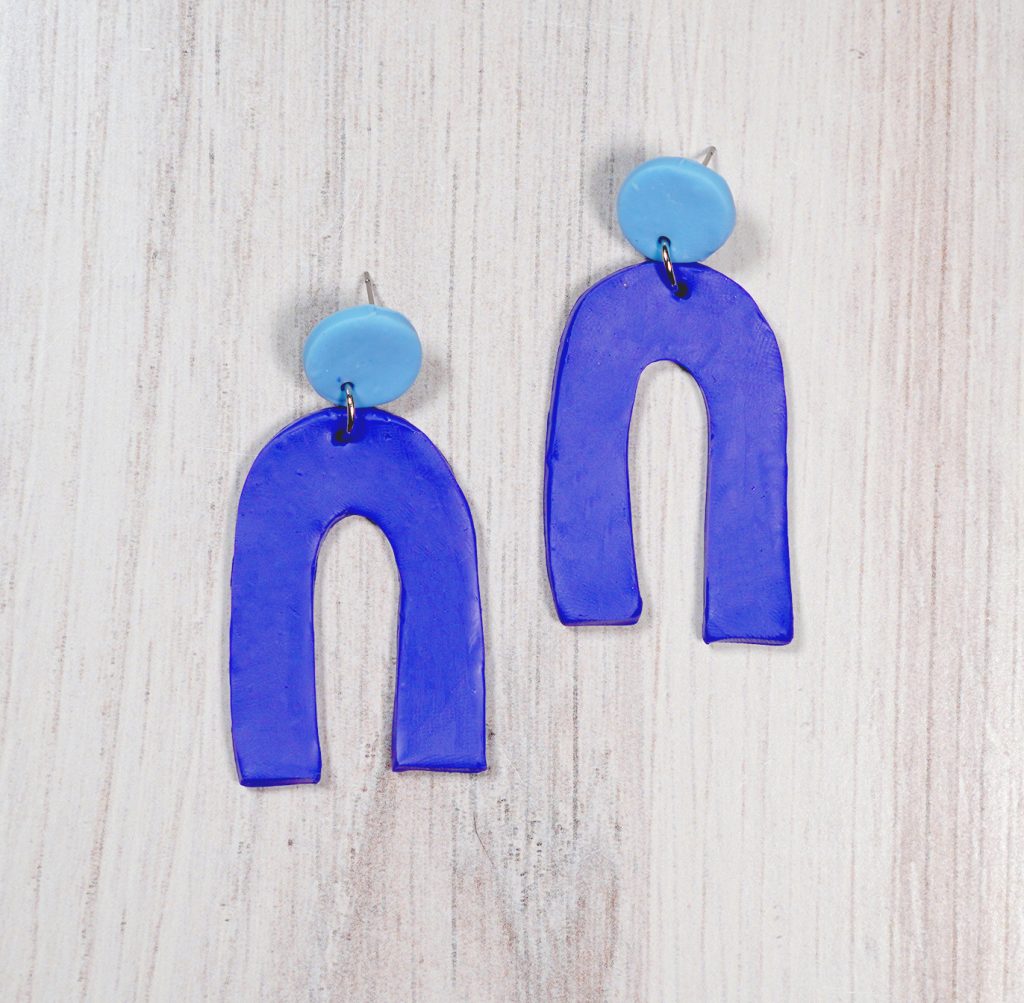
Roll out your clay, then cut your shapes. To make post back earrings, cut small circles that will attach to your arch with a jump ring. Poke small holes near the edges of each piece for the jump rings or earring hooks.
After they are baked, attach an earring post to the back of each earring piece.
Rainbow Earrings
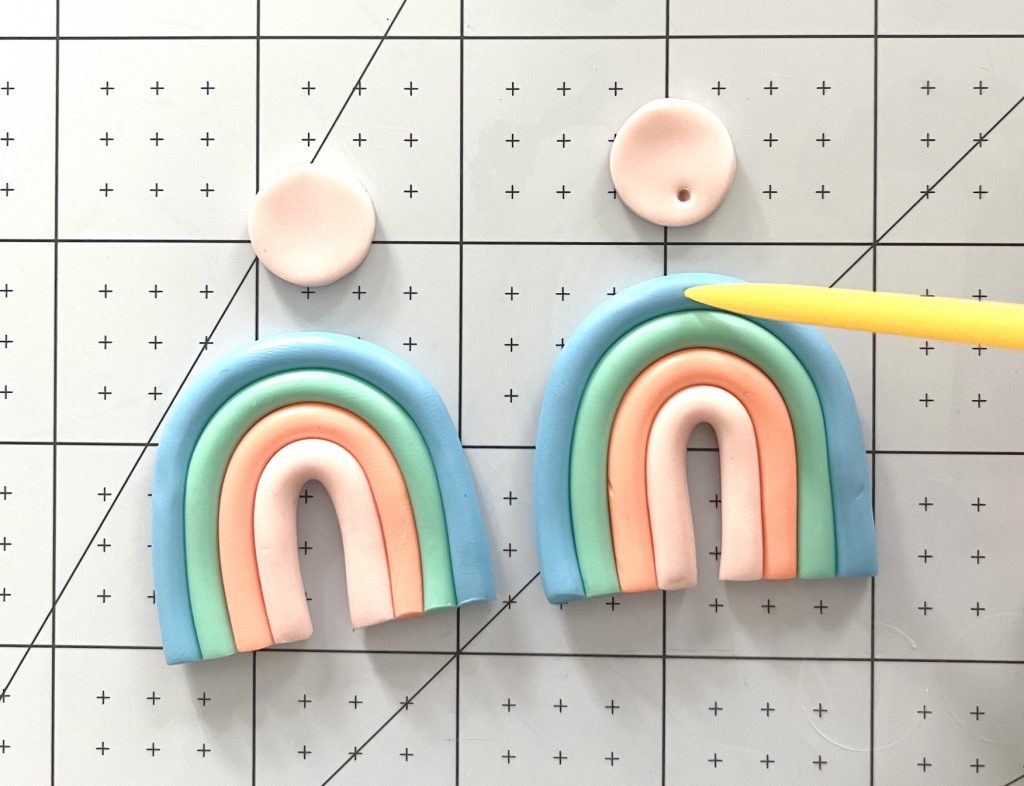
These rainbows are just another form of arch earrings. Instead of cutting the arch, roll thin ropes of clay.
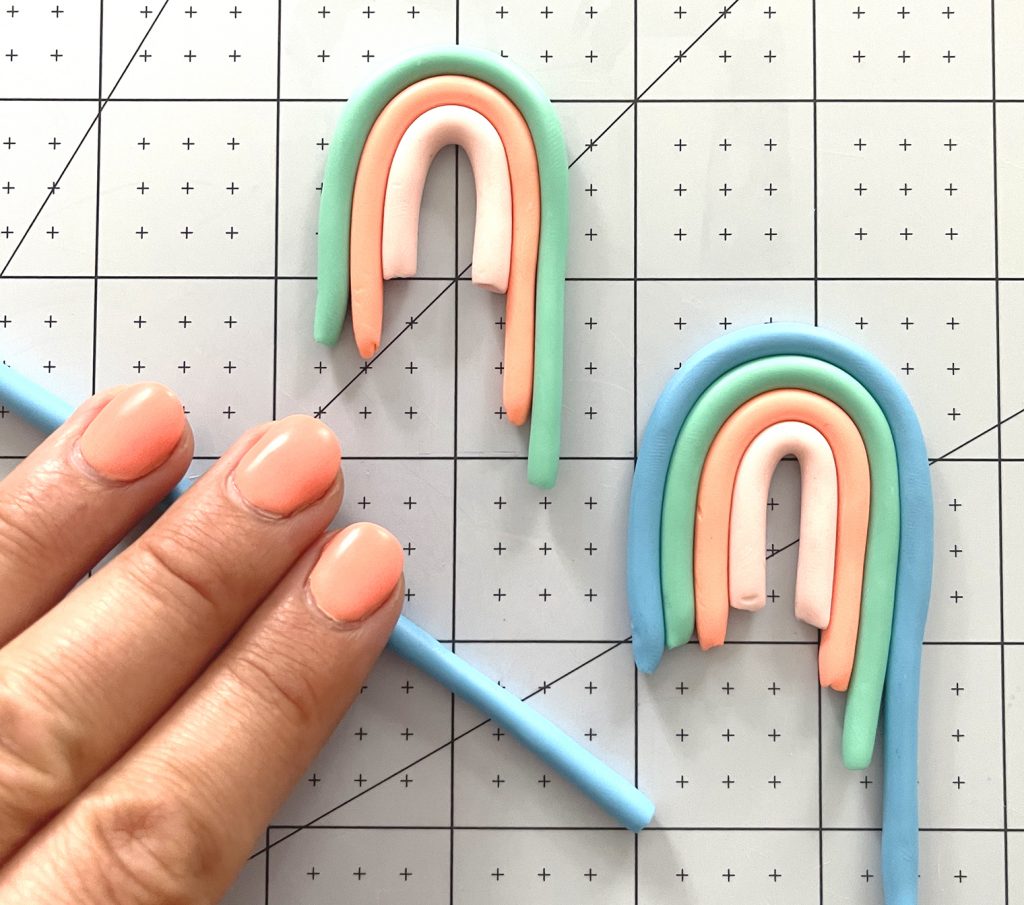
You can roll with your fingers or use a clay extruder to ensure that the ropes are even thickness.
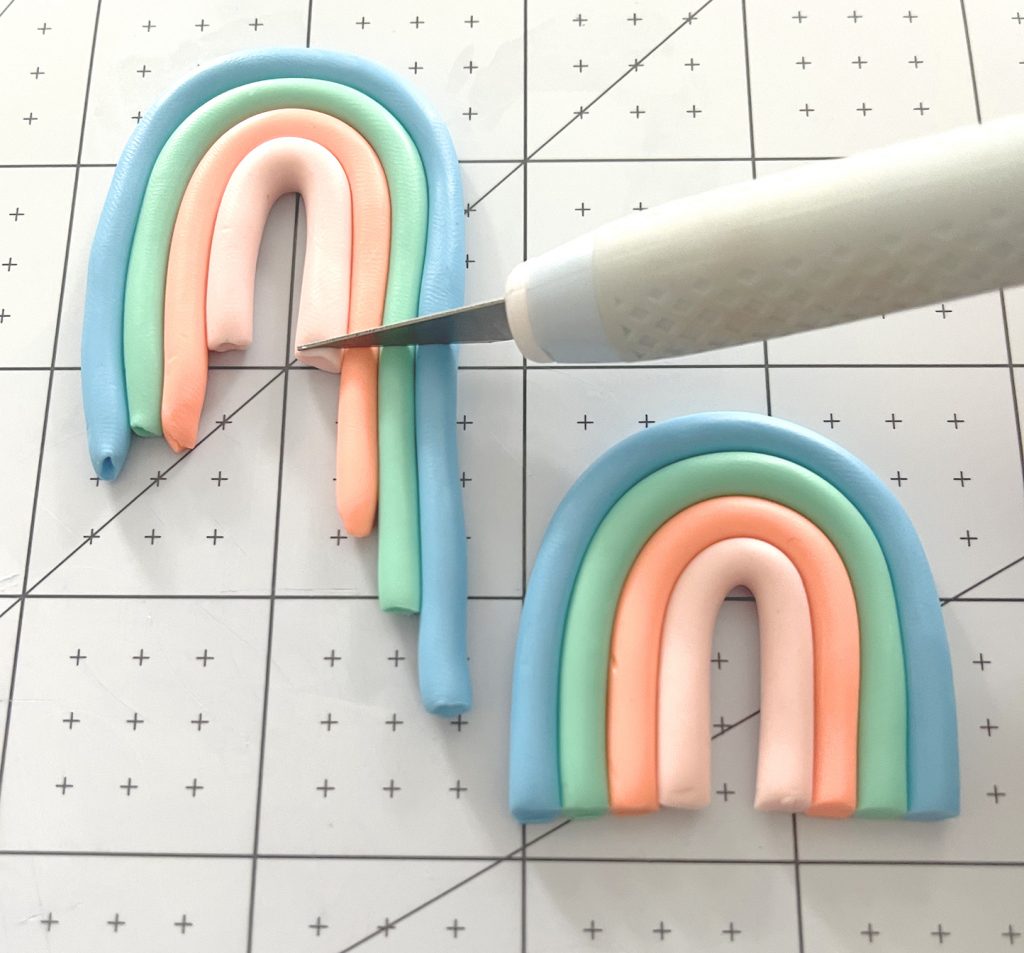
Start by shaping the inside arch, then continue with the remaining colors. Don’t worry about making them all the exact same length, because you will trim them after you have attached all colors.
Attach each arch color securely by pressing the arches together. When you have attached your desired colors, use a craft knife or cutter to trim the bottom of the arches to the same length.
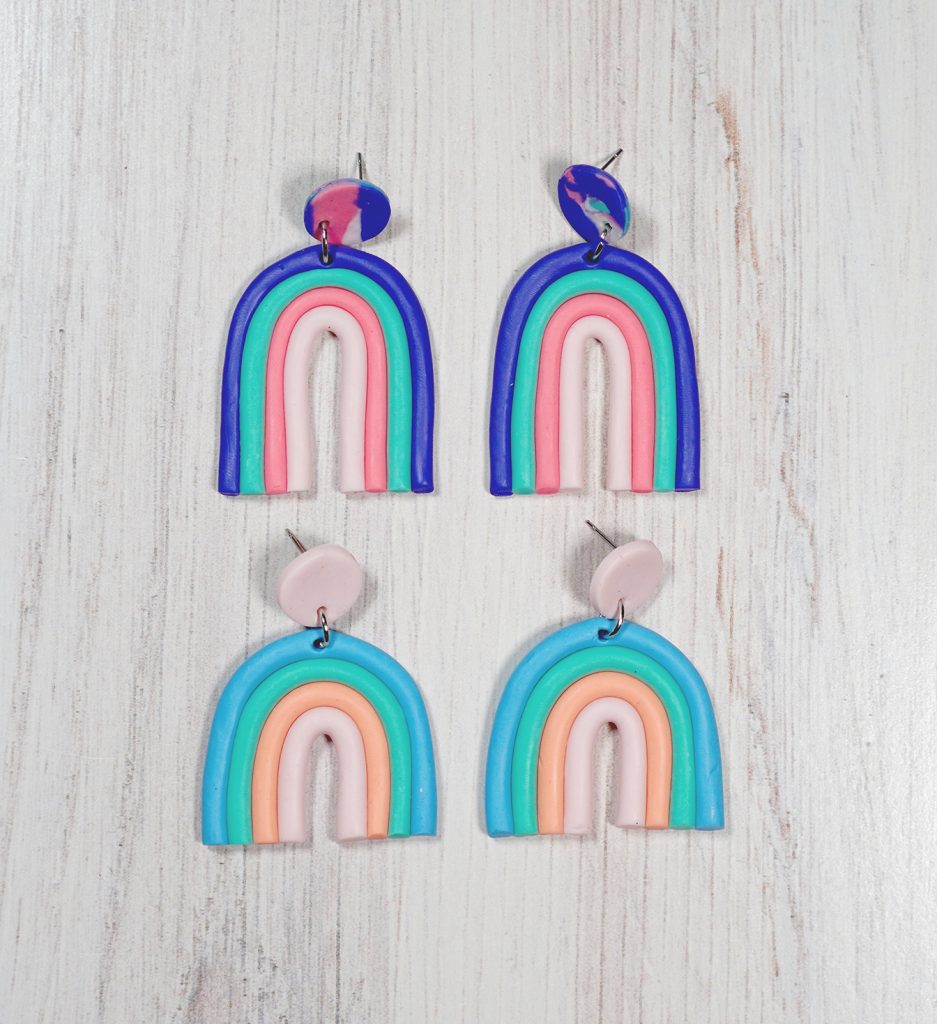
Cut small circles for the post backs in a coordinating color of clay. Use your tool to carefully punch the jump ring holes at the top of the rainbows and the bottom of the circles.
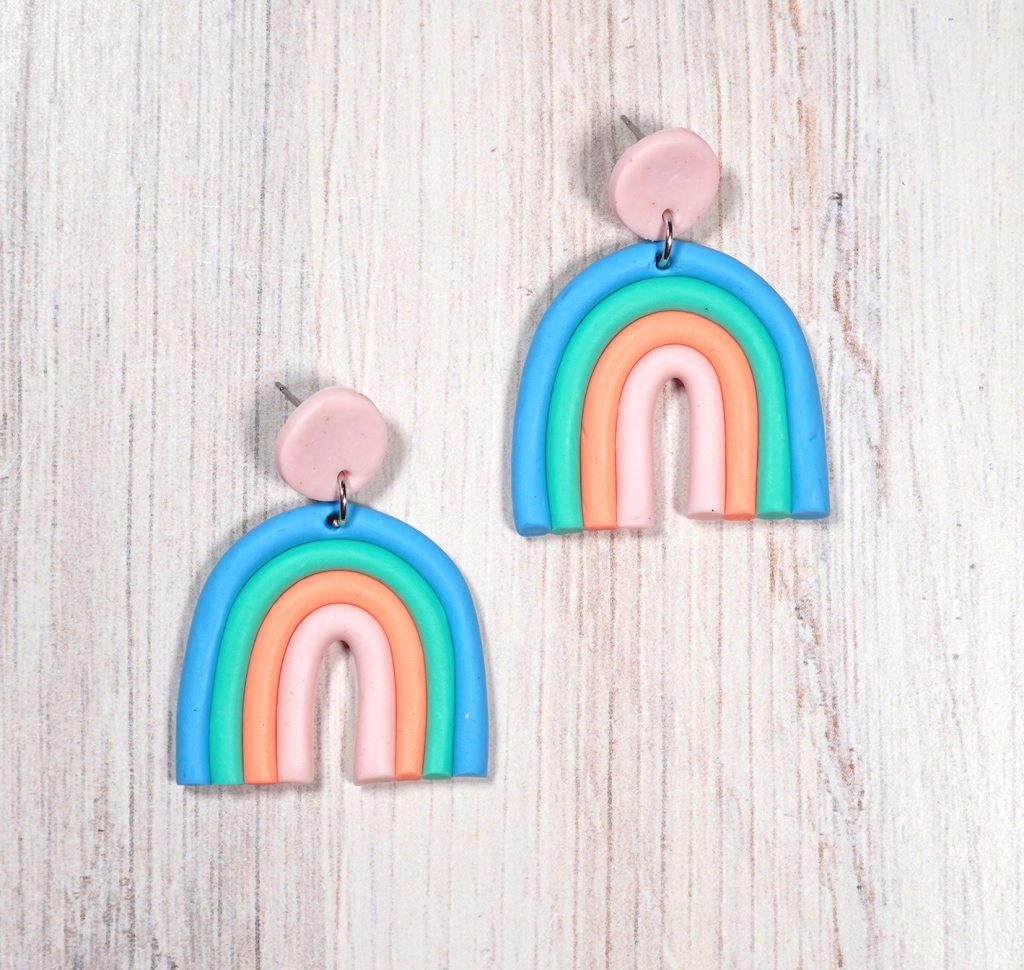
Try out different colors for your rainbows! I love the pastels, but the bright colors of clay are so pretty as well.
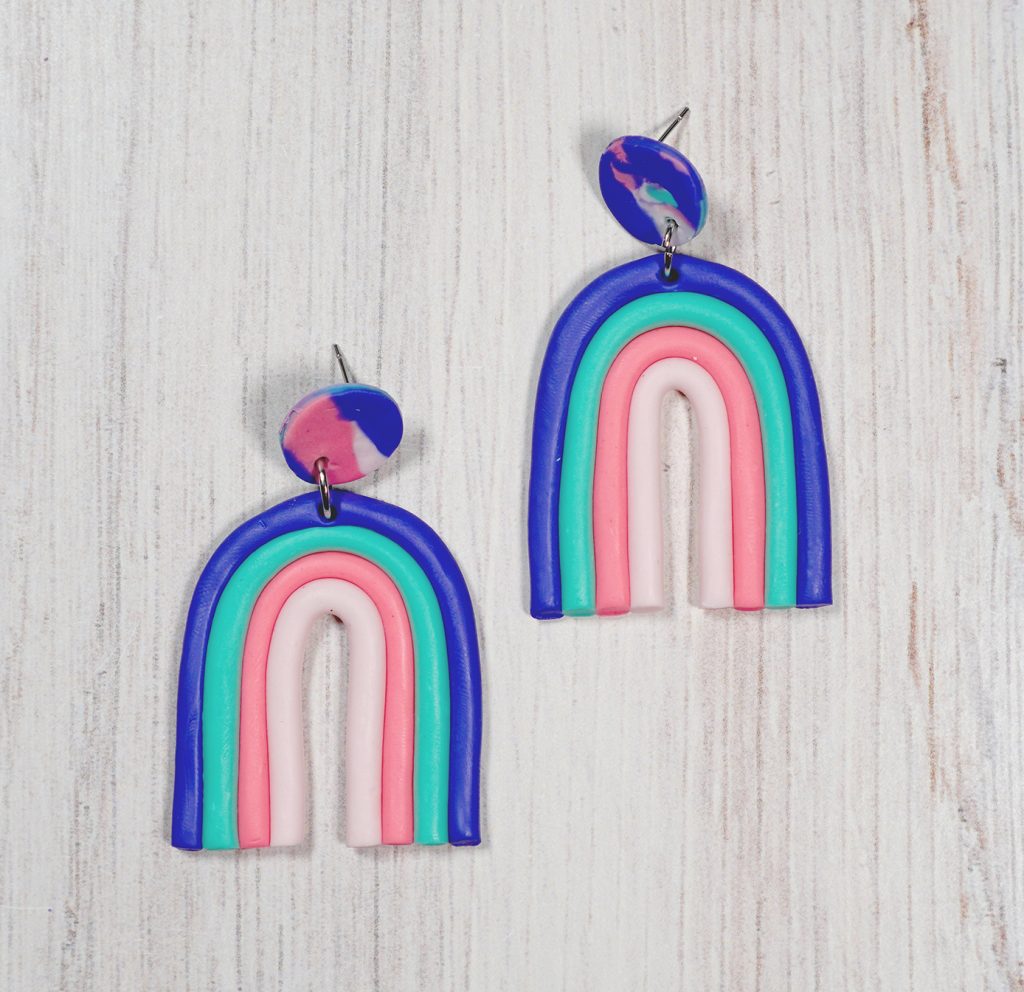
Tip: Use the scraps of clay from trimming your rainbows to make the circles for the post backs. Just combine the scraps and roll out to 1/8″ thick. Then you will get really cool swirl patterns in the colors of your rainbow!
Simple Stud Earrings
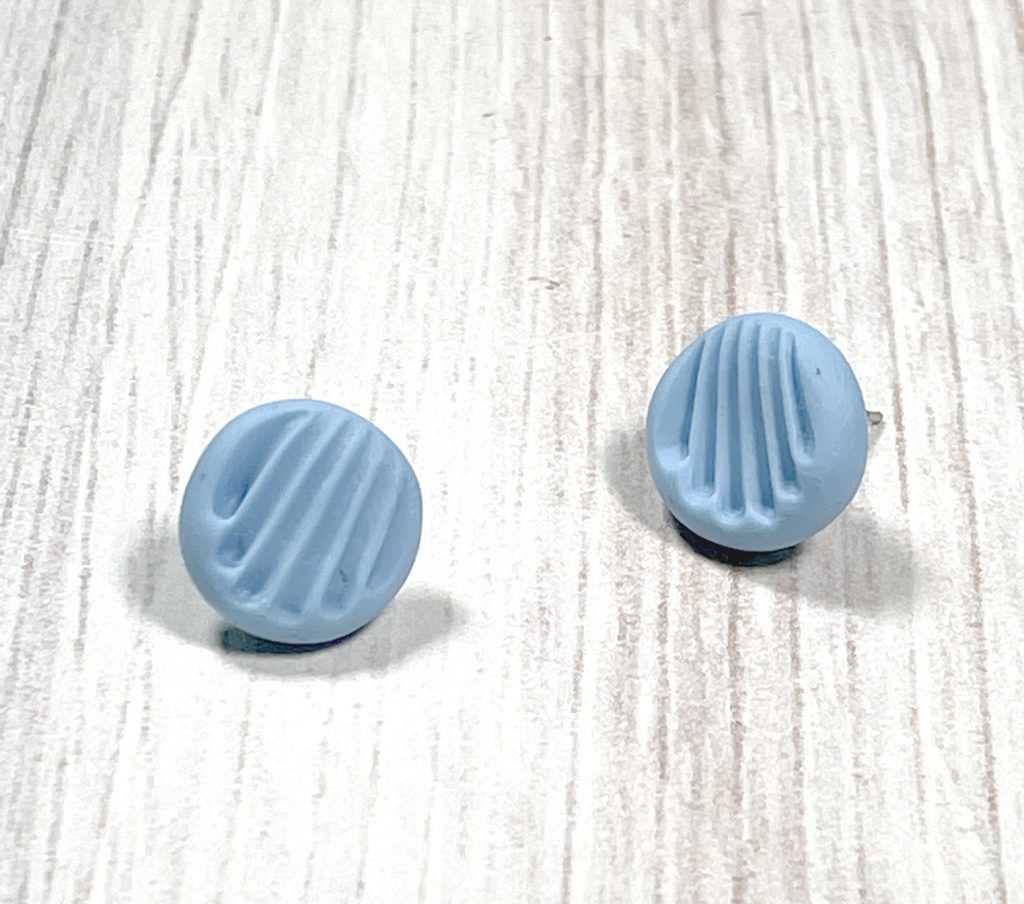
Stud Earrings are ridiculously easy to make – you don’t even need cutters! Roll small balls of clay and flatten with your fingers. To make the earrings below, I used a small clay tool to flatten each earring, leaving this cool texture behind! You can also use a toothpick or another household item to create the pattern.
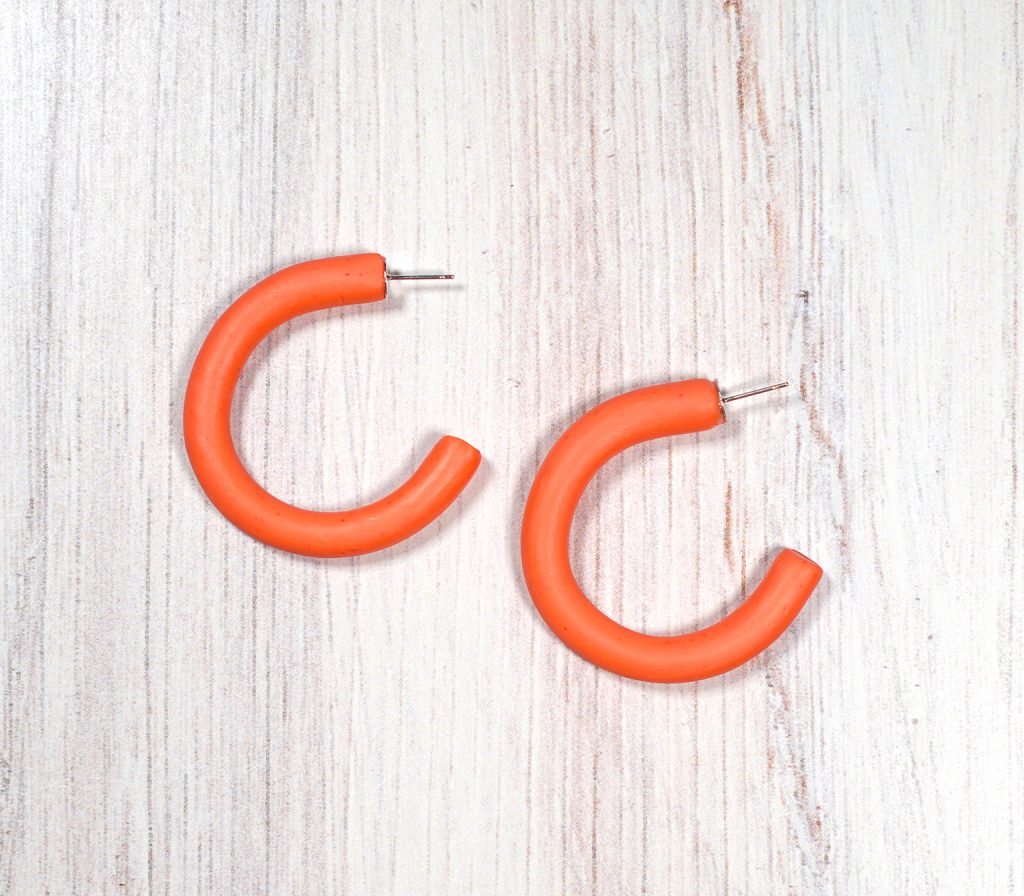
Easy Clay Hoop Earrings
I love simple hoop earrings that match every outfit, and these are SO easy to make! Just roll a rope of clay and create a hoop shape in your desired size. Trim the edges and bake! After they are baked you can glue an earring post to one end of the hoop and you’re done!
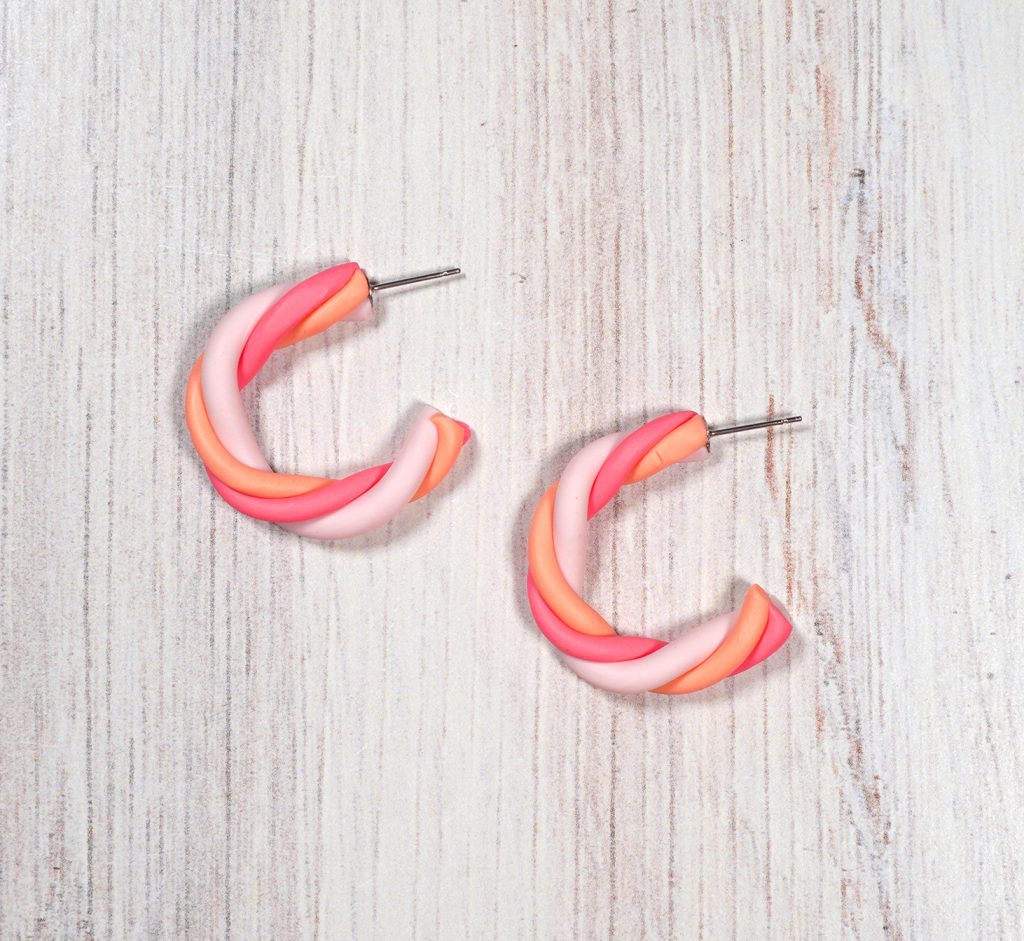
Twist Hoop Earrings
To upgrade the basic hoop design, take three small ropes of clay and twist! Create one long twist as you press the colors together and trim into your hoop shapes.
Floral Pattern Slab Earrings
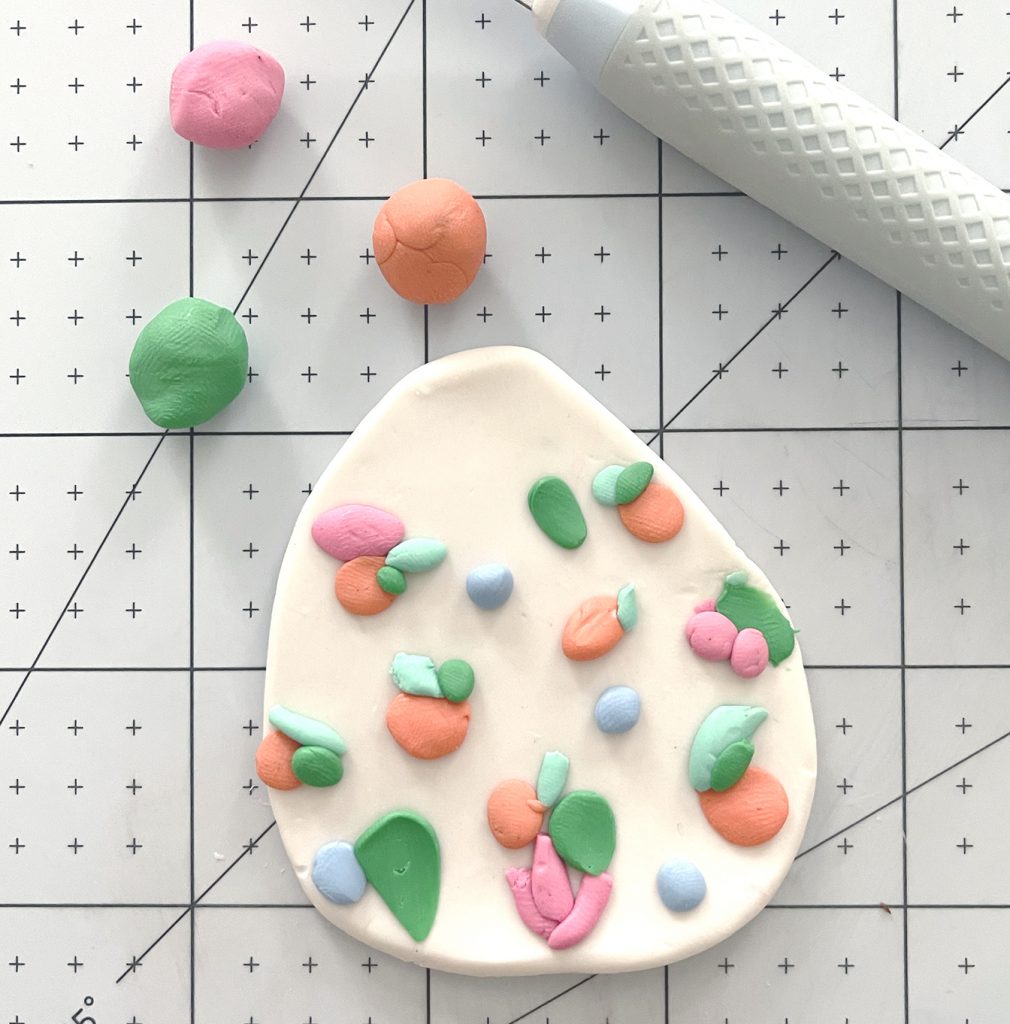
You will surprised at how easy and fun it is to create floral patterned clay earrings. To create the pattern, choose a block of clay in the main body color for the earring. Roll it out slightly thicker than the finished slab will be – around 1/4″ or so. Use small pieces of clay to create a pattern on the slab.
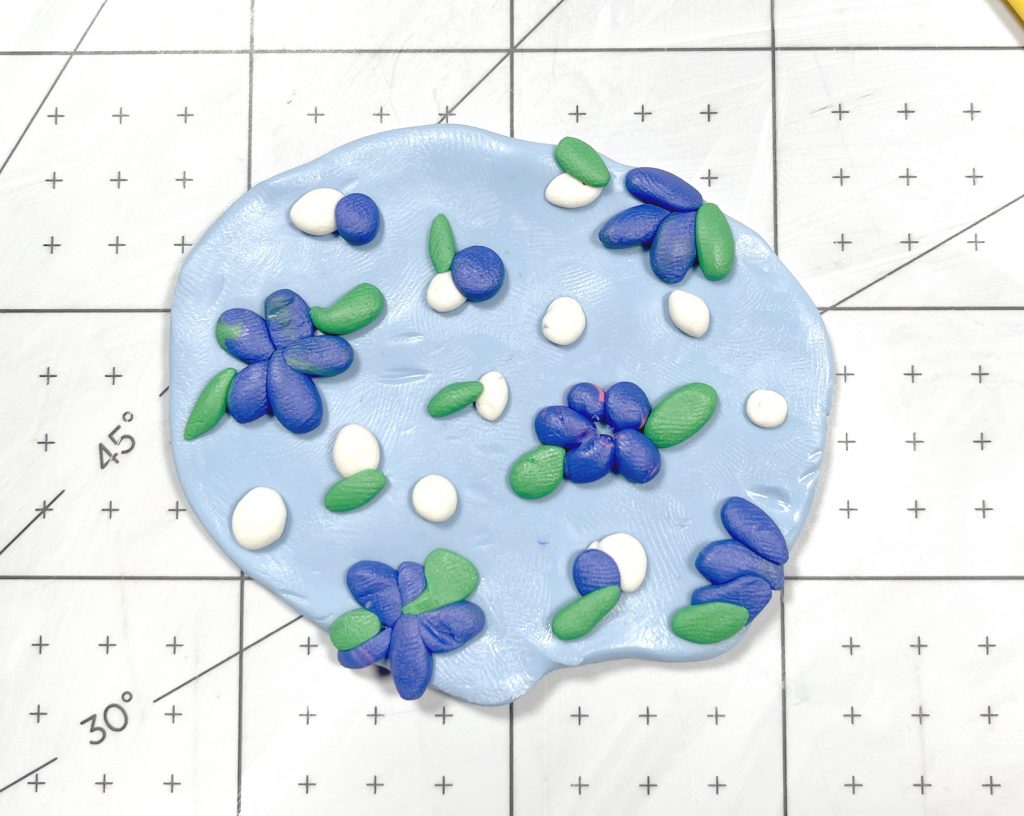
I created a floral pattern, but you can use clay shapes to make an abstract, geometric, or other pattern!
Once you have placed all of the pieces, just roll out the slab to 1/8″ to embed the pattern in the slab.

Cut large circles or whatever shape you desire from the pattern. You can definitely use different shapes and sizes of cutters to use as much as the pattern as possible. Then you can use the excess clay to create another type of earring!
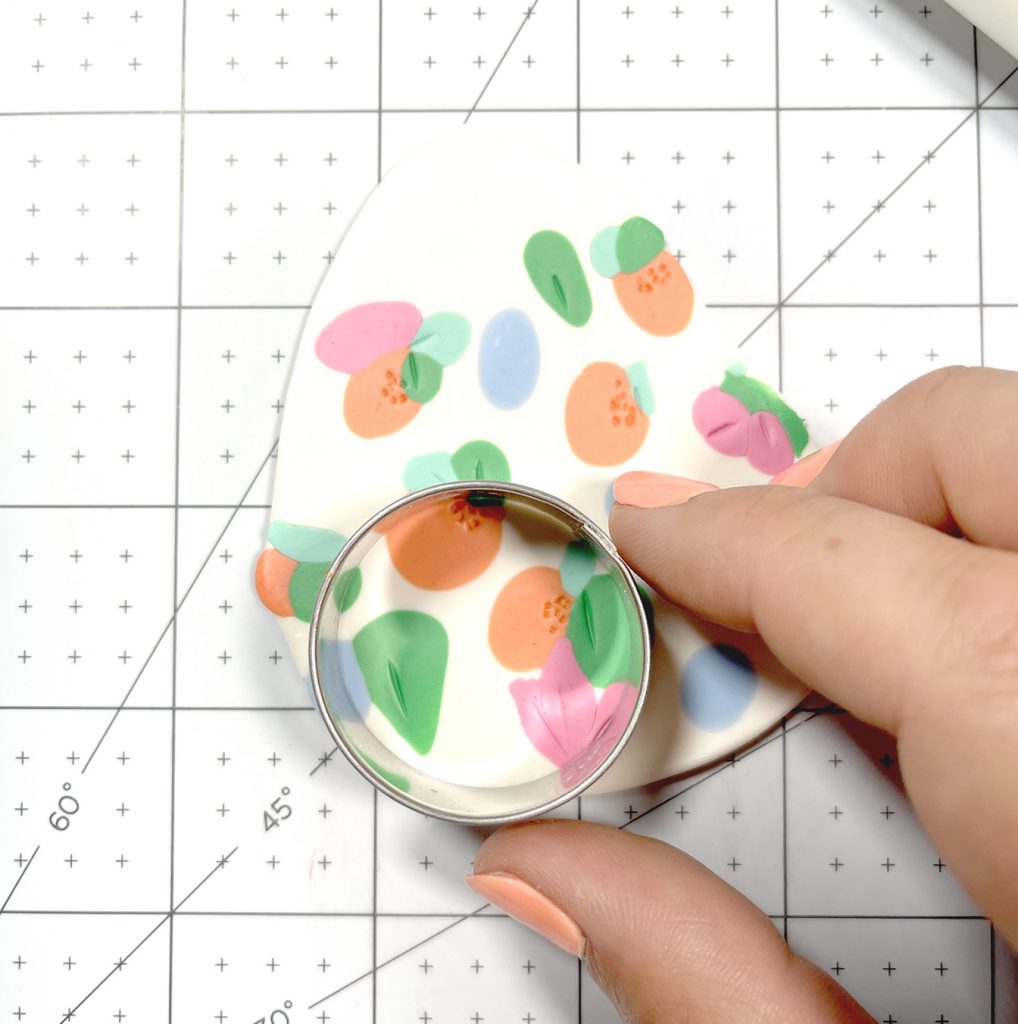
I created a couple of different patterns – a traditional blue floral pattern as well as an abstract pattern with little oranges and flower shapes.
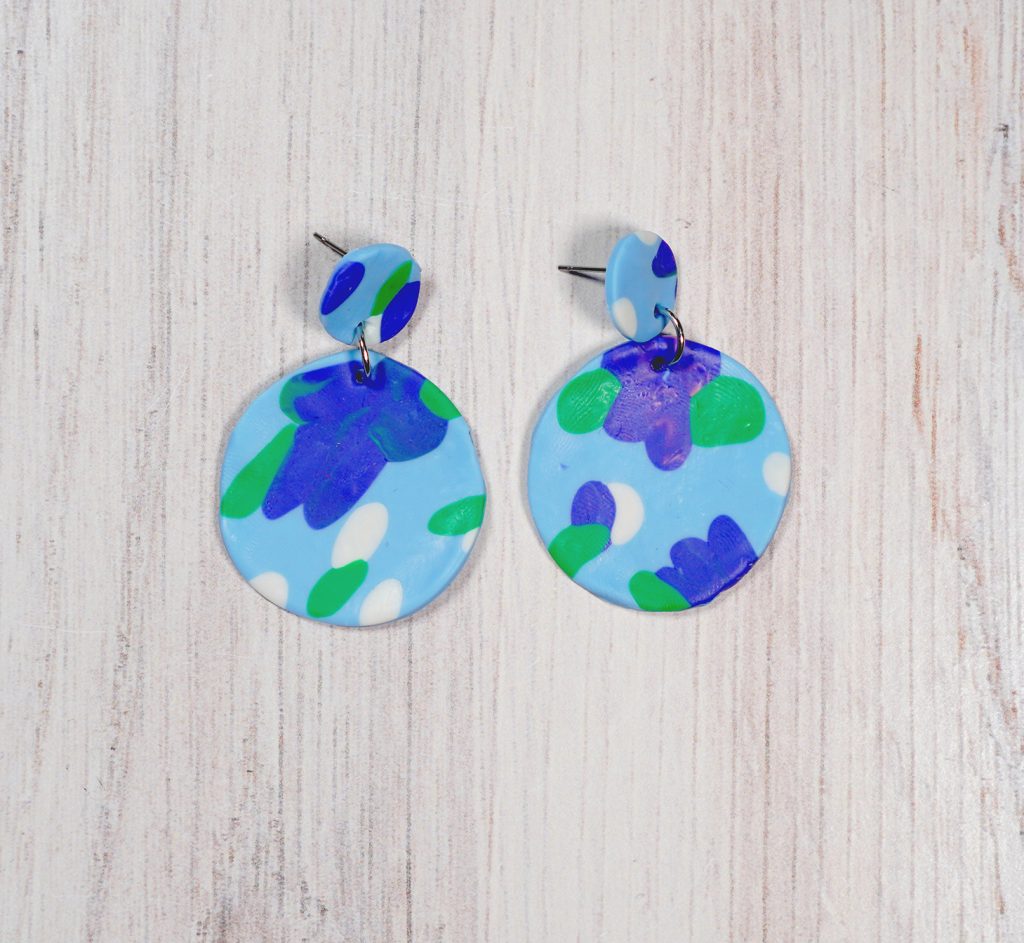
I added a small textured circle to one of the patterns, and I love how it turned out!
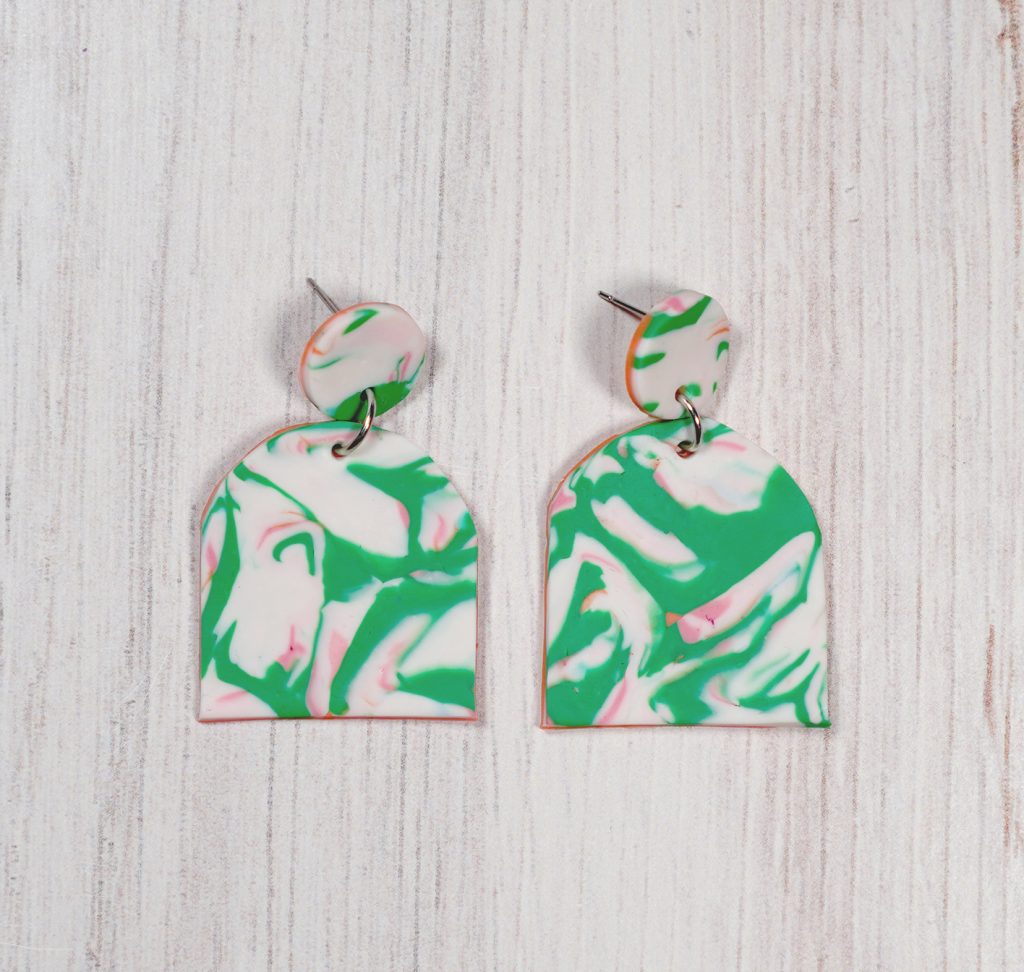
Abstract Marble Patterned Earrings
These marble patterned earrings are a great way to use all of your clay scraps! You can combine them all and roll them out, or create another slab!
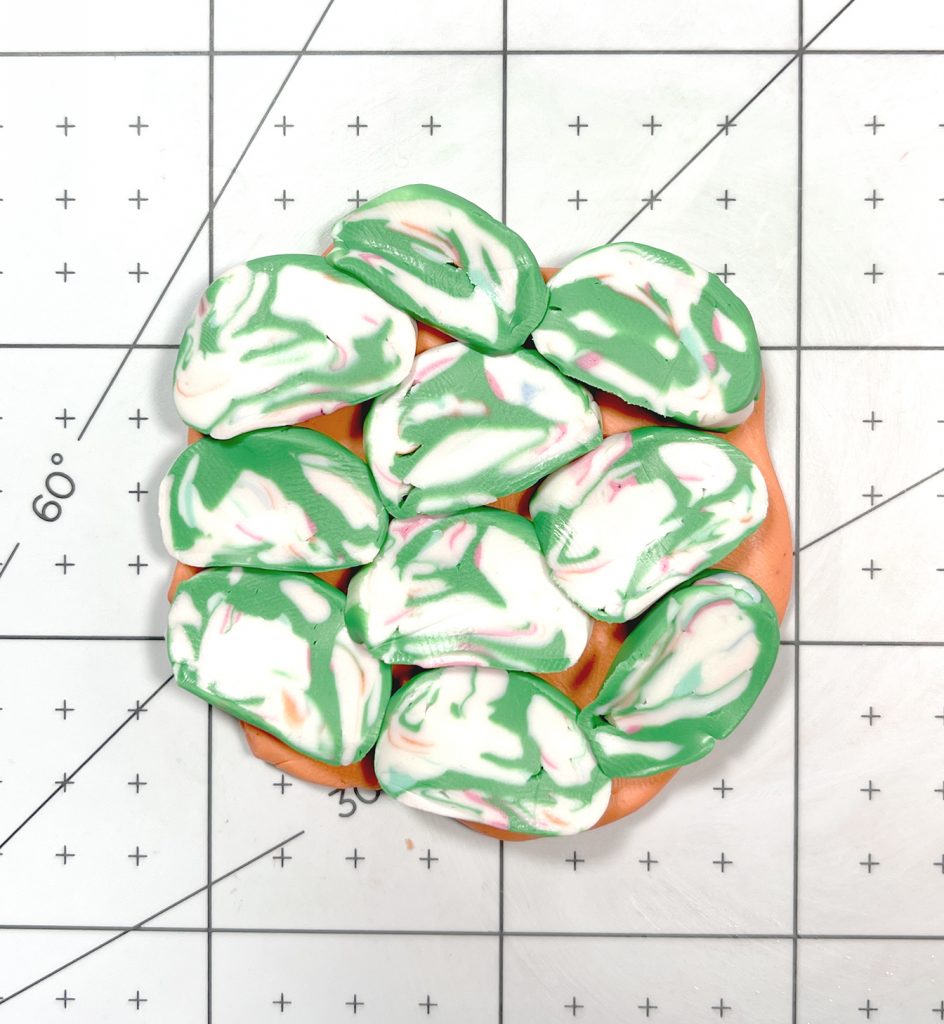
I combined small pieces of clay from all of my leftover patterned slabs as well as my trim pieces, then formed a thick rope or log with my hands. Then I used my craft knife to slice the log and placed the slices on another slab. I rolled the slab, creating the cool marbled pattern!
Simple Drop Circles
This earring design is proof that you don’t need a ton of fancy cutters or a lot of free time to create amazing DIY jewelry projects. I made these simple drop earrings with two sized circles, a jump ring, and an earring hook.
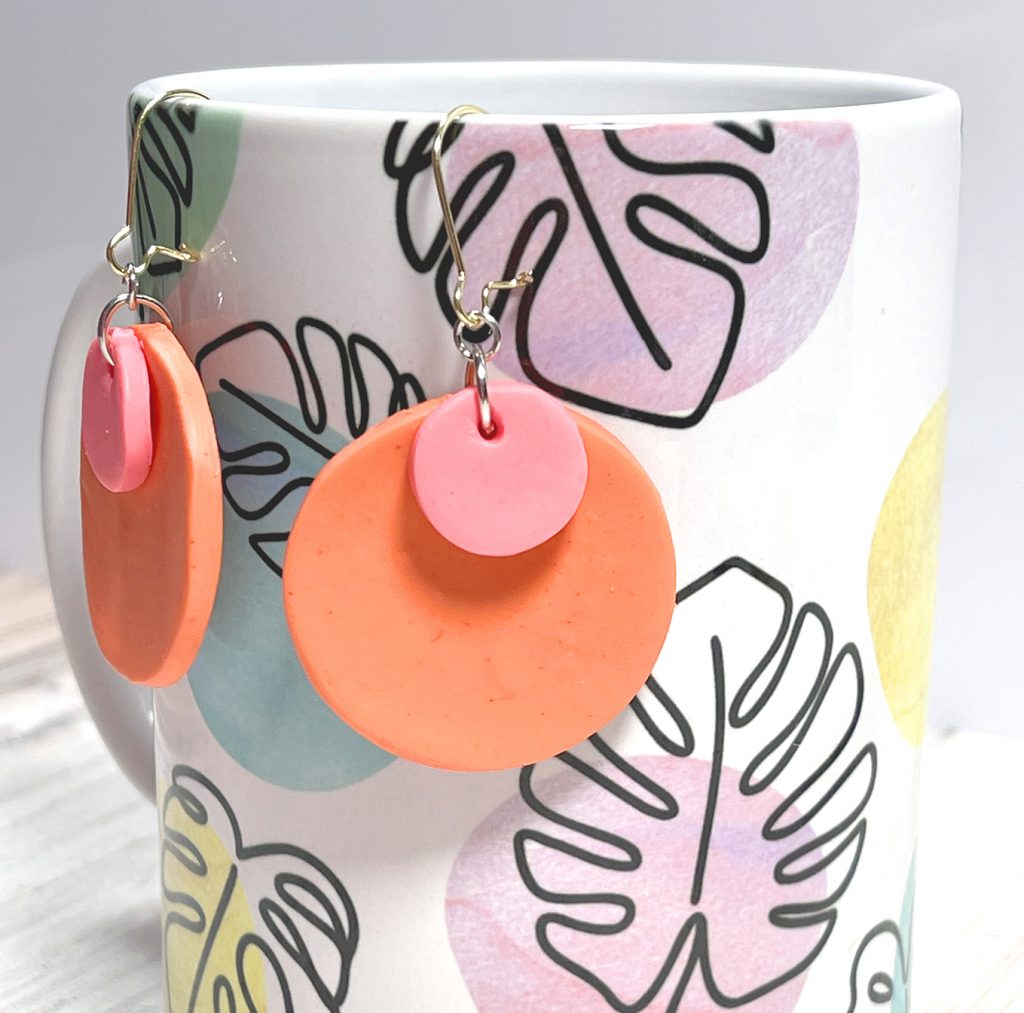
You need the jump ring so that your earring will face the proper way once the hook is placed into your ear.
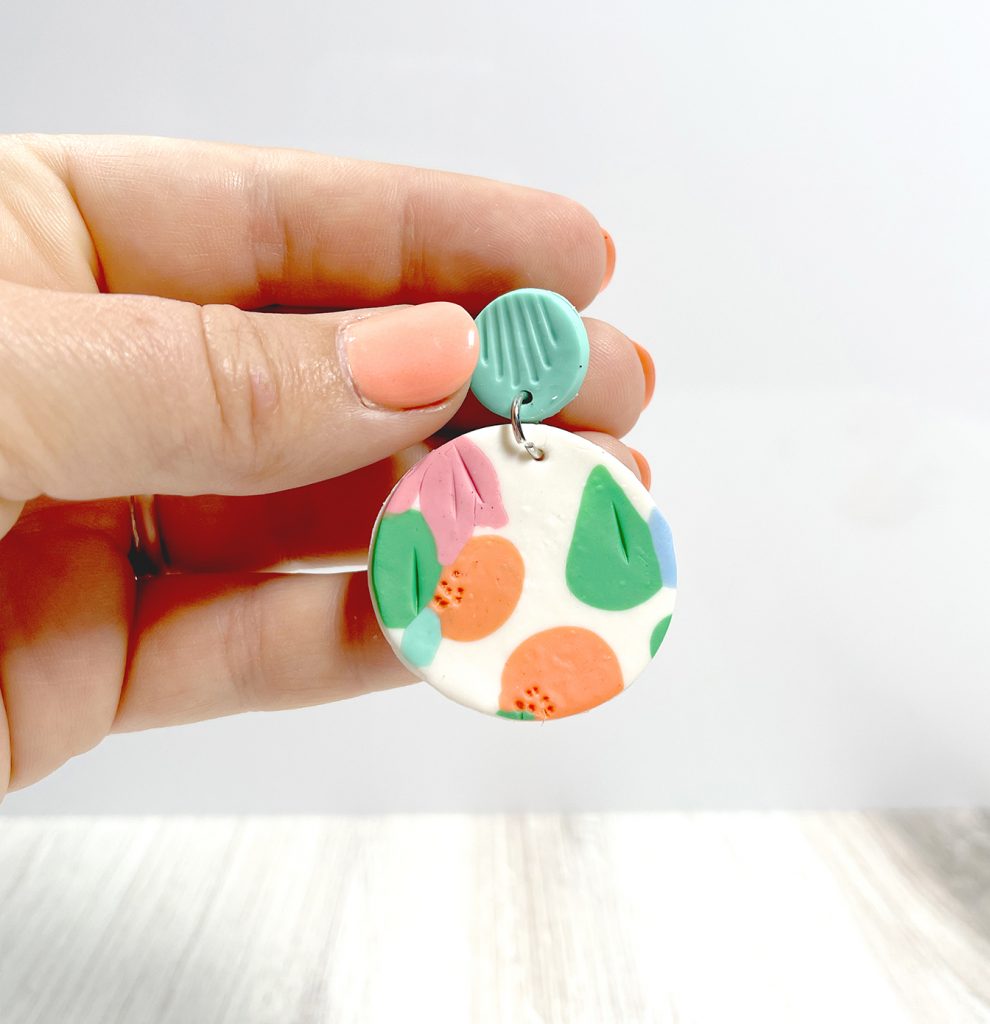
Orange Earrings
I think these statement earrings are my favorite earrings that I made. They are adorable and perfect for summer!
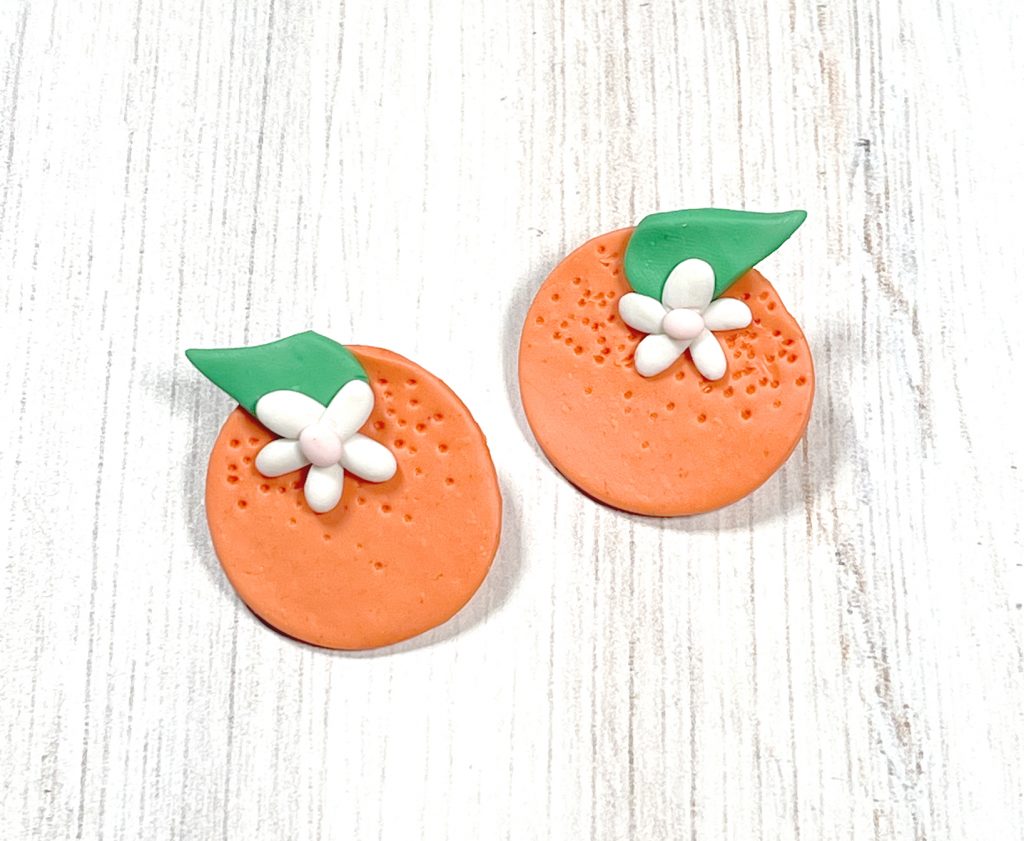
The orange shape is just a circle with a tear drop shape for the leaf. I used my fingers to form the flower petals, then used a small tool to create holes that look like what you would find on an orange peel. I added small posts to the back of the earring. They look heavy, but polymer clay is so light once it is baked! Plus, earring backs help hold the shape flat on your ear.
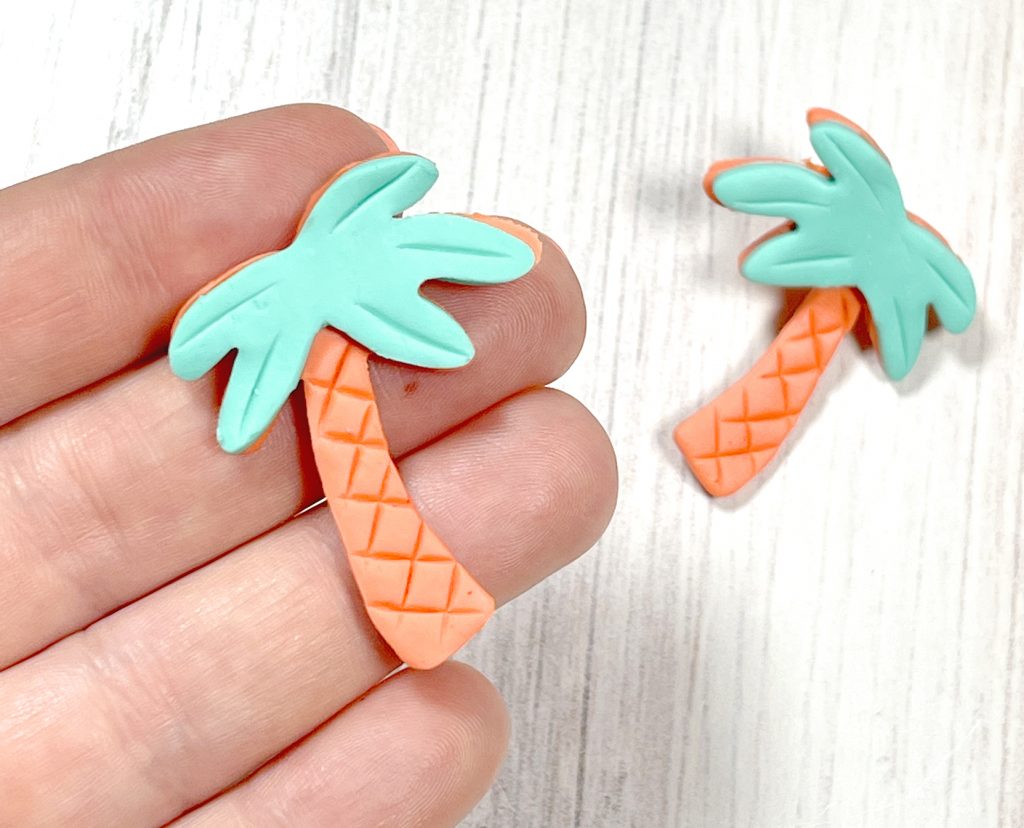
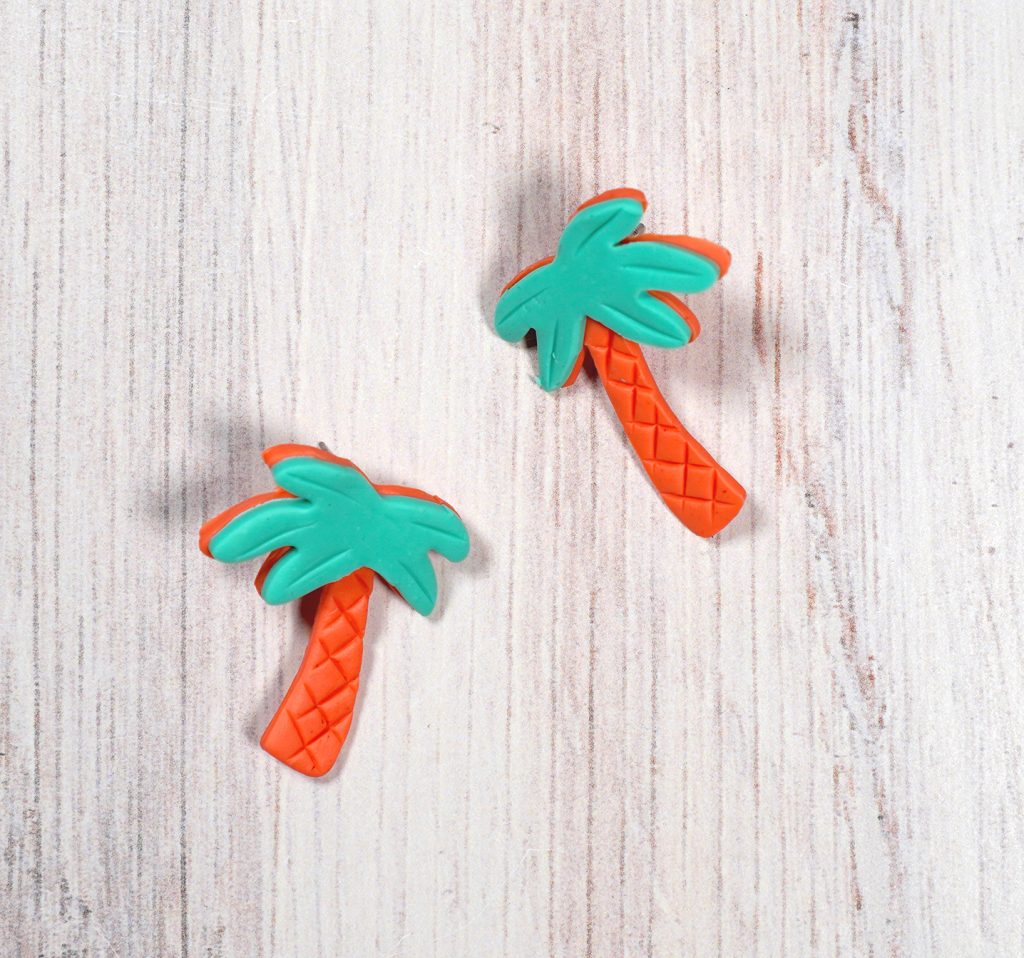
Cutout Clay Earrings
Even if you don’t want to create your own shapes, you can use small cookie cutters to create fun earrings! Statement earrings in fun shapes are one of the big fashion trends right now, especially for summer (think about Baublebar and their Target line, Sugarfix!)
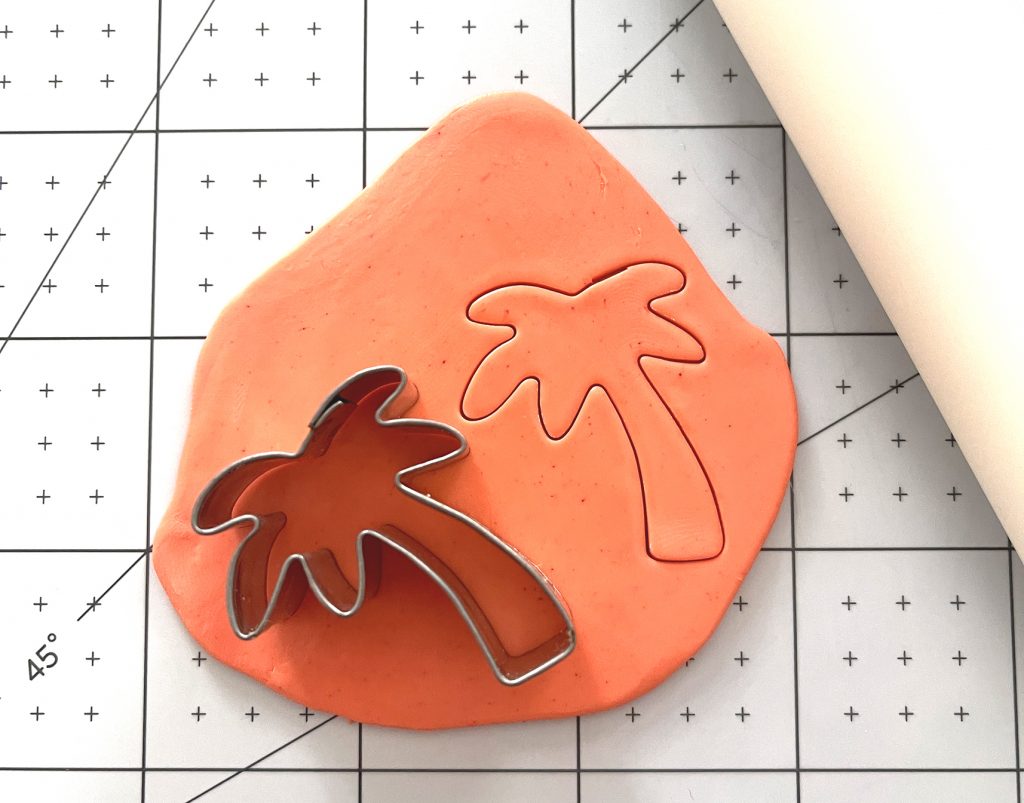
I had a small palm tree cookie cutter that I used to make these fun earrings. I cut the base color, and then cut a second shape out of a coordinating color. I trimmed the second layer to the shape that I wanted for the palm leaves, then placed it on top of the clay bottom. Then I used a toothpick to create texture on the tree!
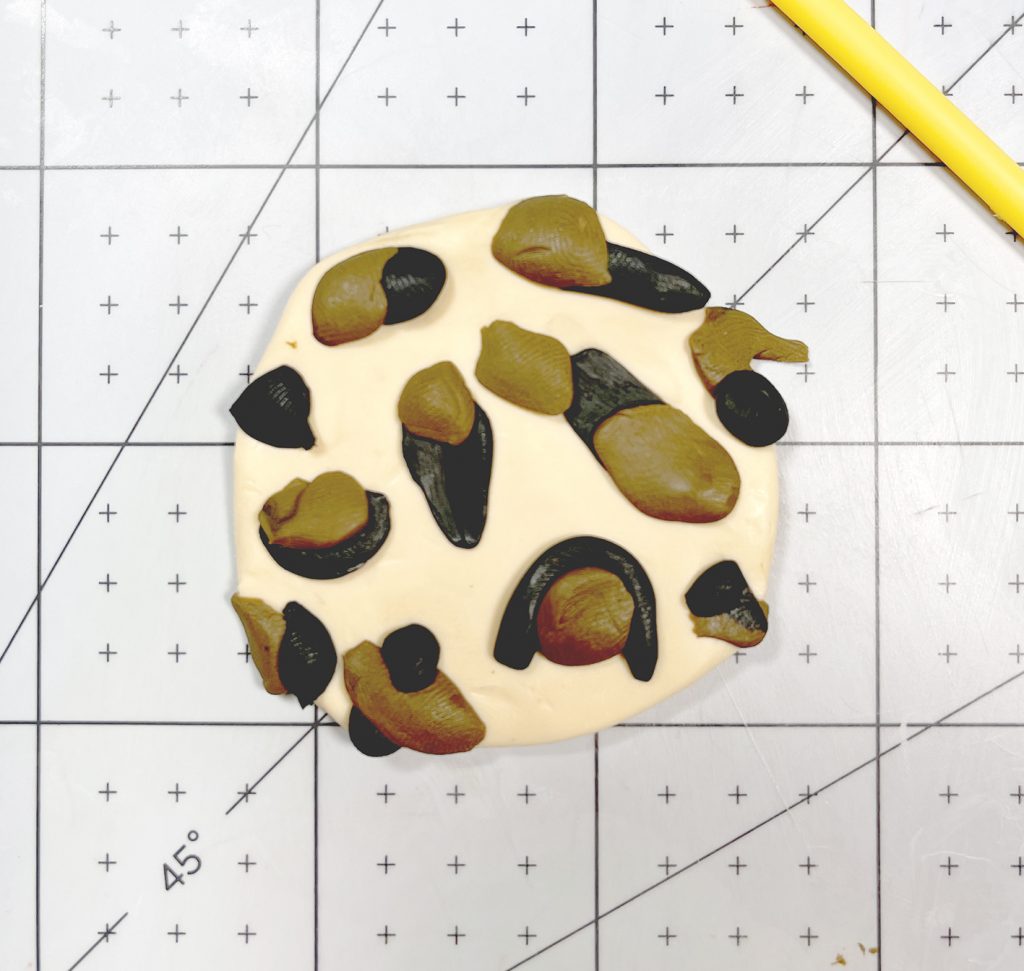
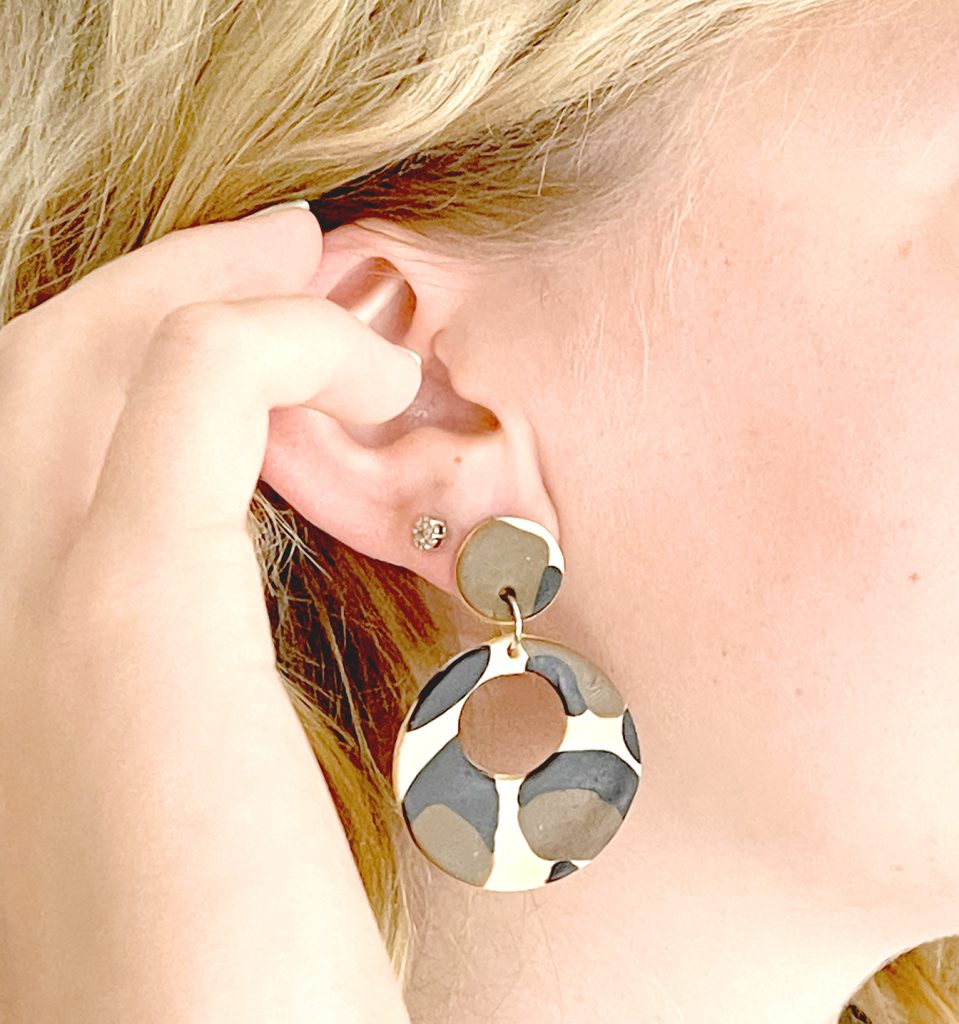
Leopard Print Earrings
Animal prints are everywhere right now, and I wanted to try to make my own version. I used shades of tan, brown, and black polymer clay to create a patterned slab just as I would with a floral pattern. Once I rolled it out, I had an abstract leopard print. I personally prefer to wear post earring backs, so I added a small circle for the top piece.
My next step is to add some gold leaf to these baked clay earrings!
If you’re not up to making your own clay earrings yet, here are a few of my favorite shops! In fact, these earrings are SO good, make some of your own earrings and support these small businesses with a purchase!
Make more earrings!
LATEST POSTS:
- Wicked Coloring Pages to Print for Free
- Free Thanksgiving Turkey Coloring Page Printable
- Free Printable Thanksgiving Meal Planner & Grocery List
- xTool M1 Ultra Beginner’s Guide and Review
- Free Best Dad Ever Father’s Day Coloring Page
Pin DIY Polymer Clay Earrings


Thanks for these helpful and thorough tips for beginners like me 🙂