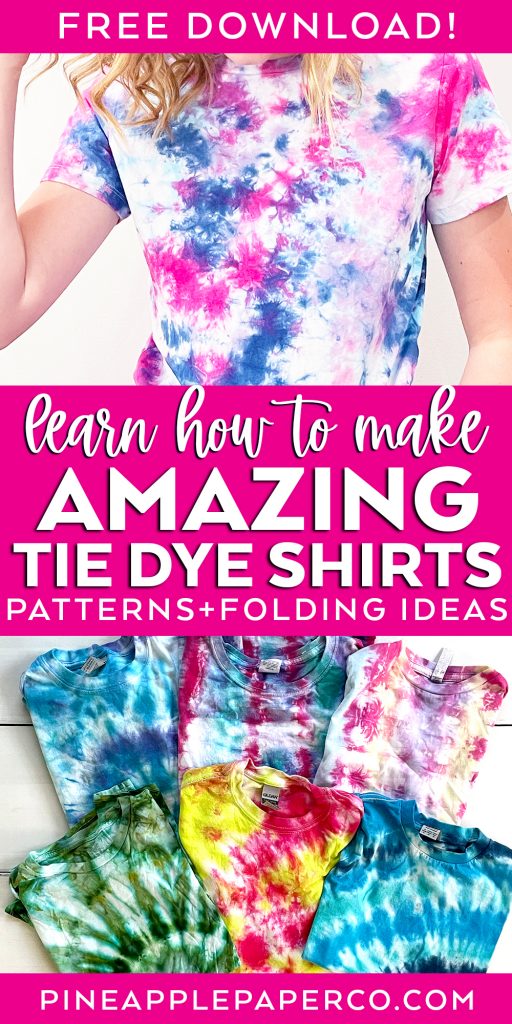
10 Easy Tie Dye Patterns and Folding Techniques (Step-by-Step Guide with Photos)
This post and the photos within it may contain affiliate links. As an Amazon associate I earn from qualifying purchases. If you make a purchase through one or more of the links, I may receive a small commission at no extra cost to you.
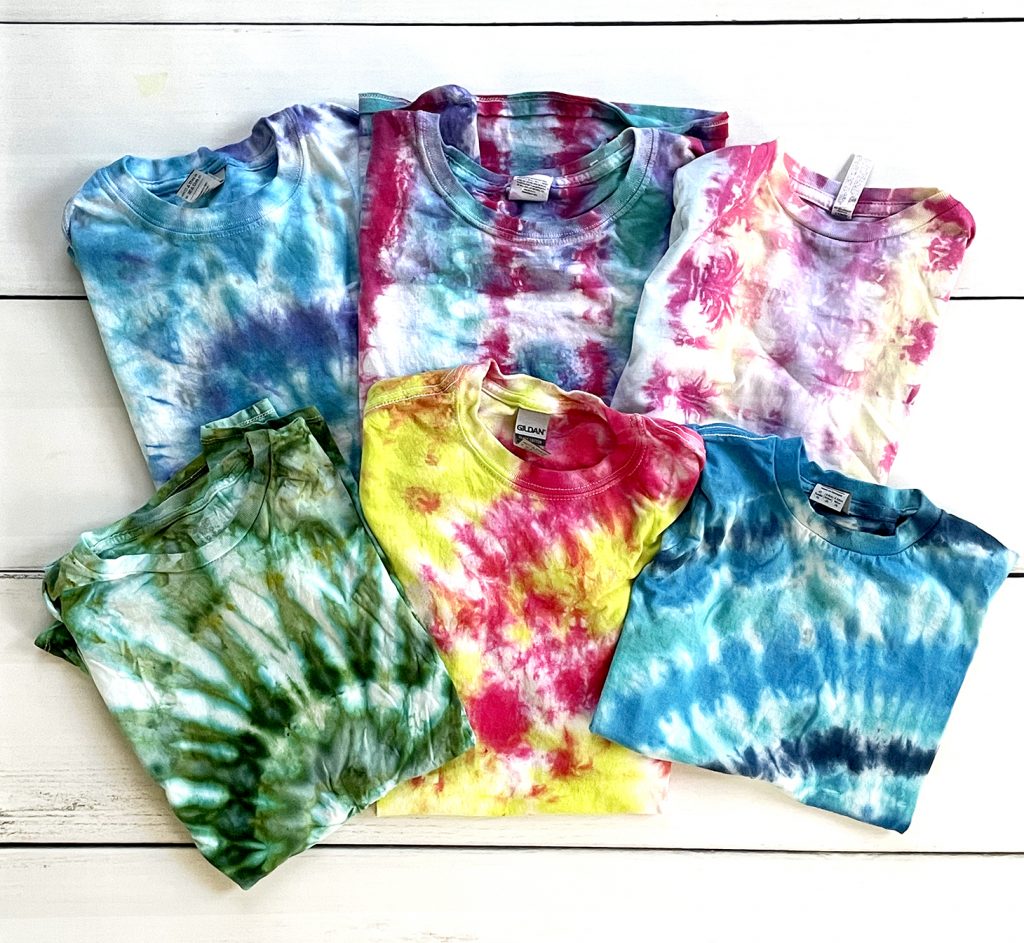
Learn how to make amazing tie dye shirts with these easy and beautiful tie dye patterns. Get step by step instructions for 10 different ways you can make types of tie dye including a spiral pattern, bullseye design, scrunch (crumple) tie dye shirts, shapes, striped tie dye, and more! Plus, I will share sources for all of my supplies and my tips and tricks you can use to get the best results and brightest colors.

Want bright, bold tie dye shirts without muddy colors? These 10 folding patterns show you step by step how to make spiral, bullseye, striped, and even galaxy designs. Tie dye is one of my FAVORITE summer projects. Tie-dye projects are fun to make and are perfect for rainy days, sleepovers, parties, or summer camps. They’re even fun to make for Halloween and Christmas!
One of the things I love is that you can learn different designs to create an infinite number of unique tie dye patterns. I’m going to show you some of my favorite EASY but unique patterns so you can make your own cool designs out of a plain white t-shirt (or even a colored shirt)! You’ll be amazed that the coolest tie dye patterns are sometimes the easiest to fold!
Other tie dye methods
Bleach Tie Dye
One of the most popular questions I get about tie dye is about bleach tie dye – sometimes called reverse tie dye. It’s really cool and I have a whole post about it! Enjoy!
If you haven’t made your Summer Bucket List yet, make sure you add Tie Dye Shirts! You and your kids won’t be disappointed!

What is Tie Dye?
Tie Dye is a process of folding and tying off a fabric item like shirts (or other products!) then dying with fabric dyes to reveal colorful and beautiful patterns. It is a popular way to create DIY shirts because tie dye is easy to do at home and is a fun way for the whole family to be creative. It’s also a great to upcycle or reuse old clothes. Plus, the surprise of what colorful pattern you will get after unfolding your tie dye projects is SO much fun!

What Do You Need to Make Tie Dye Shirts?
If this is your first time making tie dye shirts, you’ll need some basic supplies to make these tie-dye patterns. There are different tie dye techniques that will be covered in a separate post, because they require different supplies and processes!
Here’s your easy to click supply list!
If you do not purchase a tie-dye kit (like a popular Tulip kit), you’ll also need:
Tie Dye kits are easy to use and are perfect for beginners, but for professional results and a wider variety of colors, you will need to upgrade your supplies.
What I Use: Tie Dye Kits for Beginners
- Tulip Tie Dye Party Kit for 6 Kids
- One Step Tulip Celestial Tie Dye Kit
- Tulip One Step Pastel Tie Dye Kit
- Tulip Ultimate Party Tie Dye Kit for Large Groups
Tulip Tie Dye kits are perfect for beginners, kids, parties, and anyone that wants to learn how to tie dye. They are great dyes for the price! I do prefer professional dyes, but these are perfect for just getting started or for kids!
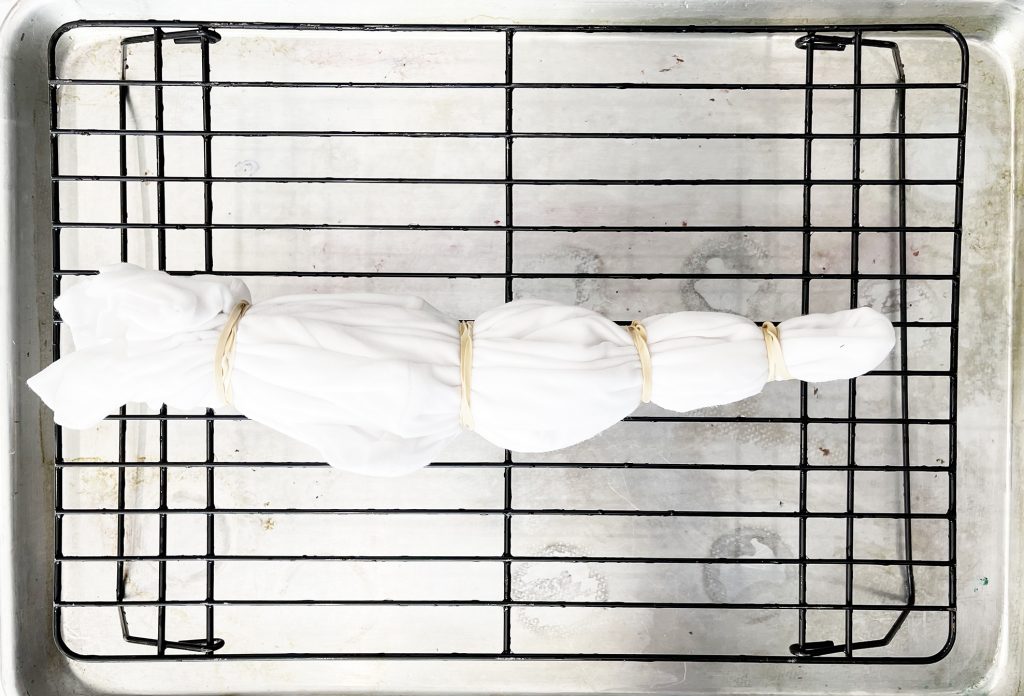
Also consider the surface that you will tie dye on – I recommend covering your surface with a plastic table cloth for easy clean up. I also use wire racks over sheet pans so the excess dye will run out of the shirt instead of blending all of the colors together.
Good quality supplies will help to ensure successful results. High quality fiber reactive dyes (dye powder) and cotton shirts will produce bright colors in the dye process, and will retain their color as you wash and wear them. I personally prefer fiber reactive powder dyes from Dharma Trading Co. or Procion dyes from Amazon. They produce consistent and amazing color results.
What Fabric Works Best for Tie Dye?
Choose 100% Cotton for traditional tie dye! Cotton is the gold standard for tie dye because it’s a natural fiber that soaks up dye easily, giving you bright, long-lasting colors. Unlike polyester or blends, cotton holds onto the dye at a molecular level, so your designs stay vibrant even after multiple washes. The smoother the cotton (like 100% cotton tees, sheets, or bandanas), the clearer and crisper your patterns will look. If you want the boldest results, always choose 100% cotton over synthetic fabrics.
Can You Tie Dye Polyester or Blended Fabrics?
Polyester and polyester blends don’t absorb traditional tie dye the same way cotton does. Since polyester is a synthetic fiber, the dye sits on the surface instead of bonding with the fabric, which often leads to faded, dull colors that wash out quickly. Blended fabrics (like 50/50 cotton-poly) will take some color, but the results are usually softer and less vibrant. For the brightest, most reliable patterns, stick with 100% cotton! Or you can use specialty dyes made specifically for synthetics if you want to experiment.
What Tie Dye Colors Look Good Together?
Tie dye color combos are fun to mix up and change with different shirts. Think back to elementary school art class. Remember the color wheel? Good! You want to be sure to use complementary colors. Just like with real paint, you can blend colors that just look awful.
Colors like red and blue, yellow and red, or yellow and blue blend together to create the new colors purple, orange, and green, those are good combinations. But if you blend green and purple together, the results will be not as visually appealing and you will get crazy tie dye patterns.
Remember that warm colors like red, orange, and yellow look good with other warm colors. Cool colors like blue and purple look great together too!
If you can’t remember the color wheel, think of the rainbow! And put colors together that are next to each other on the rainbow.
How to Make Tie Dye Shirts
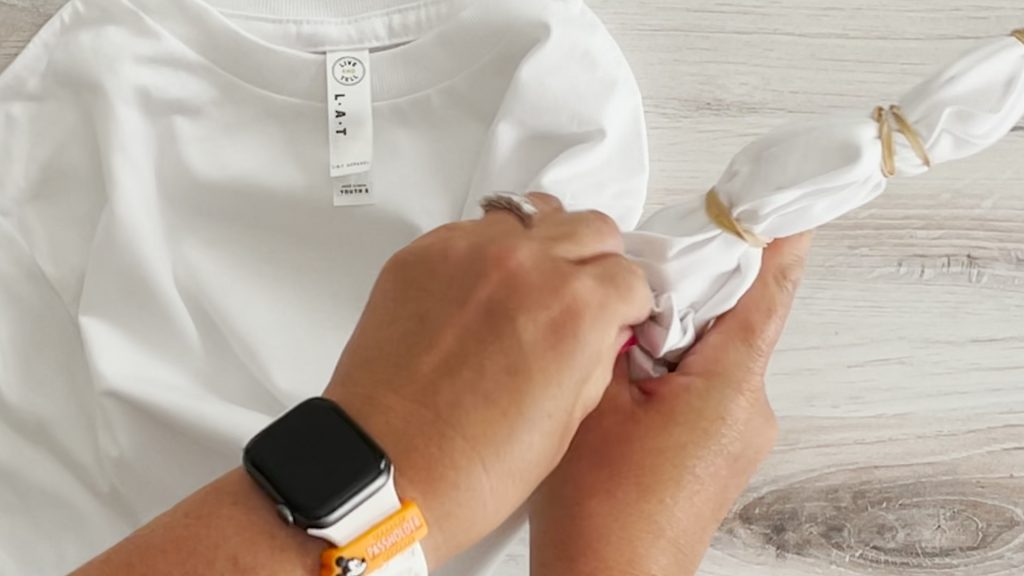
No matter what patterns you are going to make, the basics of tie dye remain the same. First, prep your shirt with water or soda ash as directed in the dye instructions. You will then create the design for your shirt by folding and tying it into sections with rubber bands or string. Then you will apply the dye and let sit in a plastic bag for a minimum of a few hours to develop. Then you will rinse, unfold, and wash your tie die shirt in the washing machine to reveal your beautiful pattern!
You can create different patterns by folding, twisting, and tying your shirt in different ways. Where you have folded and tied the shirt will create areas of the shirt that will resist the dye you apply and stay white. The white space, different colors, how much dye you add, and where you place rubber bands all are factors that determine how your particular design will turn out.

Easiest Tie Dye Patterns
I’m going to share some of the most popular and easy tie dye patterns that are a great way to get started with tie dye! You can use these folding patterns for all dye styles. Once you master these, you will have a better understanding of how the tye dye folding techniques work and you will be able to move on to more advanced tie dye methods, patterns, and color combinations. I’ll walk you through how to how to roll tie dye shirts with pictures and step by step directions, plus I have a video tutorial launching that shows you how to fold the shirts!
I have included all of these different tie dye patterns: (Click the links to jump to that pattern!)
- Traditional Spiral Shape
- Scrunch or Crumple Shirt
- Bullseye
- Rainbow Bullseye
- Sunburst
- Horizontal Stripes
- Vertical Stripes
- Diagonal Stripes
- Tie Dye Heart
- Galaxy Tie Dye (Ice Dye)
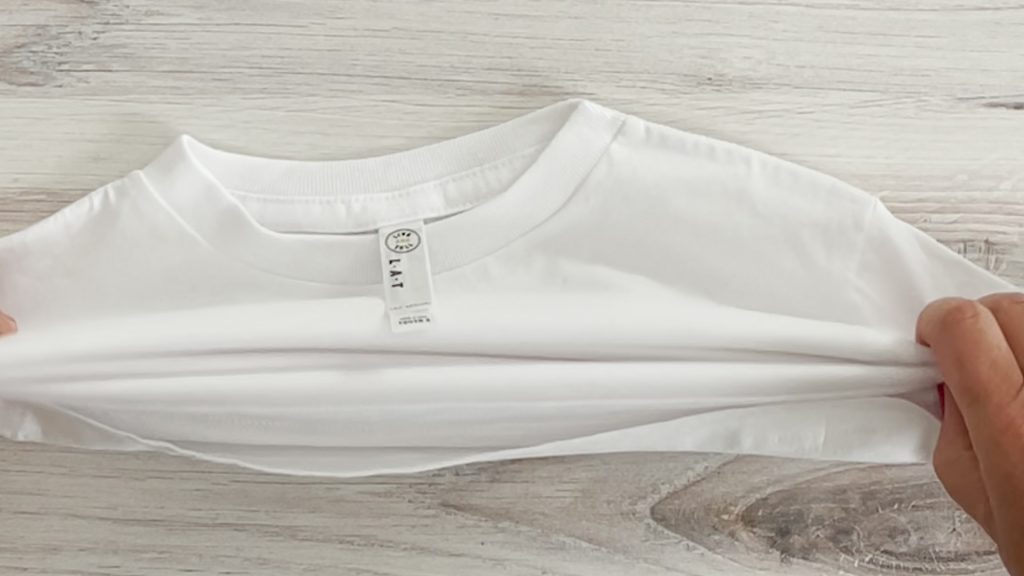
Rainbow Spiral Tie Dye Shirt
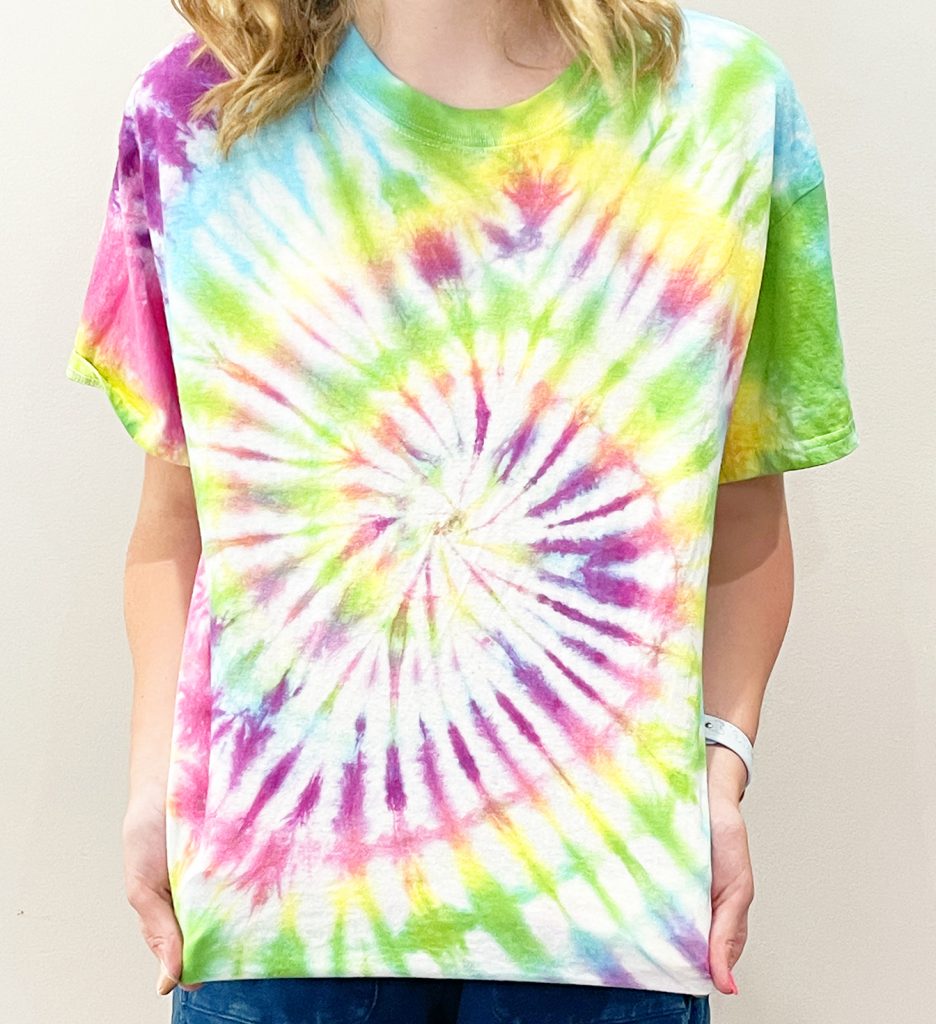
The spiral tie dye pattern is one of the most popular and tie-dye designs, and it is also one of the most traditional tie dye designs. It is definitely one of my personal favorites. I love to use rainbow colors of dye with a spiral design, but you can use the colors of your choice. You will be surprised at what an easy pattern it is to create!
Step 1
Place your shirt on a flat surface and choose the location for the center of your spiral. It is common to use the center of the shirt, but be creative and try different locations as your starting point! Using your fingers, fork, long tweezers, or another tool, start to spin the shirt (like you would spaghetti!) a circle. The fabric of the shirt will begin to fold in on itself as you keep spinning.
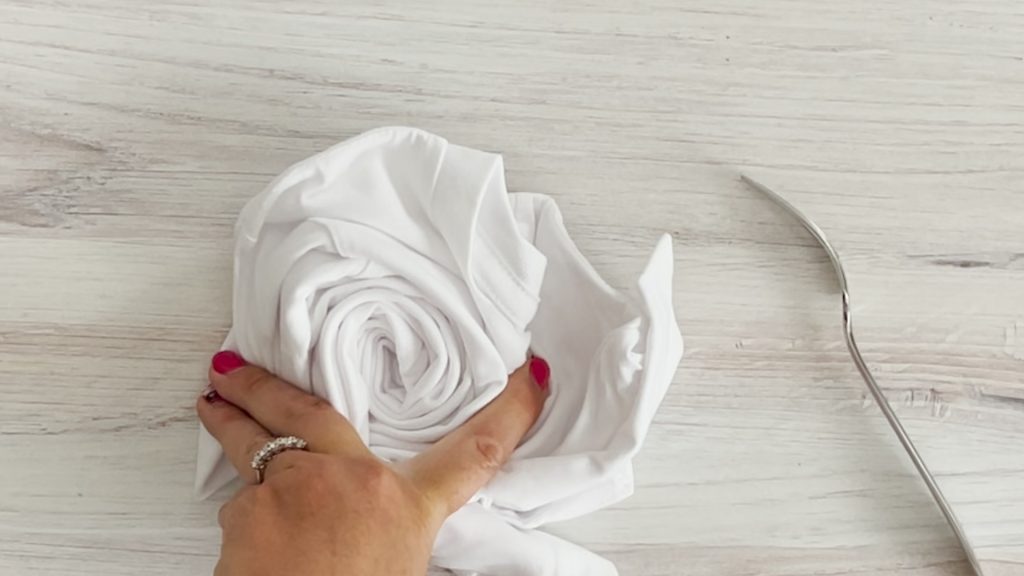
Step 2
Twirl the shirt around in a circle until the whole shirt is bundled up. How tight you wrap your shirt will determine how tight your spiral is, as well as how much white space will be in your design.
Step 3
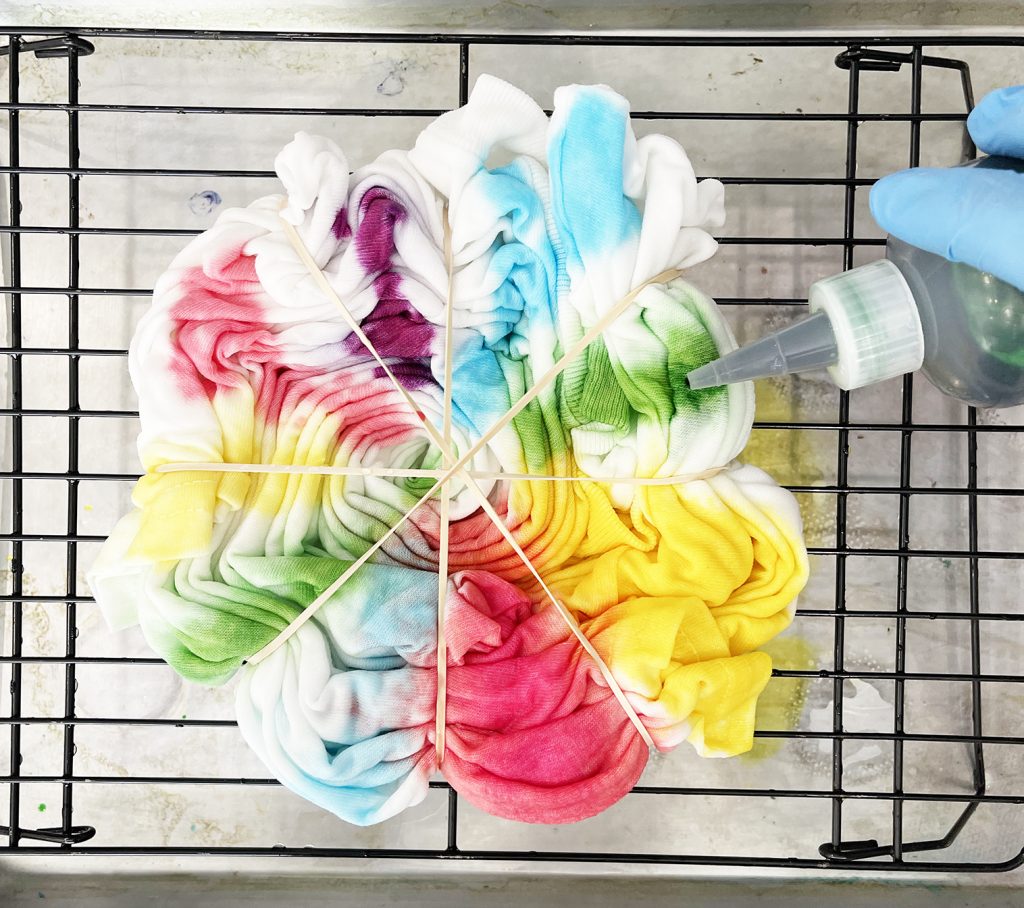
Use rubber bands to secure your spiral to create “pie slices” that you can use as color guides.

Step 4
I like to mark on the shirt with a small amount of dye which colors I will be using in which area. You can use the slices as a guide, or I also like to create concentric circles to vary the spiral design. Once you’ve determined your color pattern, start to apply the dye with a squirt bottle. You can use as little or as much dye as you want. Less dye = more white areas on your shirt, and more dye = less white areas and more color combinations. Be sure to flip your shirt over and repeat the process on the back side for more complete dye coverage.
To make the rainbow spiral shirt, I created a tight spiral and several colors to create a rainbow effect. It’s a fun technique for all ages because you can use whatever colors you want and they almost always come out amazing.
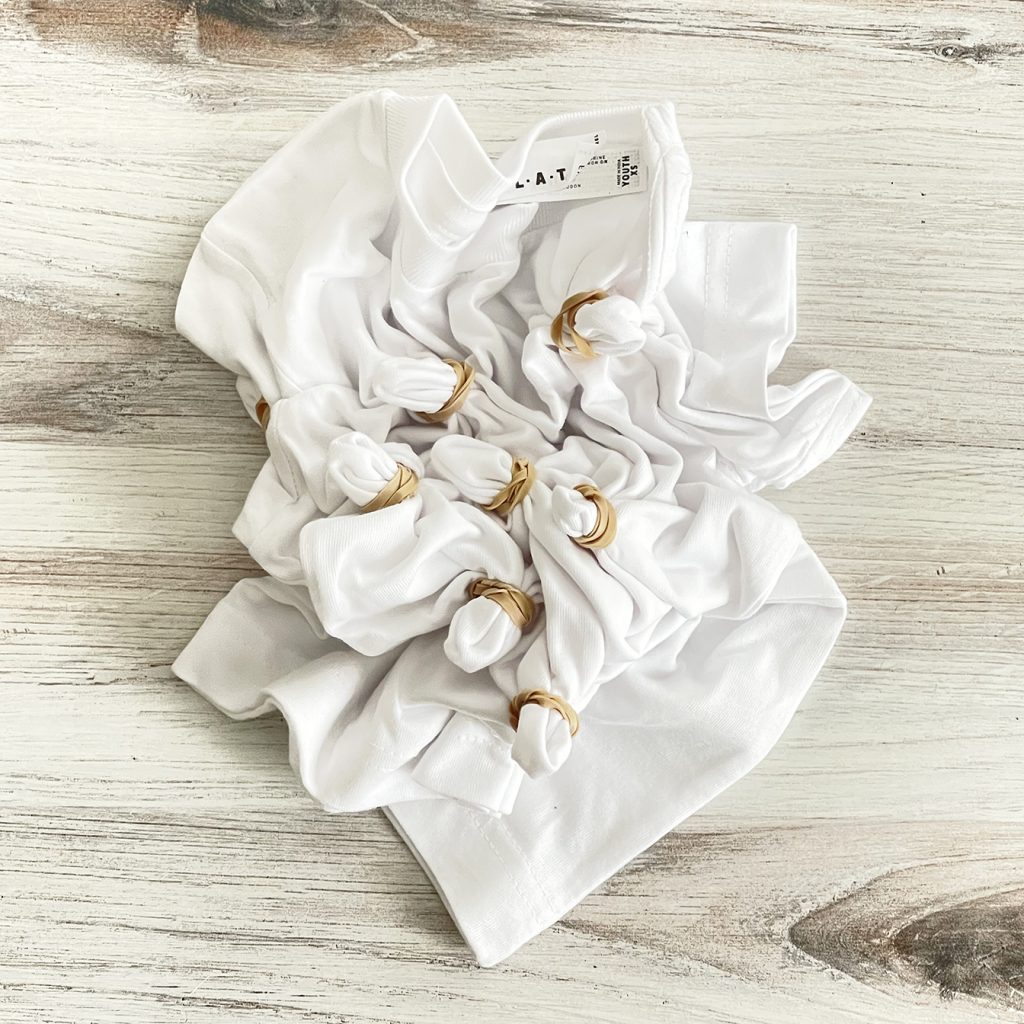
Simple Scrunch or Crumple Shirt
This is quite possibly the EASIEST tie dye pattern to make, but still produces a really cool shirt. It’s also really great for tie dye dress patterns. There’s one step: wrinkle your shirt into a flat mess, then bind it together with a rubber band.
Get the FULL Tutorial for this Easy Pattern: How to Crumple Tie Dye

You can use a second rubber band to secure the edges of the shirt, but it is not always necessary. Then just add polka dots of dye all over the shirt in a random pattern. You can use one or two colors, or be adventurous and use several.
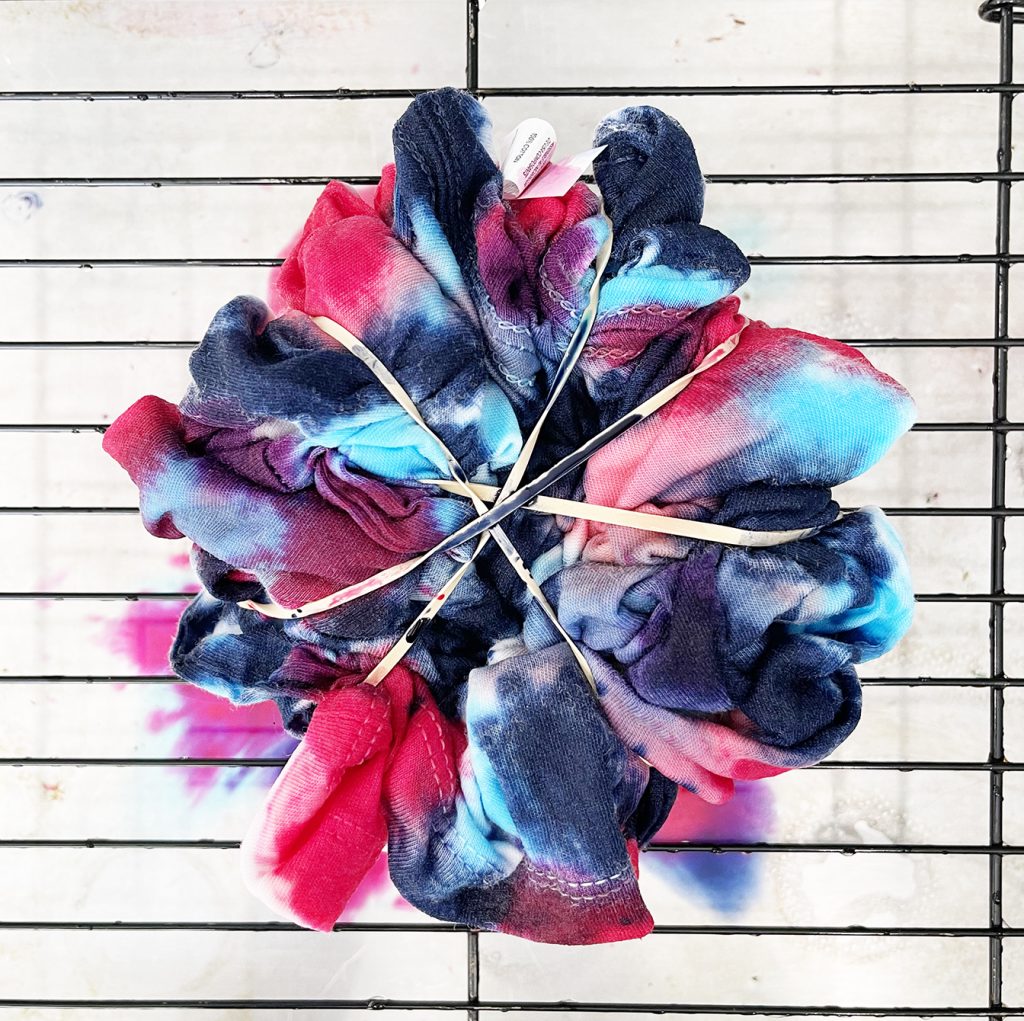
How cool is this shirt? You would never guess that it was just a crumpled cotton t-shirt!

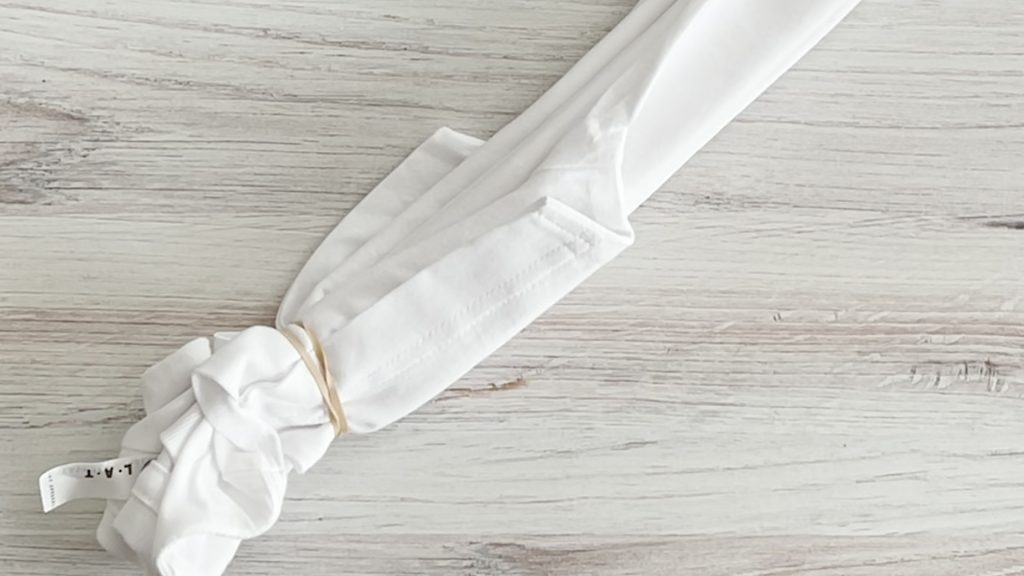
Bullseye Tie Dye
The bullseye design is another one of my favorites, only because I think it is more versatile than everyone would assume. This design makes a really cute tie dye shirt for toddler boys (it is also my son’s favorite design!) but you can really use the color dye to change up the look of the tie dye.

Step 1
Like a spiral, pick the area where you’d like the bullseye to be centered.
Step 2
Lift up the fabric of the shirt (I started at the center) and rubber band a small amount of the shirt. Continue to lift up the shirt, allowing it to fold up on itself and tie off with rubber bands. It will form a long strip of banded sections.
Step 3
To create a true bullseye design, alternate the colors you are tie dyeing to each section.
Rainbow Bullseye Tie Dye
This is another of my favorite tie dye patterns and it is just a spin on the regular bullseye tie dye pattern. Instead of starting the design from the center of the shirt, you will start gathering at the bottom corner!
Use rubber bands to create the segments, and apply the colors in rainbow color. It turns out so awesome! And I always think black tie dye looks cool.

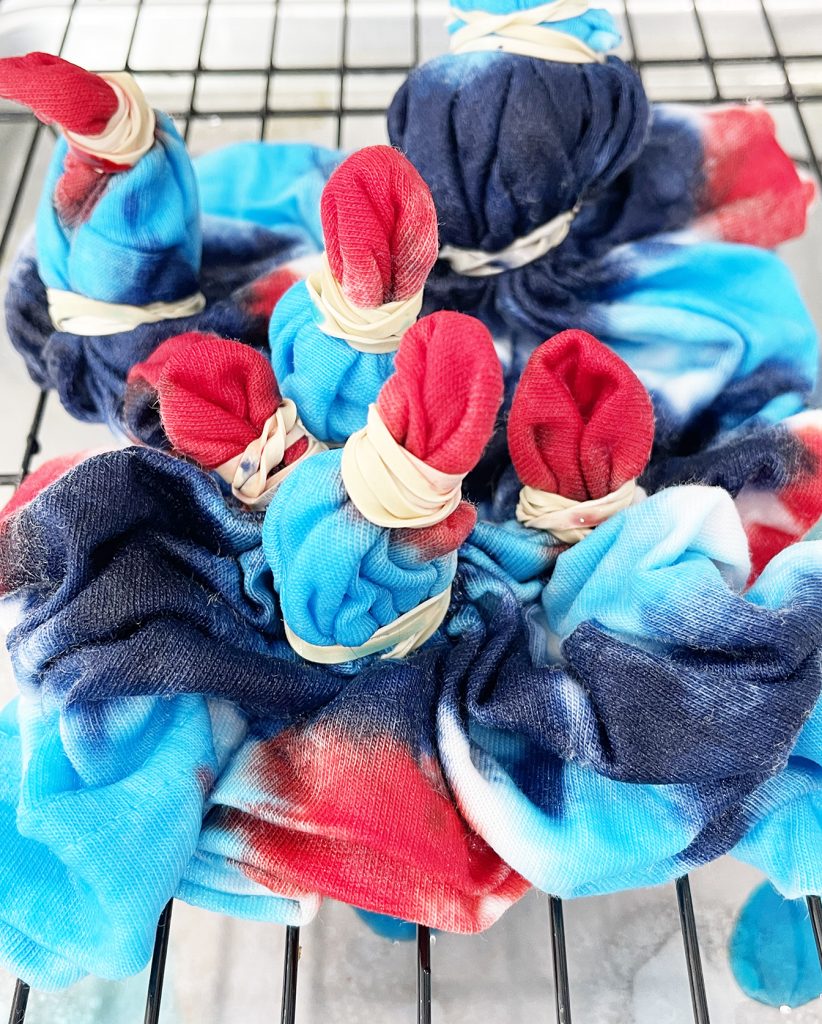
Sunburst Tie Dye
If you are wondering how the sunburst design is made, it is really just several little bullseye patterns scattered all over the shirt. I used red and blue dye to create a patriotic design that I think looks like fireworks. It’s perfect for the fourth of July!
Get the full tutorial for this shirt: Fireworks Sunburst Tie Dye Shirt Tutorial.
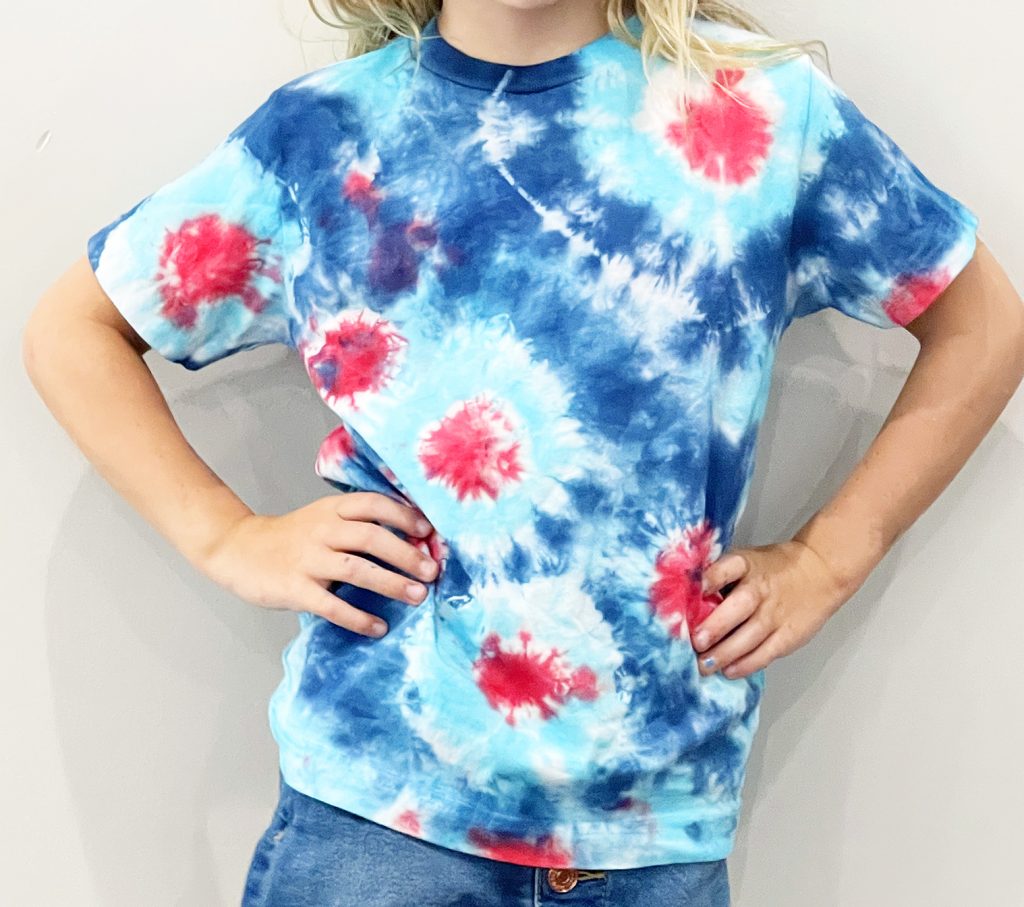
Step 1
To create this pattern, choose small sections of the shirt and wrap rubber bands as you would a bullseye. Tightly wrap one or two bands for each sunburst (the tighter you add the band, the more white areas you will get).
Step 2
Then just scrunch or crumple the rest of the shirt around the banded areas.
Step 3
Apply the dye in sections. The top of each banded area will be the center of the firework or sunburst.
Horizontal Striped Tie Dye
Striped patterns are a great way to create color blocks in your designs. And they are quite easy to make and are a fun tie dye idea for the whole family! All striped patterns are made with an accordion fold.
You can vary your pattern by changing the width of the folds, the space between the rubber bands, as well as where you apply the dye color.
Horizontal stripes are actually created by folding the shirt VERTICALLY, then tying off in sections. Each banded section is a stripe! I like to tie off the ends of the shirt first, then work my way to the middle.
You can make a simple color block pattern, or add more dye to create color blending.
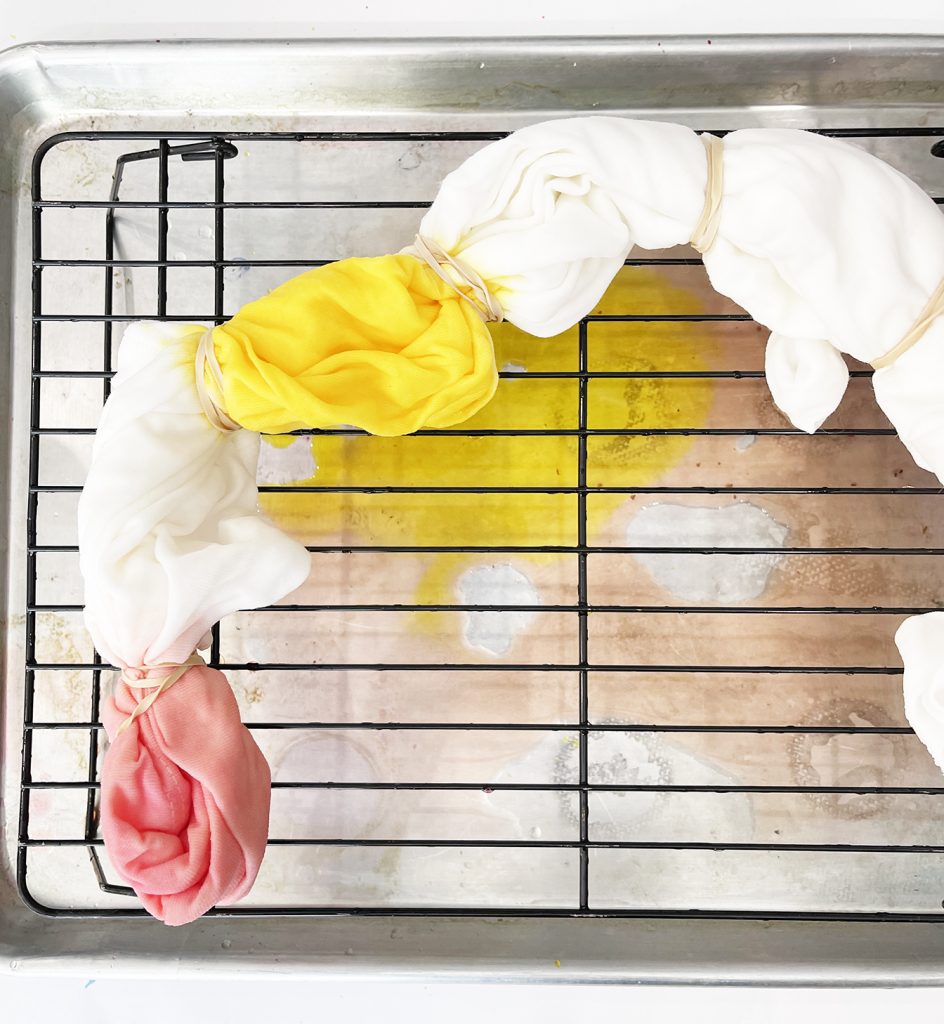
Here’s the simple pastel striped one I made!

Vertical Striped Tie Dye
A vertical striped pattern is made by folding the shirt in the opposite direction as well. Start at the top or bottom of the shirt and accordion fold HORIZONTALLY.
Just like the horizontal stripes, you can vary the pattern by changing the width of the folds and banded sections, as well as where you apply the dye.
This is one of my favorite patterns, it is easy to create a fun and symmetrical color pattern!
Diagonal Striped Tie Dye
For diagonal stripes, you will accordion fold the shirt from a corner. You can start at a bottom corner or the sleeve to create different directions of the diagonal pattern.

Tie-Dye Heart
Creating a heart tie dye pattern is a good introduction to creating more complex tie dye patterns.
Step 1
First, fold the shirt in half vertically. Then use a washable marker to draw half of a heart on the shirt.
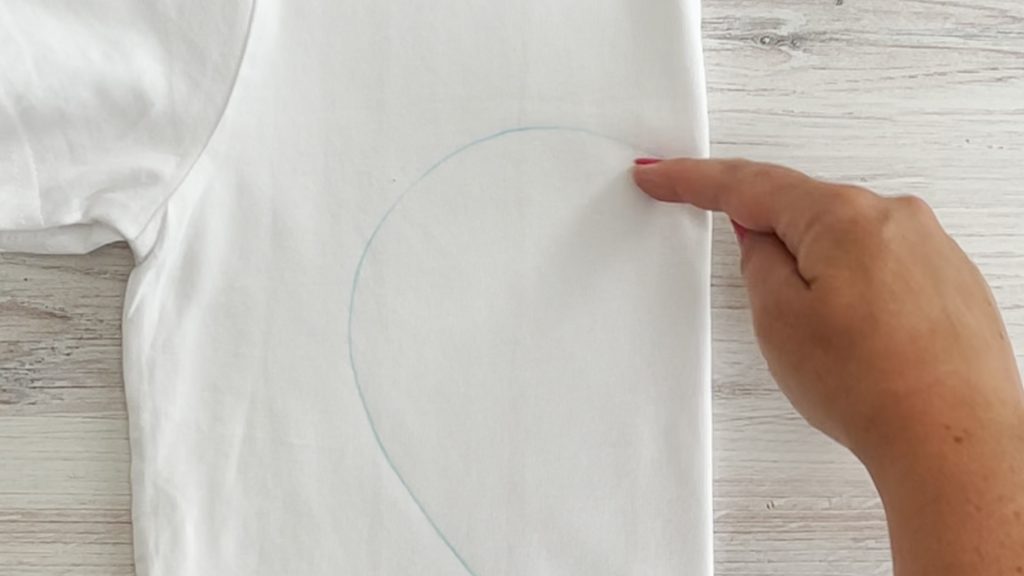
Step 2
Use the line as a guide and start folding the shirt so that the line is straight across the top of the fold.
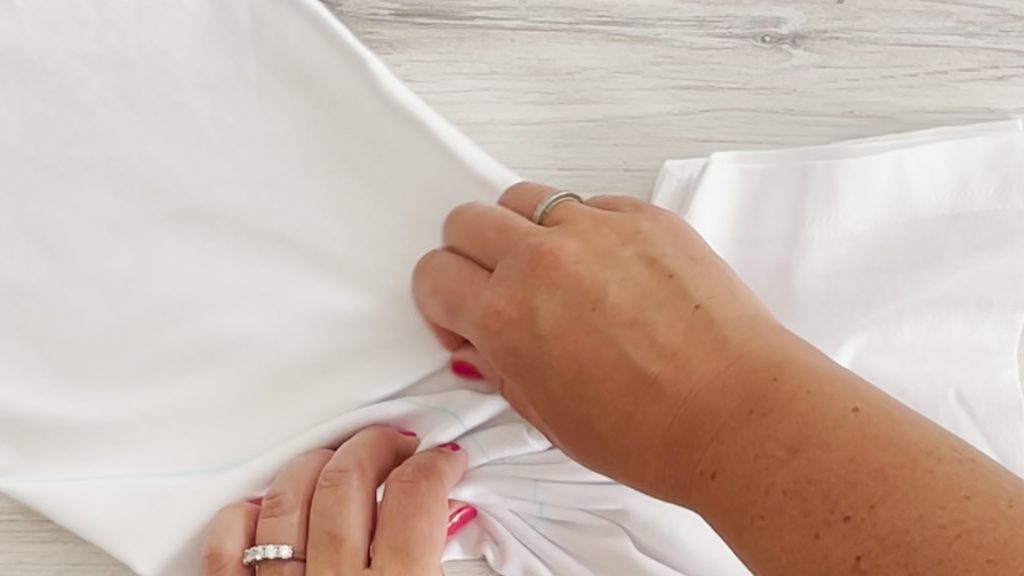
You will have to play with the size of your folds as you continue around the line. I find the easiest way is to put a rubber band right over the line, and then band the rest of the shirt. It takes some practice, but it is a really cool effect!

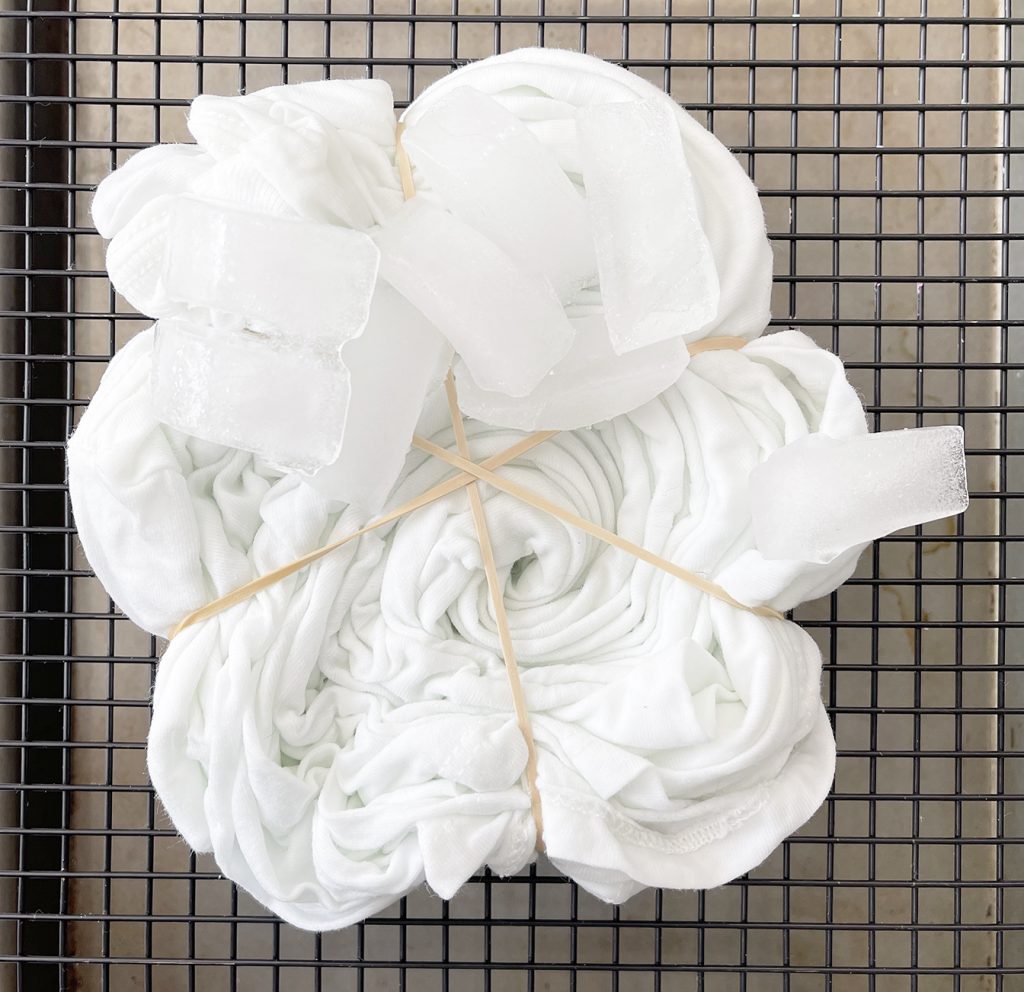
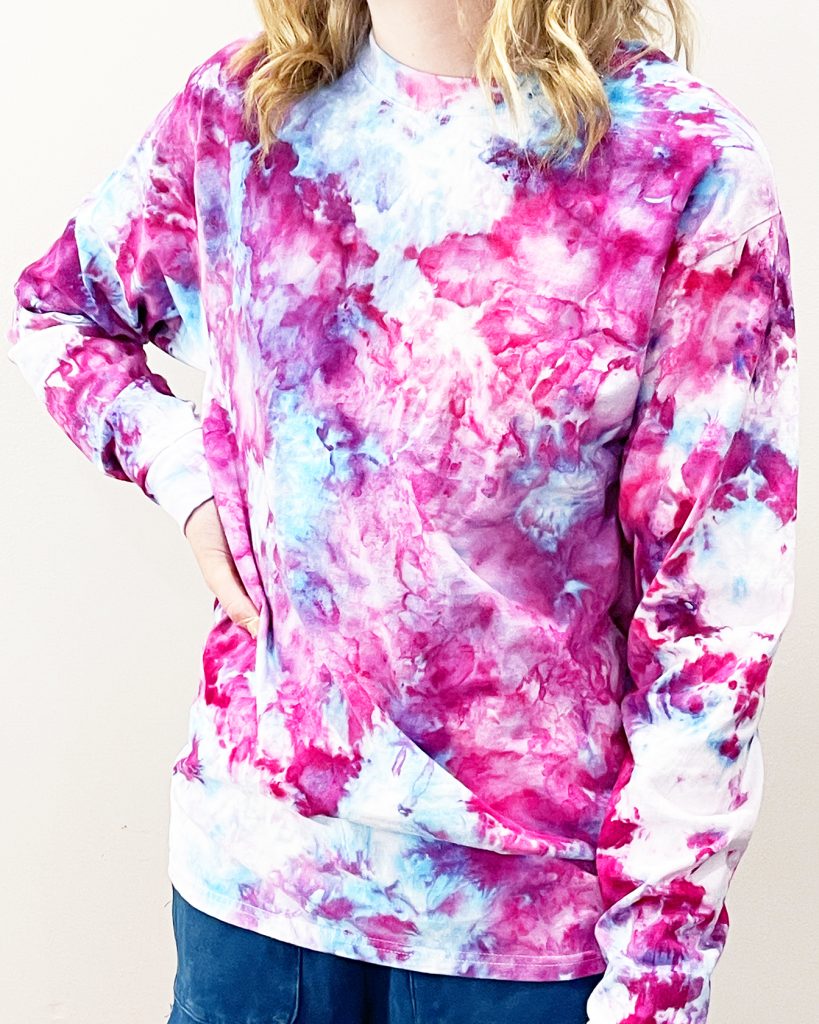
Galaxy Tie Dye Patterns (Ice Dye Shirts)
If you want to get a really cool and different effect with tie dye, ice dyeing is a great place to start! This method is how you can design your own galaxy tie dye shirts! Instead of using a liquid dye mixture, you actually use powder dye on top of ice.
See my FULL TUTORIAL on How to Ice Dye including all of my tips and tricks for the best results!
As the ice melts, the dye powder is dissolved and the resulting designs are unexpected and fun. Because you use powder and the ice turns to liquid slowly over time, the dye will split into some of its origin colors and create fun, blended effects.
To use the ice dyed technique, prep your shirt according to the tydye instructions. Then crumple or fold your shirt into the design pattern. Place on a rack or tray and pile ice on top of the shirt.
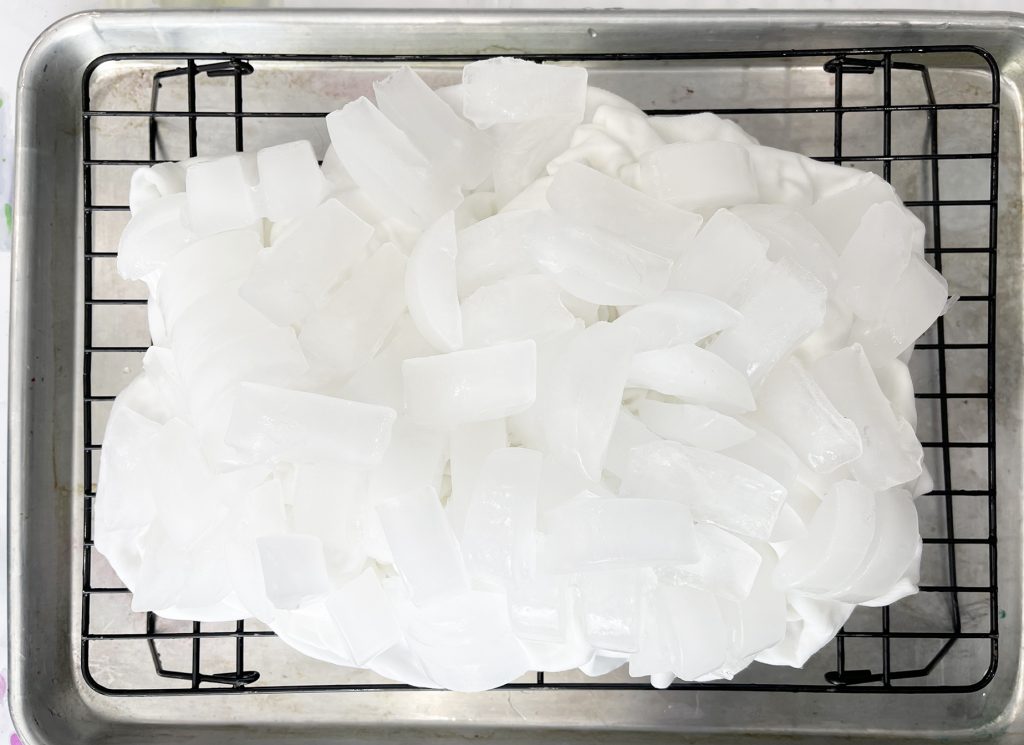
If the ice will not stay on top of the shirt, you can create a “wall” with aluminum foil or cardboard to place around the shirt.
Then sprinkle the dye powder on top of the ice.
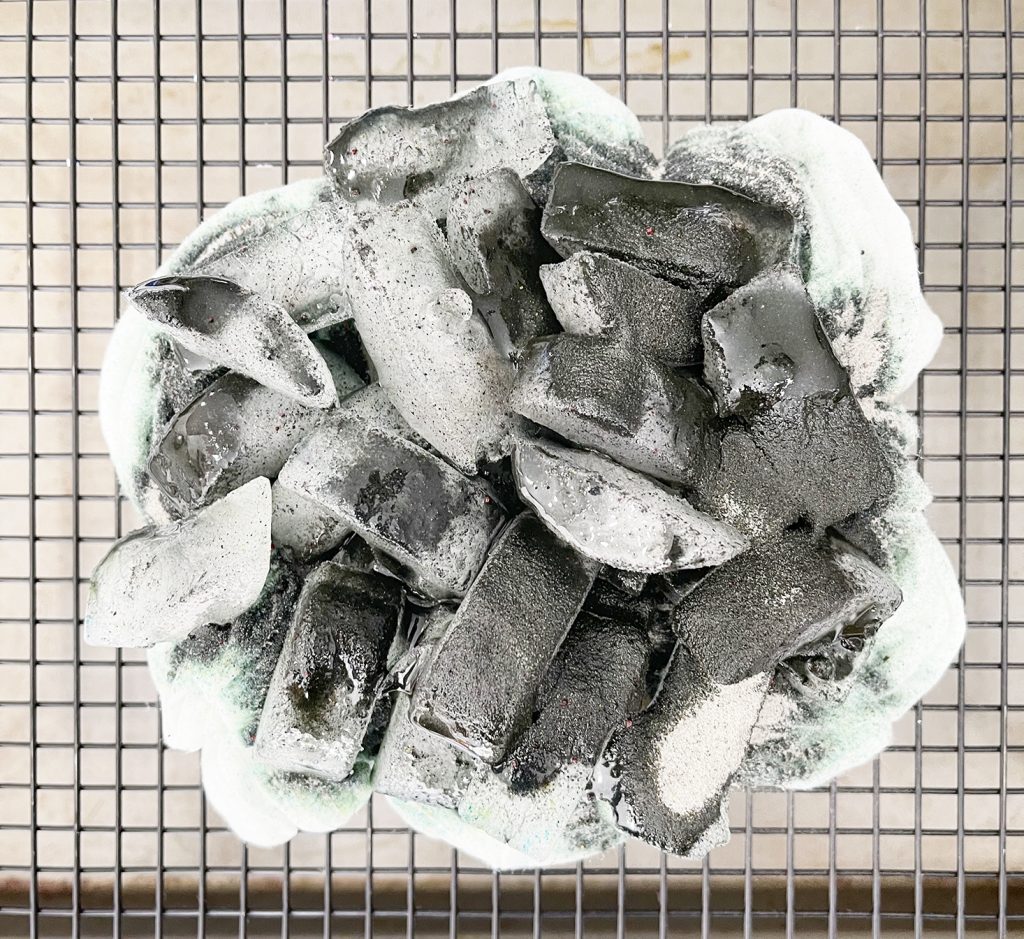
You can use one color of dye, or create a pattern!
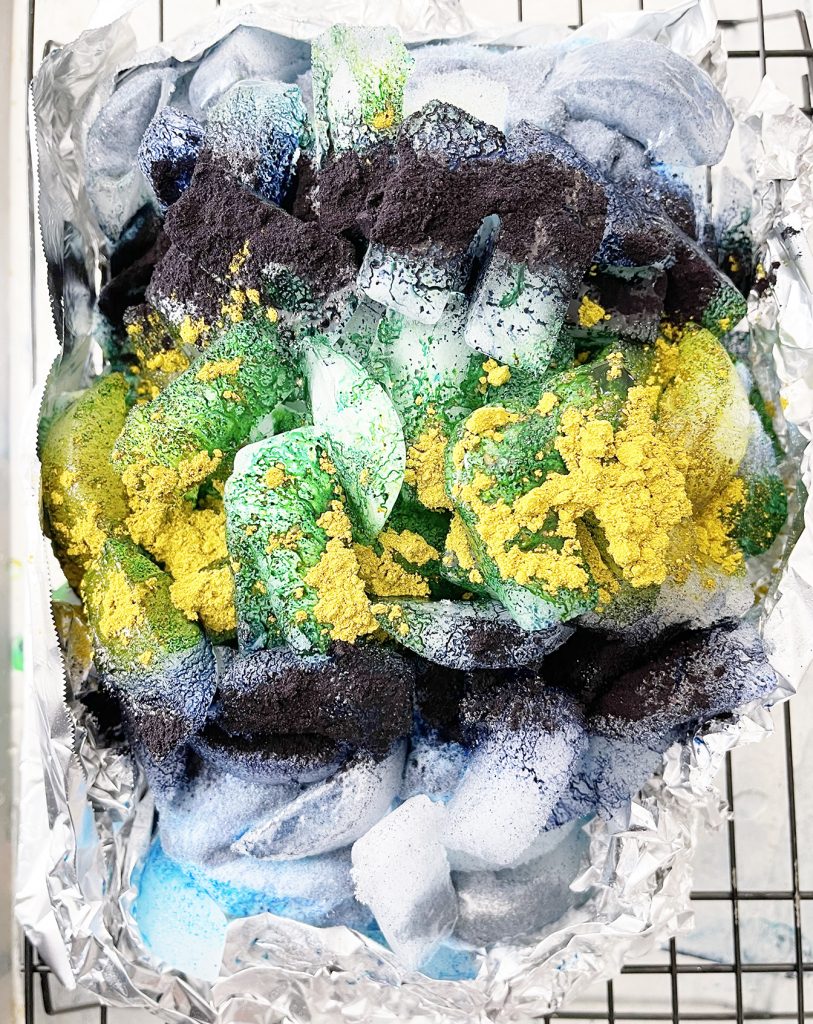
The scrunch method is popular and creates amazing results, but you can also fold your shirt before applying your ice and dye! I folded this shirt into a spiral before applying the dye.
As the ice melts, the dye will penetrate the fabric of the shirt.You can see how the dye components start to split as the ice melts!
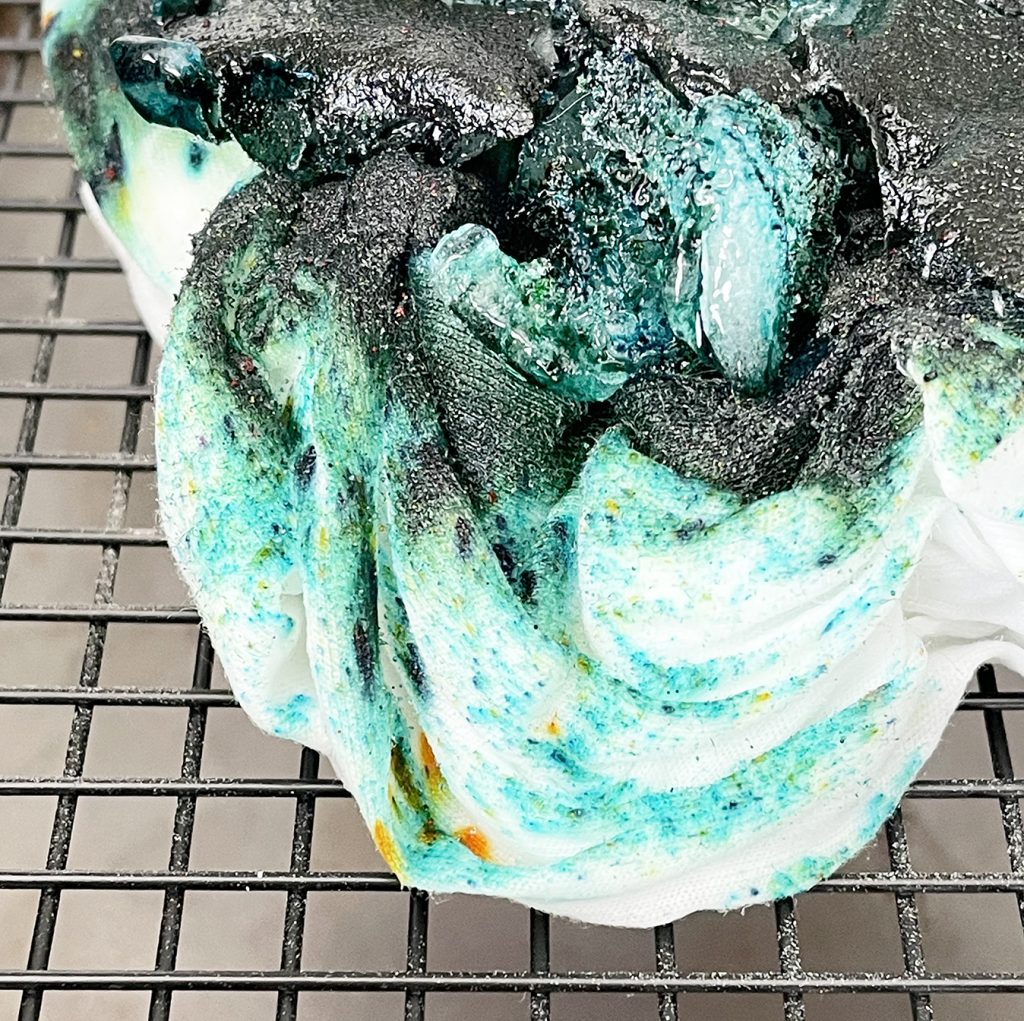
I recommend letting the ice dye sit for at least 12 hours, and up to 24 hours. You can also speed up the result a little bit by melting the ice with a heat gun or warm water, but you will not get the same cool watercolor effect.
The results are incredible, which makes this one of my favorite ways to tiedye shirts!
*Tip: Use as much ice as you can stack on the shirt so that there will be enough liquid to penetrate to the bottom of the fabric.
Tie Dye Frequently Asked Questions (FAQ):
What is the best fabric for tie dye?
100% Cotton. The dye will bind well so you get strong, vibrant results.
Can you tie dye polyester shirts?
Yes, but colors are dull/fade quickly unless you use special polyester dyes.
Do 50/50 shirts tie dye well?
Yes, but results are softer and less vibrant because only the cotton portion absorbs dye.
Why doesn’t tie dye work on all fabrics?
Natural fibers absorb dye molecules, synthetics usually resist them.
Can you tie dye black shirts?
Traditional dyes won’t show, but bleach tie dye / reverse tie dye works beautifully on dark fabrics.
More Tie Dye Tutorials:
Make sure you pin this post to your favorite DIY board! Once you start making tie dye shirts, you will want to dye everything!


Nice! Thank You my grankids and I make tye dye shirts every summer when they visit for a summer vacation at my house they will love these especially using the Ice which we have never done before!