xTool Automatic Conveyor Feeder – Setup and Review
This post and the photos within it may contain affiliate links. As an Amazon associate I earn from qualifying purchases. If you make a purchase through one or more of the links, I may receive a small commission at no extra cost to you.
Have you seen the new automatic conveyor feeder accessory for the xTool P2 laser machine? When used with the riser base accessory, it allows you to cut or engrave materials up to 118″ long without the need to readjust your project! Keep reading about this laser machine accessory that will give you BIG results!

xTool Conveyor Feeder
Although I own a Glowforge Pro, I admittedly have never used the passthrough option. It didn’t seem like an easy task, and it was on my list to eventually try out. Fast forward to the arrival of my xTool P2 and the automatic conveyor feeder accessory.
This is a good time to mention: xTool sent me the conveyor feeder to try out. But all of my opinions are 100% my own. And I hope you appreciate my honesty about all of the products I test!
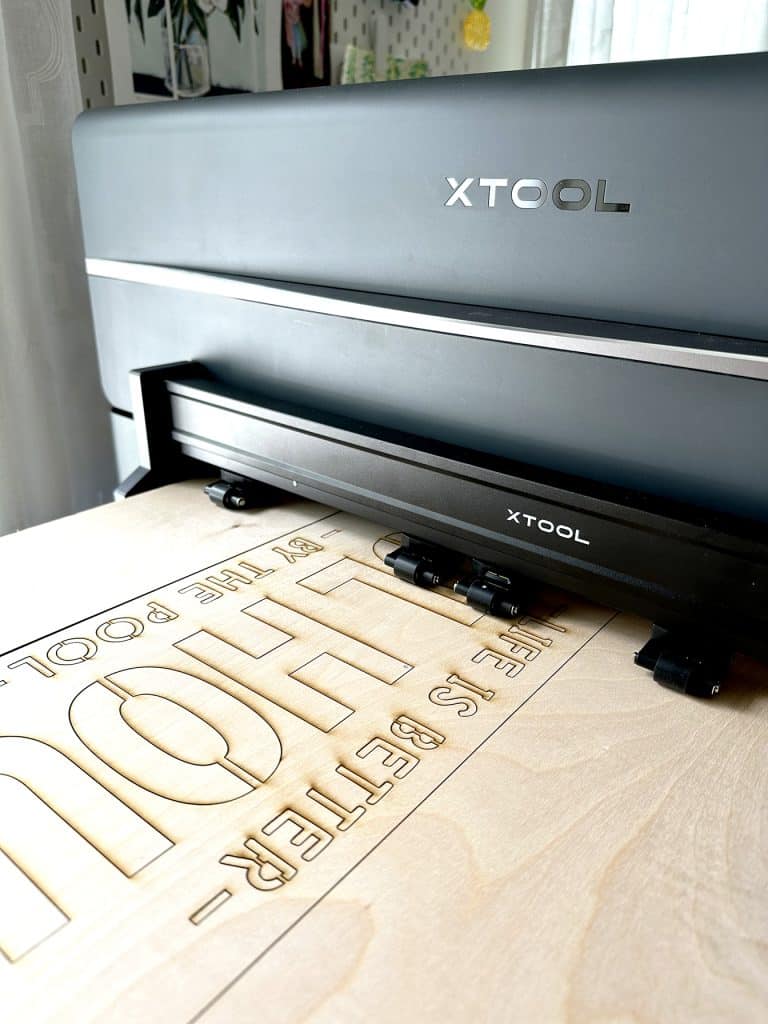
I’ve had a couple sheets of 2 foot by 4 foot plywood hanging around that I was saving to cut down for inside my laser. Instead of the engrave projects I have seen, I wanted to take it a step further and see how the cut function would work. I don’t make things easy on myself. But I love how this big wood sign turned out!
AND – you can download this large pool house sign SVG! Head to the end of the post for the download.

New around here? Don’t miss these essential laser posts and my FREE eBook for beginners:
Interested in an xTool Laser? Read more!
Trying to decide what Laser Craft Machine is Right for You?
Download my FREE eBook: Beginner’s Guide to Laser Craft Machines! With 3+ years of experience and testing of 5+ lasers, let me teach you the basics! Learn the different types of lasers, projects you can make, potential cost, and more!
Read the guide BEFORE you buy!
What is the xTool Automatic Conveyor Feeder and What Does It Do?
First things first. The Conveyor Feeder is an accessory to the xTool P2 CO2 laser cutter and engraver. The automatic conveyor feeder fits into the front access panel of the riser base accessory and attaches to the machine. Then rails attach to either side of the feeder unit where you place your material.

It allows you to cut or engrave much larger materials by feeding the material on rails through a passthrough slot in the machine. This is similar to the Glowforge passthrough slot but with the addition of the riser base and a mechanical conveyor system.
There are pressing wheels in the conveyor feeder unit that automatically push and pull the material through the process.
This is especially useful for cutting large, continuous designs such as large signs, decor, or even pieces to build large furniture type items.
It takes the concept of the Glowforge Pro passthrough slot and makes it EASY. No repositioning your project. No camera adjustments. No deviation in the cutting or engraving path. Nothing. It all happens by itself. It’s crazy.
What is the Processing Area of the xTool P2 with the Conveyor Feeder?
The standard processing area of the xTool P2 is 23.6” × 12.1″, but with the automatic conveyor feeder it increases the processing area to 19.6″ × 118″. The conveyor feeder can handle materials from 2.5″ to 24.5″ wide, but the cutting area is 19.6 inches maximum.
To support materials over 39″ in length, you can purchase additional sets of rails that can be added to the base set.
What Materials Can You Use with the Automatic Conveyor Feeder
The conveyor feeder will work with a variety of materials, but the length of material that you can use does change depending on the material you choose. Here’s the material specifications:
- Plywood: .55″ thick, 118″ long
- Acrylic: .47″ thick, 96″ long
- Fiberboard: .47″ thick, 96″ long
- Felt: .35″ thick, 96″ long
- Cork: .47″ thick, 96″ long
- EVA: .37″ thick, 96″ long
I was surprised to learn that you can use both soft and hard materials in the conveyor feeder! The pressure wheels inside of the feeder unit can be adjusted to the material you choose.
The only material that is explicitly not recommended for engraving is corrugated cardboard, because the feeder wheels will pinch it and leave marks.

Notable Features of the xTool Conveyor Feeder
It’s automatic. I’ll say it again. It works with xTool Creative Space to automatically plan your cut or engrave path and moves the material in and out of the laser machine so that the entire process is hands free.
There are two sets of pressure wheels that hold the material in place and feed it through the unit – one above the material and one below (pinch rollers). You can set the pressure to suit your material, and the anti slip material holds everything in place.
You can manually set the starting point of your materials using knobs on the side of the feeder. This makes it easy to place your material in the feeder and start your project.
There is an alignment grid right on the feeder so that you can line up your conveyor rails and the material easily. I especially appreciated this design feature.
Setup of the Automatic Conveyor Feeder for xTool P2
I captured the whole set up of the machine on video, so head over to my YouTube page soon to watch!
The instructions that came with the conveyor feeder are what I used, and I thought they were easy to follow. The only notable thing was that it didn’t show which screws to use for a couple of the steps. It was easy to figure out once you realized how many screws you needed for each step.
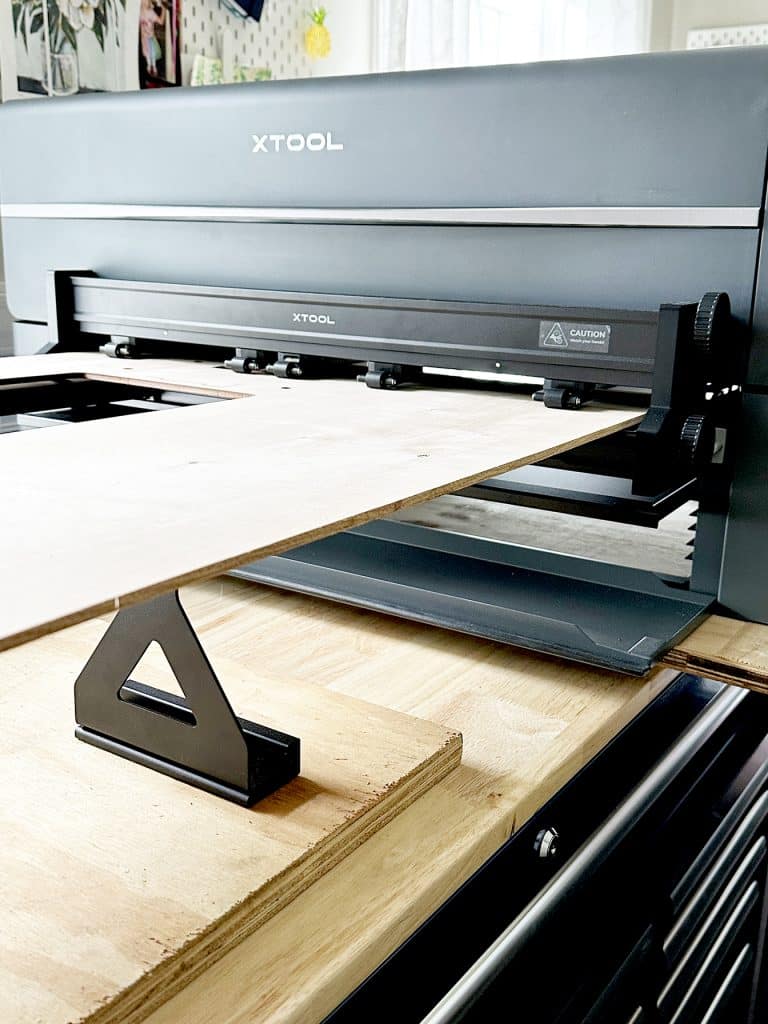
You need a large, sturdy area to set up the automatic conveyor feeder plus the rail system. If you have the space, an enclosed workshop or garage is what I would recommend.

The picture doesn’t do justice to how large the set up is! My two workbenches together are around 9 feet long!
Keep in mind that the xTool P2 with the riser base is quite heavy and awkward to move. It will require at least 2 people if you have to move your machine to accommodate the conveyor feeder pieces.
It comes with all of the pieces you need to use it, including a little tab to lift your ventilation tube out of the way!

How to Set Up a Project in xTool Creative Space to Use the Conveyor Feeder
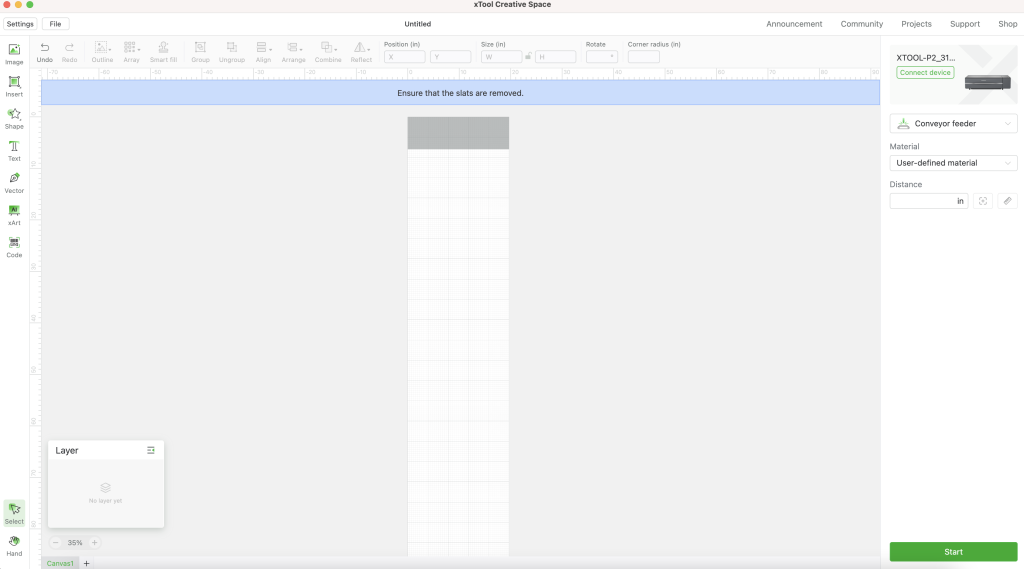
The automatic conveyor unit plugs into the back (inside) of the xTool P2. Once it is plugged in and your machine is turned on, the option for the conveyor feeder will appear on the right hand side of xTool Creative Space (XCS).
If you select conveyor feeder, the view changes to include the placement of your material and an extended screen view. I thought it was very easy to set up my design in XCS to cut!
There is one notable change when setting up your design to cut in XCS. If you have selected conveyor feeder and the cut setting, an extra setting will appear on the bottom of the right side of the screen.
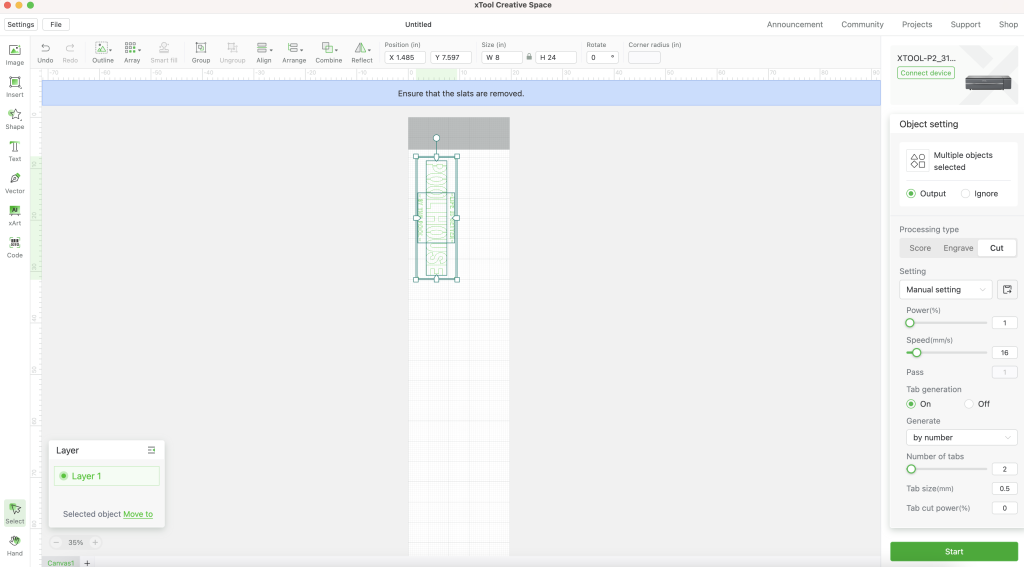
“Tab settings” are tiny little areas on your cut path that will not cut the whole way through. These little “tabs” will keep your cut pieces to fall through to the bottom of the machine, or catching on the conveyor belt as the material moves.
You can set the tabs to cut by number, or by distance. You can also set how big the tabs are and at what power (if any) that you would like the tabs to cut.
How to Use the Automatic Conveyor Feeder Accessory with the xTool P2 Laser
Once you have your design set up, the engrave or cut process is very simple! Once you click the button to start the machine runs the material automatically.
Note: I would suggest testing a small area to make sure the pressure is set correctly for your material and that the settings are dialed in.
Pros & Cons of the Automatic Conveyor Feeder
Pros:
- The design setup was straightforward. xTool Creative Space worked seamlessly with the conveyor feeder and I was able to set up test cuts and my sign design with zero problems.
- The process is truly AUTOMATIC. I was very impressed with how well the machine moved the material in and out of the machine during the cut process. There was no deviation in my design and it cut perfectly. The calibration between the laser and the feeder was seamless.
- It was sturdy. The feeder and the rails are heavy and held the material well. I used a 2 foot by 4 foot piece of plywood without the extra rails, and I had no problem.
- Perfect to add large signs or custom artwork to your portfolio or shop!
- I would recommend to anyone that wants to cut large items. It is a pretty awesome product.
Cons:
- It requires a large amount of space. I have a small office, and it was difficult to figure out where I was going to set it up. You need a large, level, flat surface to set the P2 as well as the rails.
I pushed my 2 Husky workbenches together and had to use a thick piece of plywood to extend the workbench so I could place the P2 sideways. Then I needed another piece of plywood so that the rails were the same height as the P2 and the feeder.
It can’t stay assembled in my office because there just isn’t enough space, so I will have to plan out projects in bulk if I want to use it. But it does disassemble easily! - The exhaust fan did a really good job of removing the smoke during the cut process – but not entirely. When the wood was pushed though the machine to end the far end of the project, there just wasn’t a way for the exhaust fan to pull all of the smoke away. There was too much material filling the space. Smoke didn’t fill the room, but it was still very apparent that the fumes and smoke were not being pulled outside. This would be the same result with window ventilation or the smoke purifier.
I highly recommend when you use the automatic conveyor feeder that the machine be in a garage or an outdoor covered area with very good ventilation. - Because of how the feeder unit is placed in the machine, it would be very difficult (or not possibly at all) to use the machine for normal cutting and engraving. I am not saying there isn’t a way, but when I had it assembled I didn’t see how I could make it work.
If you wanted to leave the machine set up in a dedicated space to cut a lot of oversized projects, that would be fine, but I don’t work with a lot of large projects, so moving the machine and reassembling the conveyor feeder will require some planning on my part. - This isn’t a deal breaker, but more of a reminder that the Riser Base Accessory must also be purchased for the automatic conveyor feeder to work with your xTool P2.
- XCS – I couldn’t get the tab settings to work perfectly with my sign, but that might have been user error. I will play with those settings more. However, a few pieces fell out and the sign still cut perfectly.

Overall Review of the xTool Conveyor Feeder
If you plan to make very large projects, this accessory for the xTool P2 sets it apart from other desktop laser machines and I recommend it. I enjoyed using it, and if I had a larger dedicated space for my laser machine, I would use it more often! I thought that XCS worked really well with the setup of the large material and design.
If you have no immediate plans to use the riser base or make really large single cut pieces, or if this is your first laser machine purchase, start with the base machine and work your way up.
And unless you have a very large, empty, well ventilated work space, I don’t think this is a great purchase for you. I don’t have a workspace outside of my home, so this is very difficult for me to set up and use for more than a project here or there.
FAQ about the xTool P2 Conveyor Feeder
Do the Conveyor Rails Come with the Automatic Feeder?
The listing for the feeder is a little confusing. Two sets of rails (one for for the front and one for the back) comes prepackaged with the feeder unit. If you plan to use very long pieces of material, you will need to purchase additional sets of rails. You can also buy the conveyor feeder PLUS the extra rails as a bundle to support 90″. Unless you plan to regularly cut down your material to under 39″, I suggest getting the bundle. A lot of material comes 4′ or longer.
How Much is the xTool Automatic Conveyor Feeder?
The conveyor feeder is $459 and the bundle is $699. The riser base (which is required for use) is $499.
Cut and Engrave with Ease!
Get the xTool P2 55W CO2 Laser Cutter
use code: pineapplepaperco for $80 off $999 or more
Download a Free Design to Use with the Conveyor Feeder
If you got a conveyor feeder for your xTool P2 and would like to try out a design, you can download the file for the pool house sign I made!
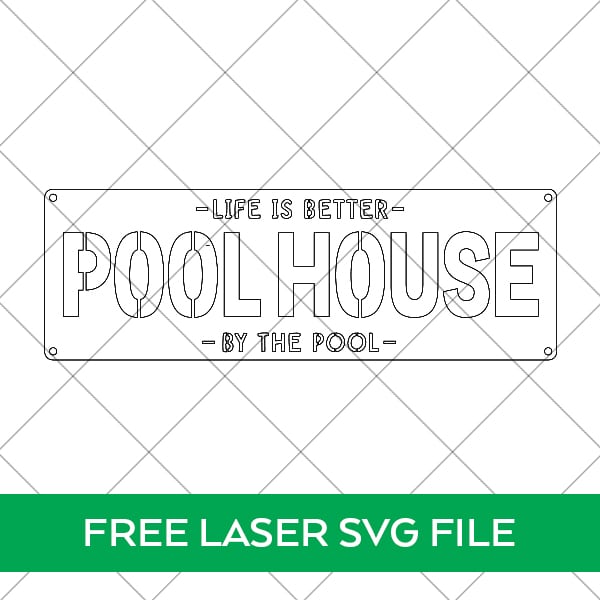
This file is DOWNLOAD #283 in my FREE DOWNLOADS LIBRARY.
Get the password below! (If you have the password, head over to the library to download the file.
You will NOT be sent an email with the file. Free SVG files available for download are for PERSONAL USE ONLY. SVG file is included to use with xTool Creative Space, Glowforge App, and other laser specific software.
Don’t forget to pin this for later!


ABOUT CHARYNN
Hi, y’all! I’m Charynn, the owner and designer of Pineapple Paper Co. I’m a mom of four kids (two girls and two boys) living in Pittsburgh. I love hand lettering, anything southern, cocktails, and of course, pineapples! I am excited to share my SVG files, printables, and craft projects with you! The pineapple is a symbol of hospitality, and I welcome y’all to my little corner of the internet. Read more…