xTool P2 CO2 Laser Cutter Review: Get All the Details!
This post and the photos within it may contain affiliate links. As an Amazon associate I earn from qualifying purchases. If you make a purchase through one or more of the links, I may receive a small commission at no extra cost to you.
There’s a new craft laser cutting machine on the market! The xTool P2 55W CO2 Laser Machine launched in 2023 and I have one! If you want to start making laser cut and engraved crafts with materials like wood, acrylic (including clear!), glass, ceramic, felt, leather, and MORE, you will want to read this post! This powerful laser cutter has a stronger laser and is more affordable than comparable machines. I will share everything I have learned about the xTool P2, including unboxing and setup, calibrating the machine, accessories you should buy, and everything in between!

Makeblock provided me with a xTool P2 machine to test, but all of my thoughts and opinions are 100% my own!
Y’all know that I am in love with my craft cutting machines! From Cricut to Silhouette, to laser machines, I use them all of the time! A few months ago, I tested out the xTool M1 hybrid diode laser and blade cutting machine, and when the 55W P2 CO2 laser was announced, I couldn’t wait to get my hands on one!
xTool launched on Kickstarter a few years ago, and has built a solid reputation with laser machines like the D1 and M1, as well as the brand new S1. If you are watching the craft world at ALL right now, you have likely seen xTool laser cutters and engravers. They are some of the most popular laser machines on Amazon right now!
I have owned a Glowforge Pro for a couple of years, but the P2 was expected to be more powerful and offer a wider range of materials to work with, including up to 20mm acrylic and 18mm wood. I needed to see it in action for myself!
If you’re brand new to laser craft machines, download my FREE eBook below!
Trying to decide what Laser Craft Machine is Right for You?
Download my FREE eBook: Beginner’s Guide to Laser Craft Machines! With 3+ years of experience and testing of 5+ lasers, let me teach you the basics! Learn the different types of lasers, projects you can make, potential cost, and more!
Read the guide BEFORE you buy!
Plus, I really wanted to try engraving slate coasters, too!
Glowforge v. xTool: Which One is Better?
I’m going to answer the first question I get right away: Which is Better – xTool or Glowforge? I have already done a detailed comparison of the xTool laser machines and my Glowforge. I have tech specs, my honest opinions, and everything you need to know before you buy a laser cutter!
Makeblock is the company behind the xTool M1, xTool P2, as well as the successful xTool D1, S1 and other laser cutting and engraving machines. They have a wide range of products that suit almost every crafter and hobbyist. The P2 55W CO2 laser is their most powerful machine to date.
What is the xTool P2?
The xTool P2 is a desktop CO2 laser cutting and engraving machine. It is intended for makers of all levels of interest, from hobbyists to small business owners that sell their handmade goods. Unlike the xTool M1 that offers both laser and blade cutting, the P2 is a much more powerful (and expensive!) C02 laser only machine.
With 55W of laser power, the P2 can cut through thicker wood, MDF, and acrylic than a lot of other desktop lasers. There are SO many materials and projects that you can make! It’s the perfect addition to your craft room, even if you own a diode laser or an electronic cutting machine like a Cricut.
What Kind of Laser Machine is the xTool P2?
The P2 contains a CO2 laser, the same kind of laser that is in the Glowforge or similar machines.
There are 2 types of lasers that most hobby crafters are interested in: diode and CO2. A diode laser is much less powerful than a CO2 laser, but it’s also WAY less expensive, and a popular choice for crafters that want an entry-level laser. Diode lasers like the M1 start at 5W and 10W of power, the S1 at 20W and 40W of power, while CO2 lasers generally start at around 40W laser power.
The xTool P2 is the most powerful desktop machine I have seen, with a 55W CO2 laser. And it is more affordable than less powerful CO2 lasers on the market. CO2 lasers are more expensive than diode lasers, so depending on what projects you want to make, you can check out the specs to decide which is right for you.
CO2 lasers also have a shorter lifespan than diode lasers, but you will still get a lot of crafting done with a CO2 laser machine. xTool says that the P2 laser will last for 6000-8000 operating hours.

What Comes Inside the xTool P2 Box?
Almost everything you need to get started comes inside the box (there’s only one thing missing but it’s easy to grab at home!) Here’s what comes in the box:
- P2 Machine
- Power Adapter & Power Cable
- USB-C Cable
- Exhaust Pipe & Supplies to Attach to the Machine
- User Manual/Get Started Guide
- Small Tools for Assembly and Calibration
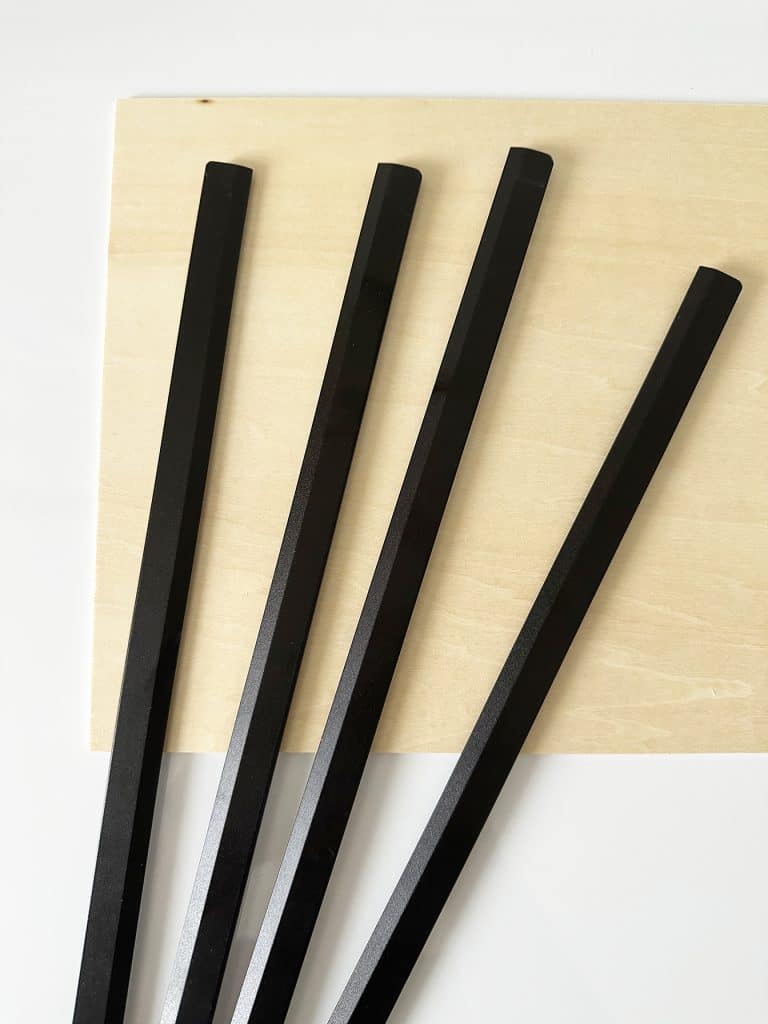
- Slats for the Cutting Bed (these provide air flow when cutting materials; the inside tray does not contain a honeycomb or similar base, but metal slats are included to insert into the machine above the base plate.)
- Small Material Pack (basswood and clear acrylic)
- Antifreeze
- Funnel
The antifreeze threw me off at first! You must add a specific combination of antifreeze and water to your laser to prevent freezing in colder climates. The water also acts as a cooling system while the machine is running. Included in the box is a large bottle of antifreeze as well as conversion charts that tell you how much antifreeze and water to measure and put into the machine.
That brings us back to what’s NOT in the P2 box. The machine comes with the antifreeze, but water is not included. You will need to grab a bottle of distilled or bottled water from your pantry or a nearby store. You CAN NOT operate the machine without completing this step.
Do You Have to Assemble the xTool P2?
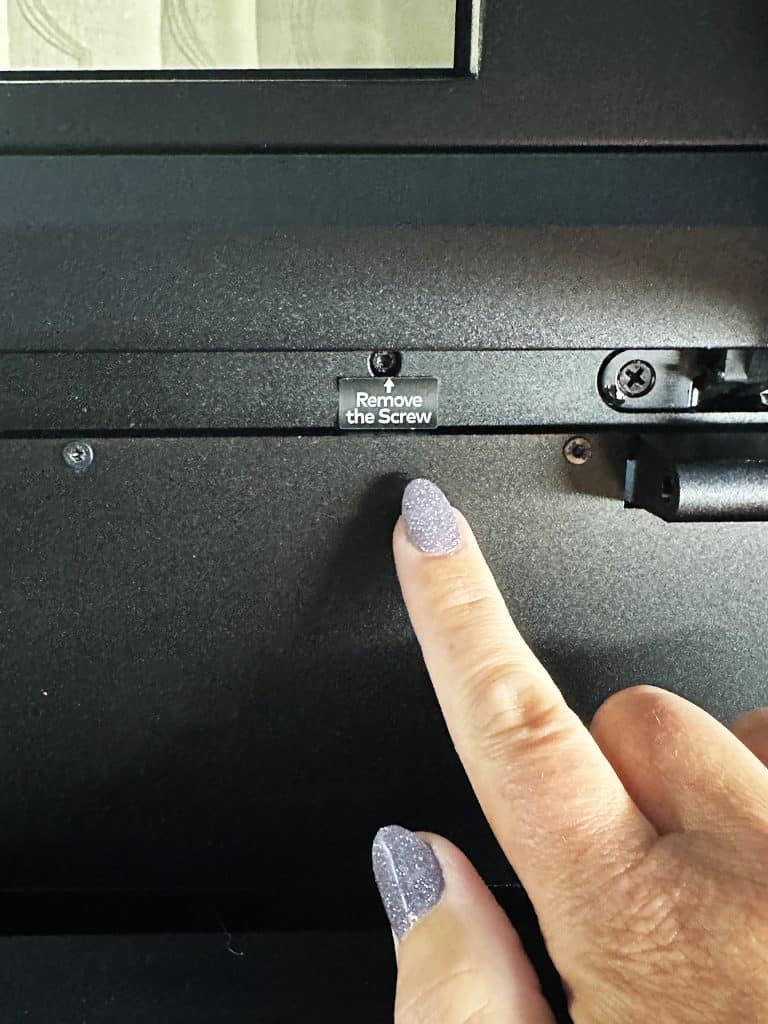
Yes and no. The xTool P2 comes fully assembled, although you have to unscrew several small screws to remove the back panel of the machine to put in the antifreeze mixture. This step was slightly harder than I expected, as the back panel did not want to come off at first. I was nervous about ruining my brand new machine by pulling hard on the panel!
Other than adding the antifreeze and water solution, the only thing you have to do is attach the air vent pipe to the back of the machine and you’re ready to cut or engrave!
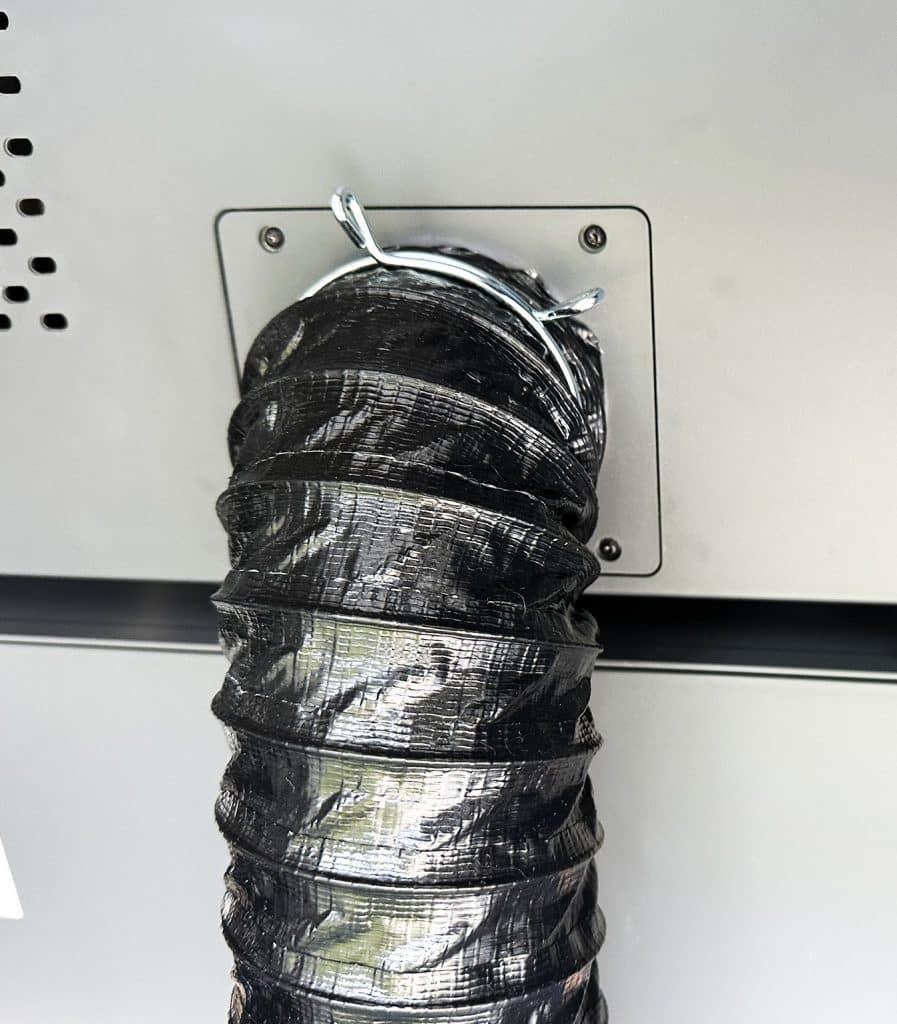
Do You Need to Vent xTool P2?
Yes, the fumes that are produced when cutting or engraving with the P2 must be vented. The machine comes with 3″ accordian pipe and the clamp to attach it. You can vent directly out the window, or you can purchase the smoke filter system. I have a window directly behind my machine, so I vent out the window.
Does the P2 Have an Air Assist?
Yes, the xTool P2 has a built in air assist and exhaust fan that helps to get rid of the smoke and fumes while using the machine. To boost the power of the exhaust, I have an inline fan that I bought on Amazon that is mounted to a piece of wood that I fit into my window. It’s not fancy, but it works well!
xTool P2 Technical Specs & Measurements
How Big is the xTool P2 Laser Cutter?
The P2 is 39.4″x25.1″x10.6″ and weighs 99.21 pounds. I definitely couldn’t lift it onto my workbench by myself. It took 2 of us to unbox it and get it into my workspace.
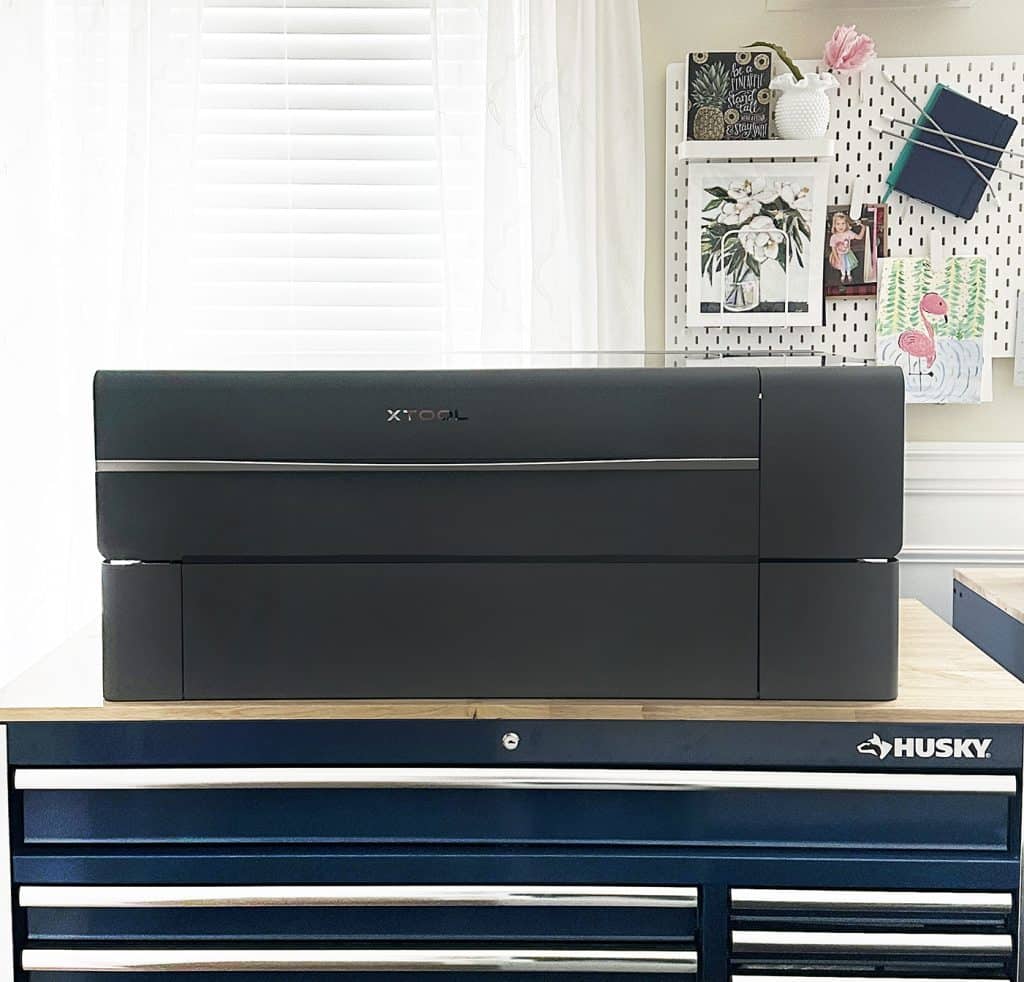
Although it was heavy, I was pleasantly surprised that it fit perfectly on my Husky toolbox workbench! The depth of 25.1 inches includes the handle, which protrudes a couple of inches out from the machine. I absolutely love my Husky toolbench, so I bought another one for my office to hold the P2.
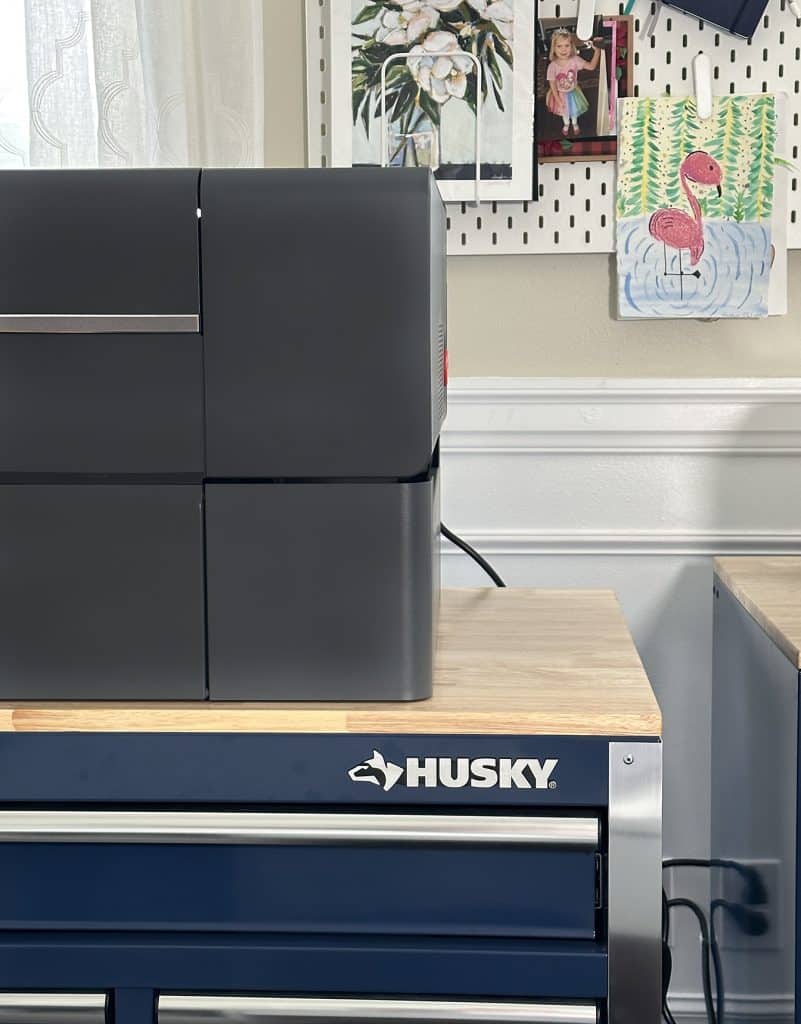
Not only is the toolbox sturdy, the storage drawers underneath are perfect for storing laser supplies and blanks. And the bench is on wheels, so I can move it away from the window to set up my ventilation before each project.
What is the Cutting Area Size in the P2?
The available cutting area of the xTool P2 is 23.6” × 12.1”, and the whole cutting bed is 26.7″ × 14.1″. The cutting area that is available is a few inches longer and about an inch deeper than my Glowforge, and I really like the size. All of the laser ready materials that I own or have recently purchased fit perfectly inside the P2!

What is the Size of the xTool P2 Laser Beam?
The laser spot size of the machine is 0.15mm × 0.2mm, which is typical for a CO2 laser.
Other Tech Specs for the xTool P2
The P2 is built to be a precise, fast, accurate, and very powerful cutting machine. These features allow you to produce professional level projects with amazing detail. You can engrave a photo realistic image, cut a 20mm piece of acrylic, or cut tiny pieces of jewelry!
- Rated Power: 55W
- Max Engraving Speed: 600mm/s
- Precision: .01mm
- Workspace Height: 2.5″ with base tray, 2.7″ without tray
Unique Features and Functions of the xTool P2 Laser Machine
xTool really thought outside of the box when they developed the P2. There are some incredible features and accessories that expand the capability of this machine over other laser cutters.
Dual 16MP Cameras
Does the xTool P2 have a built in camera? Not only does the P2 have one camera for capturing images of the cutting bed, it has TWO 16MP cameras!
One camera is used for panoramic live previews of the cutting bed, allowing you to see the whole surface of the material you are working with.
The second camera is for close up viewing – it moves with the laser head to the area you want to see. It captures a more precise image so that you can see exactly where your project will be engraved or cut.
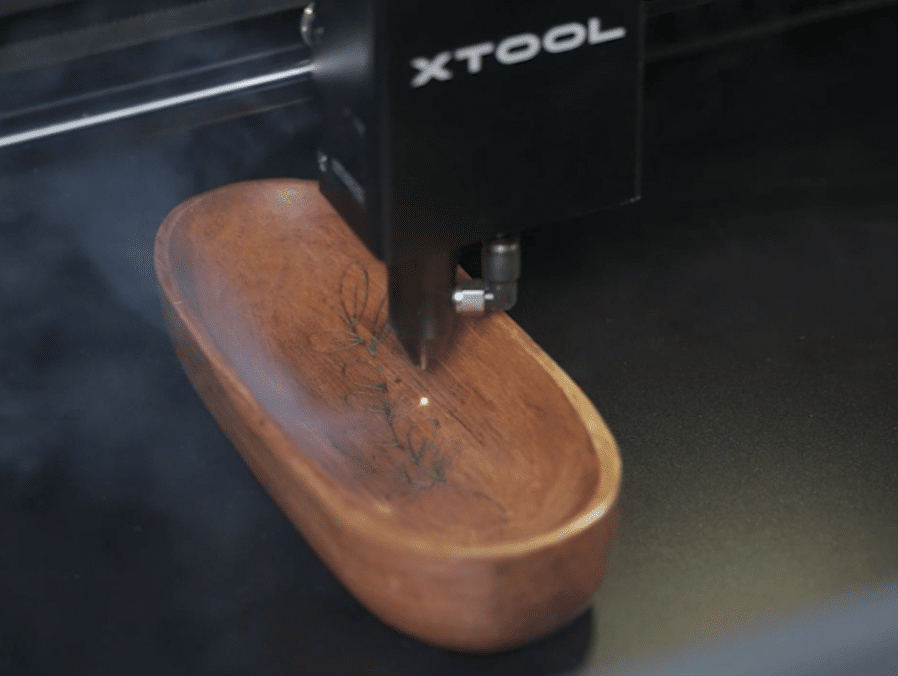
Curved Surface Engraving
The xTool P2 can scan the surface of a curved material and construct a 3D model of the surface. Then, as the laser machine engraves your project, it changes the focal length of the beam. It raises and lowers the beam as necessary, providing a crisp and accurate engrave. It’s an awesome feature!
Riser Base
To be honest, this is one of my favorite features of the P2. With the riser base accessory (sold separately), you can work with thicker and larger materials up to 8.5″ tall!
With just the base plate, you’re limited to engraving items that are about 2.5″ thick. When you place the riser base below the machine, you can engrave things like jewelry boxes, acrylic storage bins, sports balls, and more!
I didn’t think much of the riser base until I tried it, and now I am obsessed! I love the versatility of taller blank items that I can use.

Automatic Passthrough
If you want to engrave or cut longer materials that won’t fit on the cutting bed, no worries! xTool launched an automatic conveyor feeder that works with the riser base. When attached to the P2, it automatically feeds your material into the machine.
Because the process is automatic and hands free, your engrave or cut process is not interrupted.
You can see the automatic conveyor feeder all set up in my Oversized Laser Cut Sign post.
Rotary Engraving
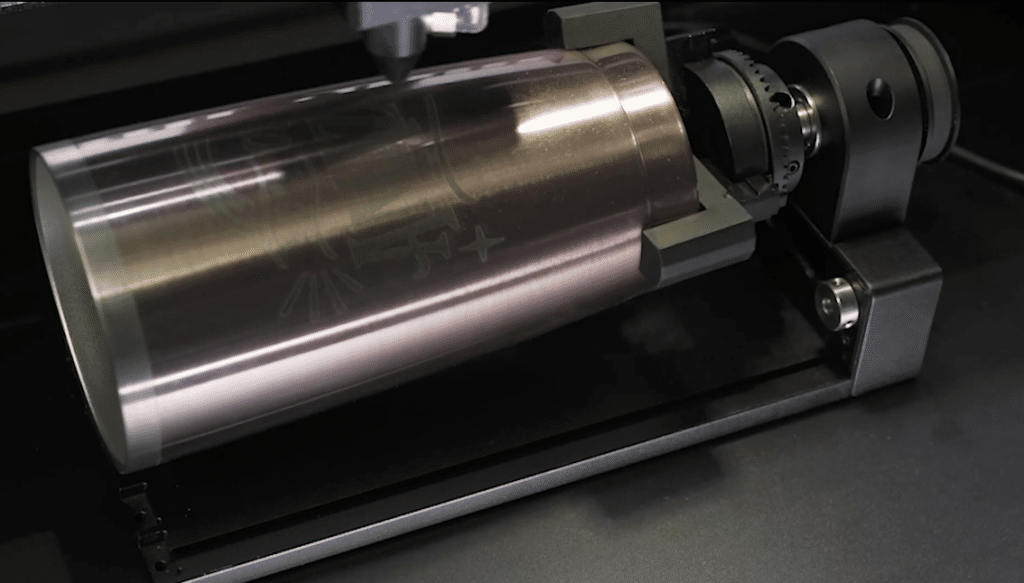
The RA2 Pro is another unique and fun accessory that is the first of it’s kind! This 4-in-1 engraving tool works with the P2 to engrave cylindrical or spherical objects! Note: you need the riser base in order to use the RA2 Pro.
If you’ve seen engraved tumblers or wine glasses, this is how you make them! As your project engraves, the RA2 Pro rotates your material automatically. It’s so cool! I’ll have separate posts to help explain these fun accessories that you can add to your P2.
xTool P2 Machine Design
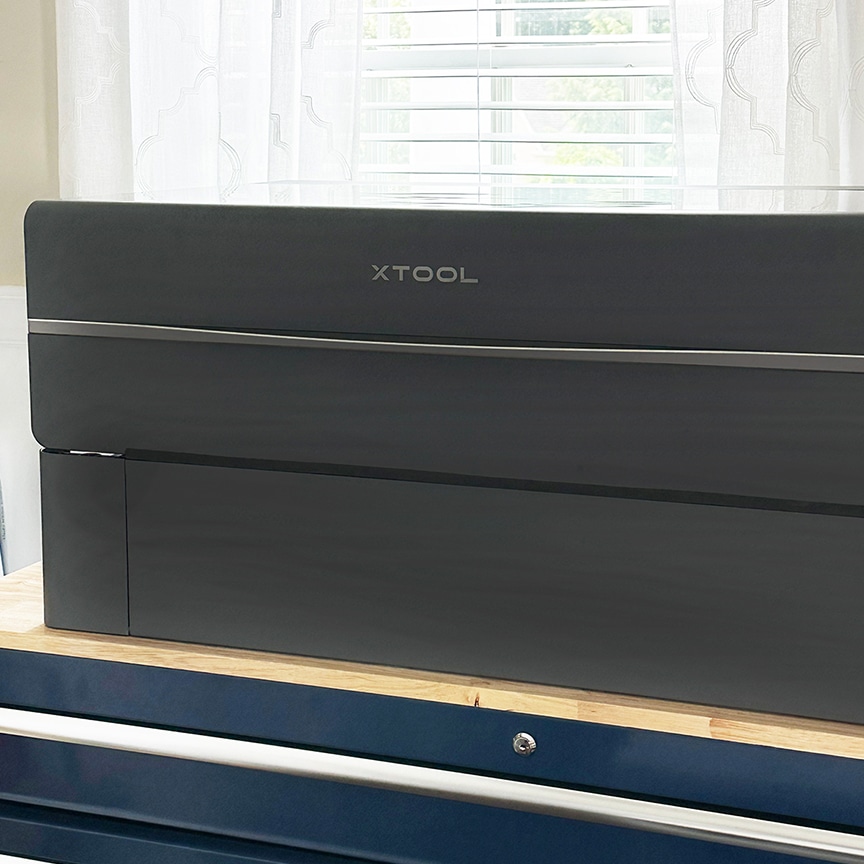
The xTool P2 is contained in a secure black unit with a lid that protects you from the harmful laser beam.
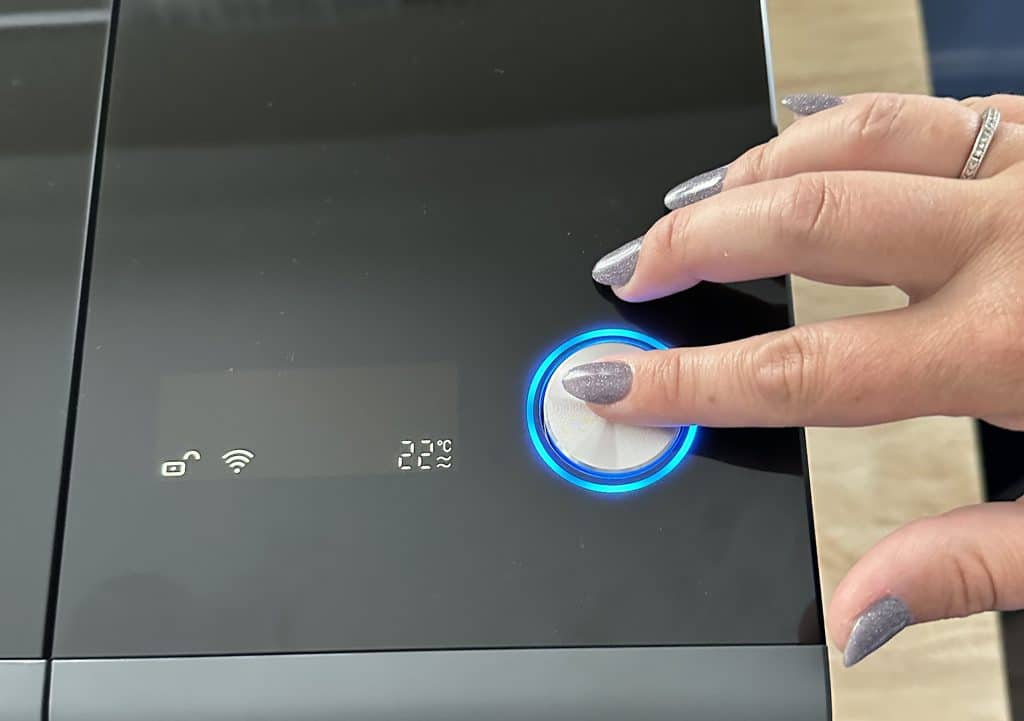
There is a screen on the right hand side of the lid that shows you the status of your machine. At the top of the screen is a progress bar that shows how far along you are with your project. It also shows if your machine is connected via Wifi or USB, an error status, the operating temperature of your machine, and lastly, a small lock graphic that lets you know if the machine lid is locked or unlocked.
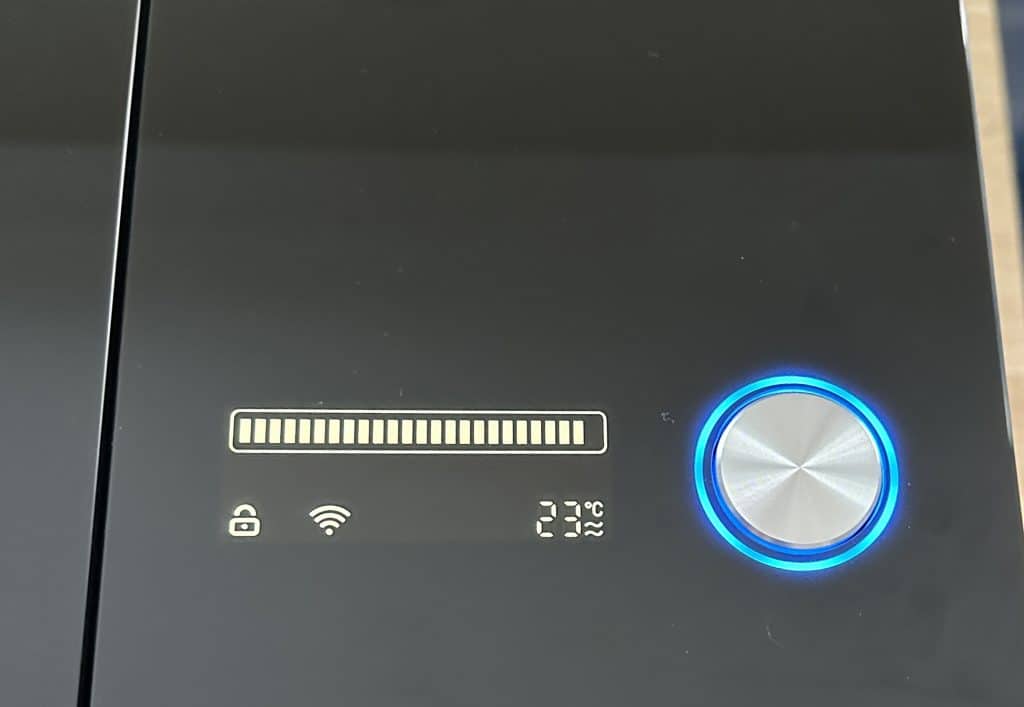
Next to the status screen is a large “go” button that you press to start or pause your project. The light surrounding the button changes colors depending on the status of the machine.
The back of the machine is where the power button is located, as well as the ventilation hose, and fire safety kit attachment (not included).

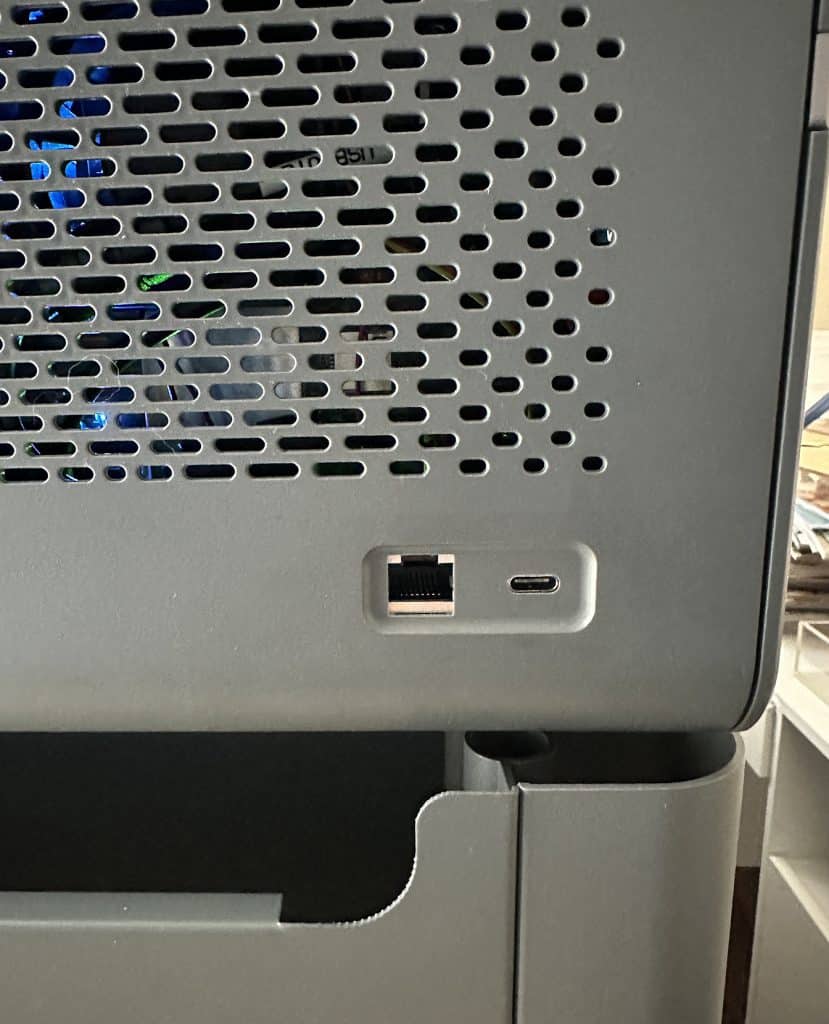
On the left side of the machine you will find the USB port and the ethernet port. The P2 connects to your computer with a USB-C cable, which is included with the machine. You can connect to Wi-Fi, too!
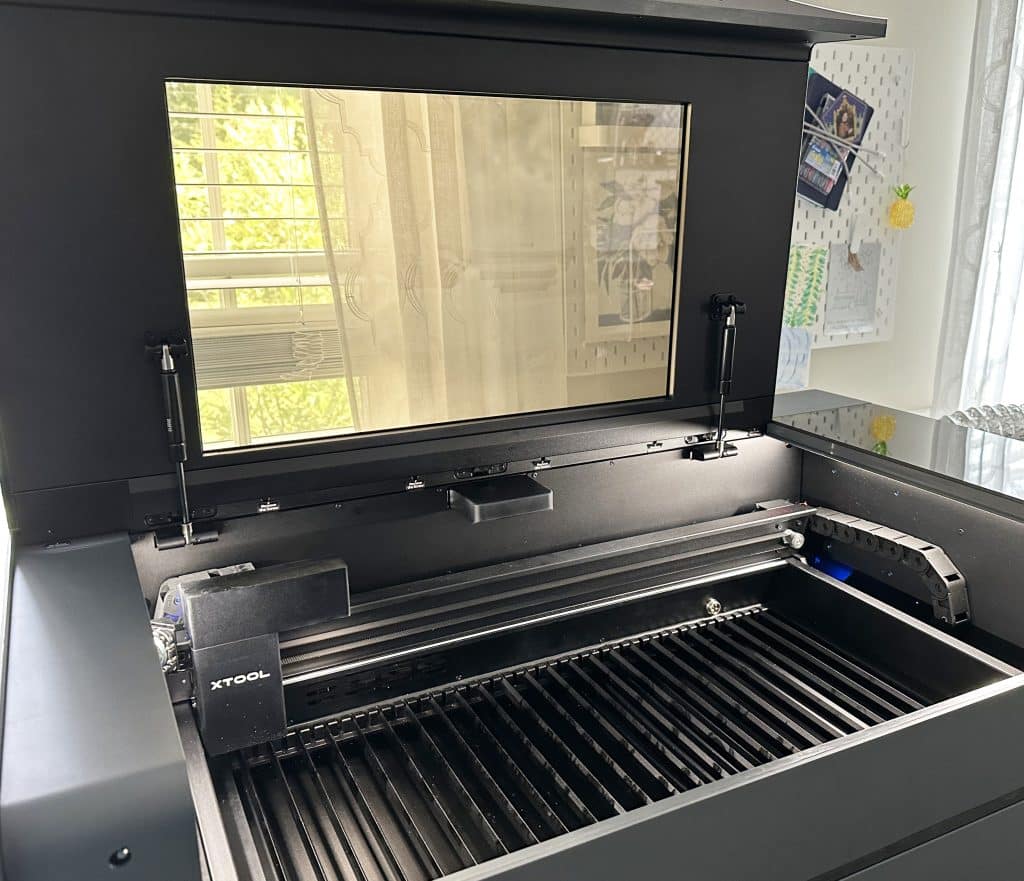
Inside the machine, there’s the laser module, slats, and base tray. There’s also a mirror (access is via a small sliding panel on the left front of the machine, and an auto locking mechanism.

The base tray can be removed and is held in place with a small screw at the front (inside) of the machine. If you add the riser base like I have, the base plate will slide into slots on the side of the base to coordinate to the measured height of your item.
The metal slats are removable and are similar to the triangular prisms that are placed inside of the M1. When you place your material on the slats, it raises the material from the baseplate and allows for airflow and exhaust.
A lot of crafters are familiar with the honeycomb baseplate of other laser machines, and there are things I like and dislike about both. The slats make cutting small designs (like stud earrings) a little more annoying because they fall right through the large gaps. It’s not a huge deal except the material remains more stable on the honeycomb style baseplate. What I like about the slats is that airflow is increased and I have noticed less charring on the bottom of my cuts.
I will likely purchase a piece of honeycomb material that is compatible with the machine to make smaller projects, but I have made tiny little earrings and they turned out great!
xTool P2 Safety Features
CO2 lasers are powerful and can cause injury or fires if not handled correctly. It’s important to remember that you never want to leave the machine unattended while you are cutting or engraving. Additional safety features are necessary to keep you and your workspace safe. The P2 comes equipped with a number of safety features, which makes me happy!
First, the laser and cutting surface is completely enclosed within the machine. The lid is light blocking and seals in smoke and particles to be exhausted by the fan. (Note: if you are sensitive to smells or dust particles, you still may want to consider a mask. No machine will ever get rid of 100% of the smell when cutting or engraving.)
In addition, the lid has an automatic lock function that engages while you are processing your design. That means that kids can’t wander through and open the lid in the middle of cutting or engraving. My laser machine is accessible in my home office, so I really like this feature. It’s unique to the xTool P2!
Plus, the lid has a hydraulic mechanism that holds the lid open so you don’t have to worry about it closing on your fingers.
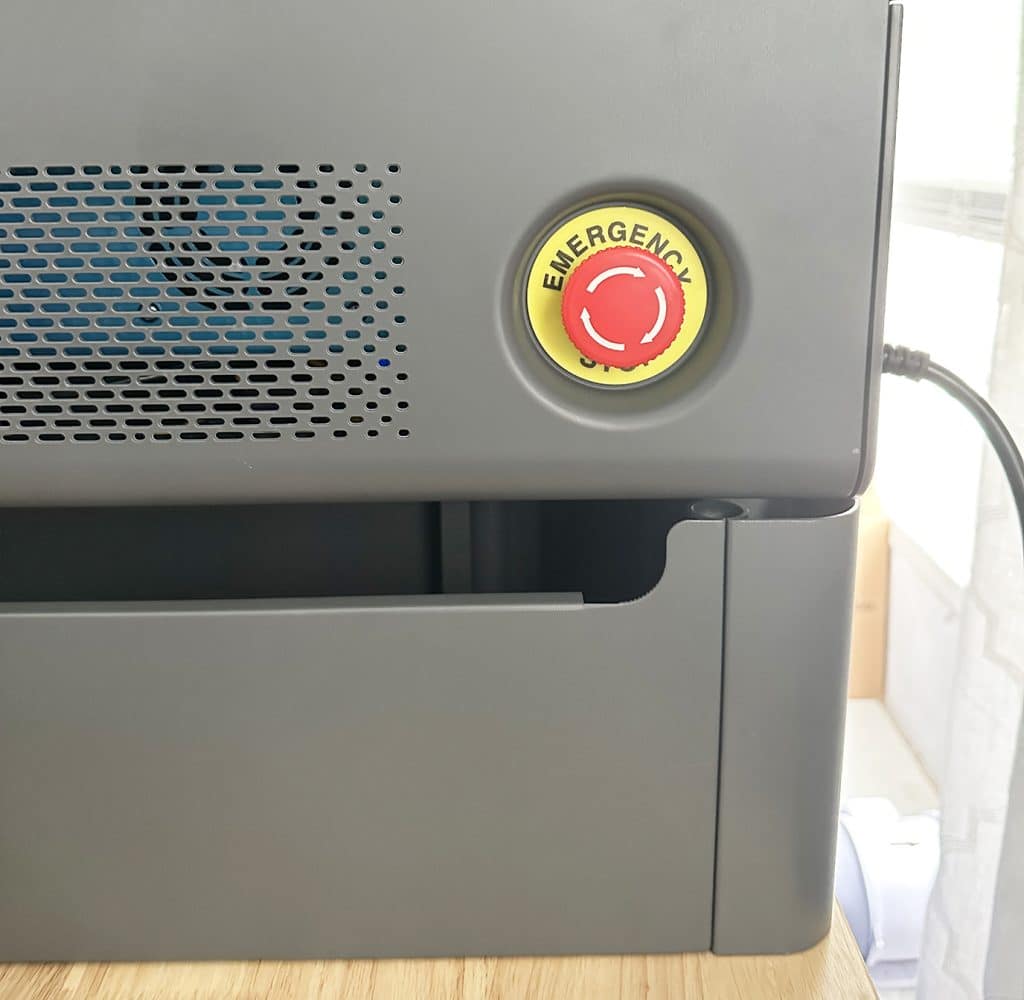
Another unique feature to the P2 is the emergency stop button on the right side of the machine. You can quickly stop your cut or engrave if there’s an issue. (You can press the go button to pause a cut or engrave, then resume as needed).
The P2 also has a multiple function warning system that will let you know if the machine is compromised in any way, like overheating or if you need more cooling liquid.
xTool also makes a Fire Safety accessory that you can purchase, which is a pretty cool idea. It attaches to your machine and automatically detects a fire. It will trigger an alarm as well as extinguish the flames with an odorless CO2 gas. This system is compatible with other xTool laser machines as well.
Since you’ll be using flammable materials, I always recommend having a fire extinguisher near your machine that you can grab very quickly if needed. And again, you should always directly supervise the machine when using the laser.
What Programs Are Compatible With the xTool P2?
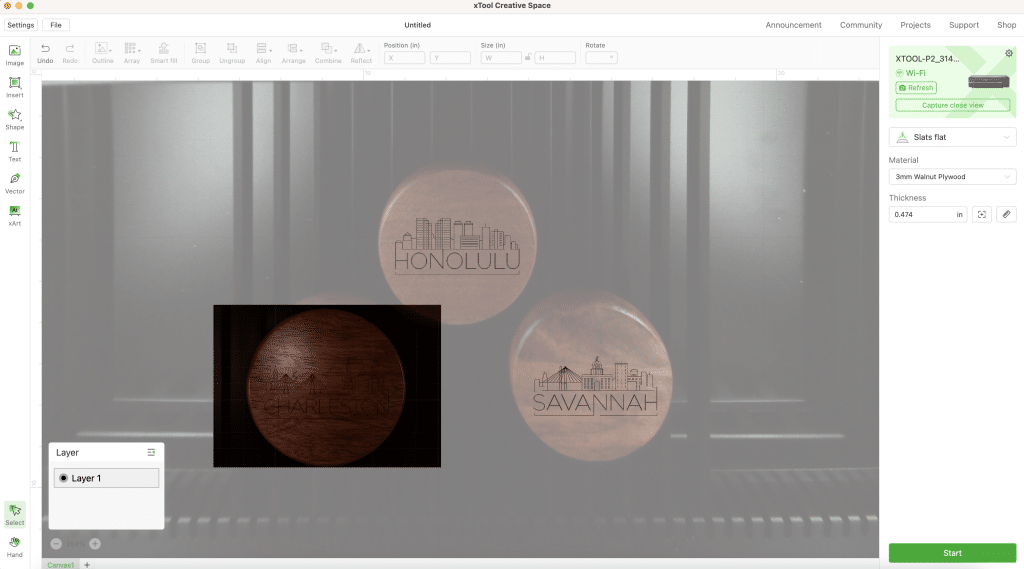
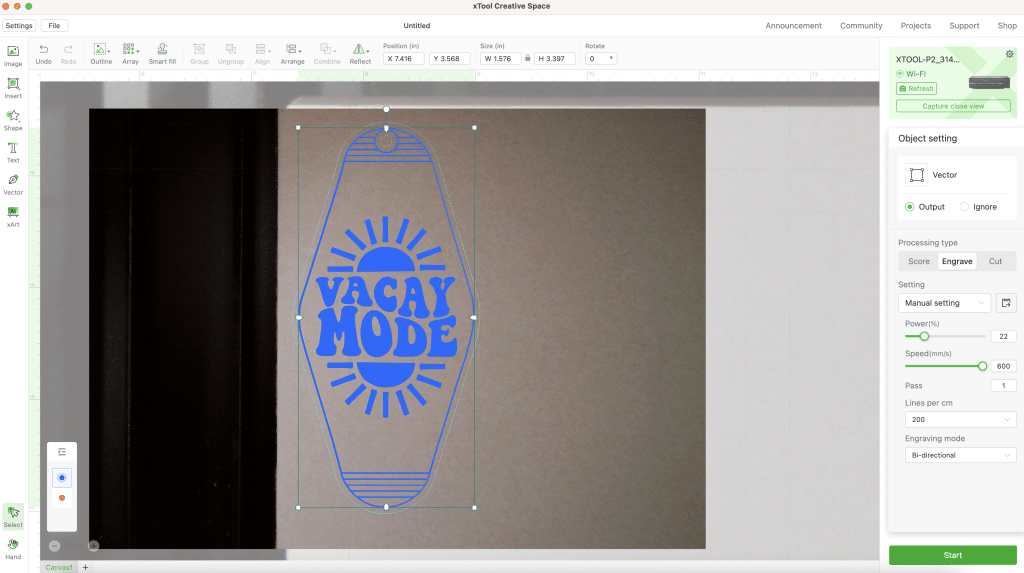
xTool has its own design program called xTool Creative Space (XCS). It has a similar(ish) look and functionality as Cricut Design Space. It downloads directly to your computer (it is not web-based.) It has an auto-update feature, and some basic design functions.
In addition, the P2 is compatible with Lightburn, which is a program that I have not used, but a lot of laser crafters love!
You Can Download xTool Creative Space HERE.
I find XCS easy to use and connect to your machine. In my opinion, it is not as intuitive as the Glowforge App, but beginners can learn it quickly.
I would recommend a design program such as Adobe Illustrator if you would like to design your own projects. You can also definitely import free SVGs (like those on my site) or purchased files from places such as Creative Fabrica or Design Bundles. I have a whole list of sites where you can find free SVGs to download as well as a post dedicated to laser ready design projects.
Similar to Cricut Design Space, Silhouette Studio, and Glowforge, Creative Space can import SVG, PNG, JPG, JPEG, GIF, BMP, DXF, and WEBP files. When you import an image, you can edit it to remove the background similarly to Design Space.
One feature of XCS that is different than other programs is the ability to create basic vector designs. (Vector designs don’t lose quality when the size is changed. It’s a whole thing, but trust me, you want to design and use vector files). Because I use Adobe Illustrator, I don’t necessarily need this function, but for beginners that want to play around with vector points, that’s a nice feature that is included with XCS.
Depending on the machine that is connected to XCS, you will have different settings available to choose from.
Before you process your design, you will have to choose how you are placing the material in the machine, or if it is a rotary engrave or curved surface engrave.
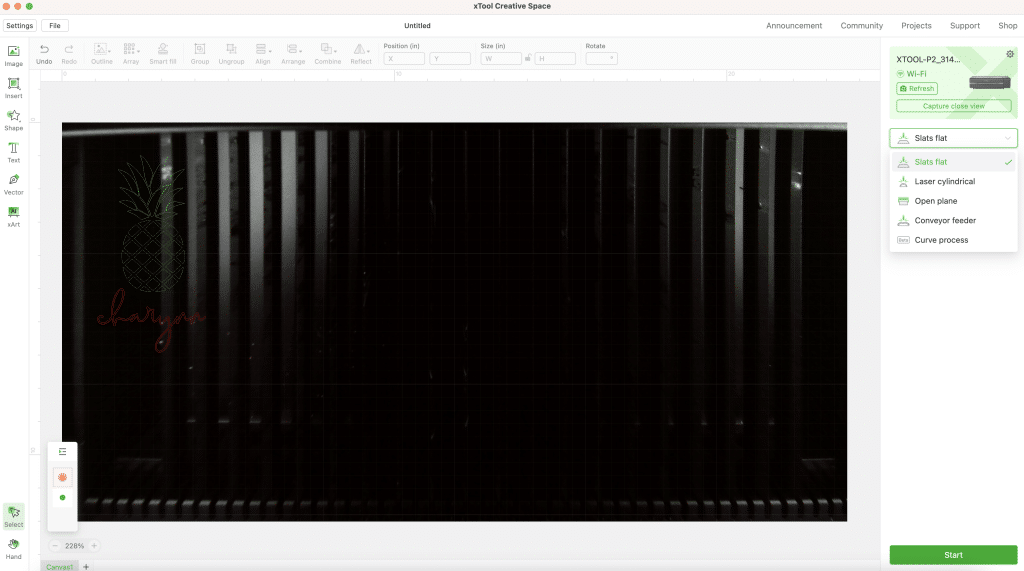
You also have to select the material you are using, or you use custom settings. The auto-measure feature is really useful if you are using materials other than the x-Tool brand.
When you select a design that you would like to laser cut or engrave, you will select each part or group/layer within a design to change the laser settings to Score, Engrave, or Cut.
If you have selected an xTool material, the process settings will be automatically entered, or you can enter user defined settings.
Once you have all of your settings where you want them, you can process your design and the program will sync with the machine. All of the projects I have tested have processed very quickly, which is really nice.
OPINION: I have found some of the xTool provided settings to be inaccurate at times. I almost always test the settings on a small corner of my material before making my whole design.
What Materials Can Be Used with the xTool P2?
The P2 can cut and engrave SO many materials, that you’ll have a hard time trying them all. The significant difference between this laser and a diode laser (like the M1) is that a CO2 laser can cut and engrave all colors of acrylic, including clear! And considering clear acrylic is one of my favorite materials, CO2 laser machines are automatically better than others.
Plus, because the P2 has a 55W laser, you can cut THICK materials, which opens up a myriad of projects you can create.
P2 Laser Materials (Engrave):
- Wood
- MDF
- Acrylic
- Bamboo
- Paper
- Cardboard
- Fabric
- Felt
- Leather
- Plastic
- Glass
- Ceramic
- Jade
- Marble
- Slate
- Cement
- Painted Metal, and More!
P2 Laser Materials (Cut):
- Wood (including maple, cherry, and walnut)
- Acrylic
- MDF
- Paper
- Cardboard
- Bamboo
- Leather
- Fabric
- Plastic
What Can You Make With a Laser Machine?
I have tested several of the materials listed above, and made some really fun projects. Because my machine only came with the small pack of xTool brand materials to test, I immediately jumped in to try other brand materials! Overall I am happy with how the machine worked with all of these materials, and I will note my thoughts with each project below.
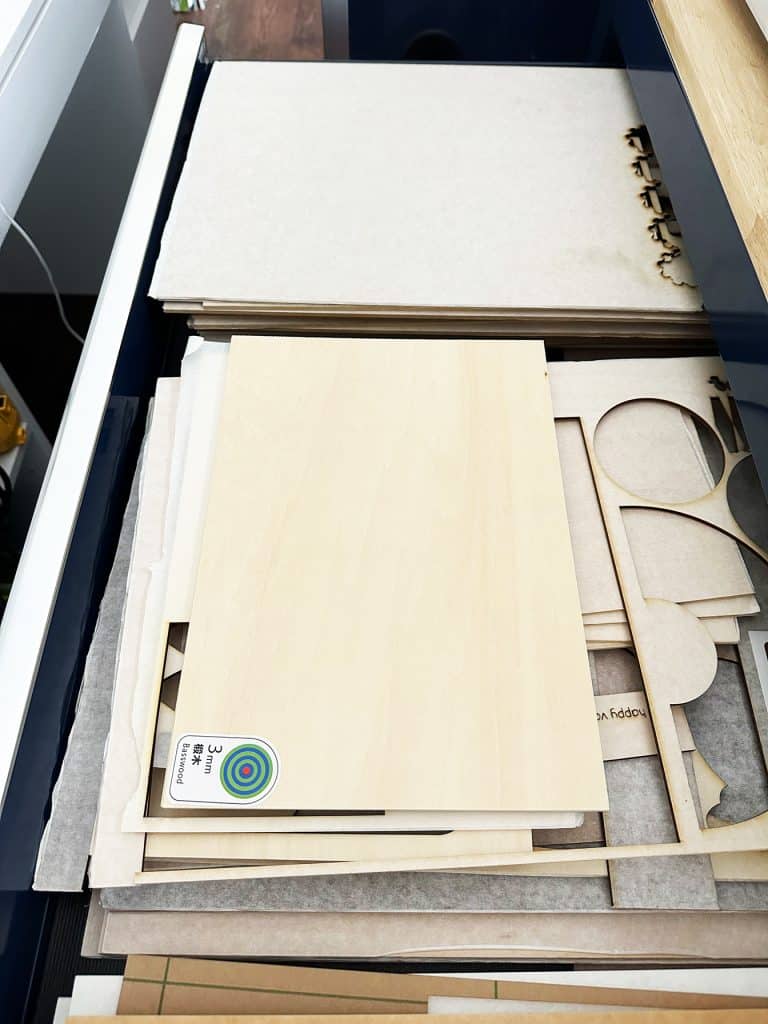
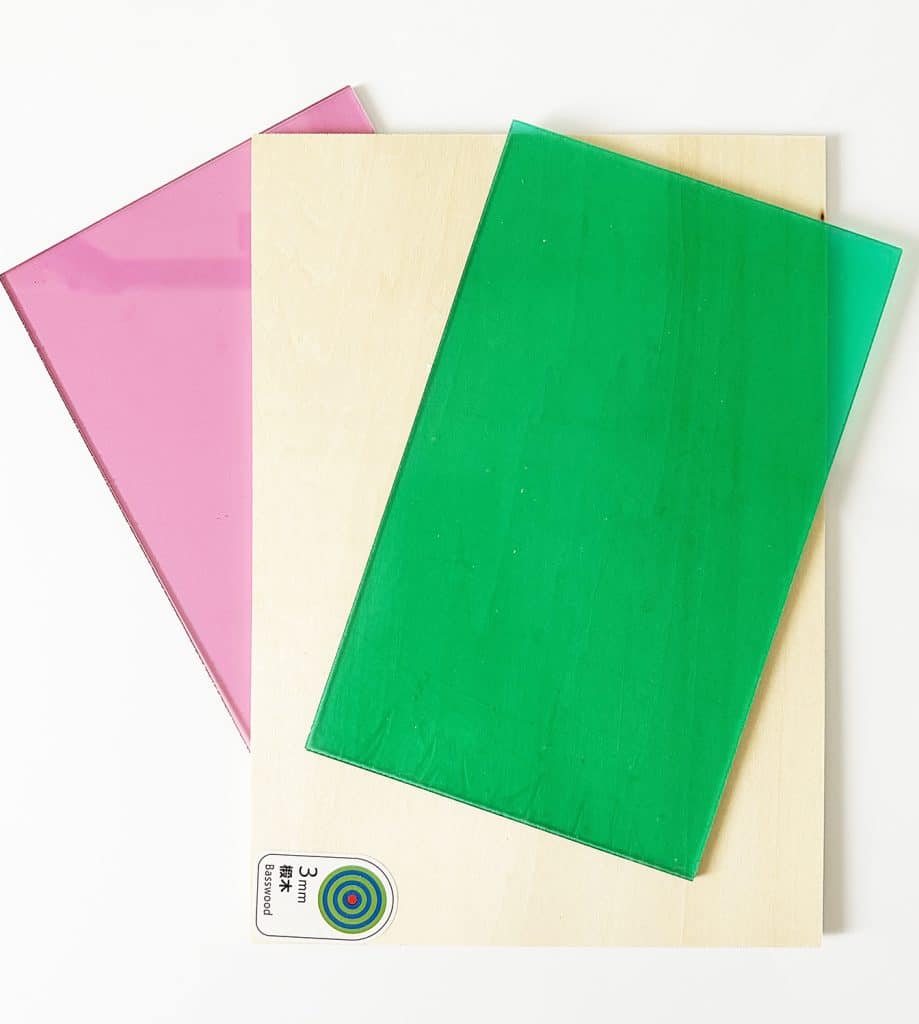
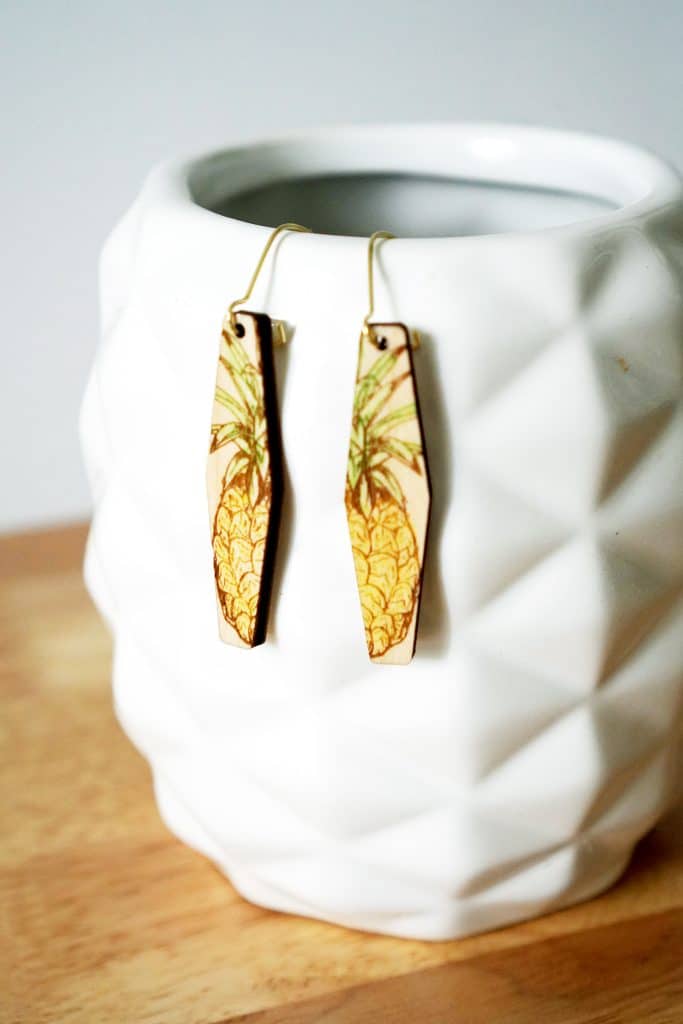
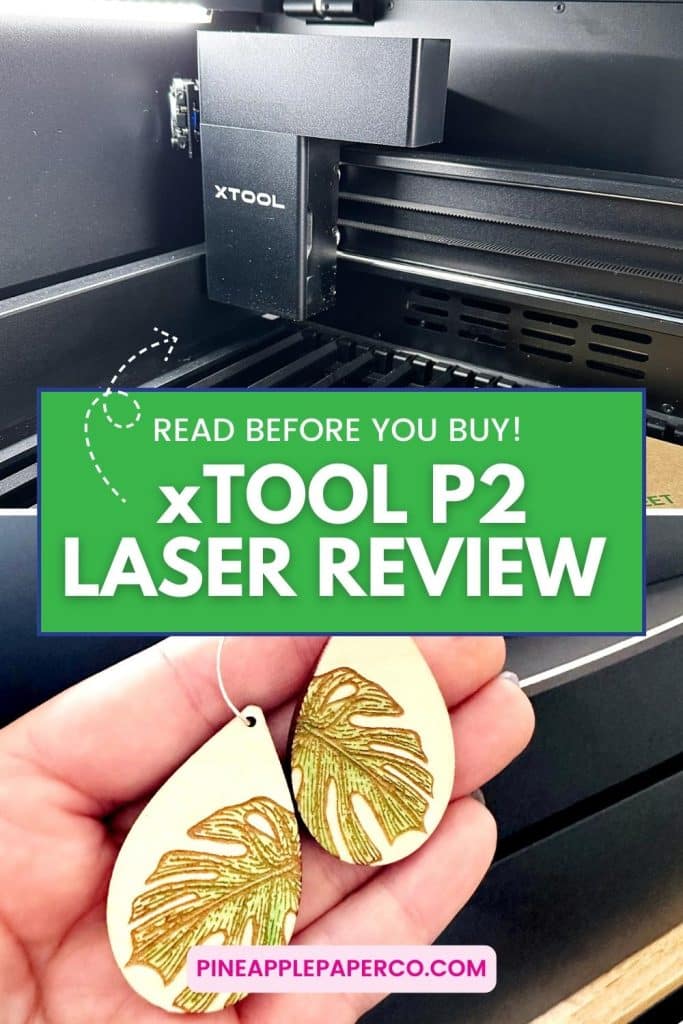
3mm Basswood
I made these Monstera Leaf engraved earrings with Basswood that came with the machine. Basswood is not my favorite wood, but it’s affordable and the P2 handled it really well. I masked these earrings with transfer paper from Amazon, which increased the quality. But look at that detail!

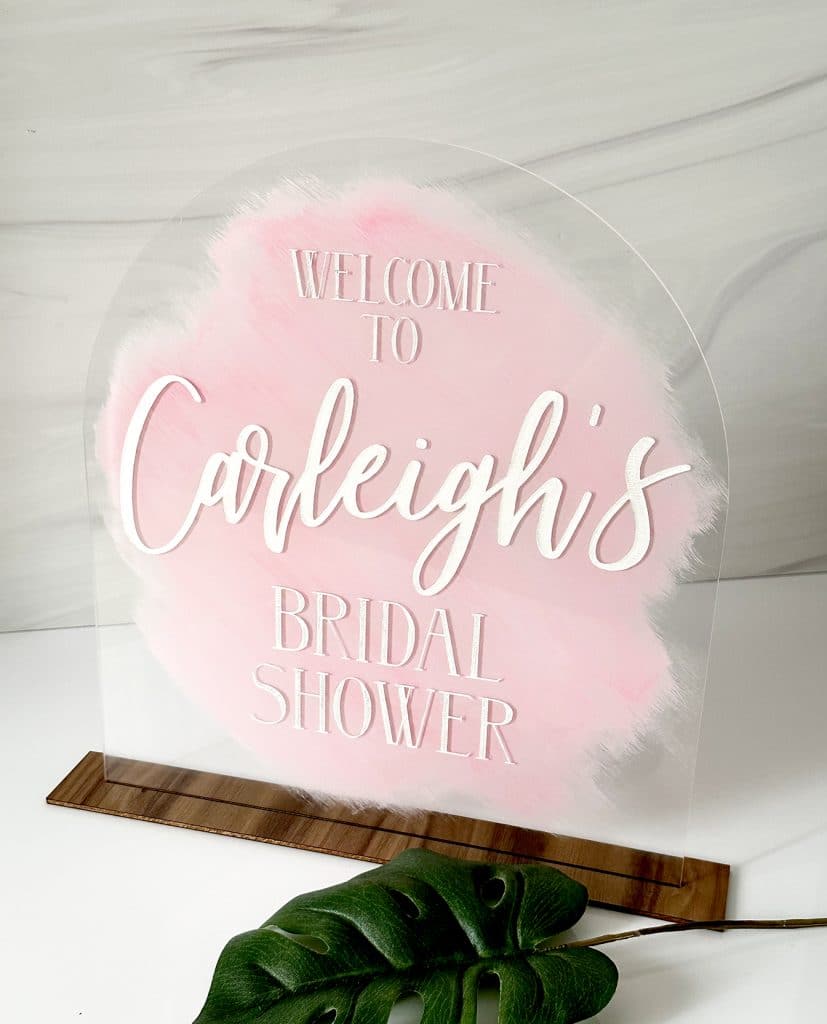
3mm Clear Acrylic
This oversized acrylic sign was SO easy to make. I engraved and cut 1/8″ clear acrylic. Because this was a large design, it took a while to engrave, but the quality was very good. The acrylic was masked and I painted the letter engraving with white acrylic paint before I peeled off the mask. The back of the sign is painted with acrylic paint as well.
3mm Walnut Plywood
The base for the sign was cut from 1/8″ walnut plywood and it cut cleanly right away!
3mm Pastel Opaque Acrylic
This is a material that the xTool M1 or other diode laser would have trouble cutting. I set the engrave a little deeper to account for the paper masking that I added to the acrylic. I also added acrylic paint to this keychain before I removed the mask.

3mm White Acrylic and Pastel Acrylic
I wanted to test several colors of acrylic, and these turned out perfectly! I did decrease the speed of the laser (from white acrylic settings) by one point to ensure all of the acrylic was cut through.

Wooden Coasters – Score
Score is a fine line that is engraved by the machine. It’s a really quick process and is good if you want to make a lot of projects fast. I tested it on pre-bought thick wooden coasters (they’re from Home Goods) and it worked really well! Being able to engrave items from local stores is an easy way to personalize items for gifts.

Acrylic Pen Holder
This pen holder is deep enough that I tried out the Riser Base! If you want to engrave thick materials (up to 8.5″ high!), you can adjust the tray within the riser base to get a perfect engrave. I used the 3mm clear acrylic settings and look how perfect this came out! It’s a really professional result.

3mm Light Maple Plywood
Light maple plywood is another type of plywood that I had from previous projects. It has a slightly gloss coating on top. Look at how detailed these small earrings turned out. It did take a couple of tries to get these just right. I actually liked the results of the basswood much better (which is the usually the opposite!)
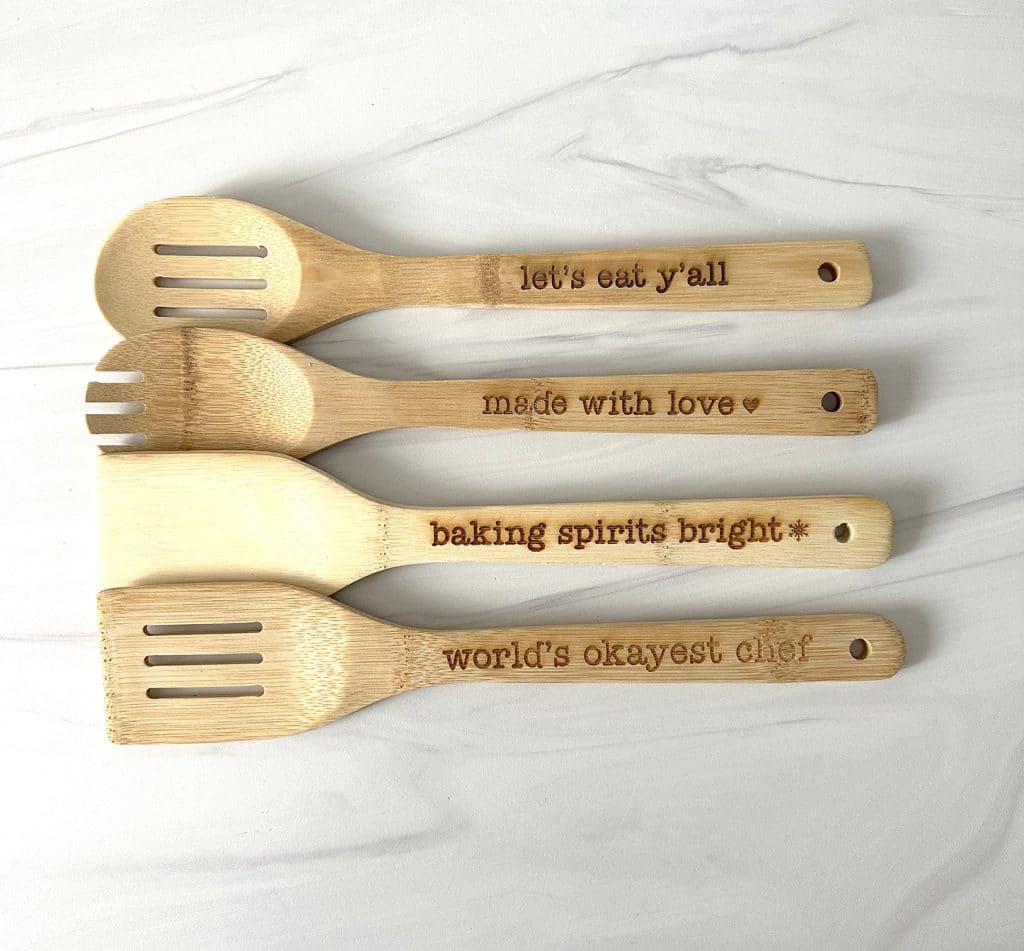
Engraved Wooden Spoons
I engraved all of these spoons at once to see how accurate the cameras and image placement were. The results were almost exactly perfect! I was impressed, as I have had problems with this type of project on my Glowforge.
This is where the dual cameras work really well! I used the close camera to adjust the image on each spoon!
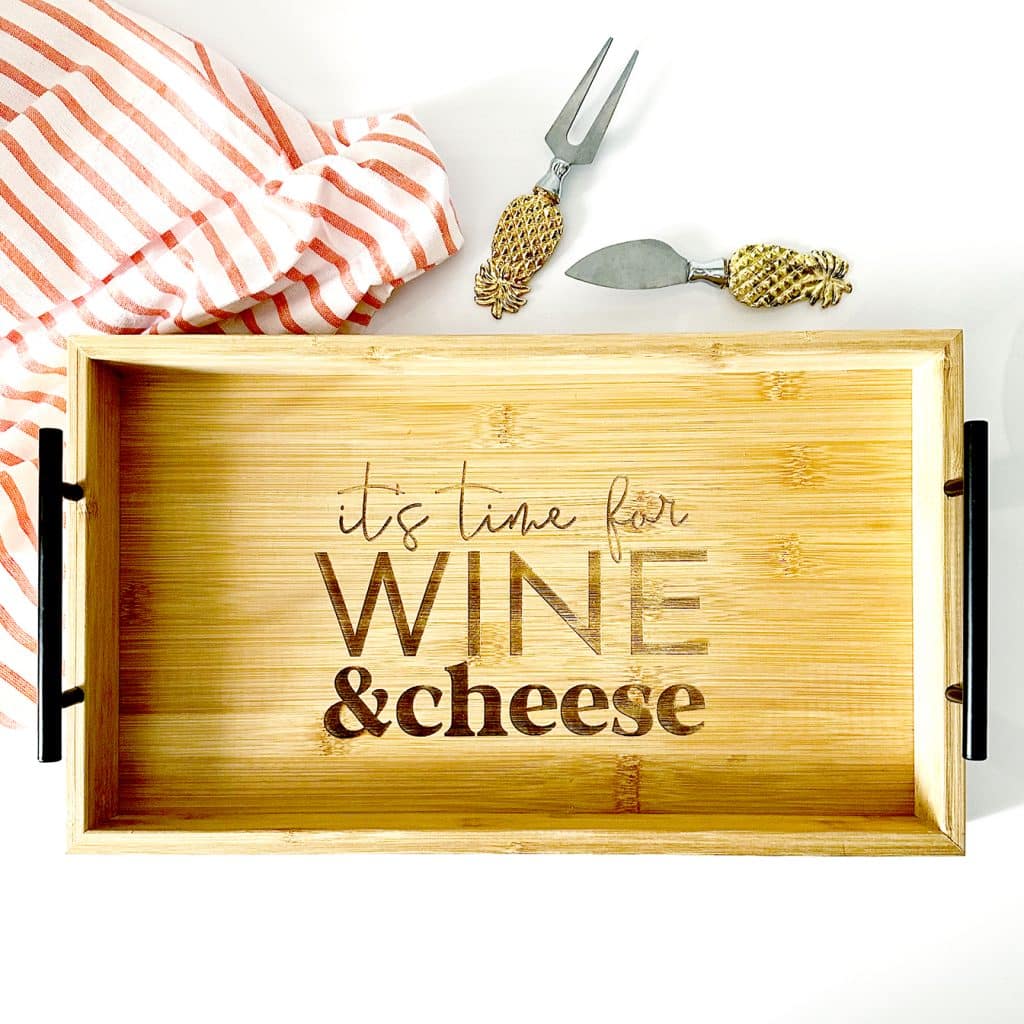
Engraved Charcuterie Board
This board I picked up from Home Goods was a challenge. But look at how well the bamboo engraved. Because it is so big and thick, I used the riser base and had to adjust the depth a few times to get the auto measure to work properly. I love the results!
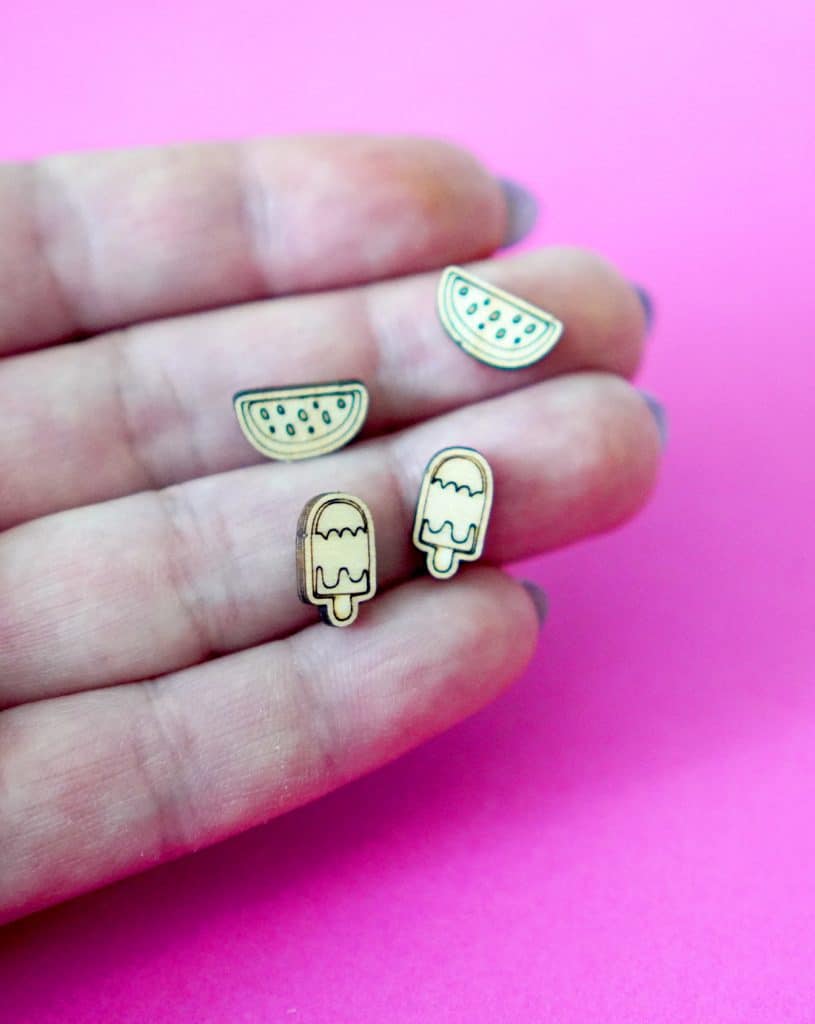
Tiny Stud Earrings
If you don’t think you can cut very small things with the P2, guess again! These were made with the score function. They did fall right down through the slats as they were cut, so for small projects like these I will consider getting a honeycomb type base to insert! I don’t want small projects to fall down and then be hit by the laser as further pieces are cut.
Learn More About Laser Machines!

What Does the xTool P2 Cost?
The xTool P2 costs $4999, but there are frequently sales. It’s a VALUE in comparison to other CO2 lasers, because the P2 is more powerful and has more features and accessories to increase the capability of the machine. In comparison, a Glowforge Pro with a 45W laser is $6995 plus shipping.
At the writing of this post, the current price of the xTool P2 is $4399 and includes shipping. (Prices are always subject to change.)
Overall xTool P2 Review
I was excited for this machine to arrive, and I wasn’t disappointed. It is a high quality machine and overall is more than comparable to other laser cutters, including the Glowforge. (Dare I say that I like it a little more than my Glowforge?!) I would absolutely consider this machine a good purchase if you are interested in laser crafting.
I think that with the ability to add on accessories like the riser base and the rotary attachment, as well as the dual camera system, it’s a better machine overall than my Glowforge. The only thing that I don’t love about it is that it’s not as user friendly for beginners. Lots of testing is required to achieve perfect results. But for the savings, I think it is TOTALLY worth it.

Here’s my honest review and opinions after testing the P2:
- The P2 requires a little bit more setup to get going. It’s not as “plug and play” as I remember my Glowforge was. Taking out the tiny screws to add cooling liquid was somewhat annoying, but I understood that it was vital to the machine. And, if I did not own a Glowforge, I wouldn’t have known that it was any different than any other laser machine setup.
- Material settings need a little bit of testing to get right. Laser compatible materials are expensive and sometimes only come in small sizes. I dislike wasting time and materials to always do tests on factory settings (I totally get that you have to test non-brand materials). That said, when I get the settings dialed in, they work very well and my results have been worth it.
I suggest joining the xTool CO2 Facebook Group to see what settings other crafters are using, as well as creating a list of your own custom settings for projects you’ve made. Plus, there’s a new feature in XCS where you can save custom settings! - Calibrating the Machine. I noticed some weird cuts and engraves when I started testing bigger material pieces. I needed to calibrate my machine! It was a little crazy to burn holes in tape, but honestly it was kind of nice to be able to troubleshoot my own machine. I found the calibration process to be quick and easy. Just don’t get rid of the little tools that come with your machine!
- The P2 is powerful and fast and is perfect if you want to start a small business selling your laser crafts. You will be able to produce a lot of crafts if you plan the right projects!
- xTool Creative Space works perfectly fine as a basic program. I don’t plan on using it to design anything, so it really doesn’t bother me. But if you aren’t as familiar with more powerful design programs, you may be a little more limited.
When importing projects, I have found the layer selection process to be a little annoying because the layer colors do not default to those that are easy to see on your cutting area. For instance, if your cut layer imports as black and you are cutting black acrylic, it’s SO hard to see your design layer.
I have also found when designing SVG files that you have to create compound layers so that you can do layer select within XCS. This is not ideal if you want to break apart pieces of your design to fit on scrap material. It’s fine for simple designs, but for more intricate designs I haven’t found it to be convenient. It takes a little bit longer to prep projects.
To get the most out of XCS, you will have to learn how to use a design editing program like Adobe Illustrator, Inkscape, or another program that handles SVG files. If you’re a true beginner, it’s a learning curve you will have to tackle.
That all said, xTool has been very good at updating XCS, and I expect them to have fixes in the future. - No Estimated Processing Time. In a recent XCS update, the estimated project times were removed. To be honest, the times were never accurate for me, BUT it was still good to know what you were getting yourself into with larger or more intricate designs. Hopefully xTool is just working on that part of the program and it will eventually be returned.
- At the retail price point of $4995, the P2 is such a good buy. If you want to max out the capability of the machine, you will need to buy additional accessories. I recommend the riser base for sure, and then RA2 Pro or the conveyor feeder if those type of projects interest you. Even if you purchase all of the accessories, you will still come in under the price of a Glowforge Pro.
If you want to learn more about the xTool P2, make sure you subscribe to my xTool mailing list and my YouTube channel. I have videos coming soon, and I plan to share a ton more tutorials and projects using the xTool P2. And if you have any questions, don’t hesitate to contact me or leave a comment below with what project you would like to see me make!


The xTool looks like something I would need to add to my craft room. You make it look easy to use.
Such an amazing machine
This looks incredible! I have so many fun ideas that this would make come to life 🩵 I am loving all the crafts you have made so far.
I have been looking and trying to decide on getting one of these, thank you so much for all your info and your beautiful things that you have made.
So excited. I’m glad I’ve seen your email, I don’t usually check my emails but I’m trying to interact more with sites. Wanting to learn more.
Thank you for the amazing review! I do believe this is the cutter that my husband has been talking about saving for. your post is getting sent to him right now!
I can’t wait to see more of what thus machine has to offer.
Am crossing my fingers. Please????
This machine looks awesome!!
I’d love to see a project for an animal memorial piece. 💕
I would love to see a tutorial on rotary engraving!
Wow! This seems like an amazing machine. I would love to see jewelry tutorials.
would love to have one but being on a limited income that won’t happen, unless I win one or win the lottery
Charyn,
I’m absolutely ecstatic about learning more on the xTool P2! Just reading your blog on all things you can create just makes it more tempting! Thanks for sharing & caring!
The P2 laser looks amazing with unlimited possibilities. With your guidance thru the process
this would be an amazing addition to anyone’s craft experience!
would love to try one of these, hopefully one day
Thank you so much for this chance to win
This is great information! Thank you!
I would love to see a tutorial on cutting and engraving door signs
Thank you so much for the detailed review! I am excited to hear about this product. I have wanted a laser cutter but have been scared off by Glowforge’s numerous fires & other safety issues.
This is AWESOME!!! How easy would this make quilting?!?! Totally jazzed about what you can do with wood too. My head is just spinning with all sorts of ideas.
What a beautiful laser machine. I would love to win this jewel of a machine. I have been looking at some for a while.
I have been looking for a laser engraver and didn’t want to go with the glowforge since alot of people have it. But you were very informative and kind to share this information! Love your content girl and keep doing what your doing.
Thank you for the detailed review! I’ve been considering a laser machine for a while, but haven’t been able to justify the expense (yet).
Wow, this machine looks amazing! It would really take my small custom gifts business to the next level. Thanks for sharing all of the tips and tricks for it!!
This looks like an amazing machine!! Definitely a game changer for my small business if I were to win this! I would be able to offer so many more products to my customers…..as well as learning new skills!!!
I have been wanting to get a machine like this. Thanks for the review and details!
I would love to see teacher/classroom ideas you could make with it!
this sounds like an awesome asset to have! I’ve been wanting a laser cutter for a while & have researched this particular brand thanks to you! since I’m a newbie, I’d like to see any & all tutorials but I know the basics are out there. I haven’t seen people say much about leather so that would be cool.
Thought I wanted a glowforge but this has shown me I’d rather save my money for the xtool P2. Wish I had the money now because I’m stoked about it and all the possibilities.
This looks like an awesome machine. I have just started to research them. Thank you for sharing.
This looks fabulous~ what a creativity boost this would be to a crafter!
I would like to see a tutorial for wooden plaques. I love wood projects.
What a great review. I appreciate how detailed you were with demonstrating it’s features and all the material it can cut. I also read your blog on the comparisons between this laser to the Glowforge and other xTool laser. You have made me a fan! It is a fantastic tool for an amazing price. I was recently looking at the Epilogue lasers and they cost $20,000 for the same wattage. I would love to see how detailed this machine can cut through cardstock and if the paper edges burn at all. Thanks again for all the time you spent in putting together these reviews!
Looks amazing I hope to own one.
I have been wanting a laser cutter for awhile and you make it look easy!
Oh my goodness! The possibilities are endless! The things you can do with this gem…. I would love to have one.
I would like to see some rustic Christmas ornaments made from this machine.
I have been dreaming about a lazor cutting machine for years, when I first learned about the Glow Forge. I am glad I haven’t bought one now so that I can really look at all the options that have come onto the market. Thanks for the comparison between these 2 machines and I would really love to win this one!
this machine seems so awesome!!
O.o that curved surface engraving is neat. I’d love to see more about that.
I would love this machine!
WOW, what an amazing tool and such an asset for your business! I’d love to see a tutorial on how projects are set up digitally in your design program and then how they go from your computer to the laser cutter!
I’ve been wanting one for a while but want to learn more before I can justify. I’d love tutorials on engraving!
This is on my wish list of tools to have, it looks like so much fun. I’m just a hobby crafter but have sold some things to friends and family.
You’re review of the xTool P2 Laser was so thorough and really makes me want to add it to my list of “Must Have” crafting tools! The P2 Laser sounds AMAZING! Thank you!
100% made it to the top of my crafting wishlist!
Wow! This is awesome. Also- thank you for the very detailed post on all of the features! The antifreeze freaked me out for a minute as well! 😅
Thank you for all the helpful information about the xTool P2! I’d love to see a tutorial for engraving pencils. 🙂
This review is awesome and has sold me! I currently have the xtool M1 and I’m looking to doing more projects, working with more acrylic, and reducing work time. I THIS IN MY LIFE!
I’d love to see a tutorial for making earrings using the XTool.
I currently have a Glowforge, but when the time comes and I need to replace it….I am looking at the xTool P2. Thank you for the chance at this great sweepstakes offer.
Tv
This is a total game changer in crafting! Thanks for the review!
I would love to have a laser machine. The ability to create so many things is endless.
The whole thing is really cool! I’m impressed to see all the good designs and products you’ve come up with.
I would love to see more engraving projects, since this is my latest passion!
Wow! What an amazing and detailed review. I will definitely have to add this to my wishlist since your review lessened my intimidation!! Thank you!
I would LOVE one of these!!
This is the coolest tool ever! So many possibilities. This is a definite game changer!
So many choices of ideas to make with this machine but I think the top of my list would be to cut wood for including in my resin projects but also to make items that I can use to make silicone molds for resin projects.
This will help me in all areas of crafting. Would love to acquire one.
This machine would totally up my crafting game!
Thanks for the info on this machine. I’d love to have one and I like that this one is so much less than glowforge. The detail you provided was helpful as I didn’t expect some things (antifreeze??!!)
I would love a tutorial on personalizing gifts like name plates, birth announcements, or even scenes within a shadowbox!
This looks amazing! I’d love to see a tutorial using the rotary tool.
This machine looks incredible! So many possibilities! I would love to see what someone has done with it regarding leather engraving – I bet some cute accessories could be made!
I love the acrylic pen holder!
I would like to see a tutorial on engraving earrings.
Thank you for your honest opinion on these cutters. I am still a bit scared to pull the trigger and purchase one but, this is very helping information to get me started.
Wow! very cool machine. I love it. I could engrave a lot of items, especally the wooden spoons. I can’t wait to see you using it.
This looks like it would be much better and easier for engraving signs than using a router and templates. I would like to see more on this subject.
Omg! Yes it definitely would be!
I have been looking and wanting this amazing machine. I would love to see a tutorial on how to do those door hanger rounds with the raised wood cutouts instead of vinyl.
Yes! They definitely look more professional than with vinyl!
this would be a great addition to my craft room!!
The possibilities look endless!
Thanks for sharing your honest review. Great read.
The only comment I can make about the xTool P2 Laser is: WOW! Holy Cow! And I would love to win this awesome machine cause I simply can’t afford to purchase one!
I have been drooling over one of these for months now. I am eager to “up my game” and join others just a like in this creative, crafty side. I enjoy watching the impressive things that one can do with this and would bring so much to our local community and the involvement I could offer to them with one of these.
I’d love to see an acrylic earring or wood sign tutorial.
Ahh! I love making acrylic earrings. That’s definitely on the list!
I am new to a machine like this! I would love to have one and any tutorial would be such a big help!
All the information you have here is amazing. I would love to have one.
I love having an expert on speed dial. This is the most epic blog post ever!
Thanks! I feel the same way about you 😉
The rotary option would be a nice upgrade over the Glowforge, hard to jump ship though!
lol I know that attachment! I love them both!
Wow!! What a great review. This sounds like an awesome machine that can do it ALL! Thanks for your extensive testing and thorough evaluation of the many features. Can’t wait to see more of your wonderful creations.
Love the versatility of the machine. Need to start saving or fingers crossed for the contest!
This is awesome! I’d love to see tutorials for engraving things like drinking glasses, if possible.
I would like to see a tutorial on gifts for a wedding. My son is getting married next spring!
I would love to see a barn quilt tutorial
Would love to see jewelry tutorials
Would love to see some home decor
What an amazing machine! I had not thought to use it to make earrings, but what a great idea! Thanks for the overview!
Earrings are one of the most popular things to make – they use a small amount of material and sell like crazy for small businesses!
So cool!!! Other machines were so expensive but this has a great price with so many great features!. Thank you so much Charynn!
Thanks for your review! I would love to own one of these machines! Maybe someday!
Thanks for the review! This machine is so amazing! I can’t wait until I am able to get one. I want to make everything…….well so much stuff nothings off limits lol.
I love that you do in-depth reviews. Too often people praise a machine but don’t do enough hands-on to why.
I am on a limited budget, as are many others, and appreciate your taking your time to do such a thorough review. Machines cost too much to sit around, gathering dust because there were no thorough reviews done by actual users.
Thank you, again, for a great review.
I forgot to say what project I would like to see a video on. I would love to see a video on taking a photo and etching it onto glass and wood.
Thanks, again.
Thanks for all the detailed information.
Before reading this, I had no idea of all the things I could do! Now I have so many ideas for gifts or my own Etsy shop, which I’ve been wanting to do for a while now. You made it seem like this “old” girl can still learn a new skill!
I can’t wait to be able to get one!
So many things you can do!! Always inspired by your post, so creative! Would love a chance at winning and try your crafts!!
Wow! Looks amazing! Can’t believe everything it can do!
This was such an awesome, in depth review!!! I have been seeing XTool pop up all over the place and have been reading bits here and there, but this was just what I needed to read to make me REALLY want this machine! There are so many possibilities!!!
Yay! I’m so glad 🙂 They take forever to write lol but I want everyone to know what they’re getting themselves into 🙂
This is incredible! Would love to see a countertop cookbook holder…maybe engraved with a special recipe from a loved one?
I love that idea so much!
What a versatile machine! Would love to explore all the things alongside my husband.
WOW! great review! Very intrigued by this article. Another item to add to my “I want this” list. Thank you for providing all this information.
This is a very comprehensive review of both machines. Thank you.
This machine looks amazing and would open the door to so many more projects
This printer seems amazing! Thank you for your very in-depth review.
Thank you for the very detailed review. I would love to see a memorial project with wood and acrylic. That can be kept outside in the garden area for my best friend who was found dead on her bathroom floor. The autopsy indicated it was her heart.
This is the coolest machine. I would love to give it a try to make earrings and 3 D pictures.
Would be so excited to try this out and be able to leave a better review.
Excellent in-depth review. I have been praying some day to be able to take that next step in my small home business. Thank you for time you put into this.
Great information and comparison
wow, this machine is incredible! I would love wood engravings, like on a serving platter. I’d also make Christmas ornaments!
Thank you so much for the in-depth review!! Like so many others, a laser cutter has been on my wish list and now xTool P2 is on the top of my list.
Thank you for this review! I would love to see a tutorial on engraving glass cups/bottles!
Thank you so much for such a detailed review!
I would love to see more wood cuts with the xtool!
Such a great tool! I love your review and can’t wait to see everything you create!
what a beautiful and complete review and I really would love to have this beautiful machine and then I think I really need help to figure out everything about it lol.. thank you for this complete and beautiful review 💖
This was very informative thank you Charyn!!! I would love to see more of cutting and engraving acrylic and maybe see how to engrave reflective surfaces. If you can that is? I have so many ideas, but I’m disabled stay at home Mom that’s on a set income. So I live vicariously through other crafters like you.
I love working with wood but saws scare me! Hello finger stumps! So adding a design to wood with out a saw is my dream. I have acculimated a few files and would use them to start and eventually find more.
Nice machine. My only complaints are that you can get similar specs on OM Port and Gweike machines at about a third of the cost.
Holy cow! What a great review!!!
Very good information
that is a cool machine. i hope i win
I reallly need this for my craft room, looks like so much fun!!!
This looks like such an amazing machine. I would love to learn about all you could do with it!
Thanks for doing this review. I currently have a diode laser and I am hoping to move to a CO2 soon.
I would like to see a 3d image of an american bald eagle.
Love the P2 cant wait to get it!
I would love to add one of these to my craft room. I currently have the Cricut Air 2, which is great, but limited. I could do so many more crafty things with one of these!
WOW what a fantastic machine I am absolutely amazed at everything that you can do with just one machine I would love to see a tutorial for some memorial gifts and decorations that I could make for my Daddys memorial service, thank you for the chance to win
Would LOVE to have one of these machines.
This tool blows my mind!
I would like to use this amazing machine to make projects out of wood. I have a Cricut and love it, however it has it limitations.
Yes! I love my Cricut and still use it but I love having the options of wood and acrylic 🙂
Great info! I saw this laser pop up on a few pages, but your info was very detailed and helpful!
Thank you so much!
Would love to see engraving on jewelry, this is a awesome toy in our craft world
I just bought some marking spray to try on jewelry!
This looks like an amazing machine!! I would love to have one.
Wow! Thanks for the great review! I would love to have this to create amazing things. Thank you for the opportunity to win one!! Good luck everyone!
This machine sounds amazing and definitely something I would love to add to my craft room.
Thanks for the honest review. I have been thinking about purchasing a laser machine for some time, but am still on the fence as I am not sure the cost makes it a good investment unless I am planning on selling my product. I am mostly interested in engraving products.
I totally agree! I have a blog post on good products to test out as a small business b/c I think there’s a lot of money to be made with a laser!
I’d like to add this machine to my crafting arsenal. I’ve been wanting to grow my crafting options and this would make a great addition.
There are so many options that sometimes I get stumped LOL
I am just learning about laser cutting. So many possibilities! My mind is overloading with all the ideas of what I could do with one. I would probably start small, like with earrings or coasters being cut out that I could sublimate on.
I definitely have combining laser and sublimation on projects
on my list!
This blog post was amazing. I have seen a demo on this machine before but your information was awesome. This machine is definitely on my wish list. I have wanted a machine like this since I first saw the Glow Forge years ago and that started my desire for a laser cutter. I love crafting with wood and this would definitely be a game changer for me.
omgosh I remember seeing the kickstarter for the Glowforge years ago and wanted one SO bad! and my husband was like…uh no. I remind him of that occasionally LOL.
This would be an amazing addition to my crafting creativity!!!
I would like to see a tutorial on how to start a project on the xtool p2. How to choose a design and set up an easy project.
Wow! Look at all the possibilities! Look at all the Awesome things you have shown everyone! I am going to put this on my wish list!
Thanks for all your hard work doing this review!!
Love them .. so many great ideas! Thank you sharing with us.
I am so intrigued with this machine it looks amazing would love to add to my arsenal some day. The possibilities are amazing. I am hoping to be able to open up my shop soon.
This machine looks amazing. The ideas are endless. Creativity is calling.
Looks like an amazing addition to a craft studio. I would love to start making materials for my classroom.
I would love to see a project done on slate!
*adds another machine to want list*
Wow!! What a Great Tool this would be for any Crafter!! 🙂 So much you can do with it 🙂 I so LOVE the engraved charcuterie board!! I think making a stove top cover would be so COOL!!
Thorough review! I am excited to read all about this. I have a Glowforge but have been considering something different.
I’d love to get one of those machines one day.
They are so versatile, all the options to craft and built. Especially the option to cut wood and build little organizers, etc.
I’m a tech. draftsmen and able to create all the templates my self.
Really adore the earrings. they look so pretty.
So exciting… would love to have this machine! Thanks for the opportunity to win one!!
I would like to see a bamboo tissue box with some engraving on it. Is it possible to do that?
Yes! It’s definitely deep enough with the riser base that you could do that to the side of the box 🙂
I absolutely love, love, love that you can make bowls with this laser!
Very impressive machine! I’d love to see a tutorial for layered wood ornaments.
I would enjoy it so much! This looks like so much fun! This is on my list of trying new things. I have a Cricut and I’ve been wanting to get one of these too. They’re just so expensive. Thank you for the consideration of winning one!
So much you can do with this machine! With the rising base to allow for thicker items, and the ability to do curved surface engraving, the possibilities are almost endless. Larger bed, faster, and so many features! Would LOVE to see tutorials on the curved surface engraving using different items.
I have a Xtool d1 10w pro. Thanks for the review! I’m looking to upgrade and this helped me decide.
This machine is amazing!! I would love to be able to bring my ideas to life!!!
Awesome review, very informative, thank you Charynn! Looking toward retirement in the not so far future, ugh on not having enough income. Need to seriously start making items to sell to pay off bills. Would love to see any posts or videos on money makers, like earrings,… This machine could make a huge difference in our financial future! Love all you do!
Thank you for the opportunity to win this amazing laser cutter.
I think this would be fun to learn.
Wow this is definitely something I could use in my craft room
What an fantastic machine! Would love to see a tutorial on Christmas Ornaments
I’ve been following this brand since they were at Kickstart and it’s on my wish list for “someday” when I can afford it. I love to work with a variety of materials, so the extra power makes all the difference is creating spectacular creations! The software and user friendly features are a bonus.
This machine sounds amazing! I had no idea they could do such a variety of things. A maker’s dream tool.
I would love to see a tutorial on how to create designs on wooden boxes.
Wow your research and descriptions make this xTool so attractive! Looking forward to adding it to my wish list. i would love to see more earring and ornament projects.
How exciting! Thank you for this opportunity!
I would love to see you work with the 18mm wood cutting and engraving for 3d effect. Also I would love to see how you clean your machine. Did you video putting in the coolant? Thanks.
Thank you for your detailed review and comparison with other crafting tools available.
I’d like to see the clear acrylic sign with the walnut base. Any of the projects using acrylic would be great. So excited for the opportunity to win.
This looks like it would be a great tool for my crafting. Thank you for all the information!
I want this machine so that I can cut wooden model kits for my nephew to assemble.
Thank you so much for your review!
WOW…just WOW!!! I love this machine! So many possibilities on what to make, I can’t decide?! So many different materials to try. Wood being my favorite, I guess! How about engraved wooden Christmas cards! YES, can you engrave on the front and back? Like I said so many questions and possibilities, I want to try!
Thank you for this review! I’m going to look at the FB and YouTube sites now to watch you work more with it and see if it’s something I could possibly invest in.
I love everything you have created! I would love to watch a tutorial on how you engraved the pen holder and the wooden items. So creative!
I would like to see information on engraving on wood. I want to start a business doing this but the cost to start is so much.
I am just starting to explore laser cutters. This post will help me learn more. Thank you
Hi, I just entered into that xTool Giveaway. Sure hope I win!
This looks like an amazing tool. I have been drooling over this type of machinery for awhile. Thanks for the review to put this one at the top of my wishlist.
I think I would use this for several things. I have some 3d laser files I would try out and definitely would find a way to create gifts for teacher appreciation.
This machine looks so amazing! Wow, thank you for the great review. Now I just need to win the lotto. I would love to see turtle earrings cut out.
Love that Pittsburgh coaster! Awesome machine! Is there any type of material you cannot engrave on with this machine?
Yay! H2P! Technically, you can’t engrave on some metals, but I have a marking spray that I’m going to try!
This looks so amazing! I would love to have this machine to make so many things!
I would love to get one of these
Amazing tool!
This is such an amazing tool! I can’t believe all the versatility it offers. I would absolutely love to own one one day!
Fantastic information, Charynn! So helpful in understanding the xTool P2!
This sounds like an awesome machine!! I have a cricut but hubby has a couple of different laser machines and one is in closed and everything but he’s had so much trouble getting it to work correctly. I would love one that I could actually use.
Thank you for this review. I’ve been wondering about the capabilities of Laser cutters and how I might use one. This post has really helped!!
Would love to see tutorials on engraving metallic and acrylic keychains and wooden perpetual calendars.
Would love to make all kinds of crafts, a wooden clock, earrings, all kinds of things!
I would love to see a tutorial on a layered wood sign with several layers.
I love those too!
What a great review! I have a friend that has some type of XTool and her projects are so awesome. I am more of a designer but would love to be able to create designs and then create the projects. Like others, it is definitely cost-prohibitive for me, but a gal can dream, right? 😉
I hear you! I love that I can draw something on my iPad and then 5 min later watching it being made on my xTool!
Charynn, My husband and I have been going around and around on whether to bite the bullet on an XTool. He is a finance guy and goes back and forth. I am hoping this blog post of yours will tip the scales in favor of it. It is very well written.
I would love to see a cutting board tutorial in hopes to change his mind. If I could find someone in my area where he could see it in action I know he would cave. Keep your fingers crossed for me.
if he sees a laser in action he’ll be scheduling craft shows for you to set up LOL
This machine looks like fun! It would be so happy in my she-shed.
I would love to see a basics for beginners tutorial. I’m excited by what I read in the article !
I have been interested in this tool for quite some time. It is so versitile and would make creating so much more fun!
Wow! That is an awesome tool!
Having a laser cutter is so valuable seeing all of things that as you have done with it makes me excited to use one in my home❤️
I’m obsessed with my garden and can think of a dozen ways I’d use this for garden projects! Would love to see gardening project tutorials.