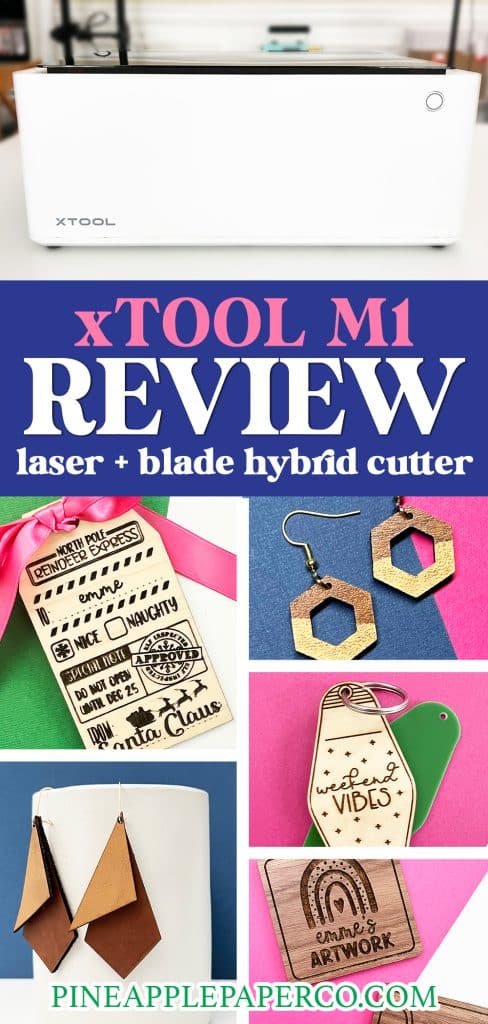
xTool M1 Review: Desktop Hybrid Laser and Blade Cutting Machine
This post and the photos within it may contain affiliate links. As an Amazon associate I earn from qualifying purchases. If you make a purchase through one or more of the links, I may receive a small commission at no extra cost to you.
Learn everything you need to know about the xTool M1 laser and blade cutting machine! This hybrid machine will take your crafting game to the next level! The xTool M1 has laser cutting and engraving as well as blade cutting to handle almost every material in your craft room! So grab some wood, leather, vinyl, HTV, paper, or acrylic and let’s learn about the xTool M1 desktop hybrid cutting machine!
Makeblock provided me with a xTool M1 machine to test, but all of my thoughts and opinions are 100% my own!
As a proud crafter and owner of several Cricut machines as well as a Glowforge, I have shared loads of SVG files and craft tutorials that you can use with those machines. But, the one piece of feedback that I hear ALL of the time about my Glowforge is that it is SO expensive. And y’all, I hear you. You are not wrong.
Makeblock reached out to me and offered me an opportunity to review this more affordable hybrid laser AND blade cutting machine, and I couldn’t pass it up! Makeblock has been a HUGE success on Kickstarter, and as a company they are launching several laser engraving and cutting machines into the crafting space. The M1 is a machine that I think y’all will be REALLY interested in!
NOTE: Since this post, I’ve reviewed 4 xTool machine total and I love helping crafters pick the RIGHT machine! Make sure you read my Glowforge vs. xTool post and my most popular xTool posts:
Learn More About Laser Machines!

What is the xTool M1?
The M1 is a desktop hybrid laser and blade crafting machine. It’s pretty cool because it is like a Glowforge and a Cricut combined into one machine! It offers laser engraving and cutting (similar to the Glowforge) as well as blade cutting (similar to a Cricut Maker or Explore series machine). It’s the first combination machine of its kind to hit the market, and I think it’s a genius concept!
What does that actually mean for YOU?! It means that if you’re cutting heat transfer vinyl to make a shirt, you can use the SAME machine to engrave a leather bracelet or cut a pair of wooden earrings. Honestly, the potential for this machine is HUGE. You can make SO many things with the addition of a laser to your blade cutting machine.
What Kind of Laser is in the xTool M1?
The power behind the xTool M1 is a diode laser, as opposed to the CO2 laser of the Glowforge. Diode and CO2 lasers use two entirely different scientific methods to create laser beams, which also creates differences in their capabilities.
Most importantly for the home crafter, diode lasers are MUCH less expensive than CO2 lasers. It is the main reason that diode lasers are becoming popular in the DIY and crafting market. Diode lasers last longer, are more durable, but are less powerful than CO2 lasers.
Because they are so much less powerful, they are much slower than CO2 laser machines. But both lasers have limitations to the thickness and material that you can cut, regardless of which one you choose.
Trying to decide what Laser Craft Machine is Right for You?
Download my FREE eBook: Beginner’s Guide to Laser Craft Machines! With 3+ years of experience and testing of 5+ lasers, let me teach you the basics! Learn the different types of lasers, projects you can make, potential cost, and more!
Read the guide BEFORE you buy!
The xTool M1 diode laser machine is available in 5W and 10W laser optical strengths, which is powerful enough for most home crafters. However, it is much less powerful than a CO2 laser, which usually start around 40W of power. (If you’re looking for a more powerful laser, xTool also has a 40W Diode Laser and the awesome 55W P2 CO2 laser).
Makeblock sent me a 10W machine, which I am super excited about! I wanted to test it out and see if the 10W would be powerful enough to suggest as an affordable alternative to the Glowforge.
That said, CO2 and diode lasers are different enough that I can’t compare them fairly. Which in my opinion is okay! If a CO2 machine is not in your budget, I want you to know how this more affordable option would work for you! This review will provide positives and negatives to the diode laser and the machine in general. Also, since the M1 contains a blade, I will also review how I think it stacks up with a Cricut machine.
M1 Technical Details and Measurements
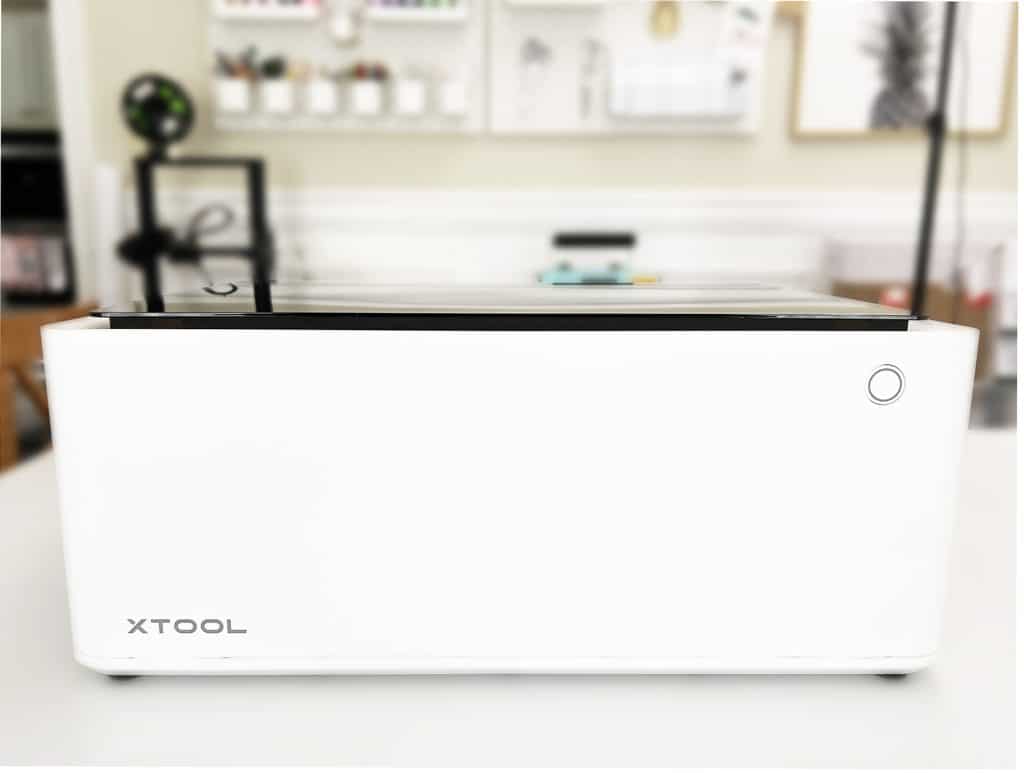
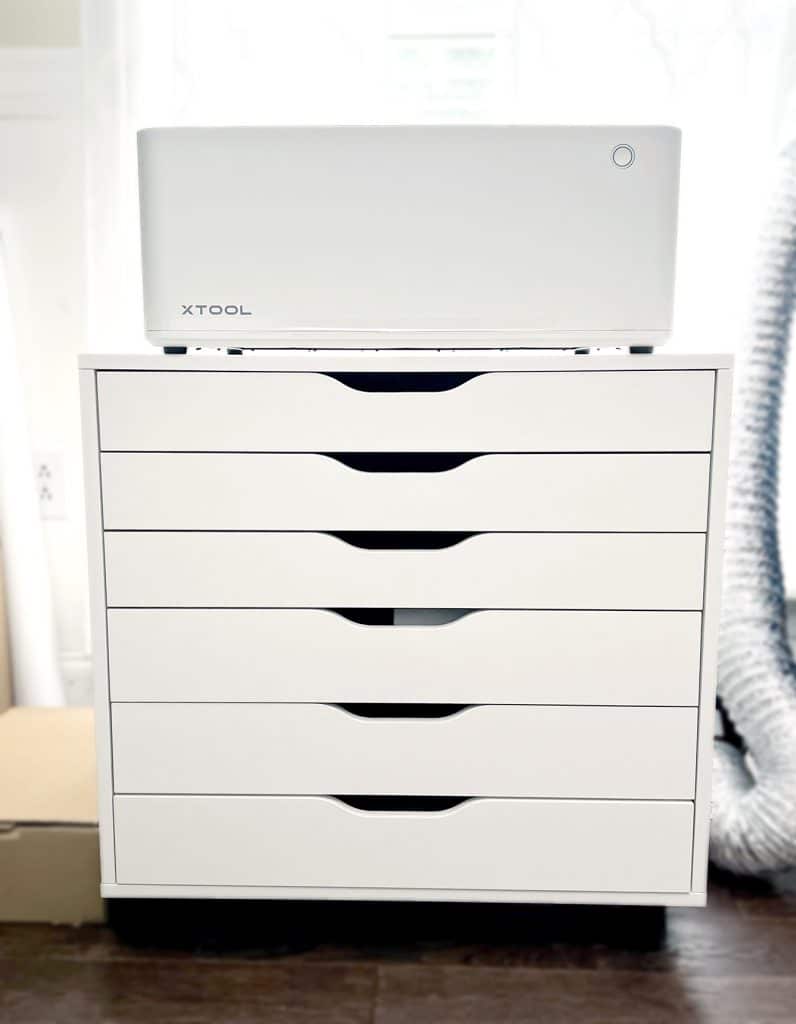
How big is the xTool M1? The measurements of the M1 are approximately 22 inches long x 18 inches deep x 9 inches high. It weighs just over 20 pounds, which is easy enough for me to move around by myself. That is a nice perk! It’s about the size of a large desktop printer. In fact, I moved some things around in my office, and I put the M1 on the Ikea Alex drawer cart that my printer was on!
You can see how much smaller it is than my Glowforge in this picture. If you don’t have a huge crafting area, the size of the xTool M1 is definitely an advantage.
What is the cutting area size of the M1? The cutting area of the M1 is 15″ wide x 12″ tall. This is only a little smaller overall than the Glowforge Basic and Plus models, but wider than a Cricut machine.
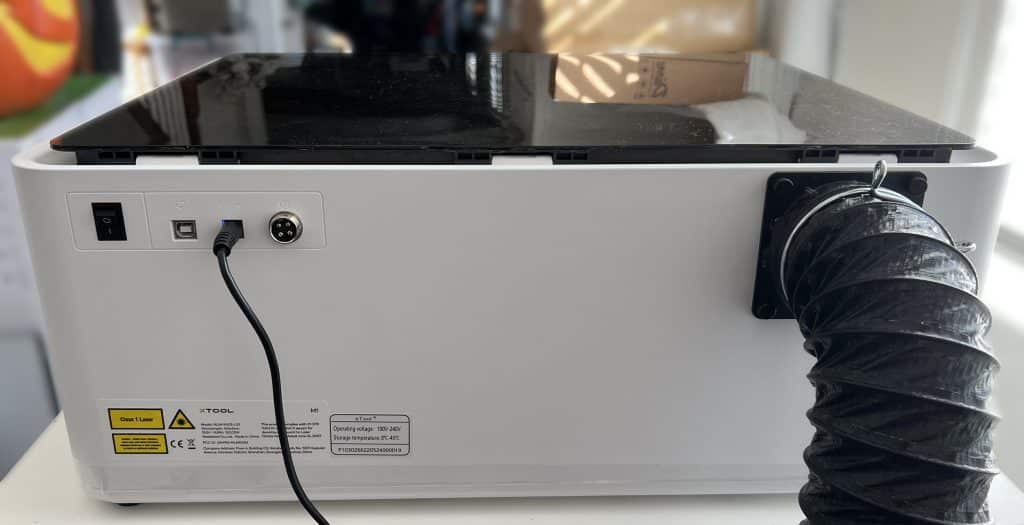
Do you need to vent the xTool M1? Yes, ideally you should vent the M1 out a window, although Makeblock does make a smoke purifier if you have to use it in an enclosed room. A vent pipe and machine attachments are included in the box, which makes set up really easy.
To increase ventilation, I ordered an inline fan from Amazon. Makeblock also sells an air assist system. I will attach it to the vent pipe and my window attachment to pull more particles and smell from my office. This is not a requirement to use the machine, but I also did this with my Glowforge, and it helps a ton.
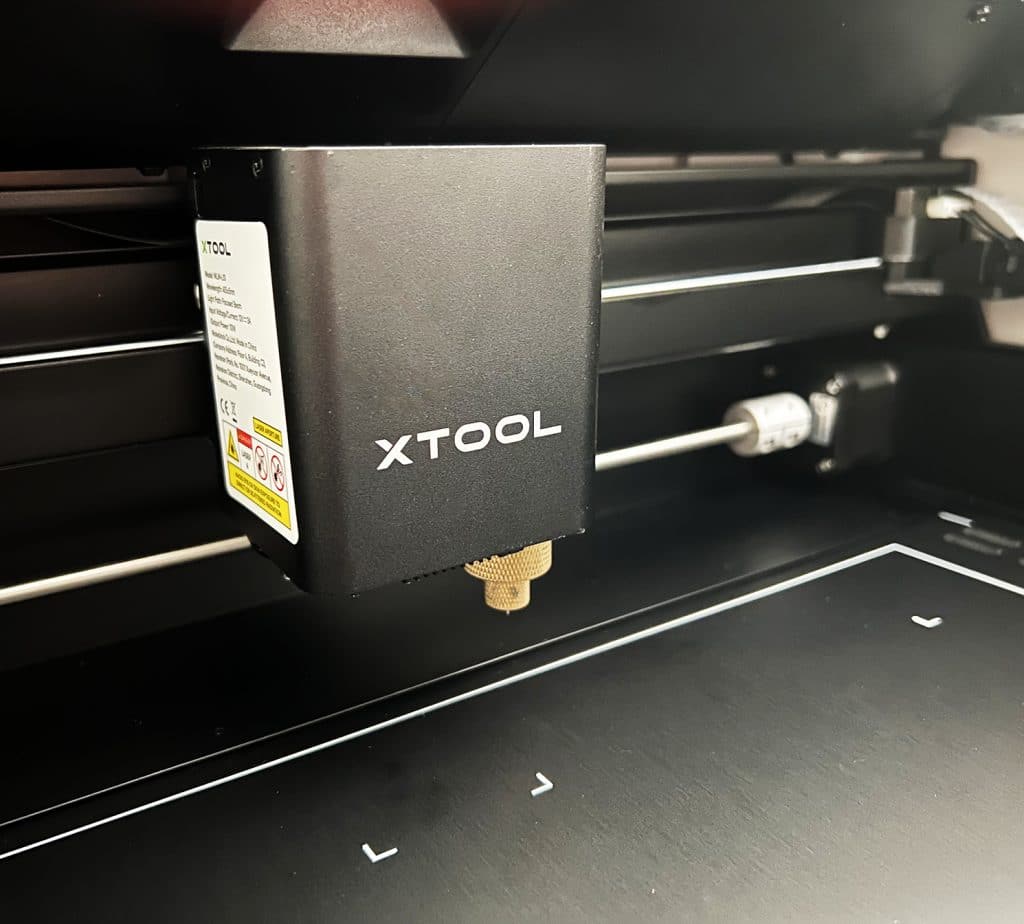
What size is the xTool M1 laser beam? The laser beam produced by the M1 is 0.08 x 0.08mm (.08mm in diameter), which is quite impressive for an affordable laser cutter. The M1 laser is designed for precision and accuracy, which means you get a clean cut and engrave on your projects!
How do you connect the xTool M1 to a computer? The M1 can be connected via Wifi or USB to a Windows or Mac computer. I own a newer model Macbook Pro laptop, which does not have a USB port. I own a USB to USB-C adapter for other computer accessories, so I connected my machine via USB. It was really easy to connect with xTool Creative Space (more on this program below).
How loud is the xTool M1 hybrid laser and blade cutting machine? I was incredibly impressed at how QUIET the M1 is! It is considerably quieter than my Glowforge, and I think it’s even quieter than my Cricut machine when in use! There is a small electronic hum produced by the machine when it is turned on, but it really isn’t that bad.
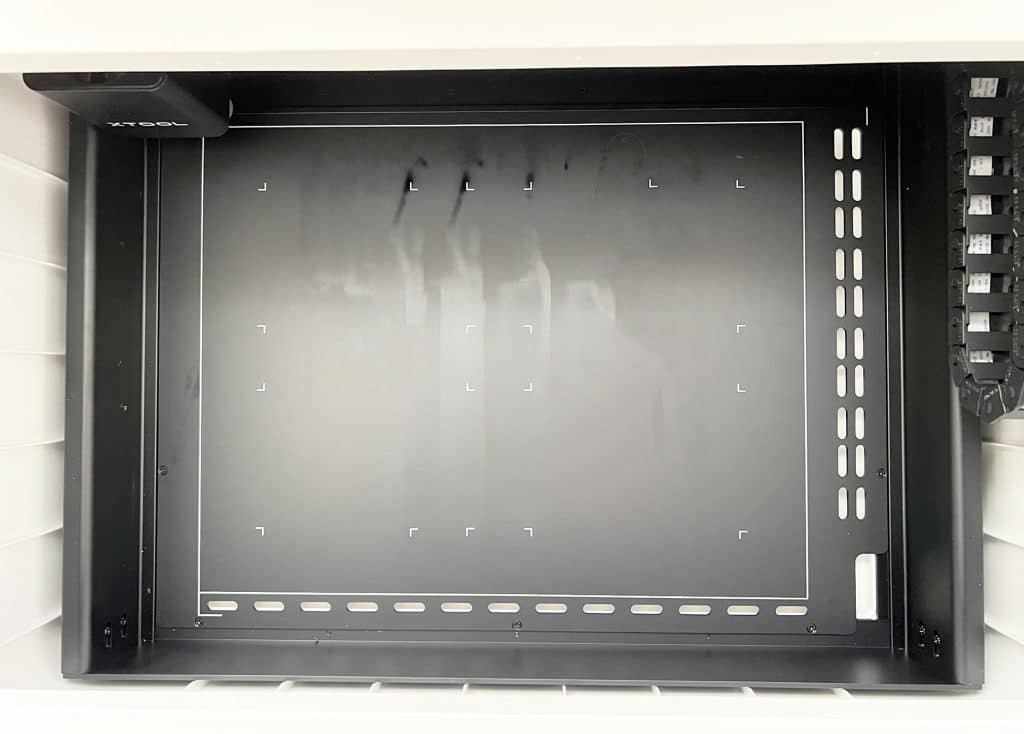
More M1 features: the xTool M1 has a built in smart camera which allows you to place your design on the material in real time in xTool Creative Space. The camera also enables Image Extraction (Capture) on the M1. Yes, you can put an image or object in the machine and the camera will capture the image and import it into the software for engraving!
The machine is also equipped with AI focus, which means it can auto focus on your material depending on the type and thickness. Both of these help make the M1 really user friendly, especially for small projects and materials!
Another impressive feature of the M1 is that you can connect a rotary attachment, giving you the ability to engrave round surfaces. Yes, you can engrave tumblers with xTool laser engravers! I don’t own this attachment yet, but I can’t wait to get one and try it!
xTool M1 Machine Design
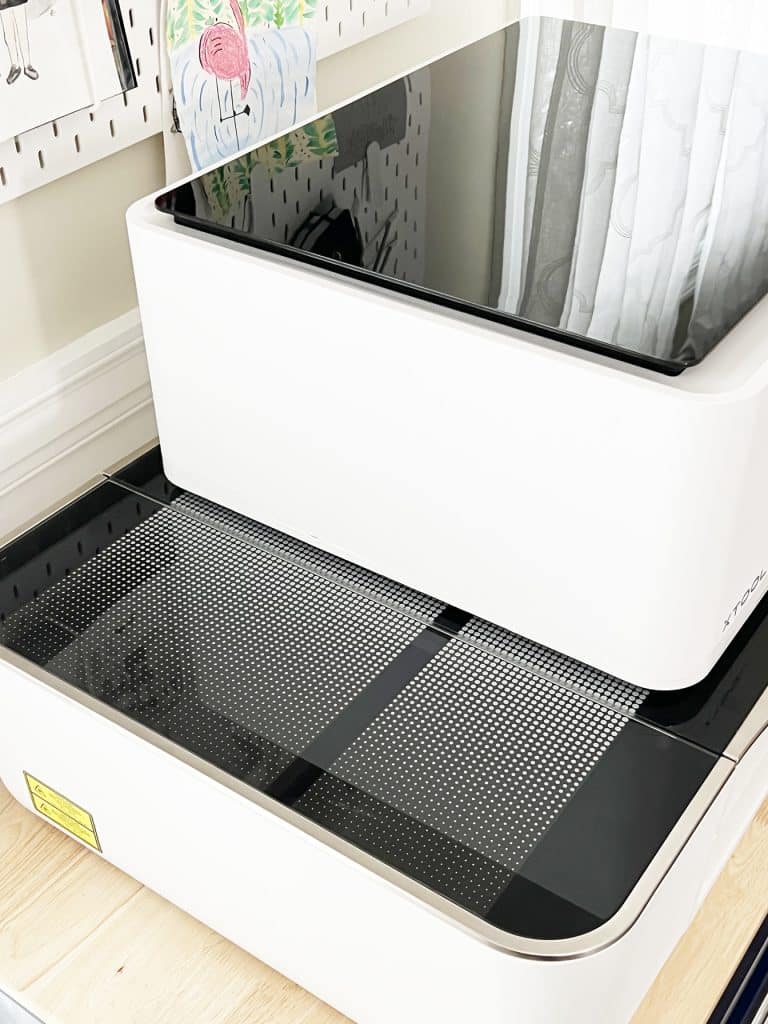
The mechanics of the M1 are housed in a white unit with a glass lid. There is a button on the front of the machine, which has an indicator light that will change depending on the function the machine is performing.

The back of the machine includes the power switch, power cable insert, the USB port, and the vent attachment.
When you open the machine, you will see the laser module, which also contains the gold blade housing. The blade housing is magnetic, making it quick and easy to remove!
The large black base plate at the bottom of the unit is where you place your materials to cut and engrave. This base plate can also be removed and you can add a Riser Base with a Honeycomb Panel to handle thicker materials. I’m really interested in trying this accessory!
These triangular prisms can be placed on the bottom of the base plate to raise your material for laser cutting. According to Makeblock, the prisms were designed and included after the initial launch of the machine to improve cutting results.
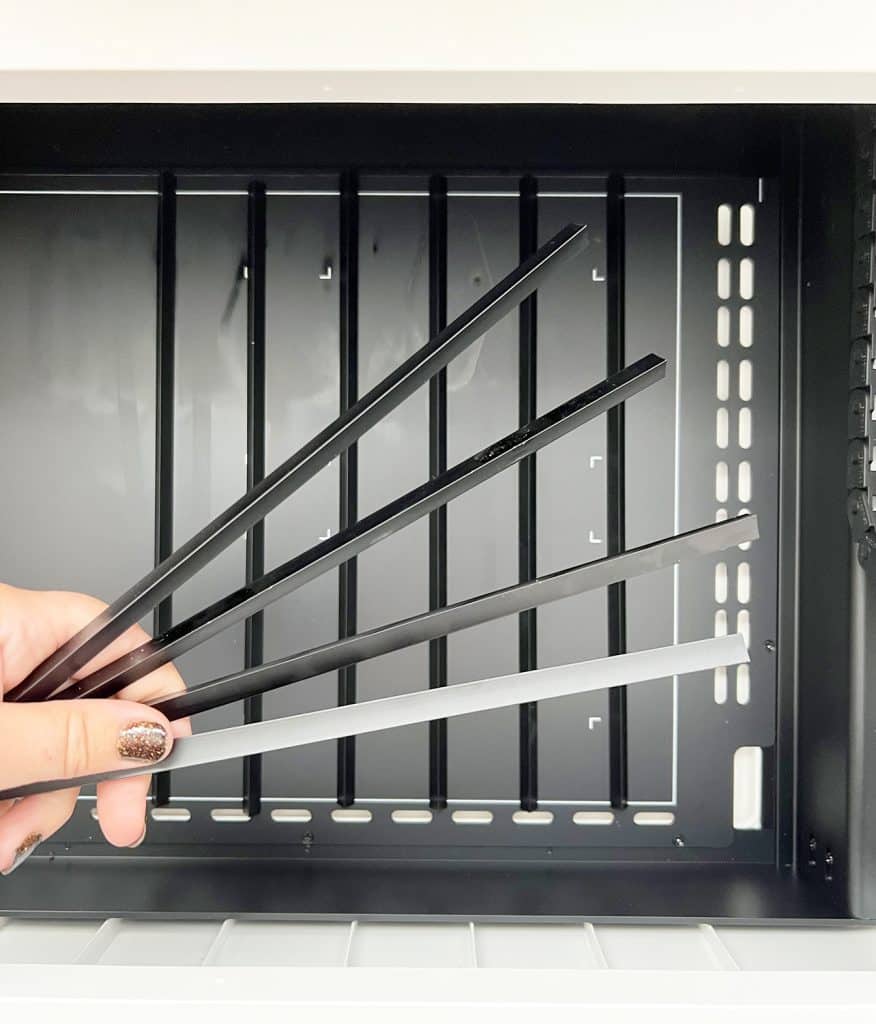
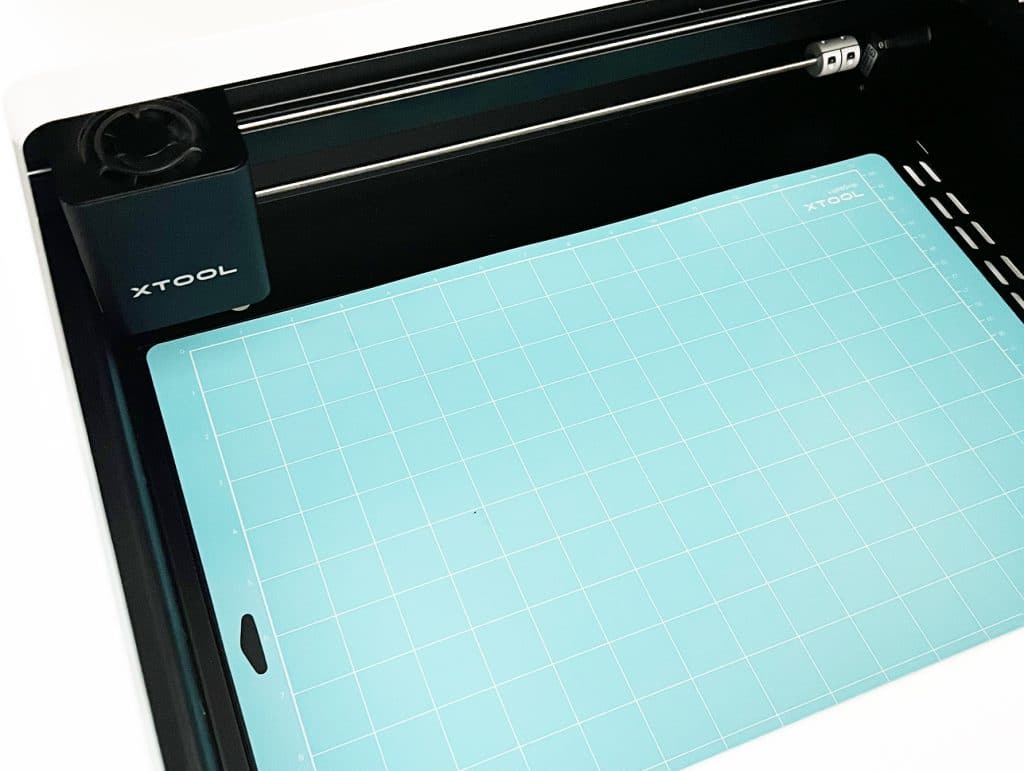
When you use the blade to cut, a self-adhesive cutting mat is placed on the black base plate. The cutting mat is adhesive on both sides so it sticks to the base plate, as well as adheres your material securely for cutting.
xTool M1 Safety Features
When using a laser cutter and engraver of any kind, safety features are important! I have little kids still, so the safety of a machine that is accessible in my home office is especially important to me.
First, the lid of the unit MUST be closed for the machine to operate. The machine will automatically stop if the lid is opened when the machine is cutting. This is even true during blade cutting, which is a nice feature to keep little hands out.
In addition, the lid blocks blue light emitted by the laser machine. So you don’t need to wear safety goggles when the laser is operational.
As I mentioned above, the M1 has a built in fan to remove dust particles and toxic fumes from the machine. When vented through the provided pipe out a window, there’s no need for additional ventilation. However, I would recommend an inline fan and/or a face mask if you are sensitive. Regardless of what I use, there is still a smell when laser cutting most materials.
Since you’ll be using flammable materials, I always recommend having a fire extinguisher near your machine that you can grab very quickly if needed. You should also directly supervise the machine when using the laser.
What Comes in the xTool M1 Box?
Inside the M1 box, you’ll get:
- M1 machine (5W or 10W power)
- Power adapter & power cable
- USB Cable
- Smoke Exhaust Pipe Pack (which includes the machine attachment, screws, pipe, and clamp)
- User Manual
- Triangular Prisms
- Small M1 Material Pack
- 2 Cutting Mats: LightGrip and FabricGrip
- Point Blade pack (contains 5 blades)
The laser/blade housing will come pre-installed in the machine. There’s no assembly except to connect the vent pipe! It’s incredibly easy to set up and only took me a few minutes to get it settled in my office and ready to cut!
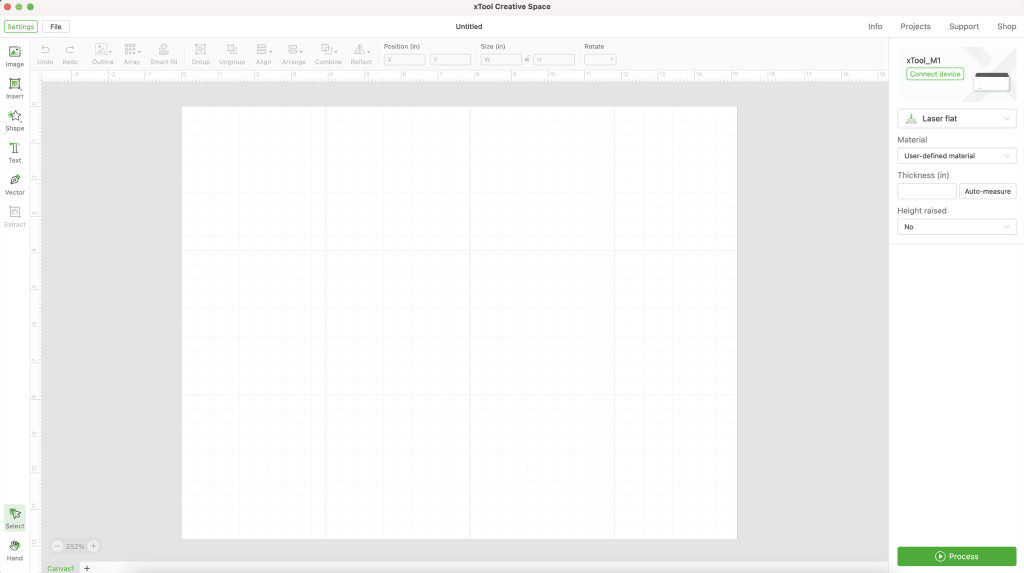
What Program Do You Use with the xTool M1?
xTool has its own design program called xTool Creative Space. It has a similar(ish) look and functionality as Cricut Design Space. It downloads directly to your computer (it is not web-based.) It has an auto-update feature, and some basic design functions.
You can Download the xTool Creative Space Software HERE.
xTool Creative Space is easy to use to connect your machine, and as of an update in October 2022, you can also calibrate your blade via the program.
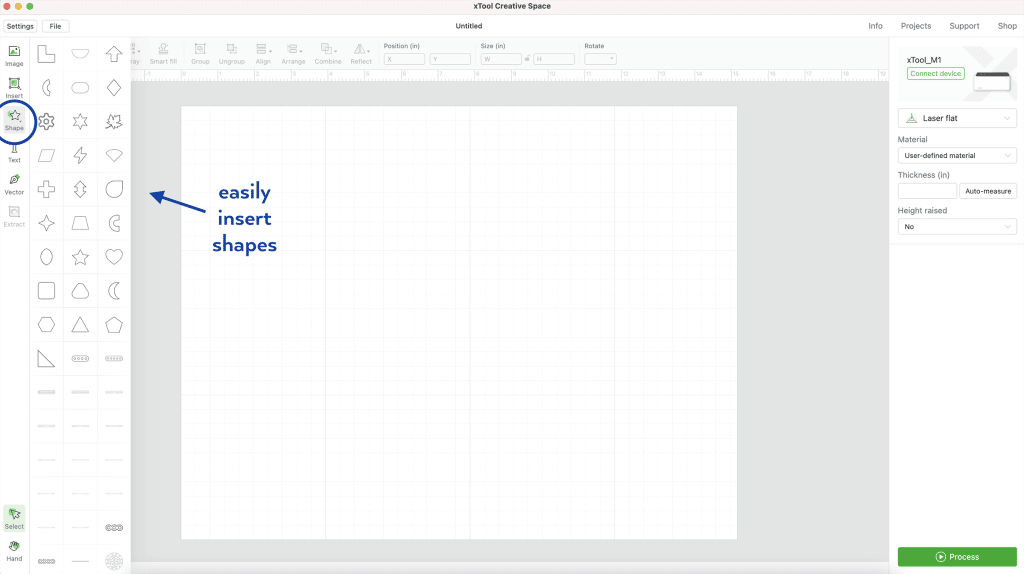
The program is easy for beginners to navigate, and xTool also provides a collection of projects to get beginners started. I find Creative Space to be completely fine for inserting simple shapes and text, but I definitely will be importing most of my designs.
I would recommend a design program such as Adobe Illustrator if you would like to design your own projects. You can also definitely import free SVGs (like those on my site) or purchased files from places such as Creative Fabrica or Design Bundles. I have a whole list of sites where you can find free SVGs to download as well as a post dedicated to laser ready design projects.
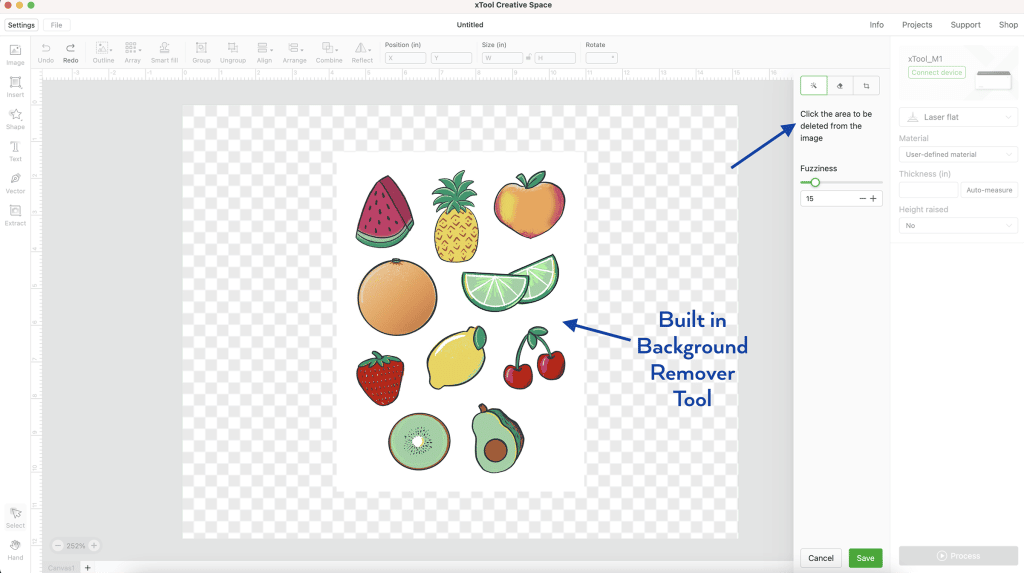
Similar to Cricut Design Space, Silhouette Studio, and Glowforge, Creative Space can import SVG, PNG, JPG, JPEG, GIF, BMP, DXF, and WEBP files. When you import an image, you can edit it to remove the background similarly to Design Space.
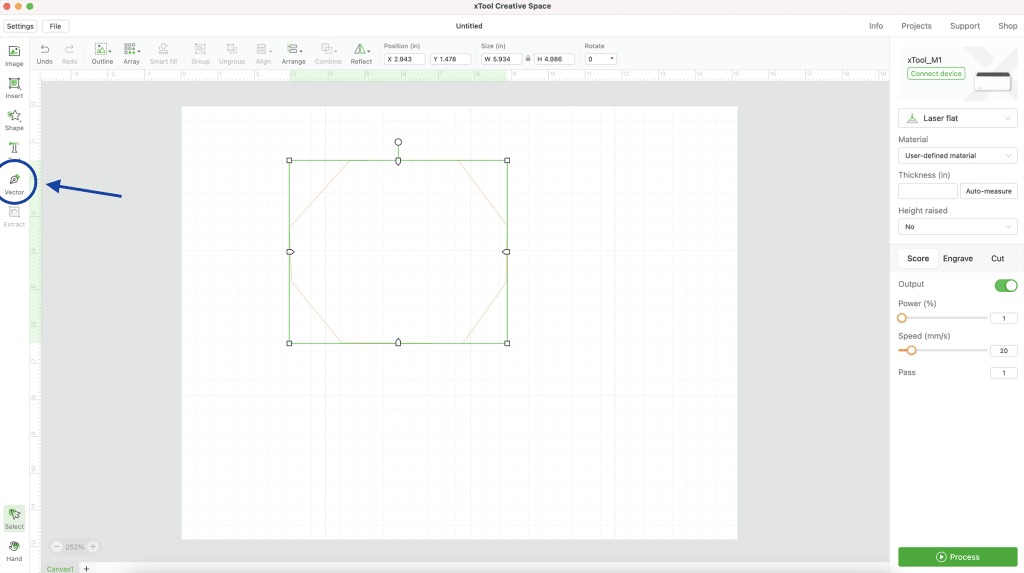
One feature of Creative Space that is different than other programs is the ability to create basic vector designs. (Vector designs don’t lose quality when the size is changed. It’s a whole thing, but trust me, you want to design and use vector files). Because I use Adobe Illustrator, I don’t necessarily need this function, but for beginners that want to play around with vector points, that’s a nice design feature.
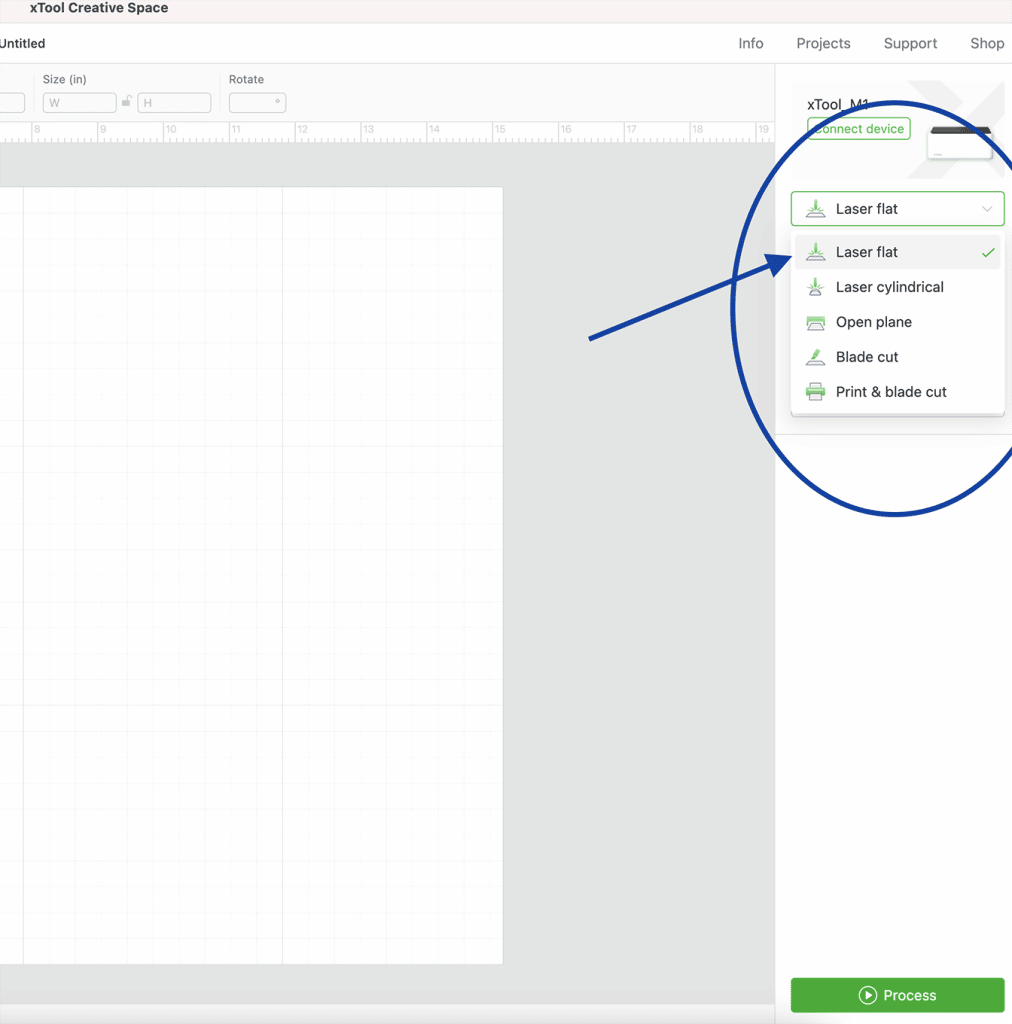
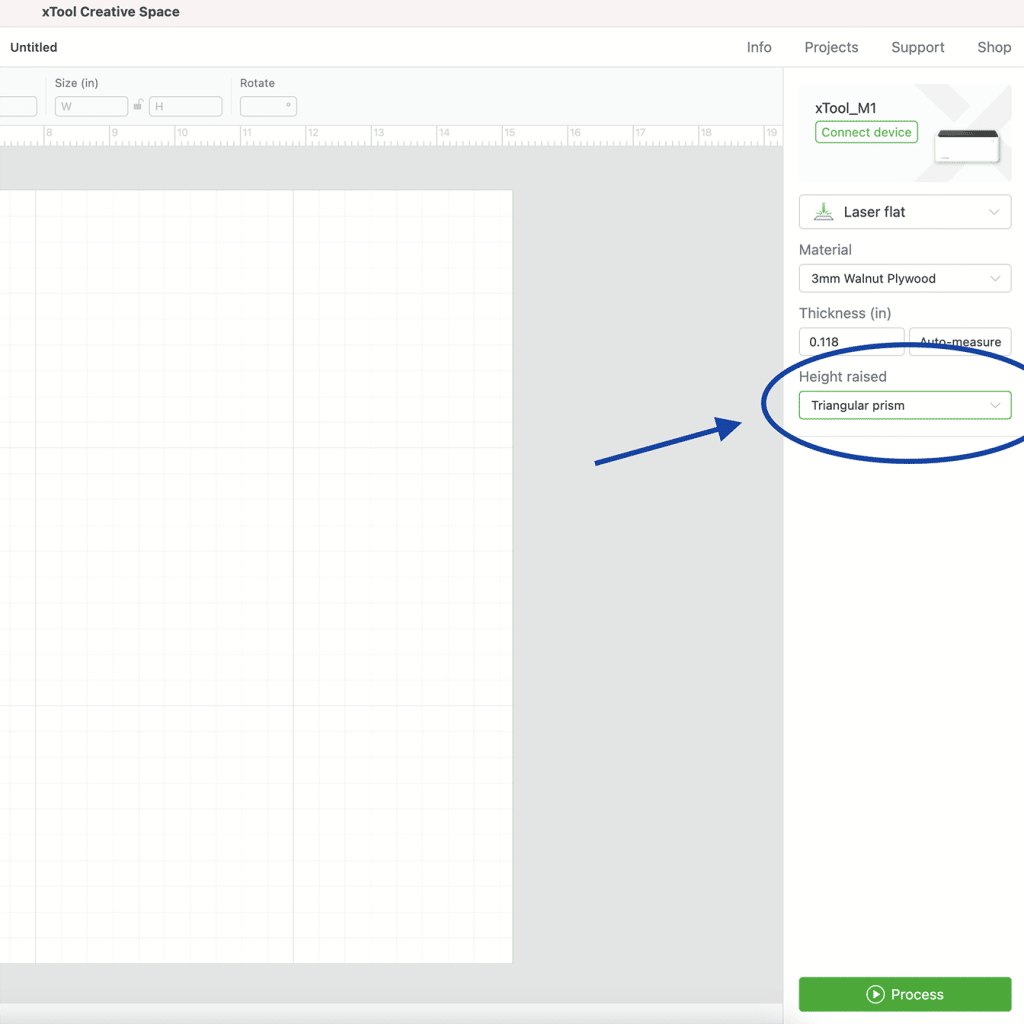
There are a few program setting selections that you need to make before you process your design. You have to choose if you are using the laser or the blade, plus there are settings for the rotary attachment.
Then, you can manually enter the material thickness (for laser projects), or use the auto-measure button. The auto-measure feature is really useful if you are using materials other than the x-Tool brand.
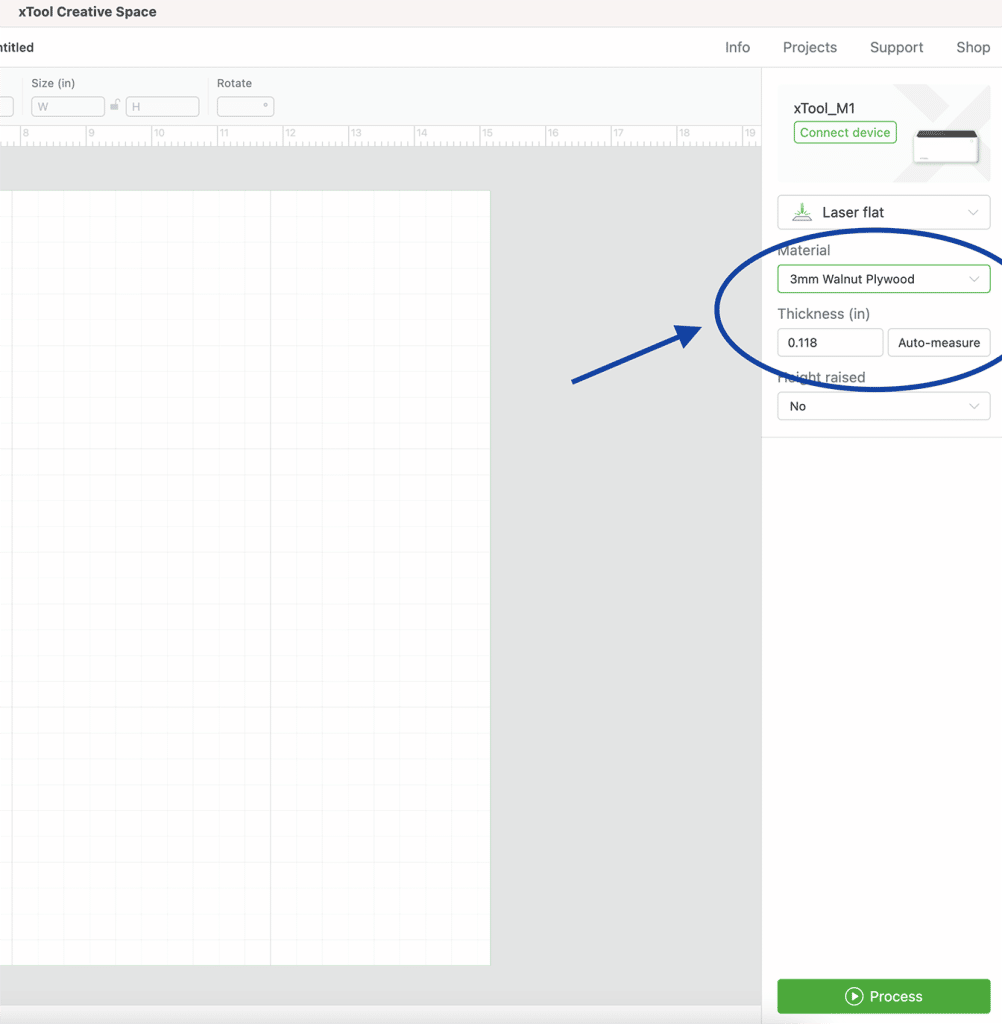
Lastly, if you are using the laser function, you need to select if the material is raised on the triangular prisms or laying flat on the base plate. The measurements will adjust as necessary.
When you select a design that you would like to laser cut or engrave, you can select each part or group within a design to change the laser settings to Score, Engrave, or Cut. You select the material you are using, and then can use the program settings or user defined settings. The material settings are somewhat limited, and different materials will require testing to find the appropriate settings (more on this below).
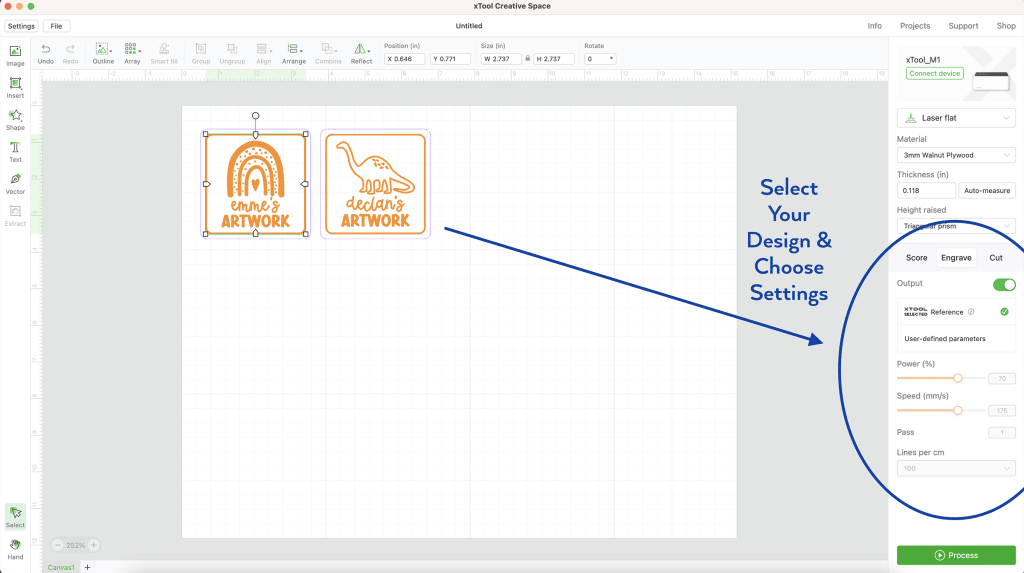
Once you have all of your settings where you want them, you can process your design and the program will sync with the machine. All of the projects I have tested have processed very quickly, which is really nice.
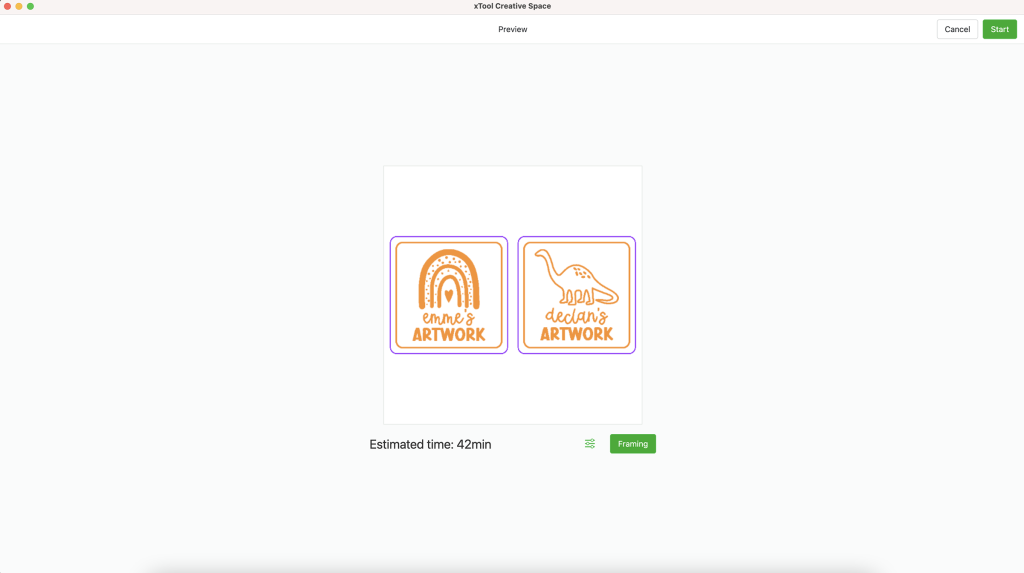
Creative Space will also give you a cutting/engraving time estimate for your project. This is only piece of the program that I have found to be a little “glitchy.” Most of my projects have been underestimated by the program, sometimes by about 25%. Since Creative Space just came out of Beta, I anticipate that these times will become more accurate and I just account for it in my crafting time.
What Materials Can Be Used with the xTool M1?
You’ve probably been anxiously reading to get to this part of the post! And honestly, it is the most exciting part. Being able to use a wider variety of materials was the main reason that I purchased a laser cutter a couple of years ago. I was a little worried that the diode laser in the M1 wouldn’t be able to handle that many materials.
But, wow, I was really surprised with the number of materials you can use with the M1. Due to the hybrid laser and blade design, it can handle a wide variety of materials that would suit most hobby crafters.
You can browse the xTool Line of Materials HERE.
The 10W laser can cut (in one pass!) a variety of materials including wood (up to 8mm thick) and acrylic (up to 3mm). The thickness of material that the 10W can cut is one of the reasons that would keep me from purchasing the 5W M1 machine. The 5W M1 can only cut up to 4mm thick basswood.
M1 Laser Materials (Engrave):
- Wood
- Bamboo – think cutting boards!
- Acrylic (some colors)
- Paper
- Cardboard
- Fabric
- Felt
- Sticker Paper
- Glass
- Ceramic
- Stainless Steel
- Slate Coasters
- Painted Metal, and More!
M1 Laser Materials (Cut)
- Wood (including maple, cherry, and walnut)
- Bamboo
- Acrylic (some colors)
- MDF
- Leather
- Most paper and fabric products, and more!
Because a laser cuts materials using very high heat, there will be burned edges. This is not desirable for most paper or fabric products, which is where the blade unit comes in! You can cut a ton of materials with the blade to get a cleaner finished product.
M1 Blade Materials (similar to Cricut machines)
- Heat Transfer Vinyl (HTV or Iron-On Vinyl)
- Self-Adhesive Vinyl
- Paper
- Sticker Paper
- Cardboard
- Kraft Paper
- Faux Leather
- Felt
- Fabric, and more!

What Can You Make with the xTool M1?
I have tested several of the materials listed above, and made some really great projects. Because my machine only came with the small pack of xTool brand materials to test, I immediately jumped in to try other brand materials! Overall I am happy with how the machine worked with all of these materials, and I will note my thoughts with each project below.
Don’t Miss New Laser Projects! Sign up for my xTool Email Club!
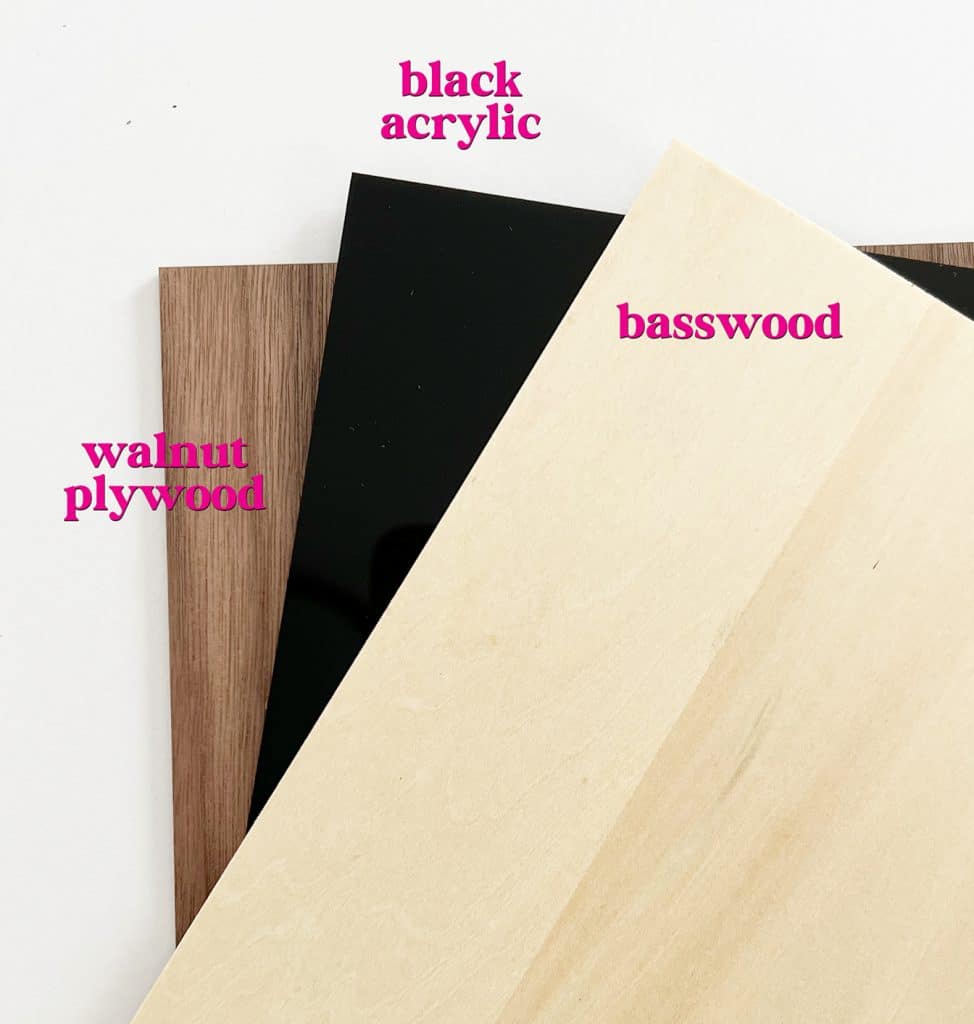
Basswood (Laser Cut and Engrave)
Basswood was the first material that I tested with the M1, and I was immediately impressed. Since I have experience with more powerful lasers, I was surprised at how effective the M1 was at creating a crisp, clean engrave and cut! I was immediately encouraged to try more products.

Maple Plywood (Laser Cut and Engrave)
I used a piece of Glowforge proofgrade Maple plywood for these projects. Glowforge branded materials are available at my local Michaels, which I think is important to note. When I first purchased my laser machine, materials that are designed to be cut with it (which are easy for beginners) had to be ordered online.
It’s nice that you can now grab something at a craft store if you need to! But – there’s always a but – due to the size of some of the proofgrade materials available, I actually had to cut them down to fit inside the M1. Not a deal breaker, but worth noting if you aren’t used to shopping for laser materials!
Both of these projects worked out really well. I specifically chose a design that was more detailed so I could test the program settings and precision of the machine.

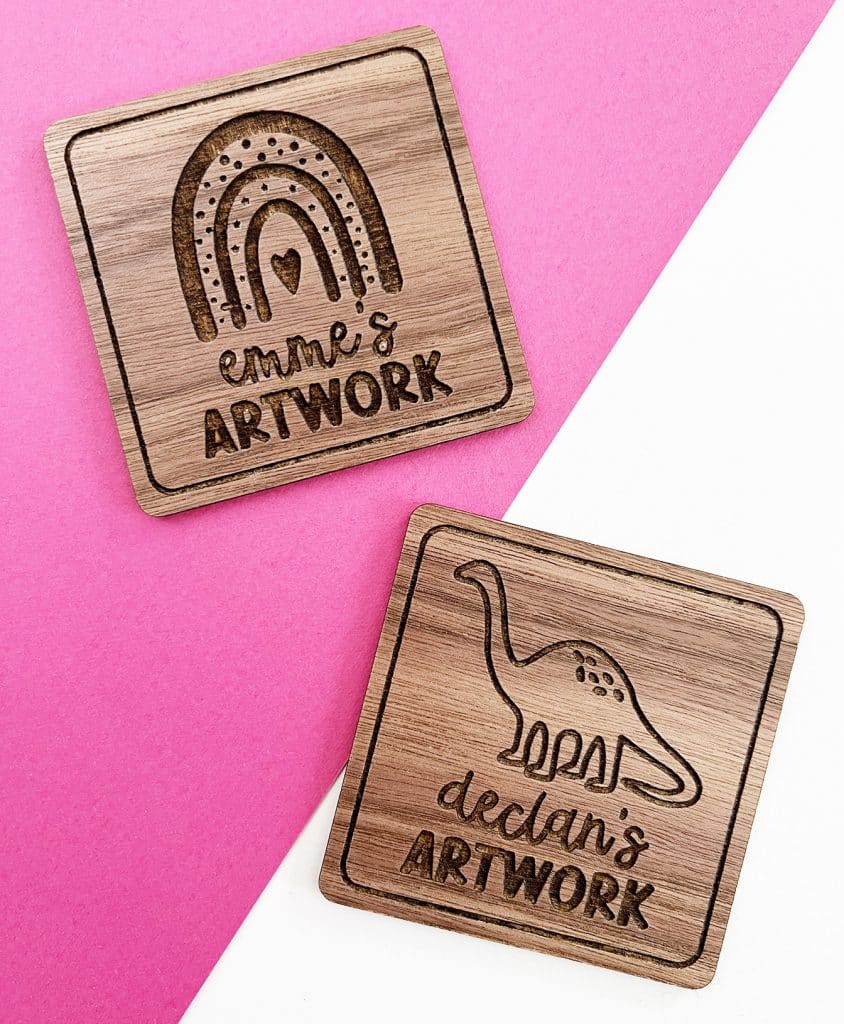
Walnut Plywood (Laser Cut and Engrave)
Walnut is one of my favorite materials to work with, because it looks so professional when it is finished. This is also a piece of Glowforge proofgrade plywood. These artwork magnets that I made for my kids turned out SO good. The amount of engraving did take quite a while, though.
Black Acrylic (Laser Cut)
Because the M1 is a diode laser machine, it can only handle certain colors of acrylic (black, yellow, green, orange – and I have been testing others). This is one of the few negatives to the diode laser. Any type of clear acrylic, which is a material I enjoy, can not be cut. Blue acrylic is another one that I have had no success cutting with the laser.
Here’s the good news – this black acrylic (ordered online) cut like a DREAM. As long as you don’t plan on crafting with a TON of acrylic, you’ll be good with a diode laser machine like the M1.
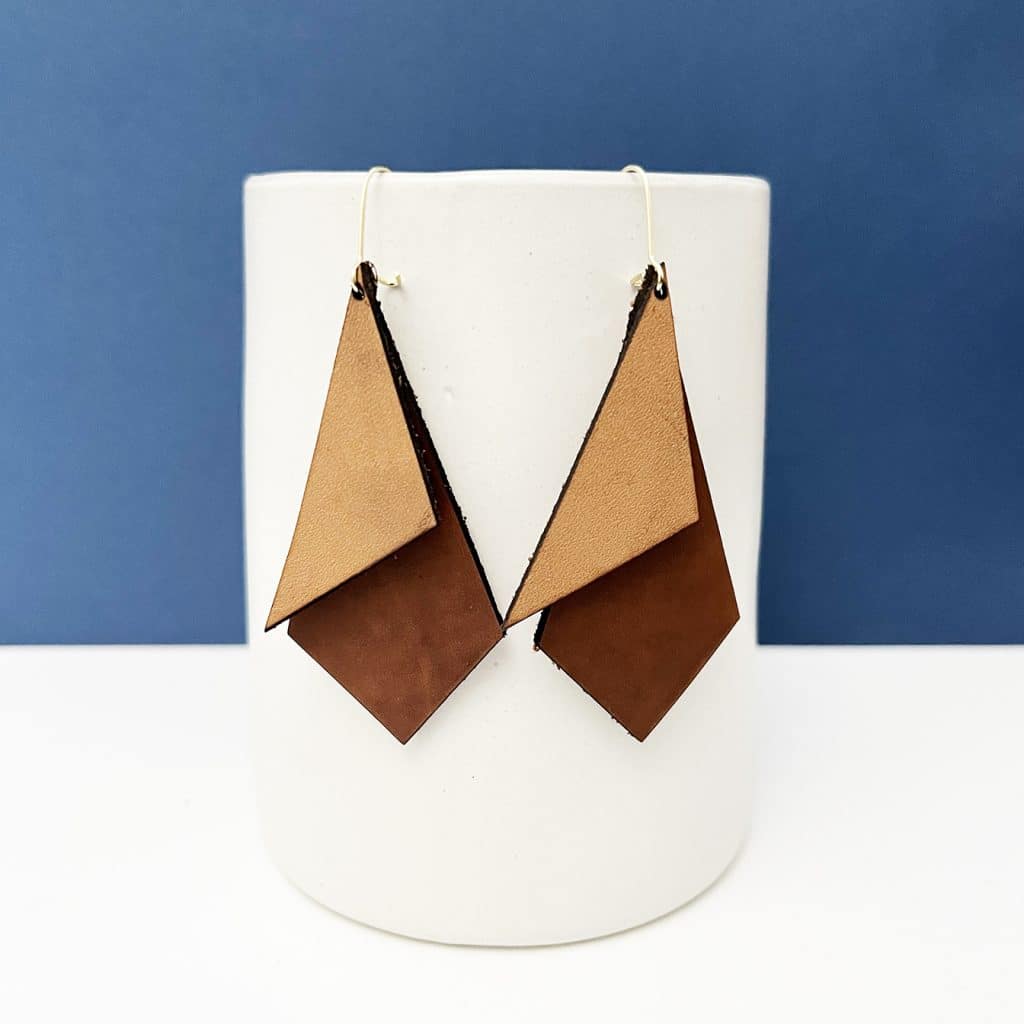
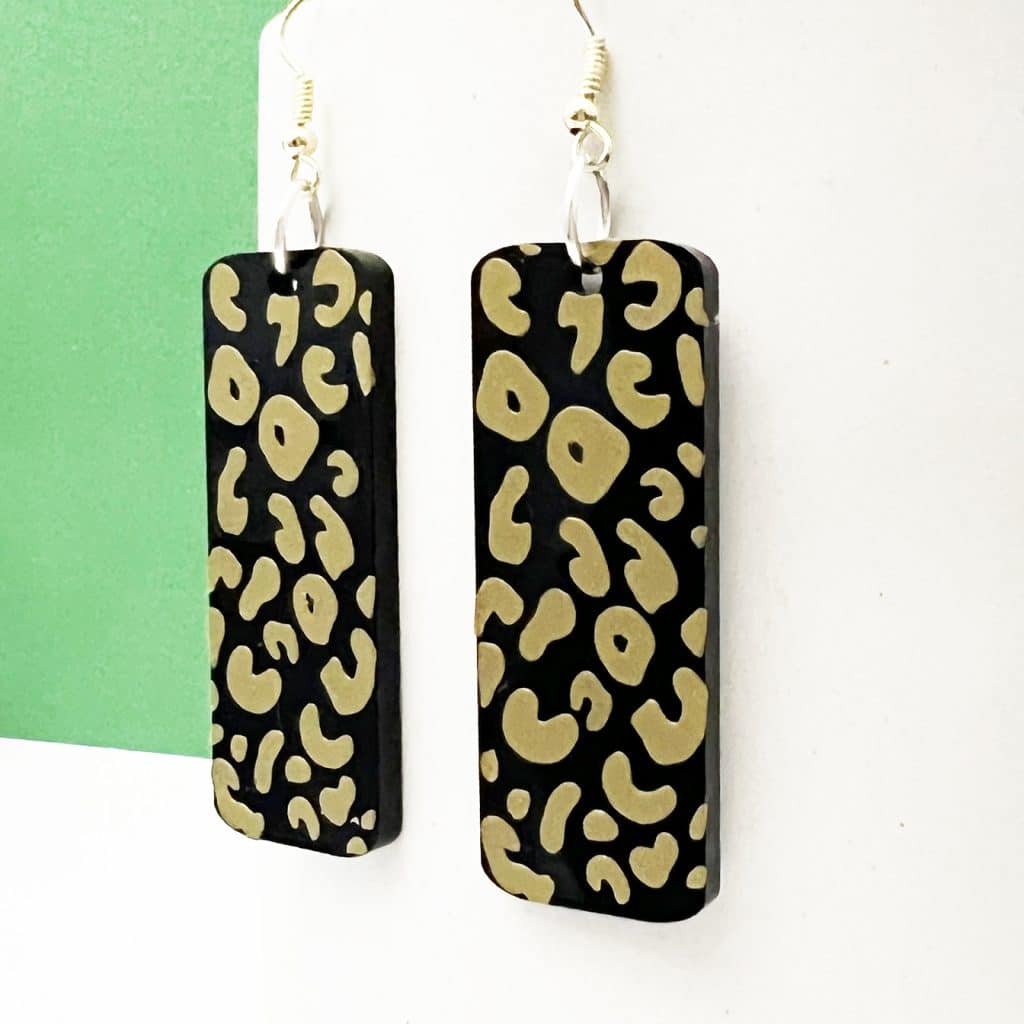
Thin and Medium Natural Leather (Laser Cut)
These earrings took a little bit of testing, but once I fine tuned the settings, this natural leather cut very well. I am not a fan of the smell when cutting it, but that’s a leather thing and not a machine thing.
Self-Adhesive Removable Vinyl (Blade Cut)
After testing the laser thoroughly, I moved to cutting vinyl with the blade. Here’s where I ran into a little bit of trouble. But it’s ok, this story has a happy ending.
The first thing to note is that the blade pressure needs to be calibrated. As of the most recent (10/2022) update, this can all be done within the Creative Space program.
If you don’t have the updated software, you will have to download a separate calibration program. This program is NOT available for Mac computers, which is a big problem for me because I have only owned Macs for the last decade. But, as soon as I told xTool about me not being able to calibrate my blade, they alerted me to the new update and I was able to do it within Creative Space. Yay!
I had to calibrate my machine blade several times before I could get it to successfully cut the removable vinyl or faux leather that was included in my materials pack. Honestly, that was kind of a bummer. However, once I got it calibrated and tested the cut settings, the blade did a great job “kiss-cutting” this Cricut vinyl.
What Does the xTool M1 Cost?
Drumroll, please! If you have been browsing laser cutters since the launch of Glowforge several years ago, you’re probably scared about how much a xTool M1 costs. But I have already told you that diode lasers are considerably cheaper to make than CO2 lasers, remember?
The 5W xTool M1 is listed at $1299 and the 10W M1 is listed at $1499. That is almost 1/5th the current price of my Glowforge Pro. WOW, right?
Here’s the best part – I have seen them online (in fact at the time I wrote this post) at $899 for the 5W and $999 for the 10W. Under $1000 to add a laser engraving and cutting machine to your craft room. Obviously those prices are subject to change, but that’s a chance to save some serious money.
Even at list price, the xTool M1 is a DEAL in my opinion. The brand new Cricut Maker 3 has a list price of $429. The variety of materials that you can cut or engrave with the M1 is totally worth the upgrade.
xTool M1 Compared to Glowforge

Again, the M1 is a totally different type of laser, so you can’t quite compare it. Knowing what you now know about diode v. CO2 lasers, it’s obvious that the Glowforge is a machine with WAY more power. A diode laser will never be as powerful or as fast as a CO2 laser. But – here are my general thoughts about the M1 as a laser engraver and cutting machine!
First things first – After using the 10W machine, I don’t think I would be interested in the 5W. I am pretty happy with the power and quality of the 10W with these projects. All of the wood projects turned out great, and I was happy with the acrylic, too!
The xTool M1 has the ability to expand with the Rotary Attachment, which is a really cool idea. This is not available with any of the Glowforge machines.
If you are a beginner or hobby crafter, and you don’t own a laser machine – honestly, the M1 might be the machine for you. It’s very easy to use, and it is a good machine to introduce you to the world of laser crafting.
Let’s say you’re a pretty experienced crafter, but want to try out laser cutting and engraving. If you want to make personal items or gifts for family and friends – you may want to upgrade to a slightly more powerful machine like the S1 40W diode. It’s a little more expensive, but in my opinion you get more machine for just a little more money.
If you are an experienced crafter and really want to get into laser crafts, or you’re considering adding laser crafts to your busy Etsy shop, website, or craft shows, I wouldn’t recommend this machine. If you are working in large product batches, want to make ALL the acrylic projects, have lots of heavily engraved items, or just need to pump out projects quickly, the M1 isn’t for you. Actually, no diode laser is going to cut it for you (haha, laser joke). You really should look into a 40W or more powerful Co2 laser. xTool makes the 55W P2 and I really like it and recommend it!
xTool M1 Compared to Cricut
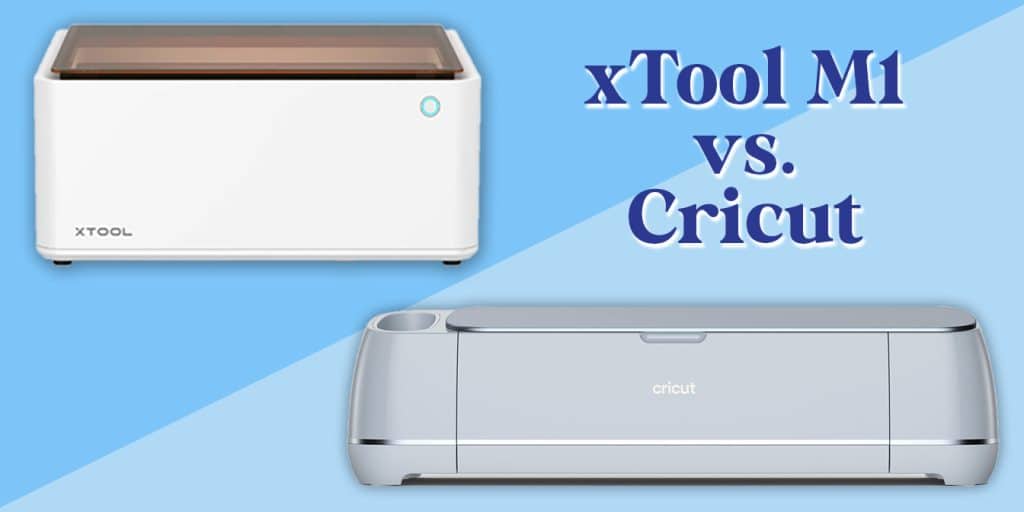
I have used my Cricut machines for YEARS, and I have built a business around designing files and crafting with my machines. I love my Cricut, and it isn’t going anywhere.
Obviously Cricut machines have a blade only. Which is totally fine. That’s what the Cricut system is designed to do. So if you love your Cricut, and you’re looking to level up your crafting, you 100% could add an xTool to your craft room. I would consider this machine JUST based on the laser alone. It’s a great tool, and I love having the ability to craft so many more projects with a wider variety of materials.
If you don’t have a Cricut, but you really want to jump into paper or vinyl crafting I’m not going to recommend that you only purchase a xTool M1 so you can own only a hybrid machine. The Cricut machine works with paper, vinyl, HTV, and other traditional materials with ease. That is a Cricut’s job, and it does it well!
In addition, the Cricut Maker has an expandable tool system that enables you to use many more tools than just a 45 degree blade. With the scoring tool, rotary blade, foil tool system, and many other blades and tools, the Cricut is a clear winner if you’re into paper crafts.
But, if you don’t own a Cricut or Silhouette machine, want to get into laser crafts, and maybe TRY some of the vinyl or paper crafts, the xTool M1 is a GREAT IDEA. Especially if you don’t have room in your budget for both a laser machine AND a blade cutting machine, the xTool M1 is the perfect way to get BOTH at one time! Then, once you make some projects with the blade and decide if you really like it, you could invest in a crafting machine just for those projects.
Overall xTool M1 Review
I’ll be honest, I was really skeptical of this machine. I had seen a few reviews of the 5W xTool M1, and I didn’t think I really wanted to try it. But, this machine surprised the heck out of me.
I can 1000% percent see that a lot of you will LOVE this machine, purely because of the price. I personally think that if you are interested in a diode laser that the S1 20W or 40W diode laser machine may be the best budget friendly laser engraver you can buy. Gaining the ability to add wood, acrylic, and metal to the materials you can craft with is an amazing feeling.
Here are my honest xTool M1 review notes:
- This machine requires a lot of material and cut setting testing. Especially if you are an experienced Cricut owner. If you want to make a quick ornament, paper card or shirt with a new material you’ve been wanting to try, you don’t want always to spend 30 minutes testing all of cut settings and wasting product. Because I can cut and engrave so many more materials with the M1, this doesn’t really bother me in the end.
If you have recently dipped your toes into sublimation printing, it feels a lot like that. A little annoying, but the results are totally worth it. I don’t think this is a deal breaker, as long as you’re aware what you’re getting into.
I recommend that you test small shapes (I like using stars, because there are corners) before jumping into your full project, as well as write your settings down for different materials so you can reference them later. - Note on Materials. Larger materials that you can pick up at your local craft store or building supplies store will likely need to be cut down to fit in the xTool M1. Just make sure you have the tools to do that! Of course, you can always buy xTool-specific materials on the xTool website.
- The 10W xTool M1 is the way to go. For the small increase in price, you double your power and speed. After reading 5W M1 reviews from others, I wouldn’t consider it.
- If you are a Cricut owner or have experience using a CO2 laser such as the Glowforge, this machine is considerably slower. The speed difference is really noticeable, so don’t be surprised by that. Remind yourself that you didn’t just spend $7k on a CO2 laser, and you’ll be VERY happy. But if you want to start a fast paced business with an M1, you need to look at more powerful machines. The S1 40W will get you the same speed as a CO2 laser, but you will still have the limitations as all diode lasers.
- xTool Creative Space works perfectly fine as a basic program. I don’t plan on using it to design anything, so it really doesn’t bother me. But if you aren’t as familiar with more powerful design programs, you can definitely work with Creative Space to design simple projects. The ability to import free or paid designs WELL is why I am more than fine with recommending Creative Space. You can learn programs like Inkscape, Silhouette Studio, or Adobe Illustrator if you want to design more complex projects.
- For the money, the xTool M1 10W is a GREAT BUY. The affordable price is the main selling point, in my opinion. It would make an amazing gift for a beginner laser crafter, especially if you’ve been scared off by the price of a Glowforge. You can buy every accessory for the M1 and a selection of supplies for less than 1/2 of the price of a basic CO2 laser.
Engraving tumblers and making wood projects are SO popular right now, and the M1 gets you into those projects really fast! - I really think that if you are interested in the M1 that you should consider upgrading to the xTool S1 diode laser machine. It offers SO much more power and speed and is still 1/2 the price of a CO2 laser.
If you want to learn more about the xTool M1, make sure you subscribe to my xTool mailing list and my YouTube channel. I have an unboxing video as well as a review video coming soon, and I plan to share a ton more tutorials and projects using the xTool M1.
Cut and Engrave with Ease!
Get the xTool P2 55W CO2 Laser Cutter
use code: pineapplepaperco for $80 off $999 or more
RECENT POSTS:
- Wicked Coloring Pages to Print for Free
- Free Thanksgiving Turkey Coloring Page Printable
- Free Printable Thanksgiving Meal Planner & Grocery List
- xTool M1 Ultra Beginner’s Guide and Review
- Free Best Dad Ever Father’s Day Coloring Page


I would love using clear acrylics so I put my tiny brain to work and think I might have a solution. You can try painting them first with a washable paint. Then cut, then wash off the paint. It is just a thought.
Thank you for taking time to review this machine.