DIY Snow Globe Tumbler
This post and the photos within it may contain affiliate links. As an Amazon associate I earn from qualifying purchases. If you make a purchase through one or more of the links, I may receive a small commission at no extra cost to you.
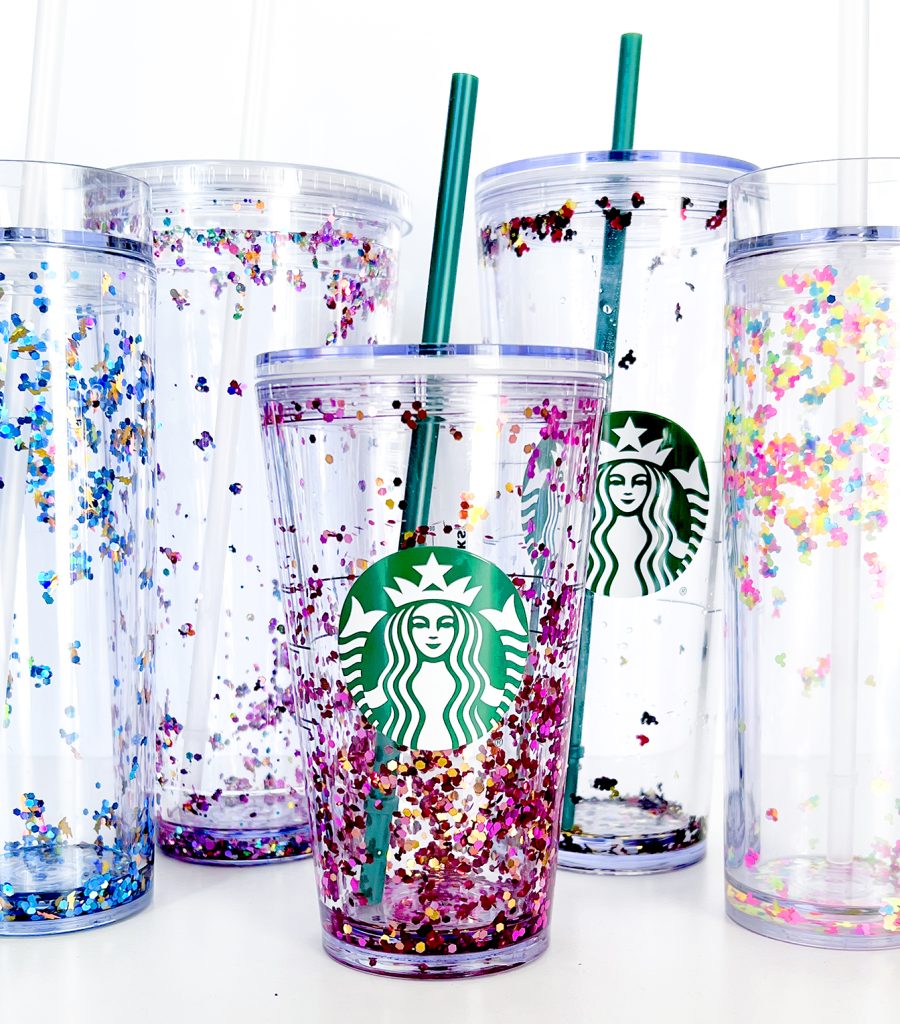
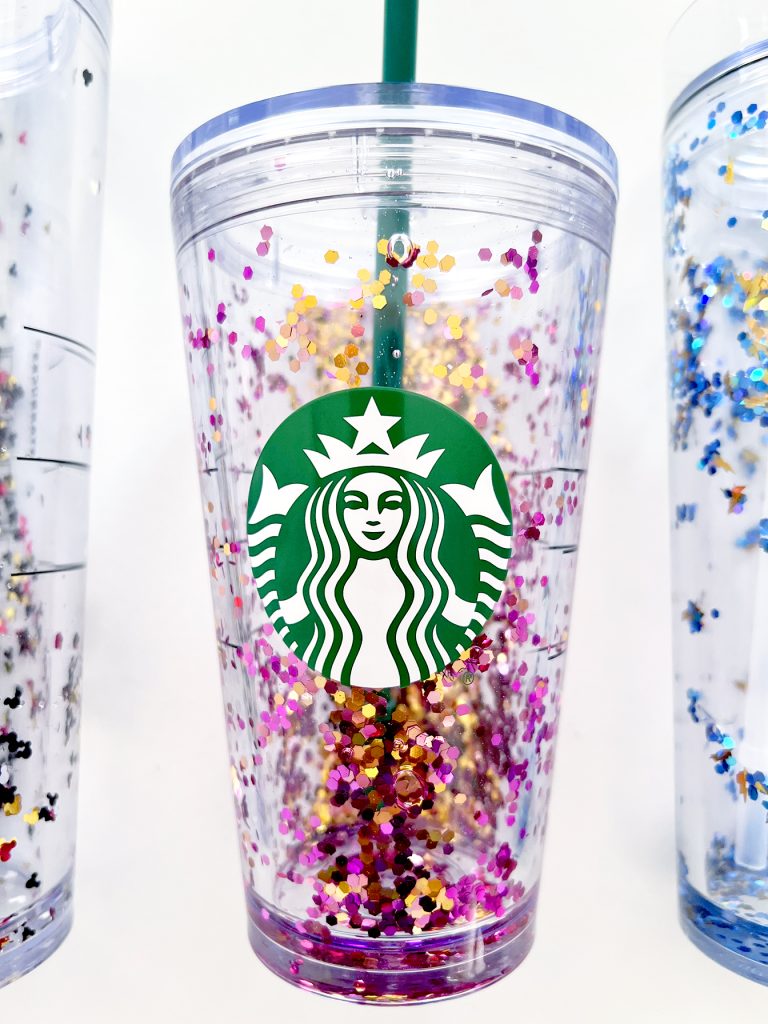
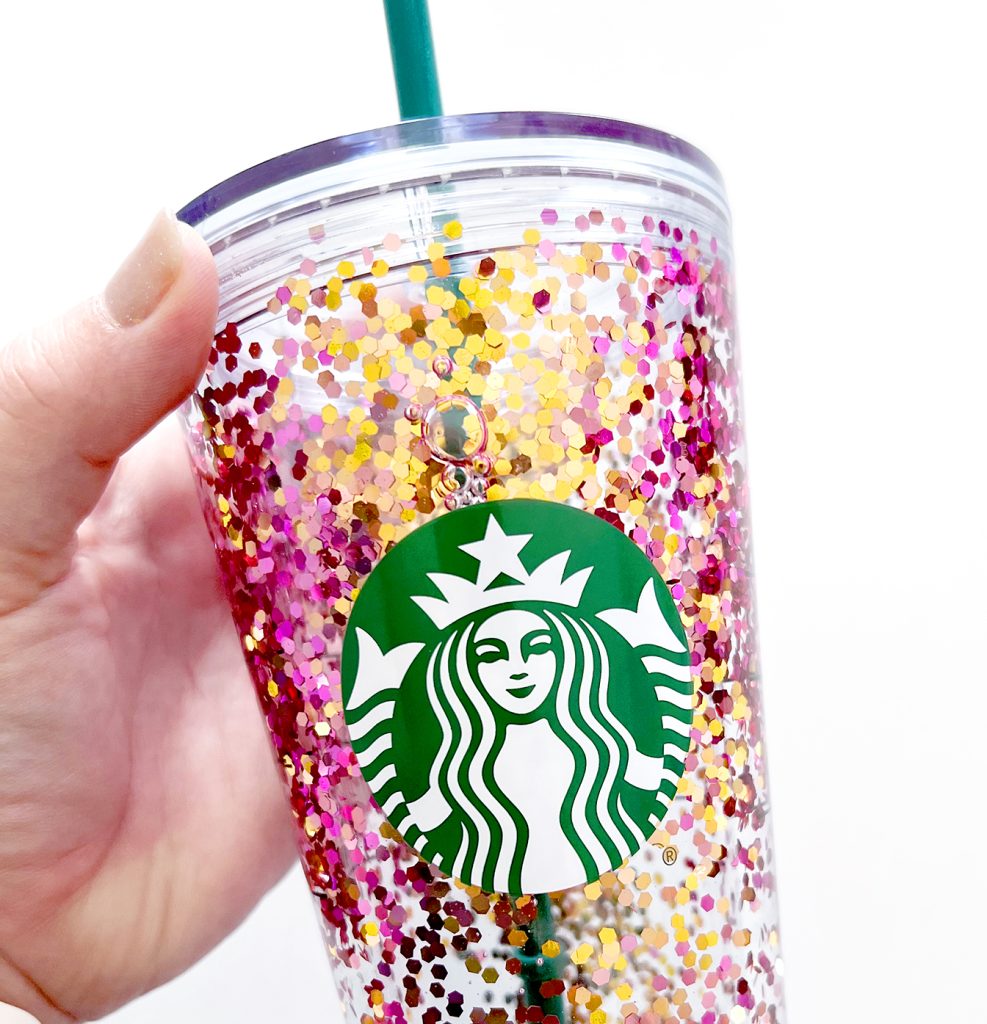
Did you know that you can add glitter to a plain Starbucks tumbler to make a snow globe tumbler? Learn How to Make a Snow Globe Tumbler with an easy step by step tutorial for drill and no drill methods! With a few supplies you can have a fun and unique snow globe tumbler with floating glitter!

I’m totally obsessed with all of the snow globe tumblers that I’ve seen on social media. I absolutely love using Starbucks cold cups in crafts, so I couldn’t wait to try this trend. They make a perfect gift, too!
I was really surprised! Snow globe tumblers are really easy to make and are SO much easier that traditional glitter tumblers covered with epoxy. I finished my first Starbucks snow globe tumbler in about 15 minutes! If you make your own glitter tumblers, you will know that they normally take multiple days.
Related Post: Sublimation Tumblers: Everything You Need to Know
The basic instructions to make a snow globe tumbler with floating glitter are simple! You will drill a hole in the bottom of a double walled tumbler, add a dispersion liquid and glitter, and then seal it off with UV resin. That’s it! I will cover all of the details, plus tips and tricks that I learned while making all of these cups!
UPDATE! I’ll also show you how to make a No Drill Acrylic Snow Globe Tumbler below! You can use either method depending on what supplies you have. I have had success with both a drill and the hot fix applicator tool.
Don’t want to forget this project? Send it right to your email so you can find it later!
What Do I Need to Make Snow Globe Tumblers?
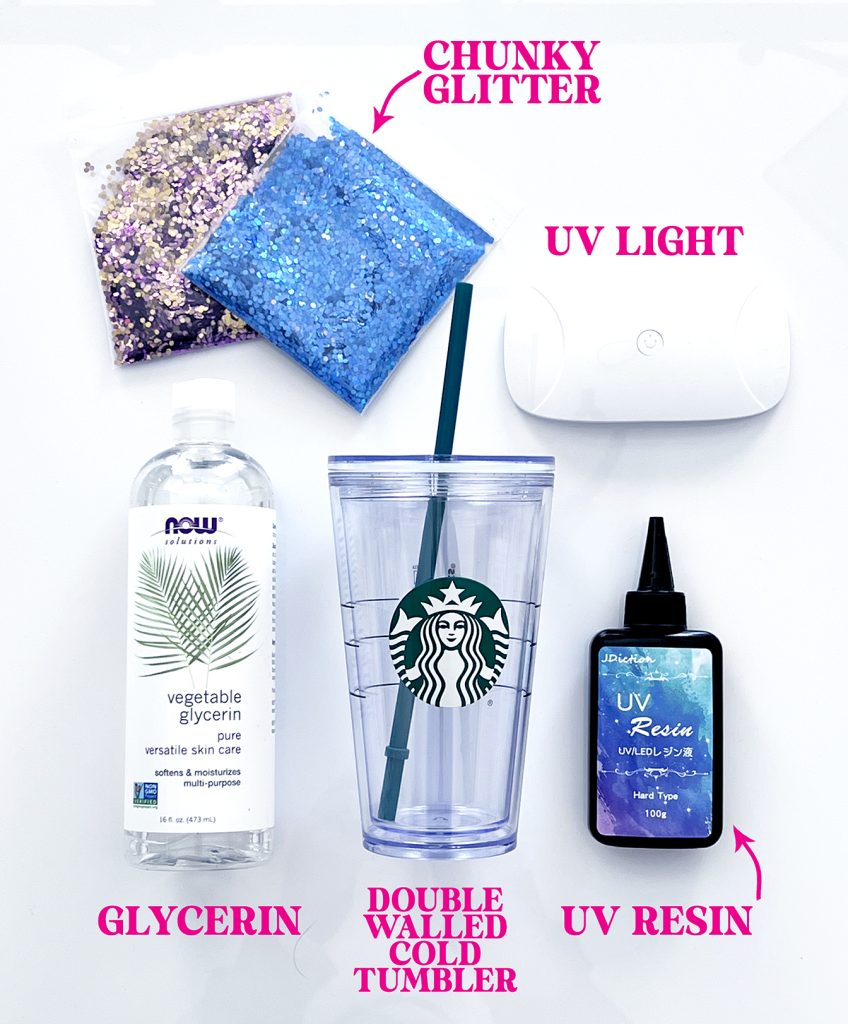
Here are all of the Starbucks snow globe tumbler supplies. No, you don’t need to buy Starbucks tumblers to make this project! I’ll link my favorite generic clear double walled tumblers below.
- 16oz Starbucks Tumbler ($10.95 in store)
- 24oz Starbucks Tumbler ($14.95 in store)
- Large Tapered Plastic Tumbler
- Straight Plastic Double Walled Tumbler
- Drill and Medium Drill Bit
- Vegetable Glycerin or Clear Glue
- Syringe or Pipette
- Chunky Glitter
- UV Resin + Small UV Lamp
- Optional: Clear Furniture Bumpers to fill tumbler hole (get the size to match your drill bit or hot tool tip.)
- Hot Fix Applicator Tool for Non Drill method
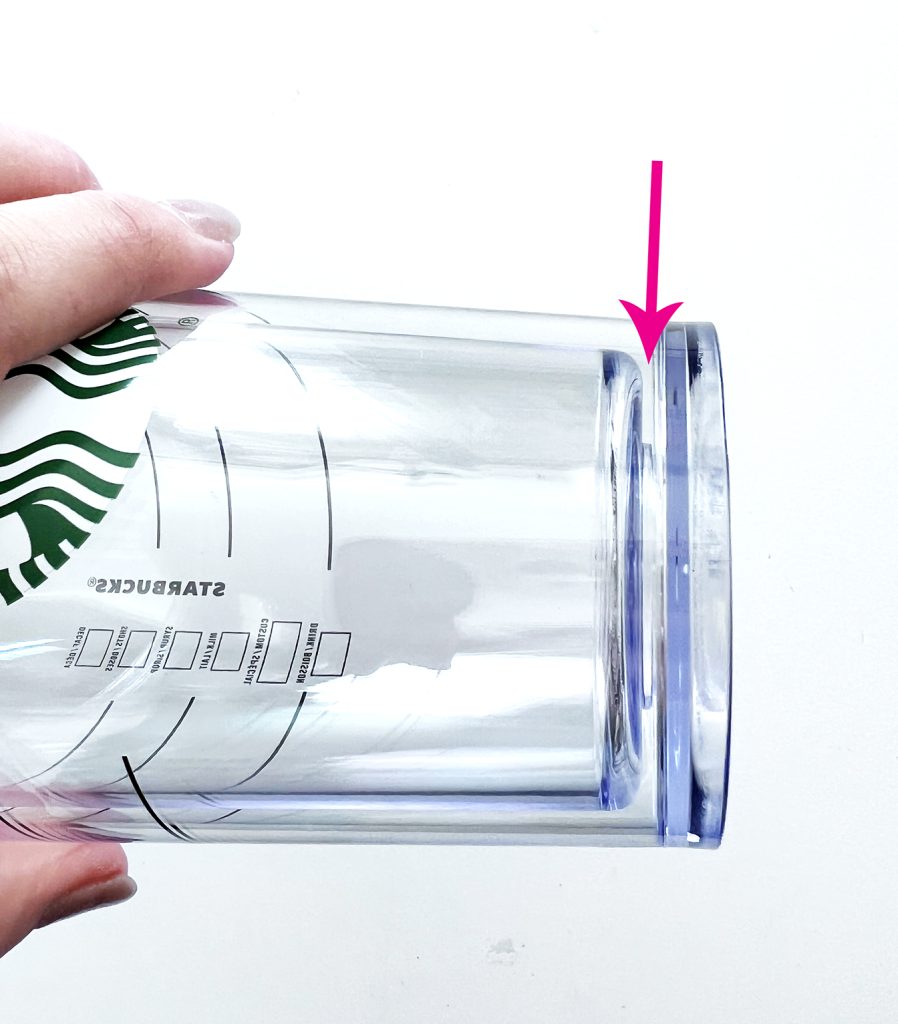
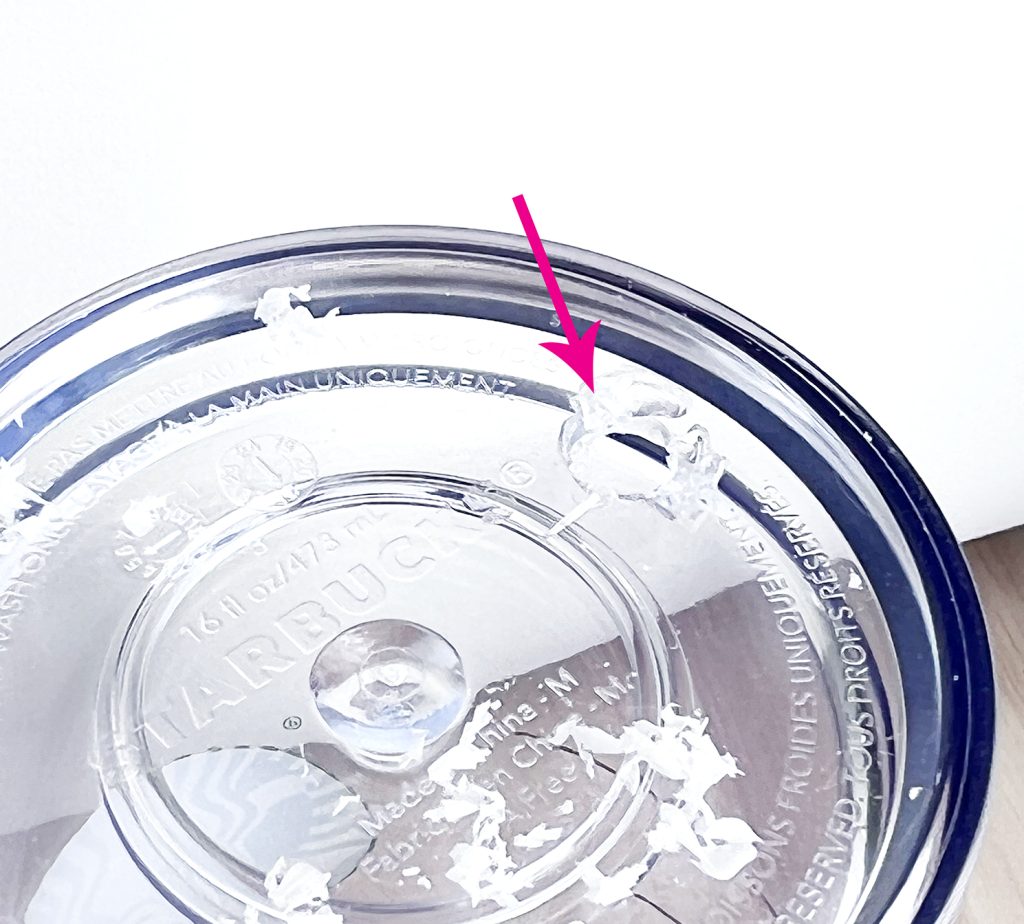
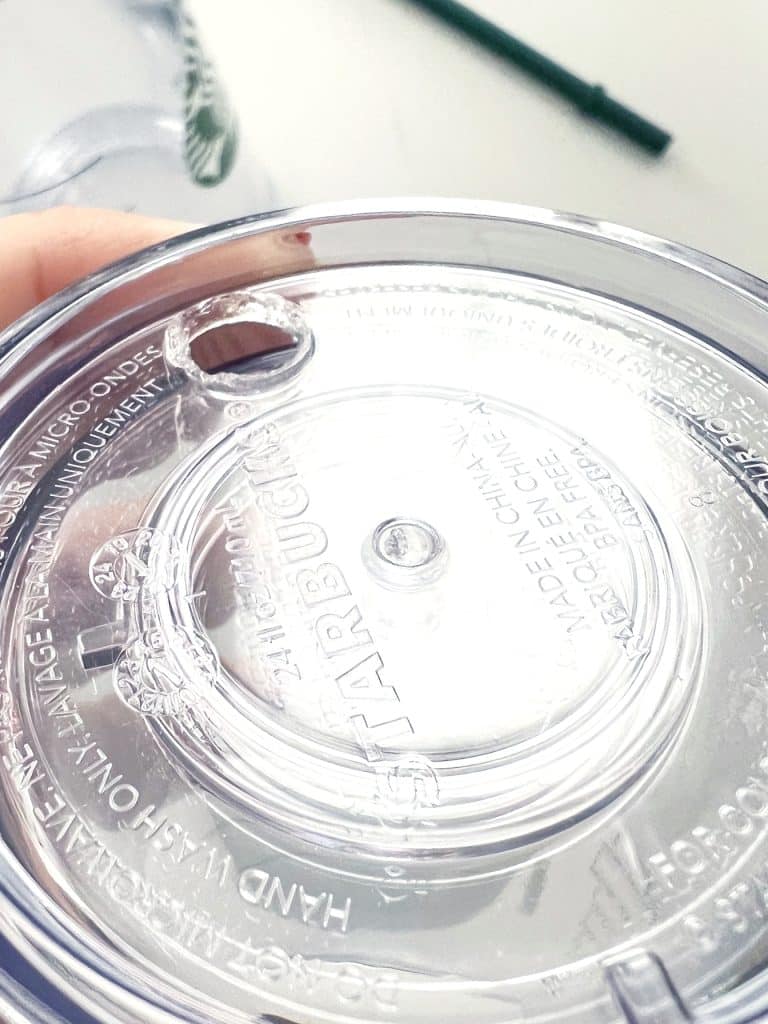
Only certain tumblers can be used to make a snow globe cup. Look for double walled tumblers that are permanently sealed at the top by the manufacturer. If you look at the bottom of the cup, you will be able to see the gap where your liquid and glitter will go. If you don’t see this gap, you have the wrong kind of tumbler.
What Liquid Goes in a Snow Globe Tumbler?
More than water is required to make your glitter float! You have two secret ingredients to choose from to make the best liquid to suspend your glitter: vegetable glycerin or clear glue. I prefer vegetable glycerin! You can find it in a lot of health food and grocery stores as well as on Amazon. I added glue to my supply list because there are a lot of people that prefer clear glue over glycerin.
Vegetable glycerin has a consistency similar to vegetable oil but is clear. When you mix the glycerin with water, it creates a solution that will suspend your glitter, allowing it to float and move around in the cup.
What is the Ratio of Glycerin to Water for a Snow Globe Tumbler?
The question I get asked most often is How Much Glycerin Do I Need to Make a Snow Globe Tumbler? I use a ratio of 1/4 glycerin to 3/4 water for snow globe tumblers. This gives the glitter tons of movement in the cup.
You can adjust your water mixture depending on how you want the glitter to move. More glycerin = slower movement. Less glycerin = less suspension. You can try different mixtures to see how your glitter moves in different ways. Find the ratio that you prefer and go with it!
Clear glue creates a thicker dispersion liquid and will result in a slower movement of your glitter mixture.
How to Make a Starbucks Snow Globe Tumbler
This is the easiest way I have found to make a snow globe tumbler. It’s so much fun and is one of my new favorite crafts! It’s also perfect as a DIY gift for the holidays.
The first step is to drill a hole in the bottom of the tumbler. Use an electric drill fitted with a medium sized drill bit. You want it to be big enough for your syringe and glitter to fit comfortably.
Drill the hole near the edge of the tumbler so that the water and glitter will travel down the edge of the cup.
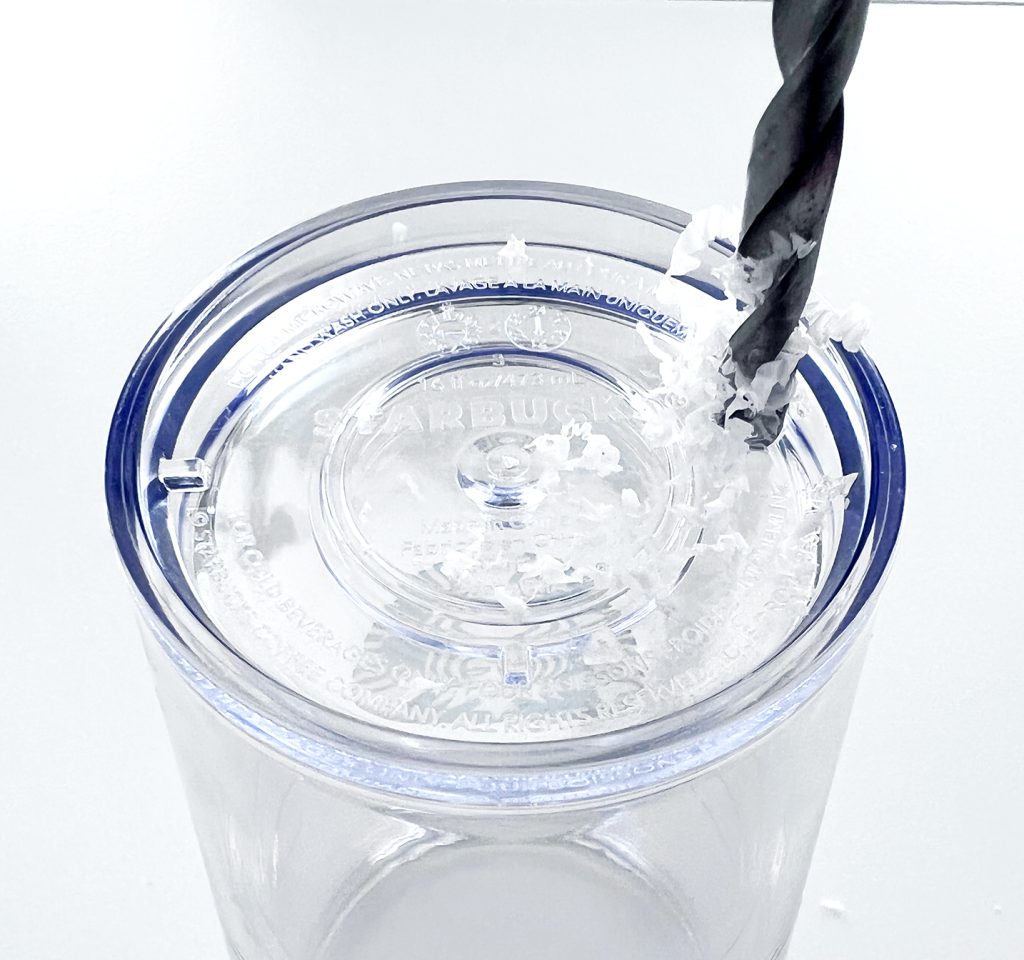
Use vertical pressure to slowly drill through the outer wall of the cup. Be careful – plastic tumblers can break easily. As soon as you puncture the outer layer of the cup, reverse your drill bit to remove. You definitely do not want to puncture the inner wall of the cup.
Add glycerin and warm water to a small plastic cup to prepare your suspension liquid. You will only use a few ounces depending on the size of your tumbler.
If you are making a lot of tumblers for a craft fair or other event, you can increase the amount but placing 1 cup glycerin to 3 cups water in a large container.
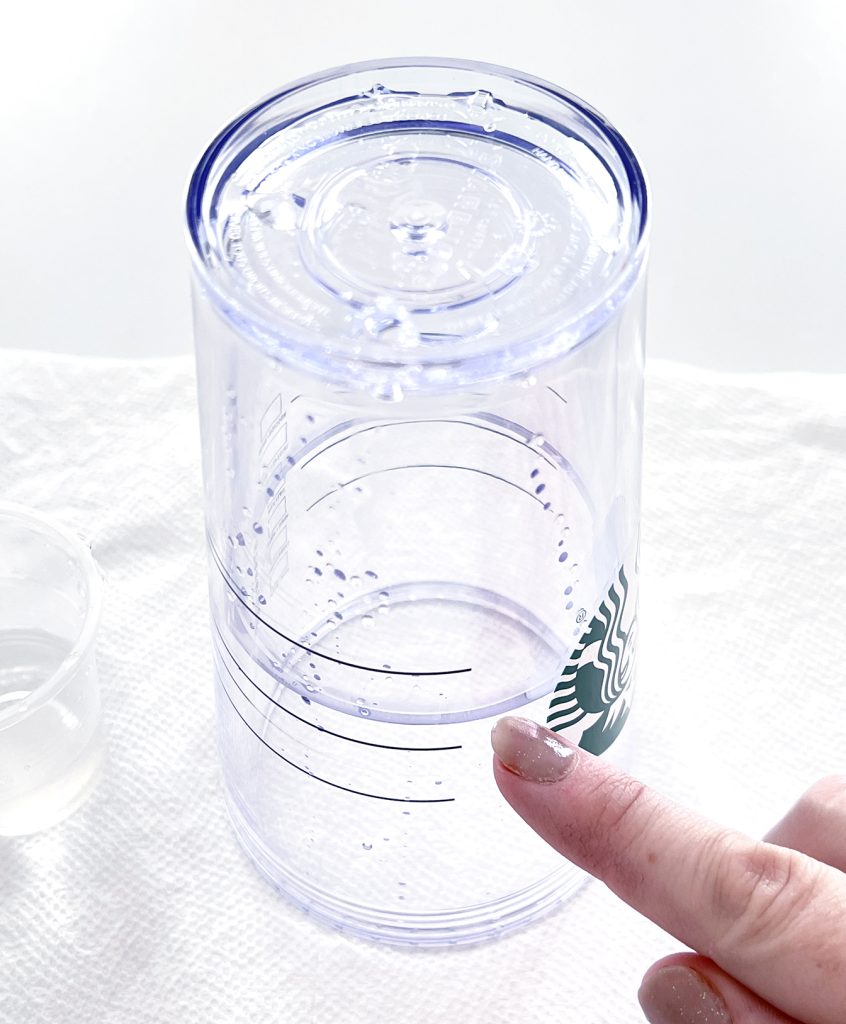
Use a syringe or pipette on to squeeze a small amount of the water mixture into the tumbler. If you angle your water tool to the side of the tumbler, it will fill more easily.
Continue to fill the cup until it is about 1/2 way full.
Next, add the chunky glitter to the cup. I find that the easiest way is to put some glitter on top of the cup and use a toothpick or the end of the pipette to push it down into the hole. You can also use a small funnel, but will still end up pushing it in.
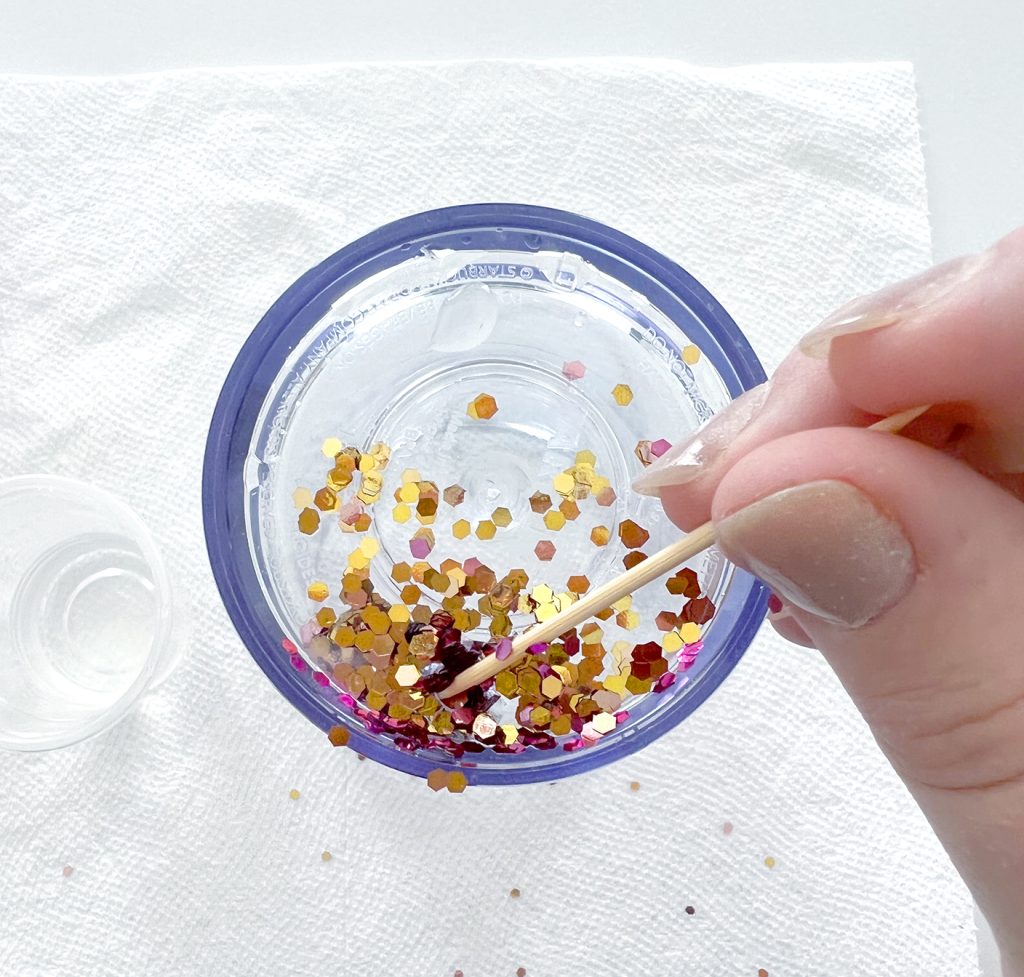
Continue to alternate adding liquid and glitter until the cup is full. When you find that it is difficult to push the glitter in, use the water to force the glitter in between the walls of the cup.
Add enough glitter that it will look good in the cup. There’s no exact amount that you need, but more so what you want you cup to look like in the end.
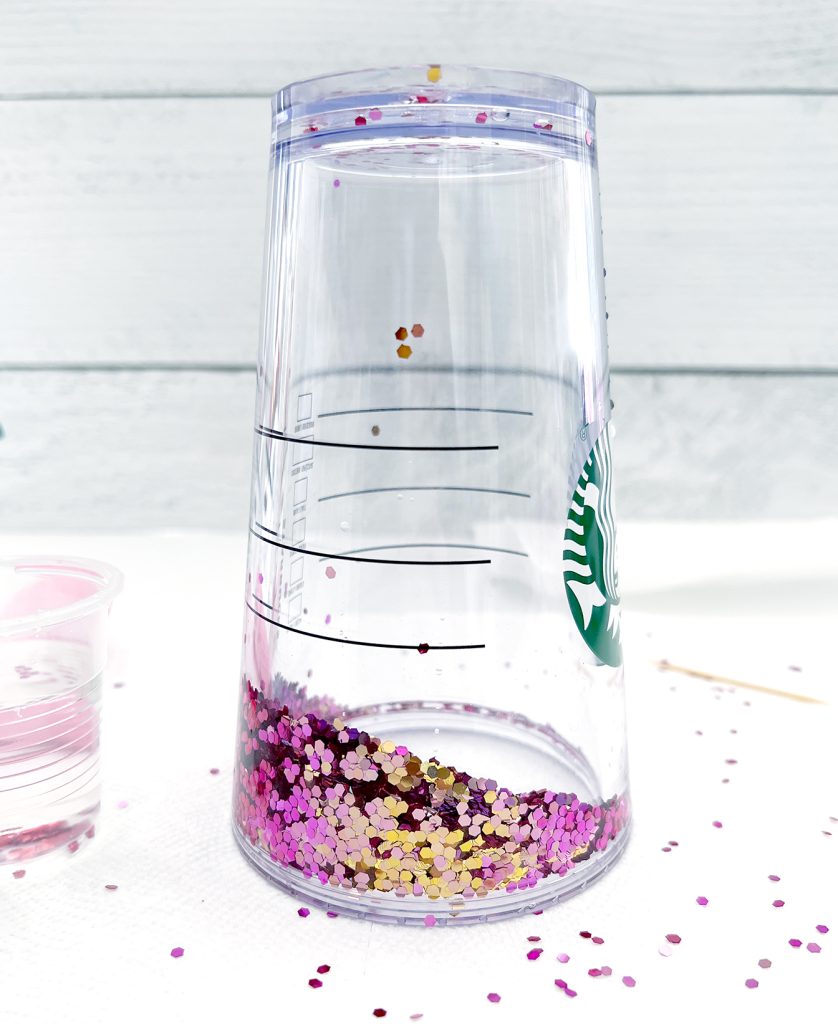
Once the liquid has reached the top of the cup, you’re done! Make sure there are no visible air bubbles at the top of the cup. You can tilt the cup to bring air bubbles to the hole and continue to add water.
Use an alcohol wipe to clean the bottom of your tumbler. Rubbing alcohol will remove any oils or glue left from your water mixture so that the resin will adhere well to your tumbler.
How to Seal a Snow Globe Tumbler
You will seal the hole of the glitter snowglobe Starbucks tumbler with UV resin. UV resin generally comes in small bottles and instead of air drying, will cure when exposed to UV light (including sunlight). There are UV resin and lamp kits on Amazon for a great price.
Since UV resin will harden when exposed to direct sunlight, make sure to work in a shaded area outside or in a well ventilated area inside. You will notice that it comes in dark bottles so that it is not exposed to light.
Just as when you use traditional epoxy methods, be sure to wear an approved mask. UV resin will smell as it hardens.
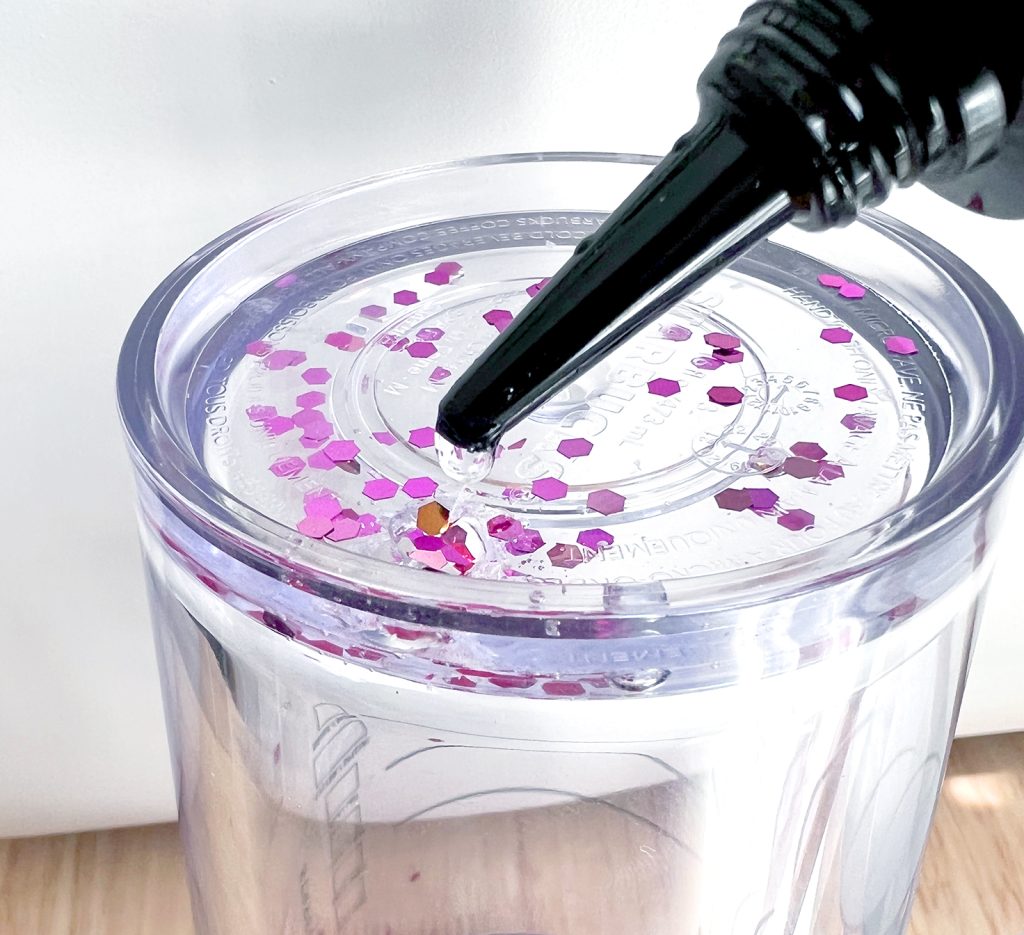
Quickly apply a small amount of UV resin in the hole of the tumbler and immediately expose it to the light from the UV lamp.
Optional: At this step, you can fill the hole with a clear furniture bumper before you seal it with UV resin.
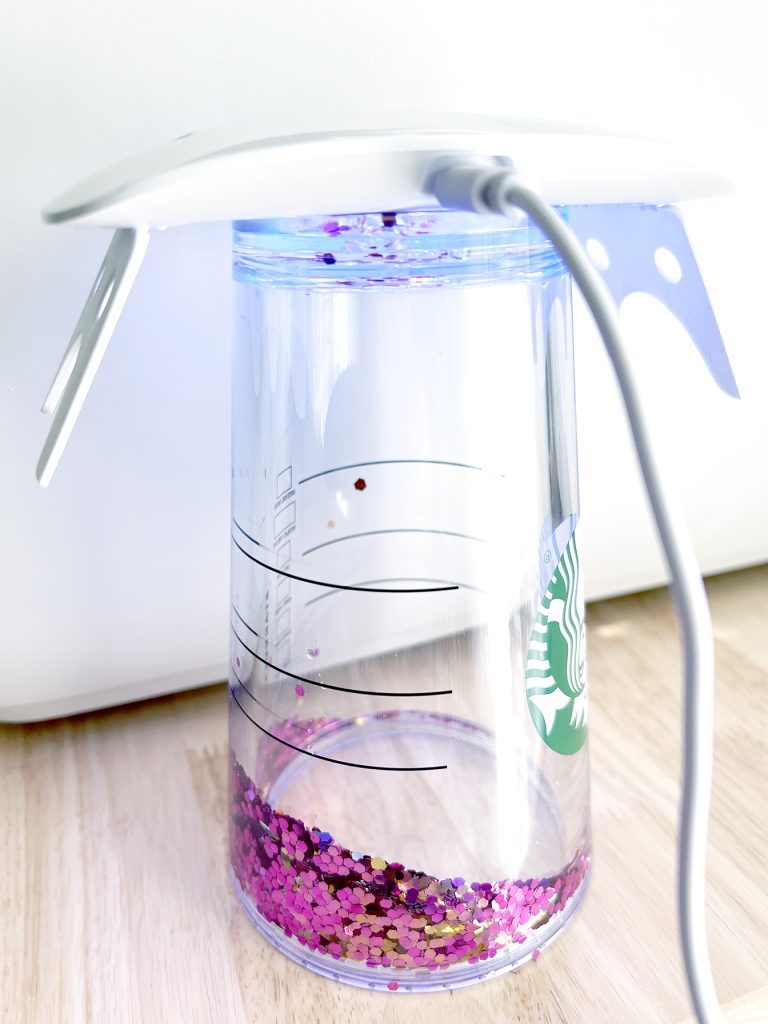
UV lamps that come with resin will likely have a built in timer, but if not, set a timer for 1 minute.
Once the resin is set, give the tumbler a good shake and make sure the resin creates a good seal.
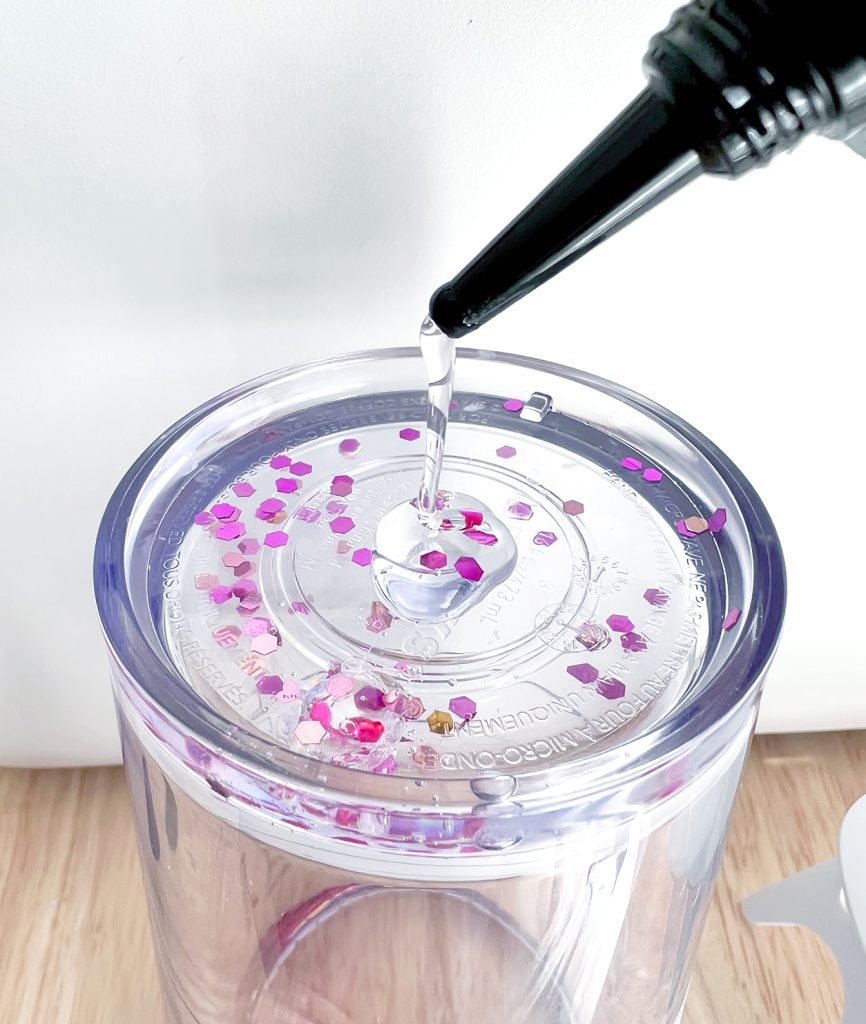
If the bottom of the cup has an inset (almost all do) I like to cover the whole inset with a thin layer of resin to ensure there will be no leaks.
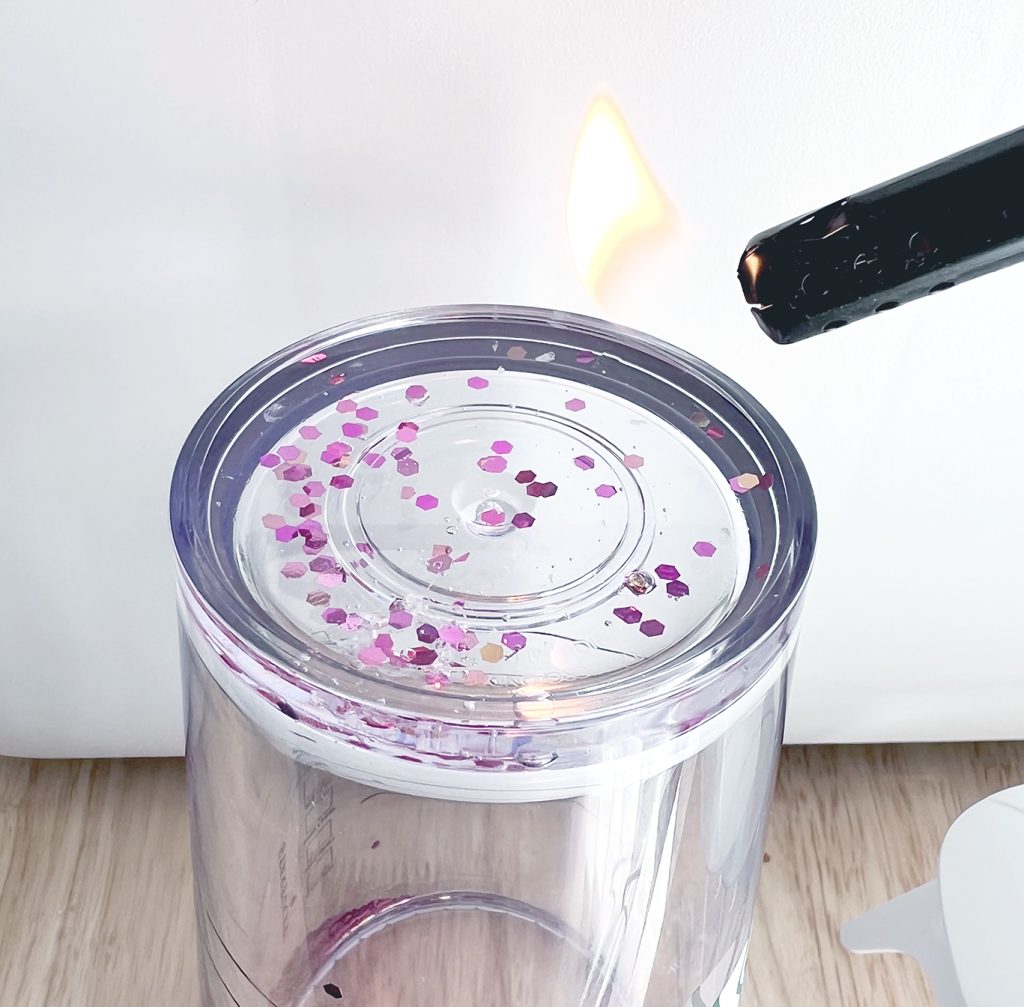
Use a lighter or heat gun and move it quickly over the surface of the resin to remove air bubbles.
Hold the UV lamp slightly above the cup and cure for two or three 1-minute cycles until the resin is completely hard.
That’s it! You have a finished cup with just a few minutes of cure time.
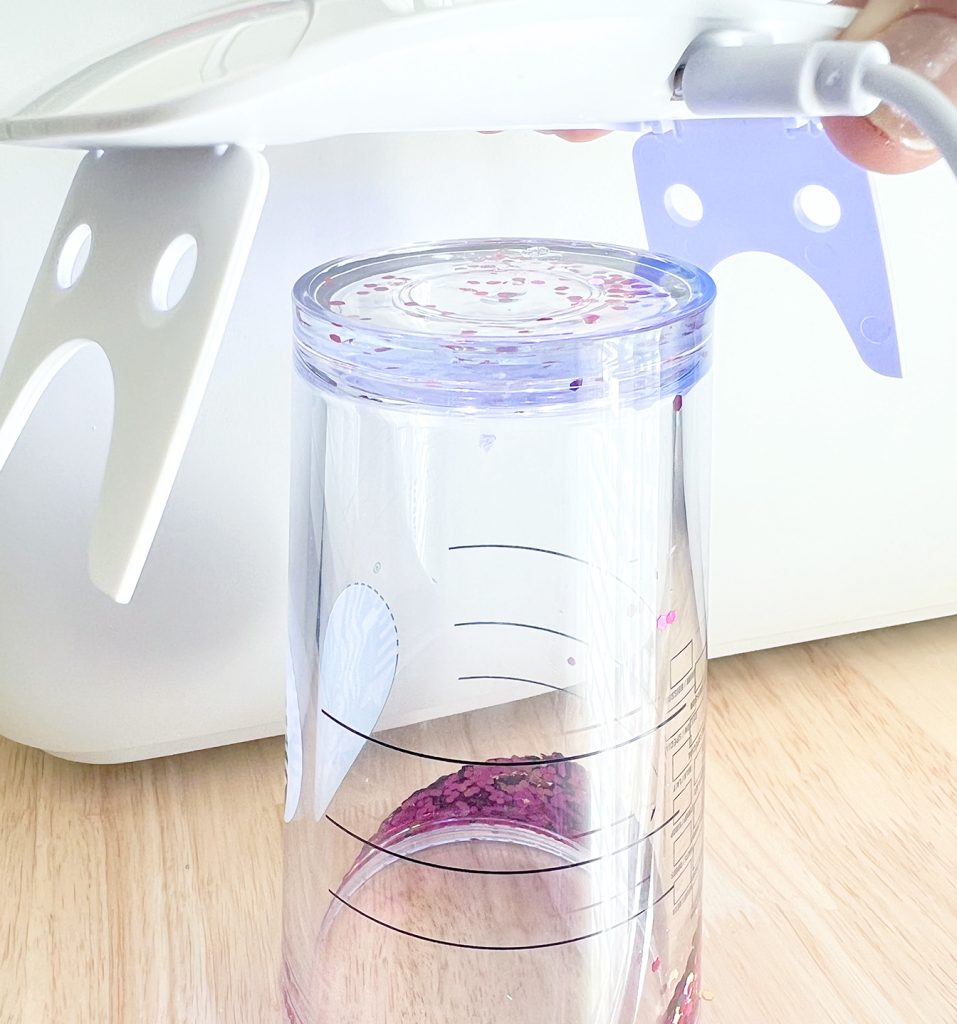
Non Drill Method to Make Snow Globe Tumblers
I just discovered how to make these glitter tumblers with a hot fix applicator! A hot fix tool is normally used to apply rhinestones to clothing. Instead, you will use the tool to melt a hole into the outer layer of a double walled acrylic tumbler. I’ve tried it and it works really well.
Hot fix tools are small and hand held, and really simple to use. They plug in and heat like a hot glue gun. This particular one that I bought on Amazon came with a small wire stand to protect your work surface from direct heat.
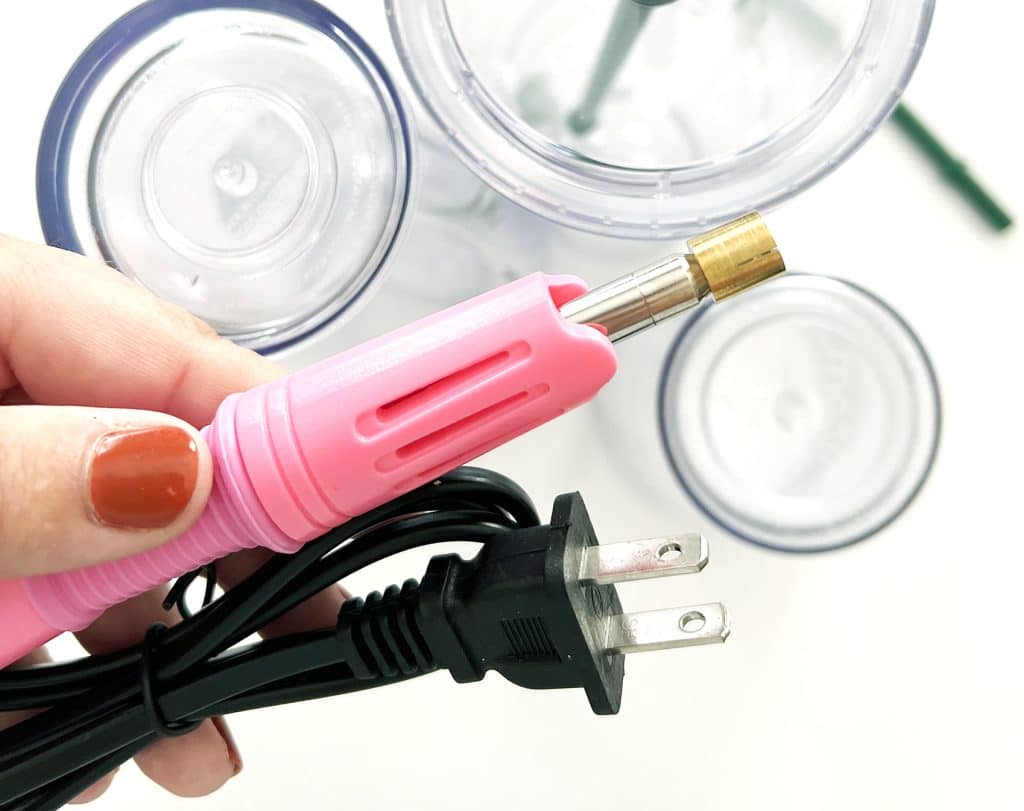
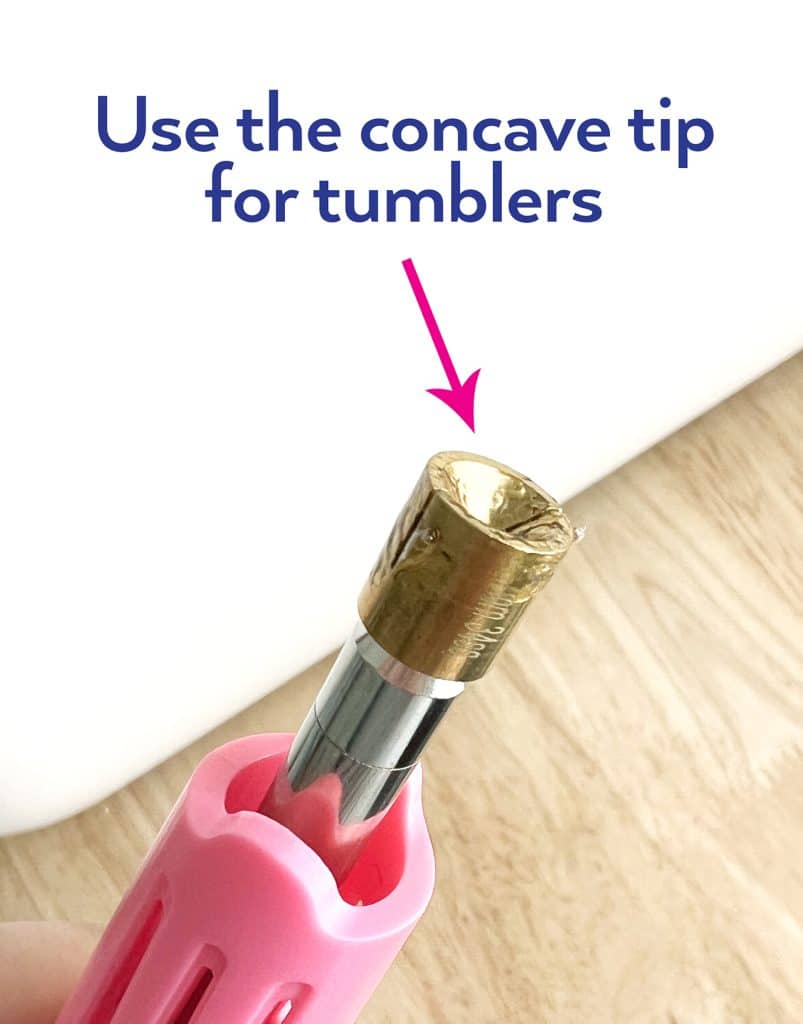
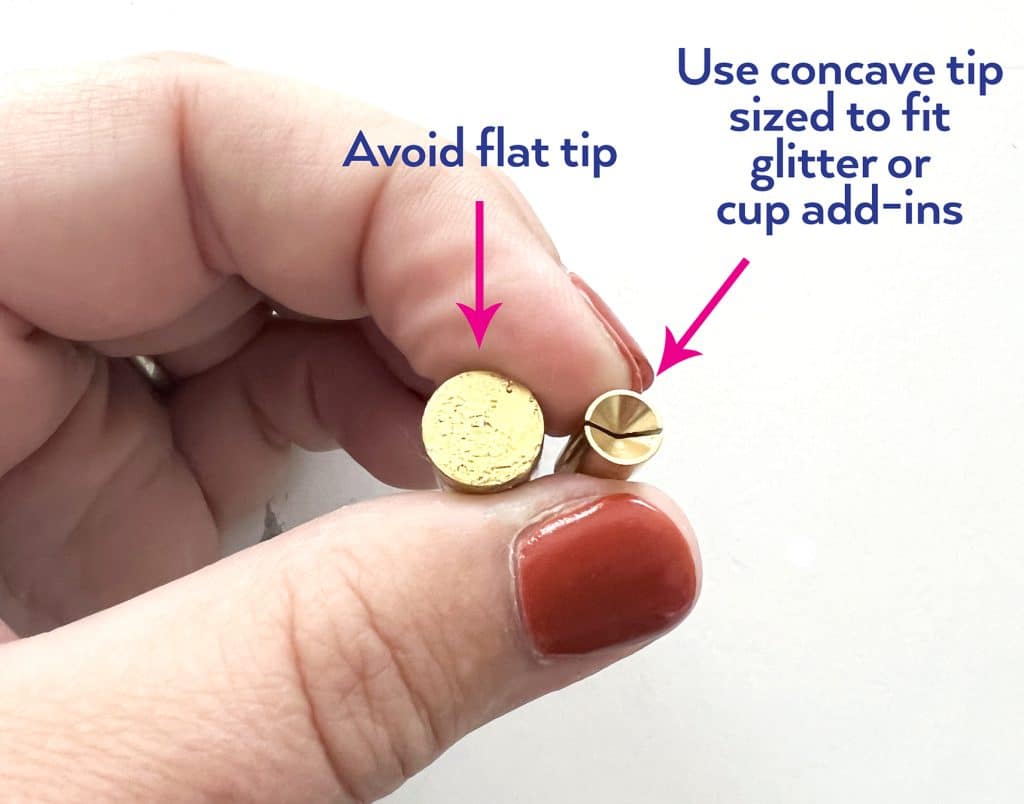
Make sure if you buy a tool, that you get one that comes with a selection of interchangeable tips. Grab one of the tips with a concave end to make a hole in the bottom of your acrylic tumbler.
Preheat the tool for 8-10 minutes to make sure it is heated the whole way. There is no heat setting for the hot fix tool, just an on/off switch.
When the tool is heated, choose a flat spot in the bottom of the cup to make the hole.
Hold the tool with even pressure and start to melt the hole carefully. You can slightly twist to make sure you have even melting.
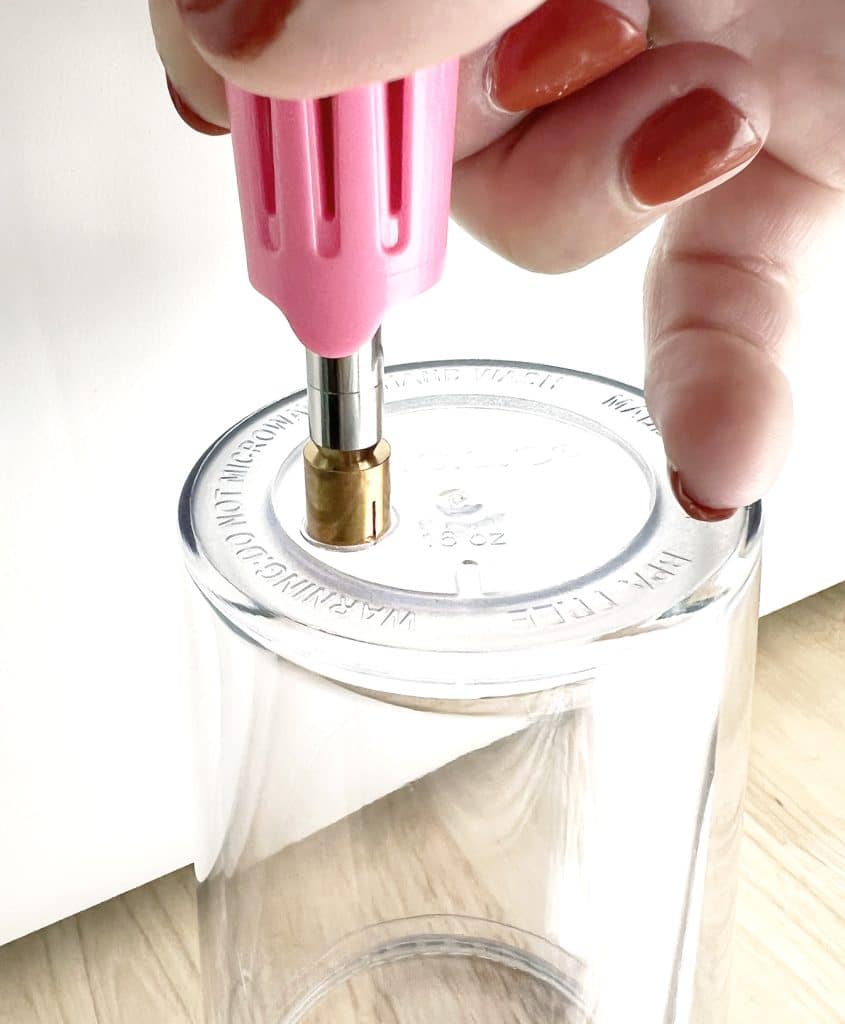
Carefully watch your cup – as soon as the tip has melted through the outer layer, quickly remove the hot fix applicator tip.
If the plastic circle remains attached to the cup, just quickly pull it out with tweezers while the acrylic is hot.

You’re left with a clean hole – with no risk of the cup cracking from the drill!
RECENT POSTS:
- Wicked Coloring Pages to Print for Free
- Free Thanksgiving Turkey Coloring Page Printable
- Free Printable Thanksgiving Meal Planner & Grocery List
- xTool M1 Ultra Beginner’s Guide and Review
- Free Best Dad Ever Father’s Day Coloring Page
Tips for Making a DIY Starbucks Glitter Snow Globe Tumbler
- Use Chunky Glitter instead of fine glitter.
Chunky glitter will move better through the glycerin solution and produce a better effect. I have found awesome glitter on Amazon and from The Glitter Guy. - Buy high quality double walled acrylic tumblers.
Starbucks cups are an extra cost, but they are thicker and will handle a larger drill bit than the generic plastic tumblers. I’ve learned this the hard way! Plastic tumblers from Amazon are made with a thinner plastic and can break easily. I recommend before drilling into a Starbucks cup, to practice on the cheaper tumblers to get the feel for it. - Make the smallest hole to fit your glitter or craft sprinkles.
If you are using a drill, you will increase the chances of cracking your cup with a large drill bit. - Use the concave Hot Fix Tool Tips for the No Drill method.
The largest tip that came with my tool is this flat tip. When I tried it, it pushed the plastic down into the space between the cup layers. The concave tips provided a space for the acrylic to melt into, and it made removal of the plastic easier.
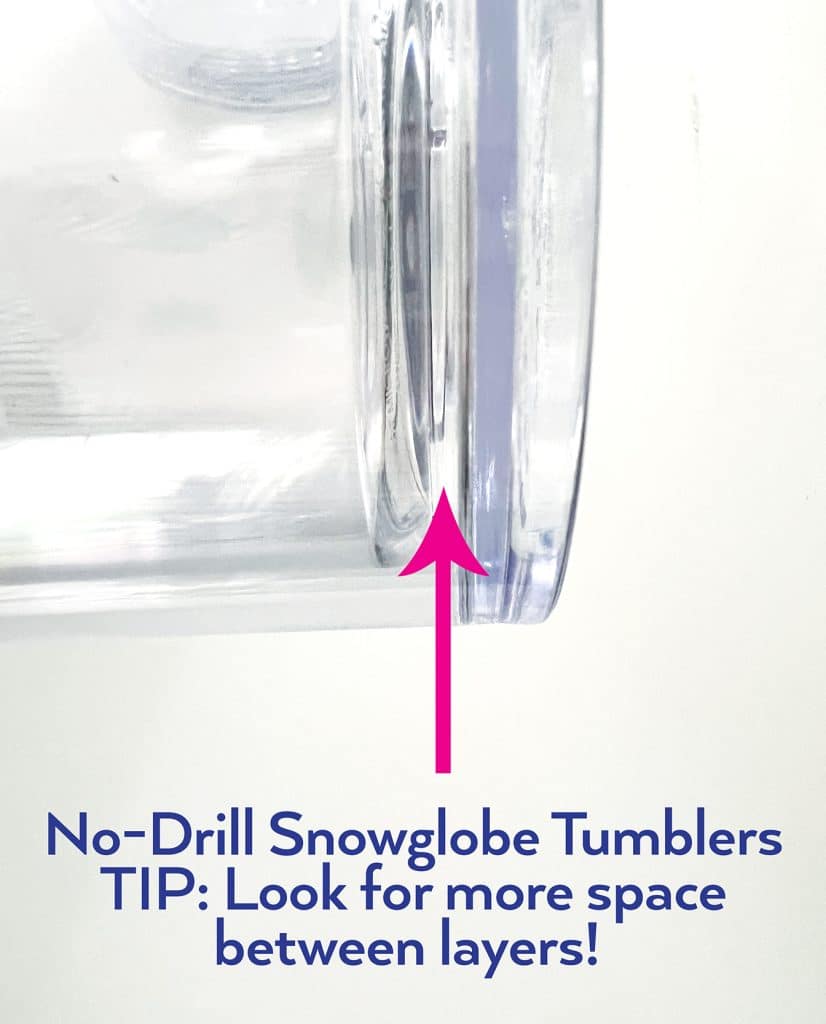
- Look for tumblers with more space between the inner and outer walls of the acrylic tumbler.
If there is more space in between the layers, there is more room for drilling or the hot fix tool to create a hole without penetrating the inner layer of the cup. As mentioned above, practice on inexpensive cups before you try to make holes in a Starbucks tumbler.
- Be okay with small air bubbles.
Obviously, try your best to get all of the air bubbles out. But don’t be surprised if a few remain! I actually don’t mind them! I noticed that the bubbles will help move the glitter around when you move your cup.
To eliminate as many air bubbles as possible, you can leave your cup sit in a secure location for a couple of days. All of the air bubbles that are stuck in the glitter will rise to the top. Then you top off with more solution. I’m not patient enough for this, so a couple of air bubbles are fine with me!
- Try a Nozzled Bottle.
Instead of using a syringe or pipette, you can mix your water solution in a squirt bottle with a nozzle and squeeze it into your drilled hole. I haven’t tried this yet, but I will the next time I make cups! I plan on using the bottles I use when I make Tie Dye Shirts. - Choose your Liquid Wisely
Is there a glycerin substitute? I have seen crafters mention glycerin alternatives such as light corn syrup, dense baby oil, or mineral oil. I have not tried either of these, so I am not sure how well they work. Oils such as castor oil or olive oil usually have a slight yellow color to them, and will not work. - Personal Use Vs. Selling your Tumblers
If you plan to sell your custom tumblers, consider adding a rubber plug to your drilled hole before you seal it with UV resin. This will hep prevent leaks. Since mine are for personal use, I didn’t take that extra step, and mine are perfectly fine! - Try Different Glitters or Plastic Craft Sprinkle Add-Ins
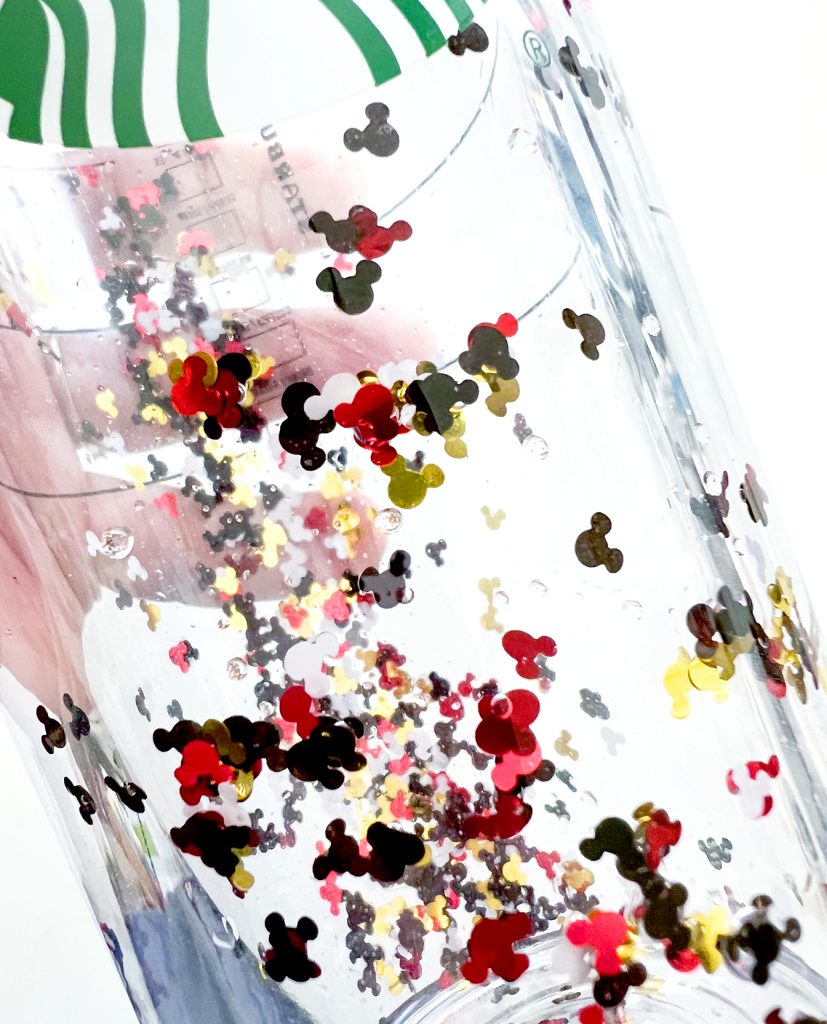
Experiment with your add ins with different kinds of glitter, or adding mica powder for a swirl effect. I found Mickey shaped chunky glitter and I love how it looks in tumblers!
- Add Vinyl Designs
You can definitely add vinyl designs to the outside of your cup! After it is sealed, you can treat it like any other Starbucks tumbler. Make a vinyl wrap, add a circle around the Starbucks logo, or personalize it with a name! Custom cups are an easy product to sell in your Etsy shop or at craft shows. They’re very popular! I’ve seen them sell for way over $50! - Many Double Walled Acrylic Tumblers Will Work
There are other double walled plastic cups. I plan to order more to make – like this mason jar version!
Related Post: I have found a ton of Starbucks SVG files you can use to decorate your tumblers!
You can also make DIY snow globe tumblers by using tumblers known as storyboard tumblers. I remember these from when I was a kid! You can unscrew the outer wall from the cup and insert photos, paper, or other items. They are not inherently waterproof! I have tried that method and it is not as easy as using sealed double walled tumblers. You have to seal story board tumblers with gorilla glue epoxy or another specialty glue, and then proceed to fill them. It’s way more work!

I hope you have enjoyed this full step by step tutorial for How to Make your Own Snow Globe Tumbler! I hope to have a little extra fun and post a video tutorial, too!
Remember to pin an image from this post to your favorite craft board on Pinterest!


This is so much easier than I had thought! I love them all, especially the Mickey one!