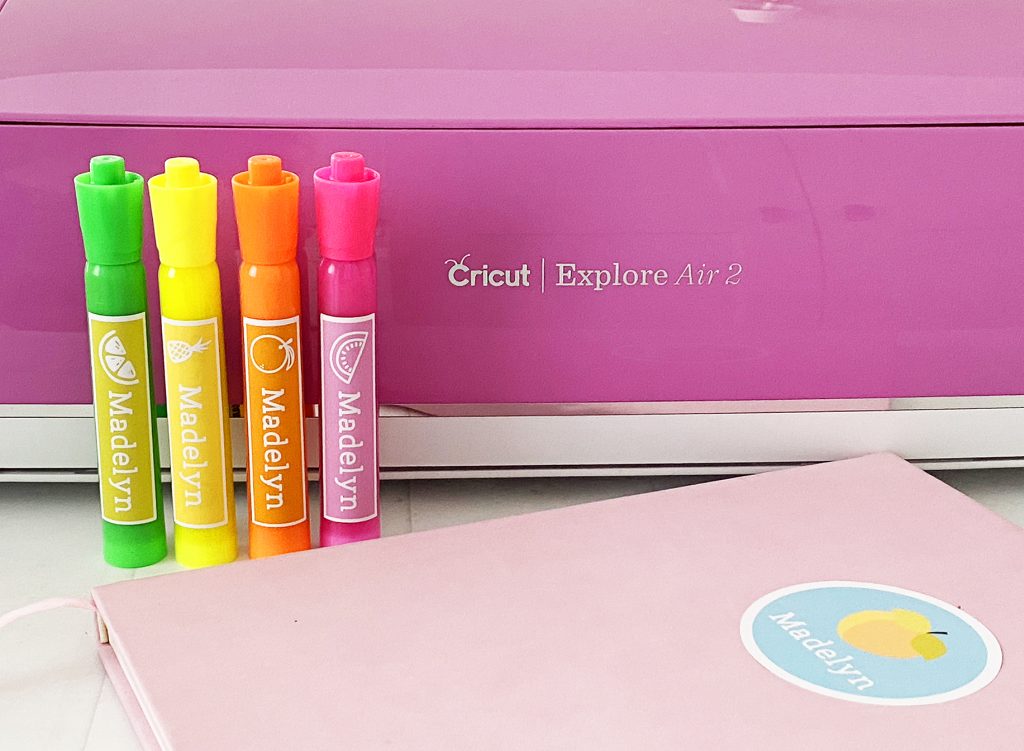
Personalized Back to School Supplies with Cricut
This post and the photos within it may contain affiliate links. As an Amazon associate I earn from qualifying purchases. If you make a purchase through one or more of the links, I may receive a small commission at no extra cost to you.
Getting ready for the kids to go back to school? Personalize their school supplies with these adorable DIY Back to School Name Labels I made with my Cricut machine!

Whether your kids are going back to school in person or are staying home, keeping their school supplies organized is extra important this year! While my kids are preparing to start at home learning, I needed a quick and easy way to keep all of their school supplies separate in our homeschool area. I made these adorable personalized school labels with the Print then Cut feature of my Cricut machine, and I’m sharing my Design Space projects with you!
Note: If you want to make your own label design, the Cricut Offset tool is the feature you need! I have a post that has a great tutorial, plus a video showing you exactly how to use the offset tool!
And if you want to design your own stickers, make sure you read my tutorial on How to Make Stickers with Procreate! You can upload them right to Cricut Design Space.

I used my Explore Air 2 for these projects, but you can use any machine from the Maker or Explore Air series. You can NOT use the Cricut Joy, because it does not have print then cut capability. There are really great deals on the Explore Air 2 right now. I love all of the colors that are available, too. The fuschia machine matches my craft room perfectly 🙂

What You Need to Make Personalized School Supplies with your Cricut
This project only requires a couple of supplies, which is a great reason to make them for all of your school supplies (and kids!)
- Cricut Explore Air 2 or Maker Series machine
- Printer (I love this Canon Printer and it’s what I use for all of my Cricut Print then Cut projects)
- Cricut Printable Vinyl (it’s perfect for making DIY stickers and labels)

School Supplies DIY with Cricut Explore Air 2
These labels can be made using basic shapes and designs available with Cricut Access. Don’t know what Cricut Access is? Now’s a great time to learn all about it – you get THOUSANDS of free designs included with a membership!
Before you get started, there’s an important step for making your school labels. I created the Design Space file so that you can use the same text for your child’s name, but it’s not ready for Print then Cut until you FLATTEN the project.
Open the DIY School Labels in Cricut Design Space

To make your labels, open the file and use the names at the bottom of the canvas to type your names. Copy and paste your names and resize to fit the labels. Then select one text and label design, and click “flatten” in the bottom right hand corner of the screen. Repeat with each label.
When you’re ready to cut your project, click “Make It.” Design Space will load your canvas. You will see the print then cut lines on the canvas and design space will automatically place your stickers inside the print then cut area. Click “Continue” to proceed. I printed one sheet of labels – you can print as many or as few as you’d like!

Follow the onscreen instructions to send the design to your printer. For this project I used the “add bleed” option. I always use Printable Vinyl to make my stickers because I LOVE the smooth finish and the versatility of where I can apply the decals.
*Make sure you put the printable vinyl or sticker paper in your printer so it prints on the proper side.*
After your page(s) has finished printing, attach your sheet to a StandardGrip Cricut Mat and the follow the prompts to cut out the school labels.

The Cricut Explore Air 2 cuts with such precision that your labels will be cut but the backing will still be in place (“kiss cut”). You can peel the stickers right off!

You can apply them to whatever school supplies you’d like! I labeled Madelyn’s Chromebook, planner, water bottle, and notebook with these labels!

Personalized Custom Highlighters for Back to School
Madelyn also wanted a cute way to label her highlighters, so I designed a second set of labels with the same fruit theme! I love how they turned out! These would also be a great gift for a teacher. Print these highlighter tags as well to make an easy back to school gift!
Open the Custom Highlighter Design Space File

Follow the same instructions as above to put your names on the labels and flatten them for Print then Cut. Click “Make It” and follow the on screen instructions to print then cut your labels. I also used Printable Vinyl for the personalized highlighter school labels.

How cute are they?! Madelyn is just excited that her siblings can’t steal her highlighters anymore. Ha!

Are you making DIY school supplies?! Share them with me on Instagram or my Facebook page!
Pin the DIY School Labels to your favorite craft board on Pinterest!


Do you find that the printed labels smear when touched or get wet?
No, not with the printable vinyl! My daughter has been using them all week 🙂 It’s what I use for all of my stickers, too.
Would these work for daycare labels too? Dishwasher safe? Talk about needing a lot!
I don’t think they’d be dishwasher safe – most vinyl isn’t great in the dishwasher 🙁