How to Use Offset in Cricut Design Space to Make Stickers
This post and the photos within it may contain affiliate links. As an Amazon associate I earn from qualifying purchases. If you make a purchase through one or more of the links, I may receive a small commission at no extra cost to you.
Make stickers from ANY SVG or other design in Cricut Design Space using the Offset Tool! Get a step by step tutorial to make your own stickers with my new favorite Design Space tool.
I absolutely LOVE making stickers with my Cricut (and my Silhouette, too!) I spend a lot of time creating new printable stickers (click that link to see all of them!), but I always make designs that are separate from my Free SVG Files.
Now with the beta launch of the Cricut Design Offset Tool, I can use ANY design from my library to create print then cut stickers! I’m so excited!
If you’re looking to make your own stickers from scratch – don’t worry! I have a whole post dedicated on how to make stickers using Procreate on your iPad!
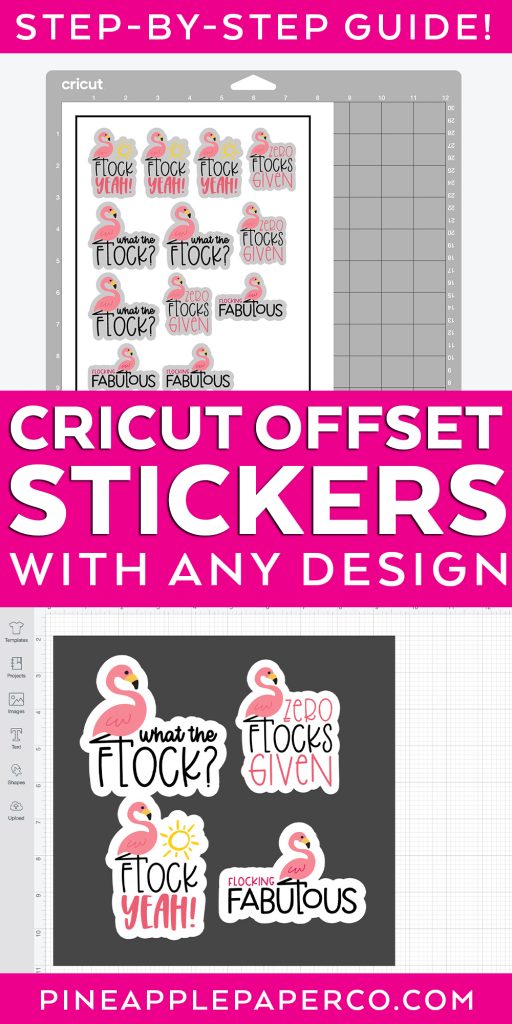
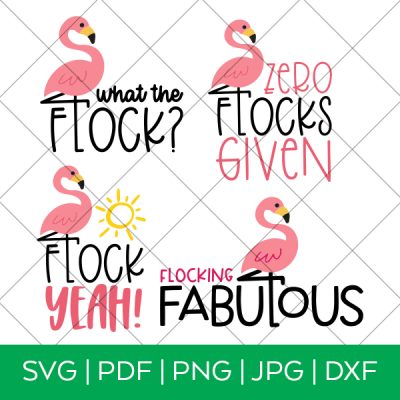
I put together a step-by-step tutorial using my Flamingo SVG Bundle available in my shop as an example of How to Make Stickers with the Cricut Offset Tool. It is really easy and is not that much different than using traditional Cricut Print then Cut – you just add another couple of steps before you print!
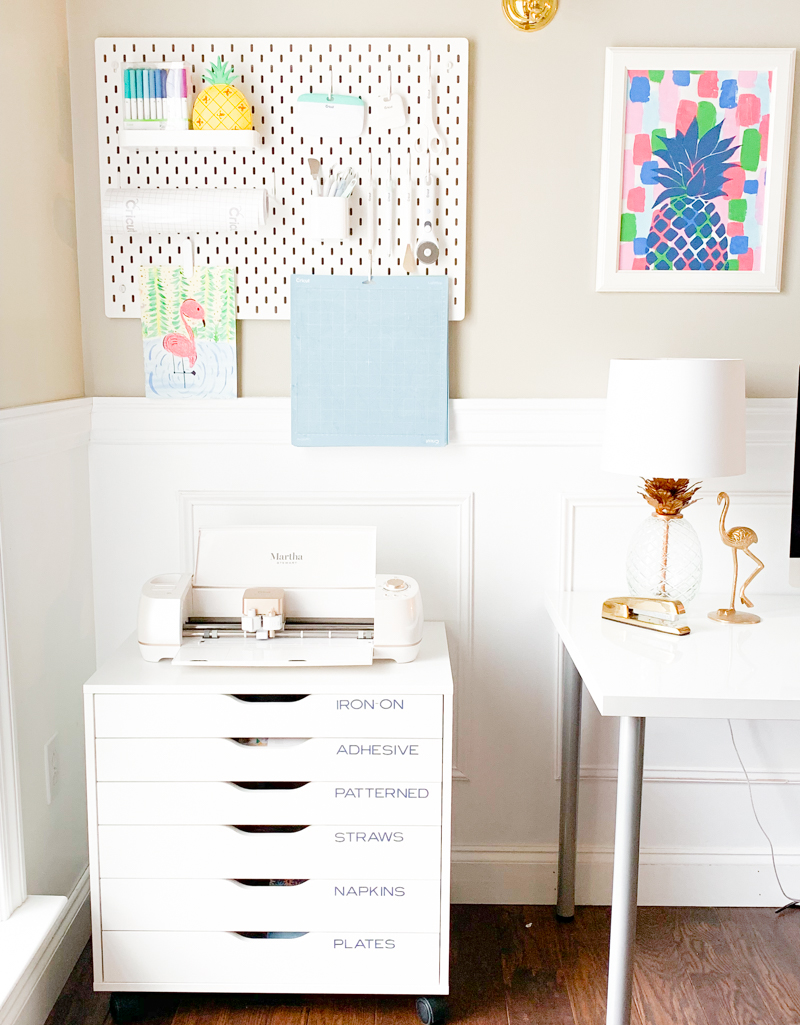
Supplies You Need to Make Print then Cut Stickers with Cricut Offset Tool
- Cricut Machine (Explore Air 2, Explore Air 3, or Maker series)
- Printable Vinyl
- Inkjet Printer (I’m a huge fan of my Canon craft printer)
- Cricut Mat – LightGrip or StandardGrip
- Fine Point Blade (comes with the machine)
- Cricut Design Space (updated to the latest version)
*Being able to make stickers with ANY design is a GREAT reason to get a Cricut Access subscription – you can turn any 2D image into a sticker! That’s TENS OF THOUSANDS of options!
-

-
Product on saleCelebrate Everything SVG Cut File BUNDLEOriginal price was: $125.00.$14.00Current price is: $14.00.
-
Product on saleGrinch Movie Inspired Christmas SVG Cut File BUNDLEOriginal price was: $23.92.$7.99Current price is: $7.99.

How to Use Cricut Offset Tool to Make Your Own Printable Stickers
If you’re new to using SVG files with your Cricut machine, make sure you read my full post on How to Upload an SVG to Cricut Design Space.
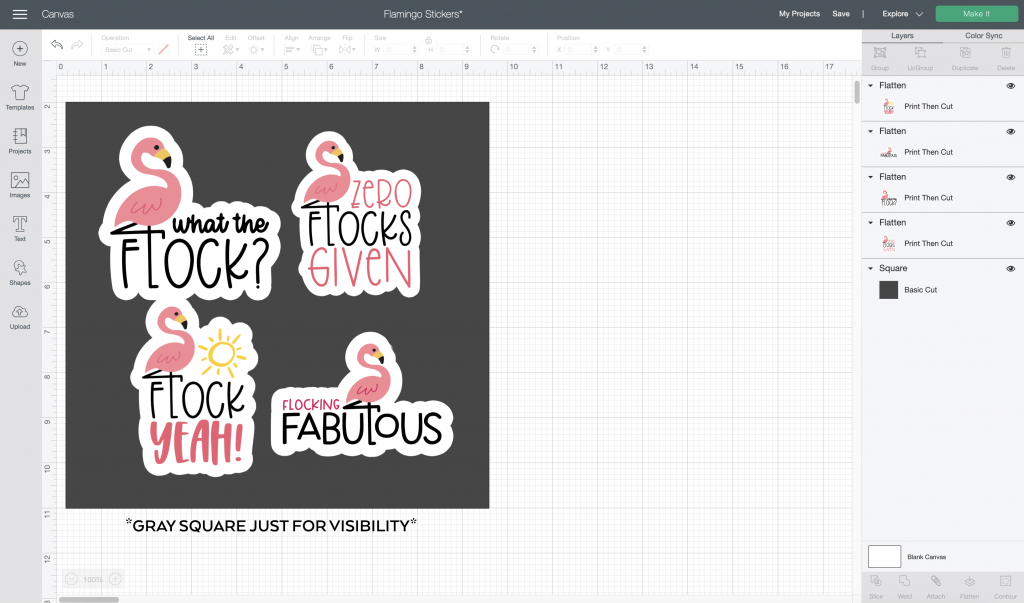
Upload your designs into Design Space and select them to add to your canvas. Separate and resize as desired.
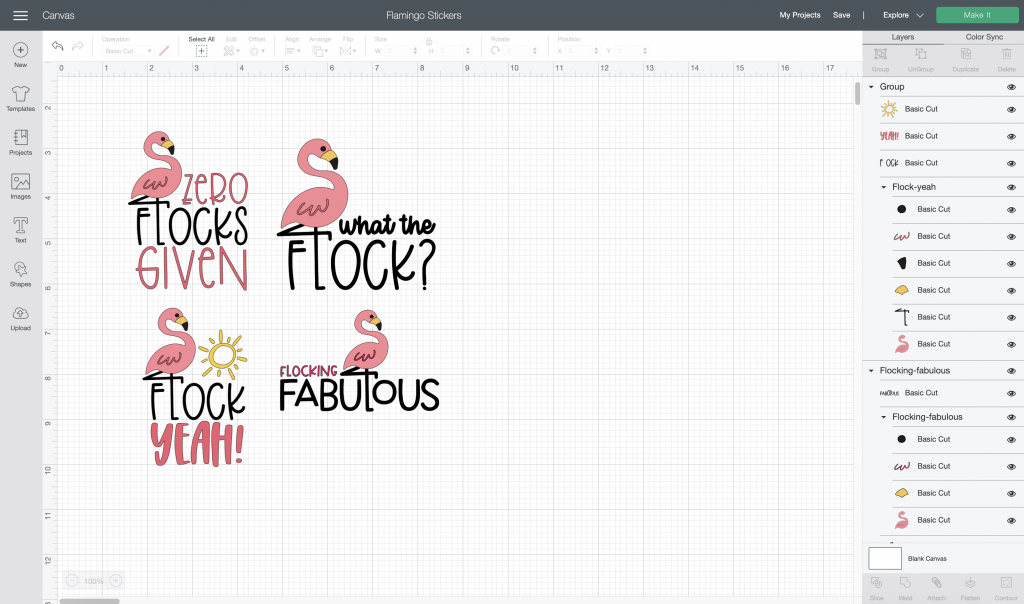
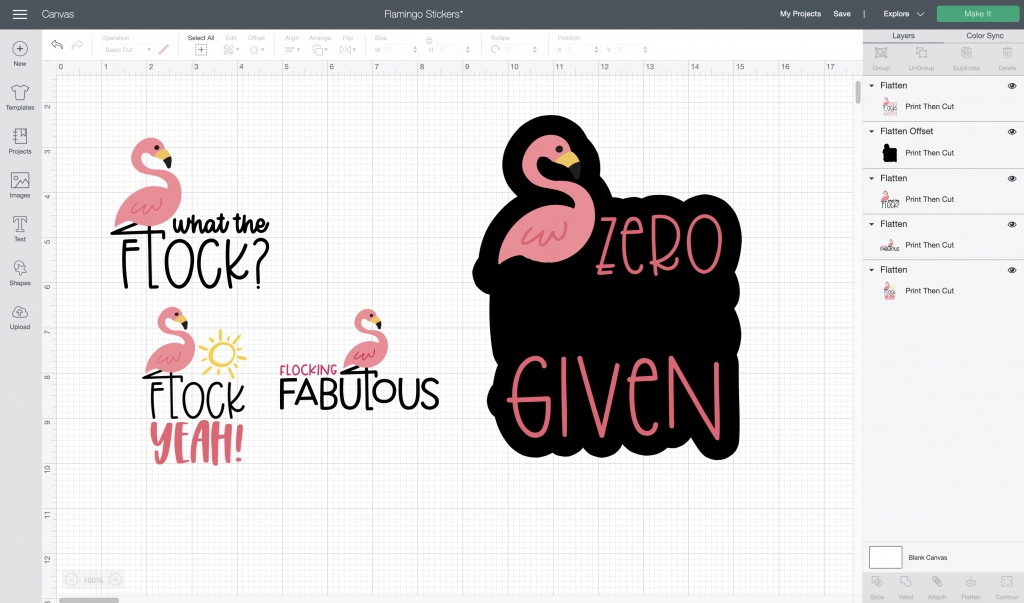
So that the design layers panel is neatly organized, select the group of each design and click “Flatten.” This will convert your SVG cut designs to print then cut designs.
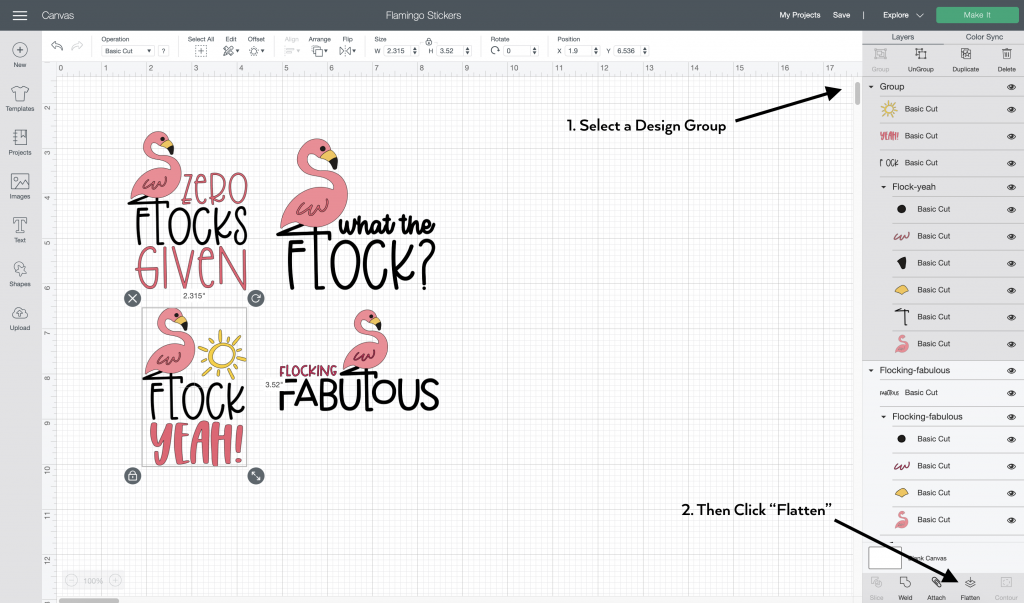
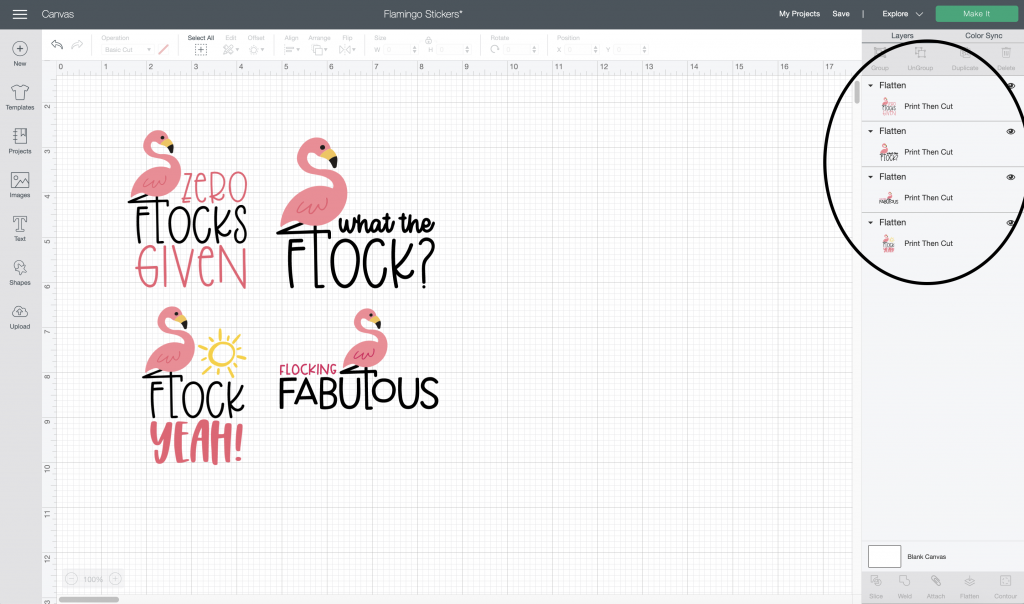
When each design has been flattened, you will clearly see each design as a separate, single layer.
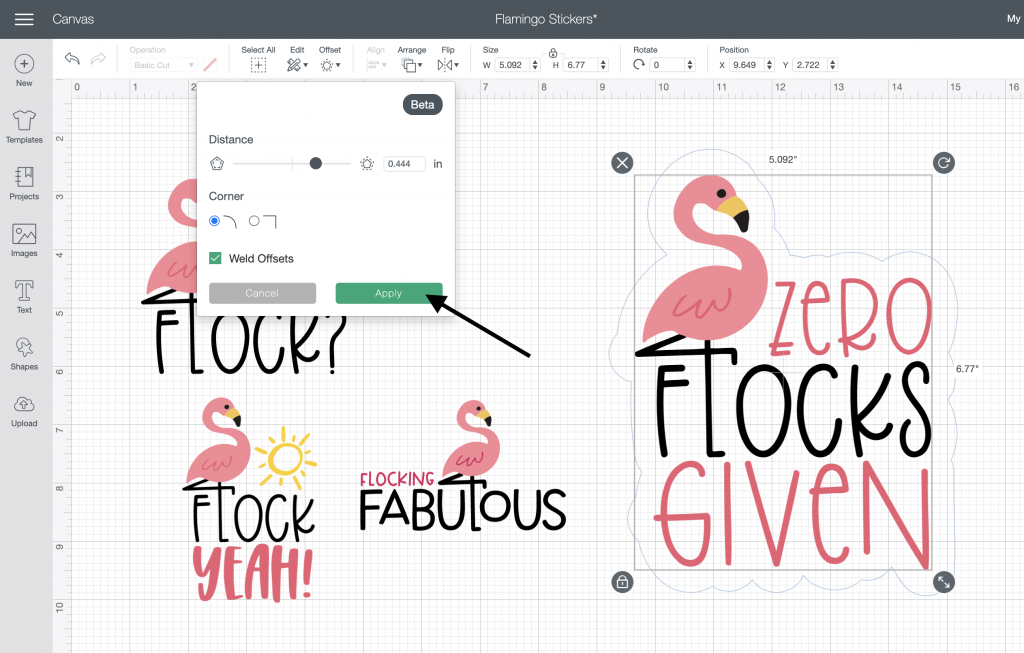
Select one design and then click the Offset tool.

An options panel will appear showing Distance, Round or Square Corners, and Weld. For this design, you will only adjust the distance of the offset. The goal is to make sure that your sticker surrounds the entire SVG design and does not leave any “holes” or “gaps” inside the letters or between the design elements.
(I enlarged the sticker design and moved it to the right so it was more visible!)
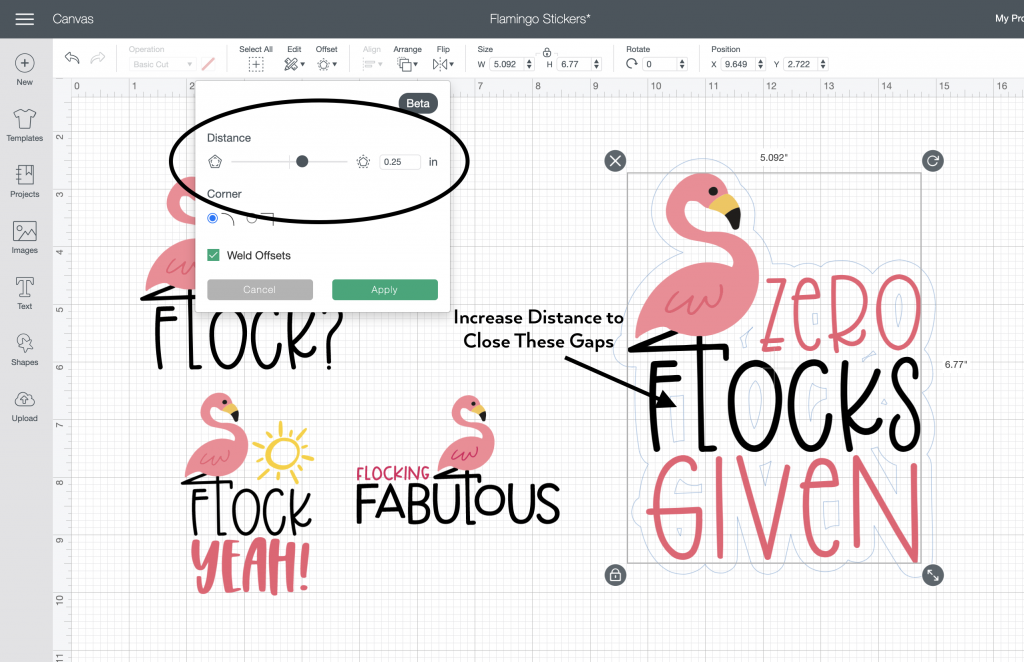
Increase the distance until the offset creates a solid background perfect for a sticker.
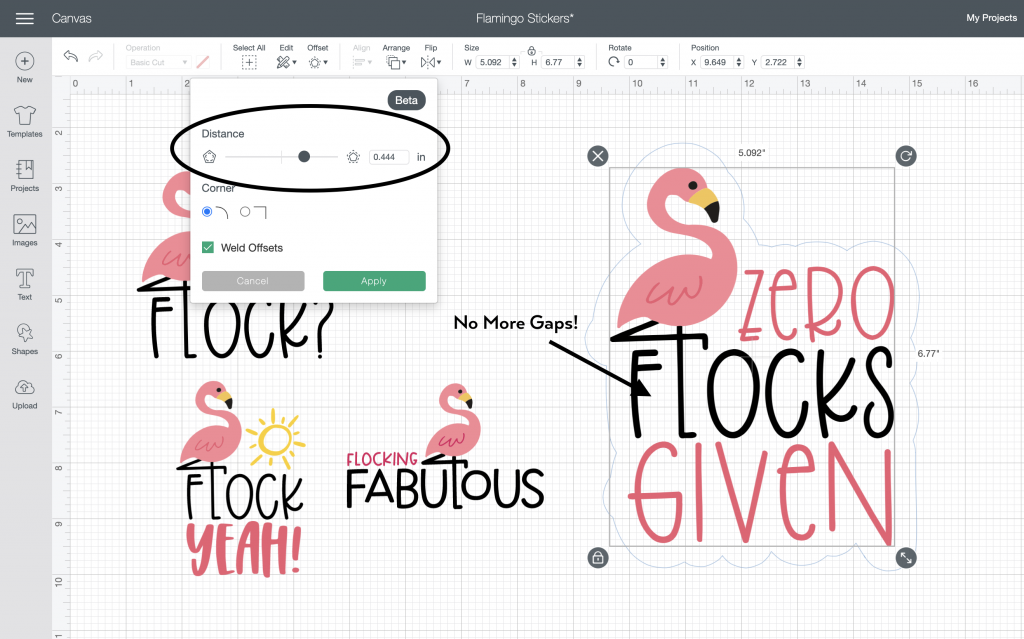
Click “Apply” to finalize the offset.
Select the offset layer and change the color to white or as desired.
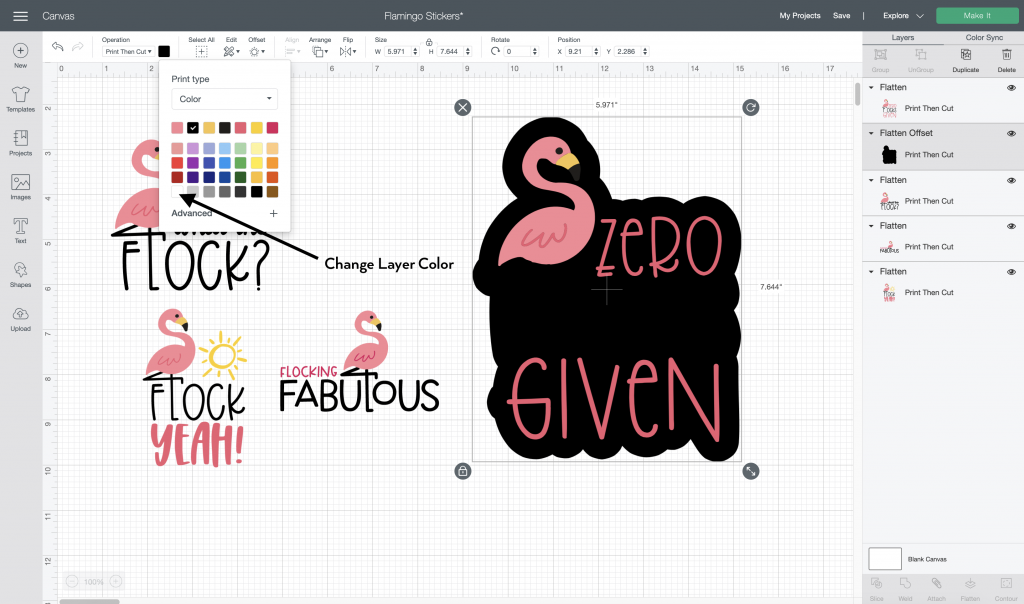
Now select the design AND the offset layer, and click “Flatten.” This will attach your sticker design to the offset layer and tell the machine that you want the whole thing to be a sticker!
Repeat with all of the other designs. I placed a dark square behind the designs so that you can easily see the sticker borders created by the offset tool!
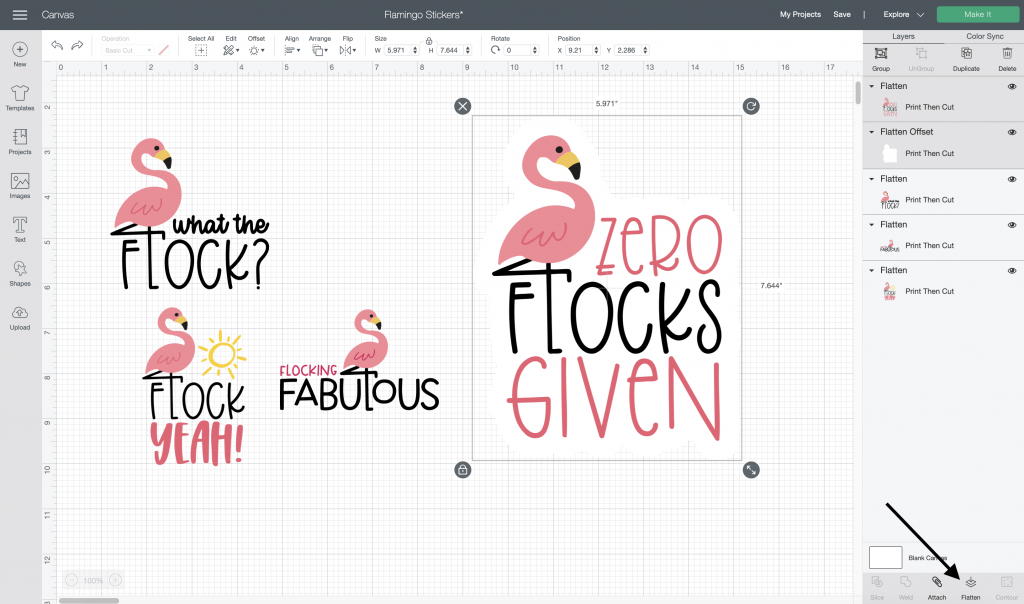
Resize or duplicate the stickers as needed and then click “Make It.” You can check your design one more time to make sure that it will cut correctly. To make it easier to see on the mat, I have changed the offset color to gray.
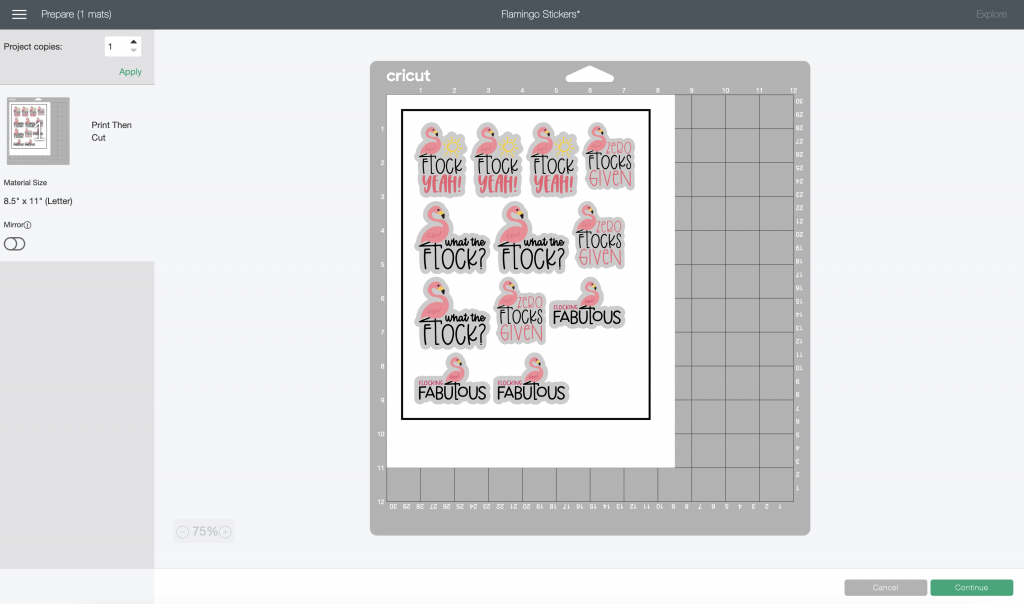
Follow the onscreen instructions to Print then Cut the design, and if you want more details on Print then Cut, check out my Printable Stickers tutorial.
If you would like to see a video of the Cricut Offset tool, check out my YouTube video! I recorded my screen while I made the stickers!
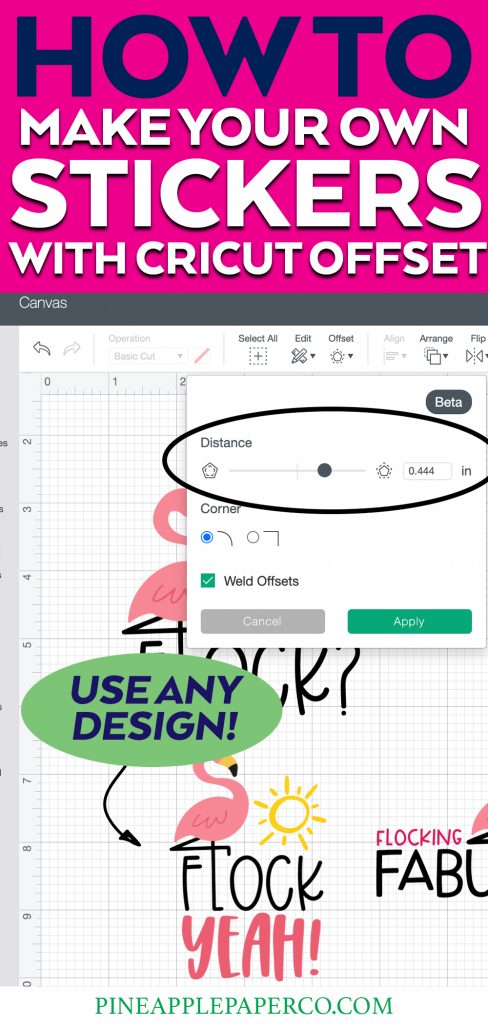
Pin Printable Stickers Tutorial with Cricut Offset Tool


I really want to make stickers and print other things for crafting as well but my old printer just isn’t working well enough. I know you just got the Epson tankless printer for sublimation and for stickers your recommending the crafting printer. Right now I can only get one which means sublimation will have to wait since you can’t do both with one printer but as far as quality and use of ink which one would you recommend if you can only have one? I don’t want to have to buy new ink constantly but I also would like a nice quality without breaking the bank on a printer. Thanks!
Hi! Yeah, I would wait on the sublimation, too! A regular printer is definitely more versatile 🙂 I would recommend a Canon or HP – you can do “instant ink” through Amazon or through the company and it’s a great way to monitor your usage and get discounts on ink!