Make Handmade Christmas Cards with your Cricut Maker
This post and the photos within it may contain affiliate links. As an Amazon associate I earn from qualifying purchases. If you make a purchase through one or more of the links, I may receive a small commission at no extra cost to you.
This year I decided to try my hand at making some of my own handmade Christmas cards with my Cricut! Make these three Handmade Christmas cards with your Cricut Maker and the designs I created for the Handmade Holiday Cards in Cricut Design Space!

Handmade Christmas Cards with Cricut Maker
Sending Christmas cards is a tradition that I hope never dies. Every year when I see Facebook posts of “not sending cards this year, enjoy this picture!” a tiny piece of my soul breaks. I love sending and receiving Christmas cards, and I display them in my home every year.
A Christmas card is such a simple gesture of thoughtfulness in a crazy, busy world. When Cricut asked if I would like to design a few DIY Handmade Holiday Cards with my Cricut machine, I jumped at the opportunity.
Making my own handmade Christmas cards is just another way to send a small piece of my craftiness to my friends all over the country. I hope you’ll use these designs as inspiration to make your own Handmade Christmas cards with your Cricut Maker this year!
How to Make Handmade Christmas Cards with your Cricut
Using the versatility of the adaptive tool system that is unique to the Cricut Maker, and a variety of Cricut Materials, I created detailed cards that look store bought. Using the step by step instructions below and the Cricut Design Space project links, you can easily make these DIY Christmas Card ideas as well.
Make sure you don’t miss my Best Christmas SVG Files – you’ll be busy making TONS of Cricut Christmas cards and crafts!
Have an Explore Air 2? Check out the other holiday DIY card designs I made with my Cricut Explore Air 2 as well!
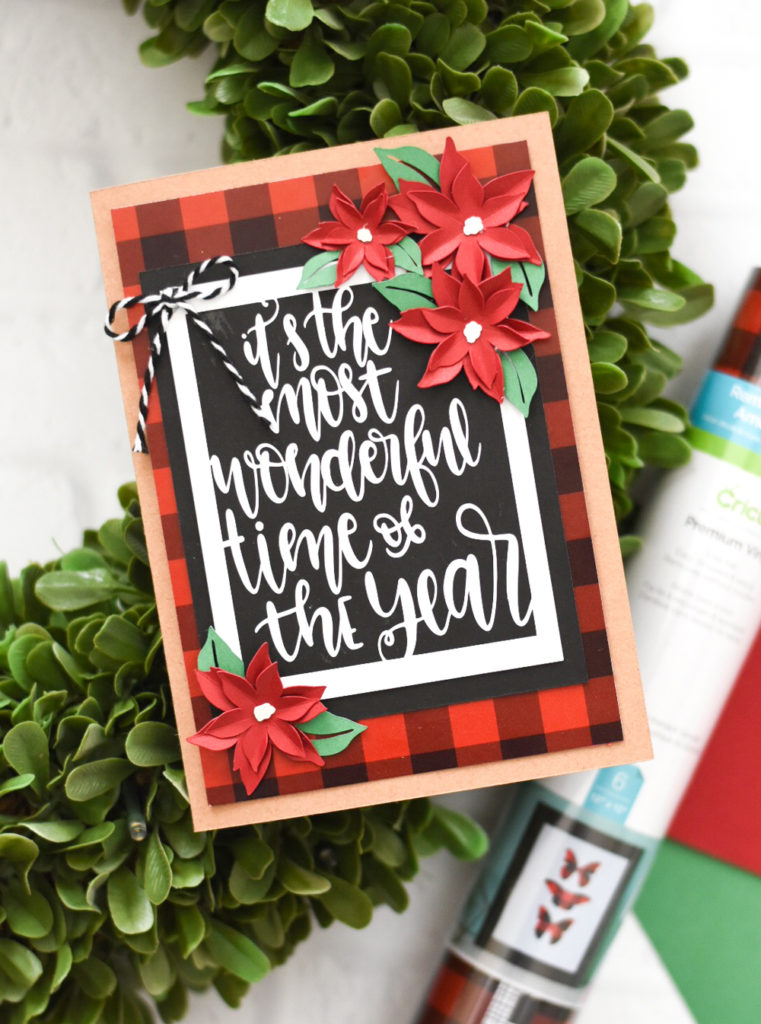
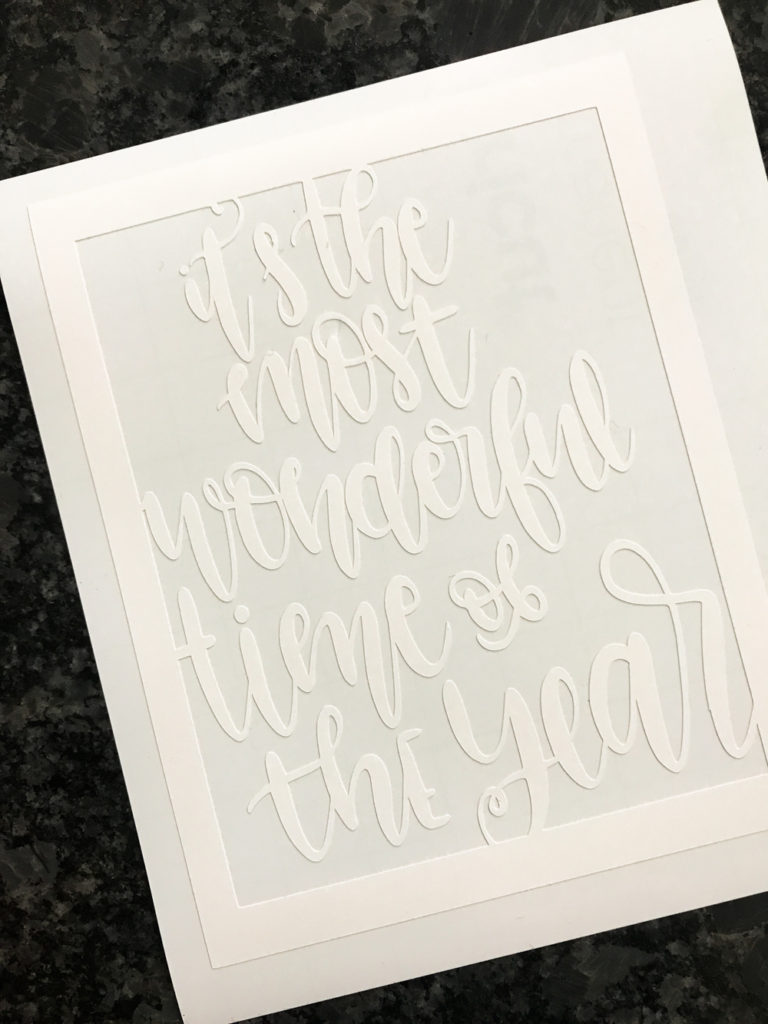
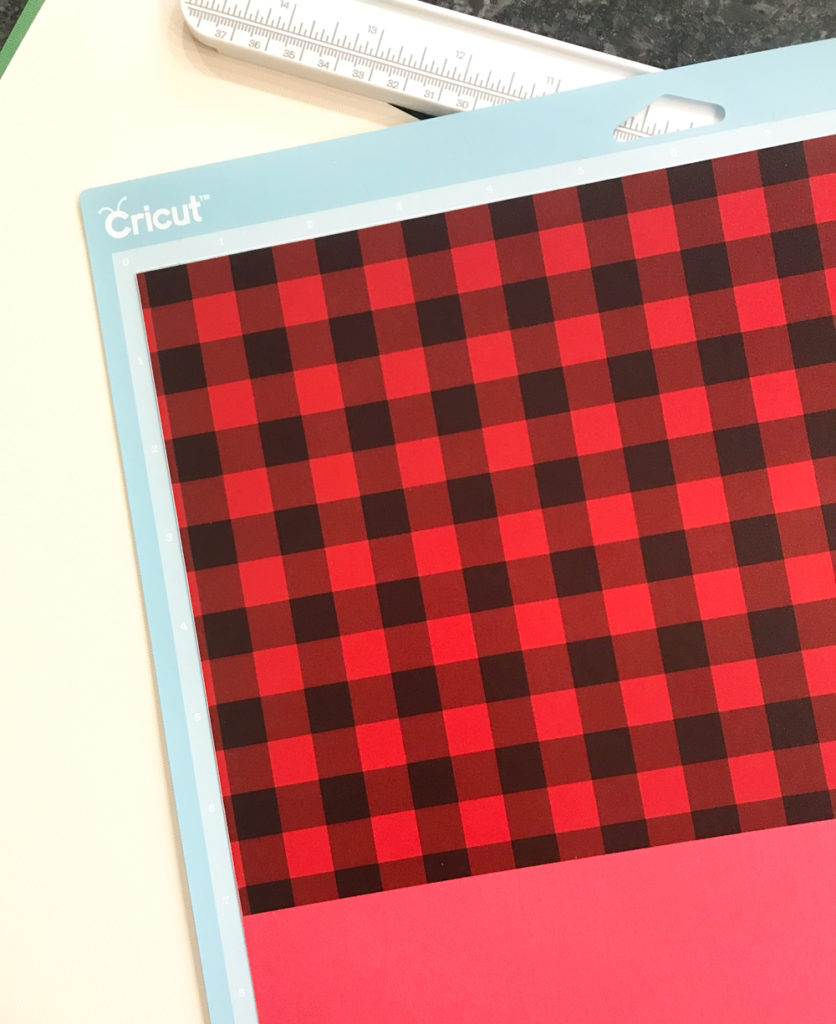
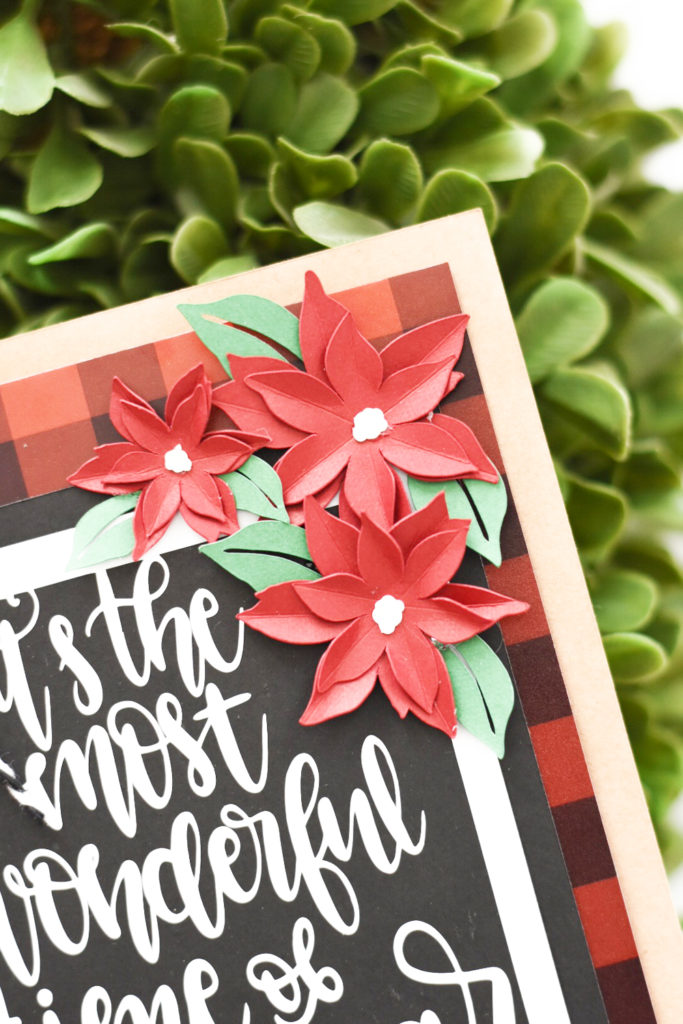
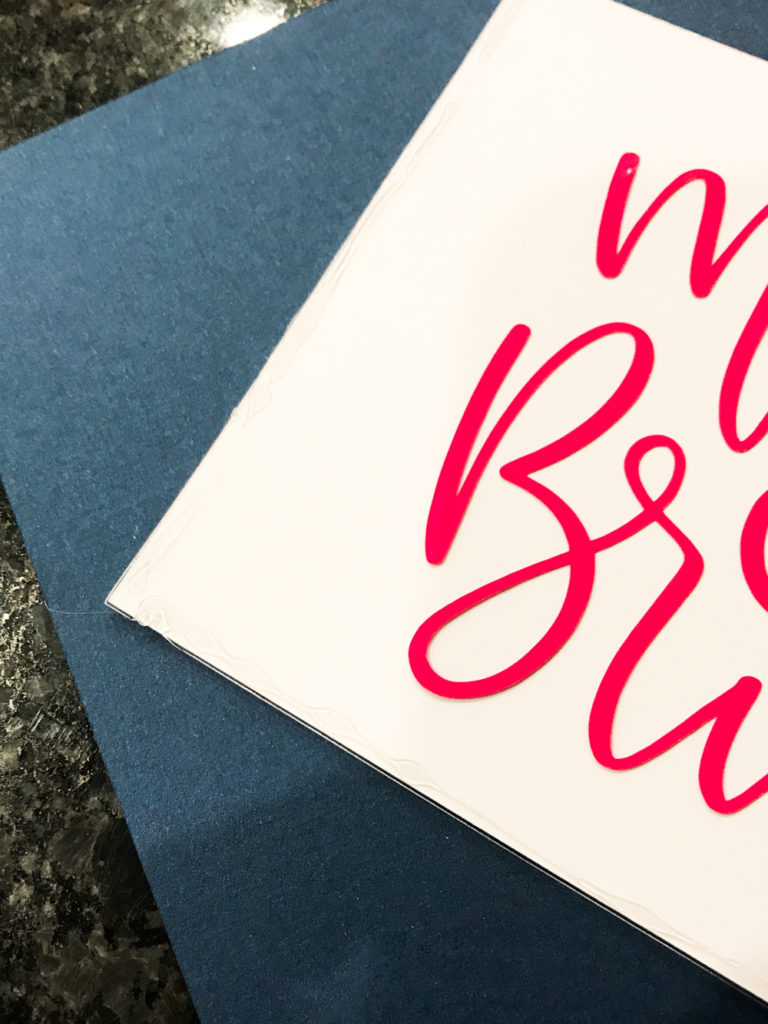
The first card I made (and probably my favorite – although it was a close decision) was this buffalo plaid “Most Wonderful Time of the Year” card.

What you Need to Make the Buffalo Plaid DIY Christmas Card
- Cricut Maker
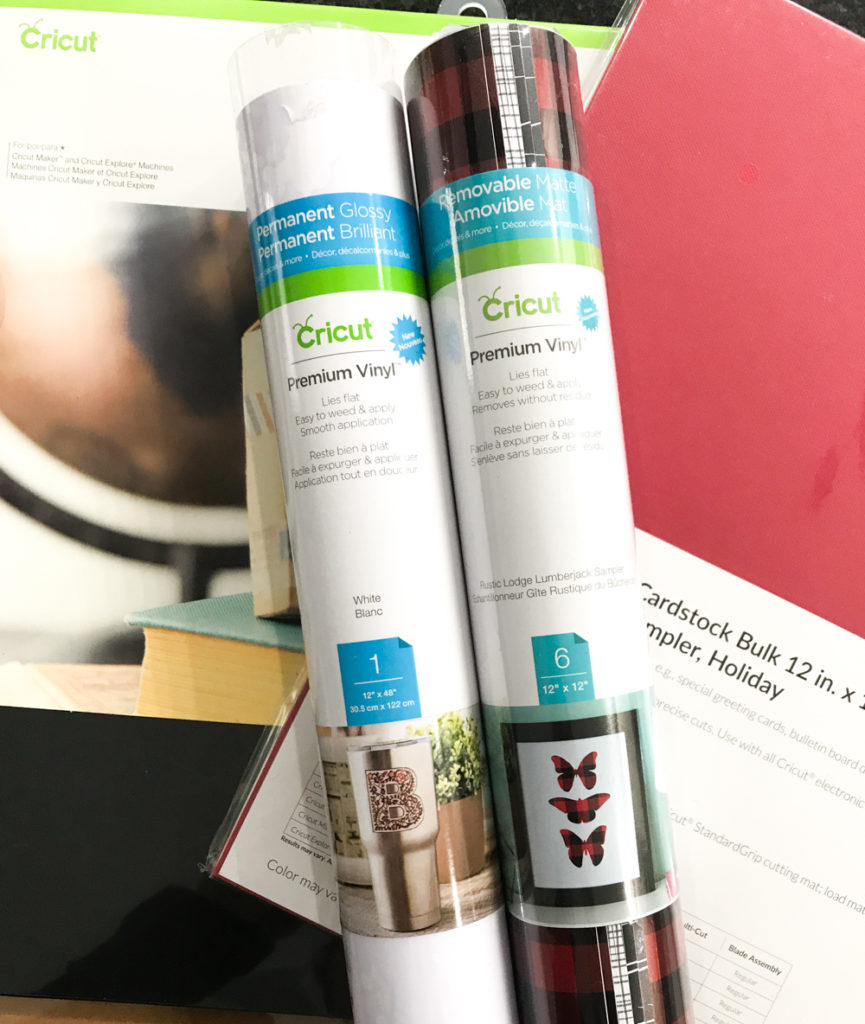
- Buffalo Plaid Patterned Vinyl (Cricut brand is no longer available but there’s a great option at Expressions Vinyl)
- White Vinyl
- Standard Grip Transfer Tape
- Cardstock (Red, Green, Off White)
- Kraft Board (Kraft and Blank)
- Glue
- Baker’s Twine – Black & White
Note: This card has a lot of layers, but they go together easily. The most important thing is to keep in mind what materials you’re using for each layer and to change your Material settings accordingly.
Click to Make: Most Wonderful Time of the Year Handmade Christmas Card
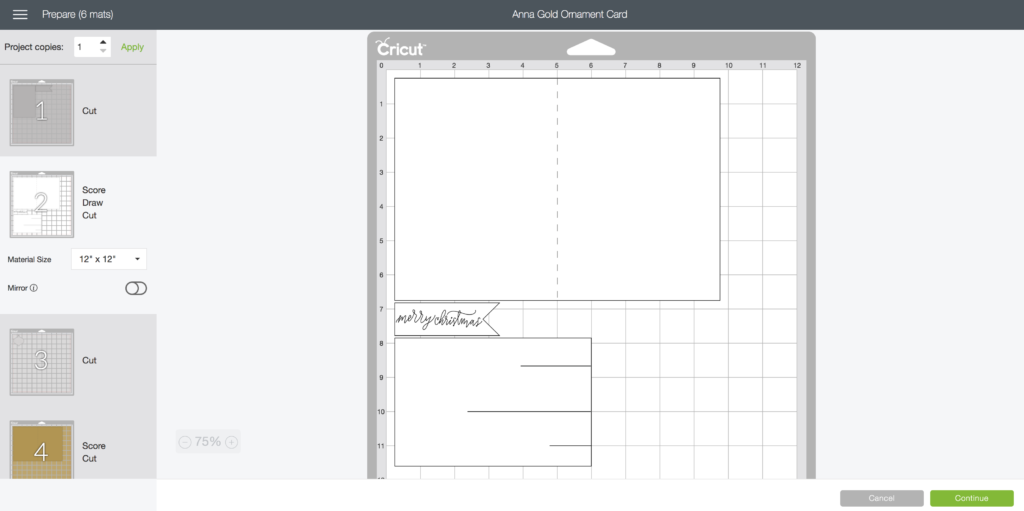
Open the Handmade Christmas card design in Cricut Design Space. Card is sized to be 5×7″ when folded.
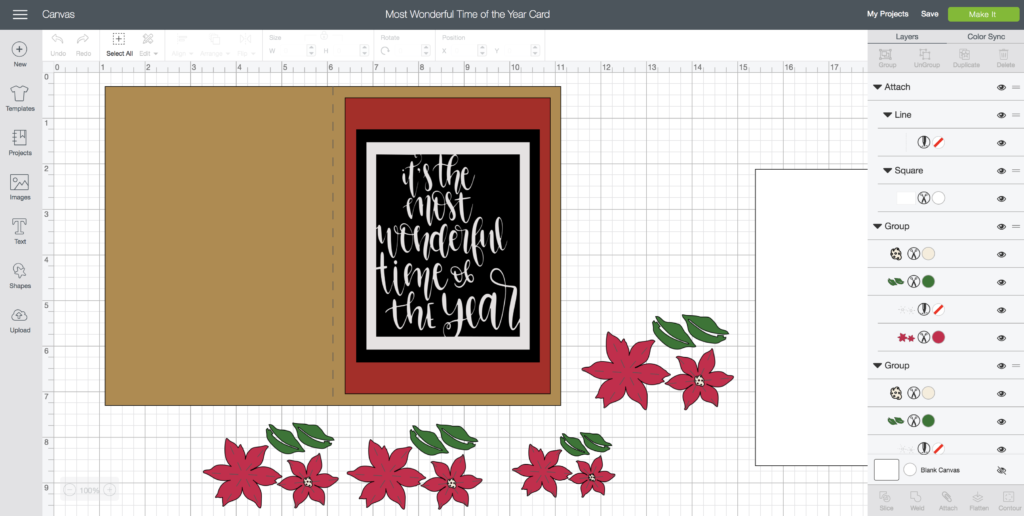
Click “Make It” when you are ready to cut the materials.
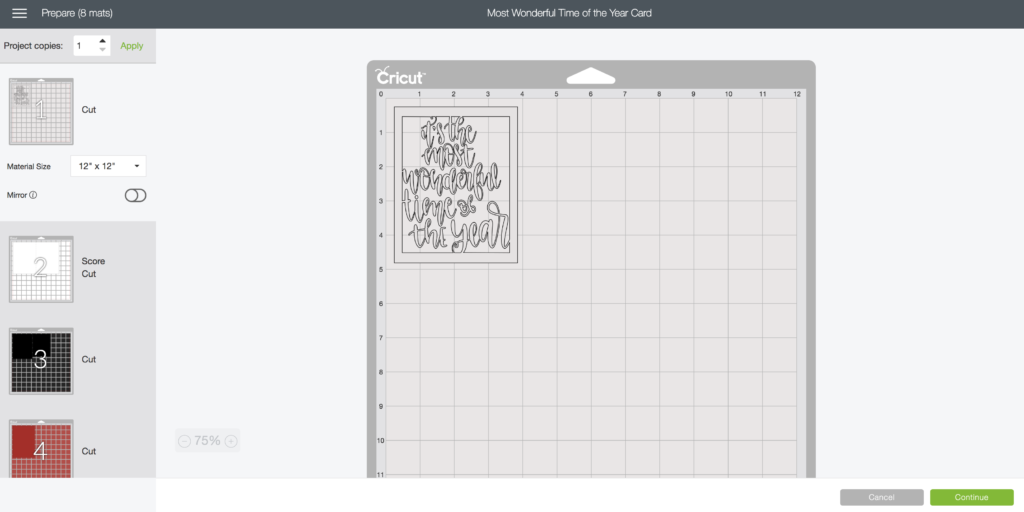
Cut out all of the pieces of the card before assembling.
There are 8 different “mats” that you will be cutting to make this card. Prep your materials first. You’ll note the first mat is the White Vinyl that will be adhered to a piece of Black Kraft Board the same size as the vinyl design.
After the vinyl is done cutting (and while the other layers are cutting), weed away the unwanted vinyl from the design.
For the red rectangle layer (buffalo plaid), I adhered the vinyl to the cardstock and before cutting. I set the material to “Glitter Cardstock” to cut through the vinyl and cardstock on one pass.
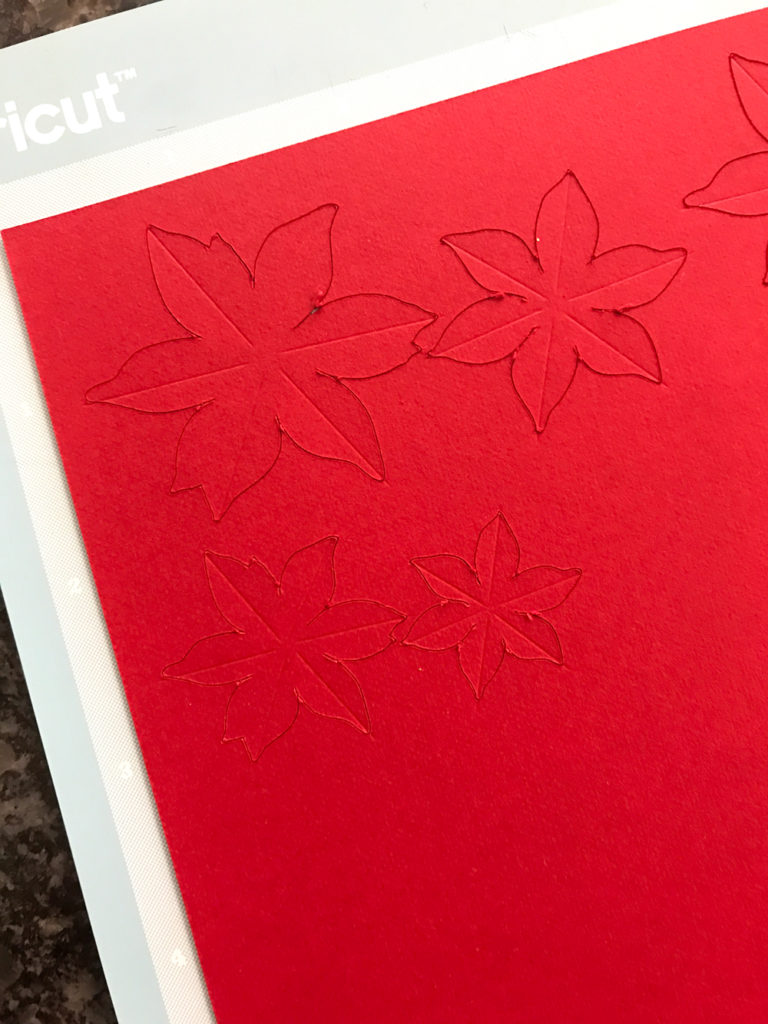
One of my favorite Cricut Maker tools to use is the Scoring Wheel! I used the Scoring Wheel tool to create crisp folding lines on the 3D Poinsettia pieces – it makes constructing the flowers so much easier! The Scoring Wheel was also used to score the folding lines of the card and card liner.
Use Transfer paper to move the vinyl design from it’s backing to the piece of black Kraft board that is the same size. Be very careful to use standard grip Transfer paper and to peel it away very carefully so it doesn’t pull the paper away.
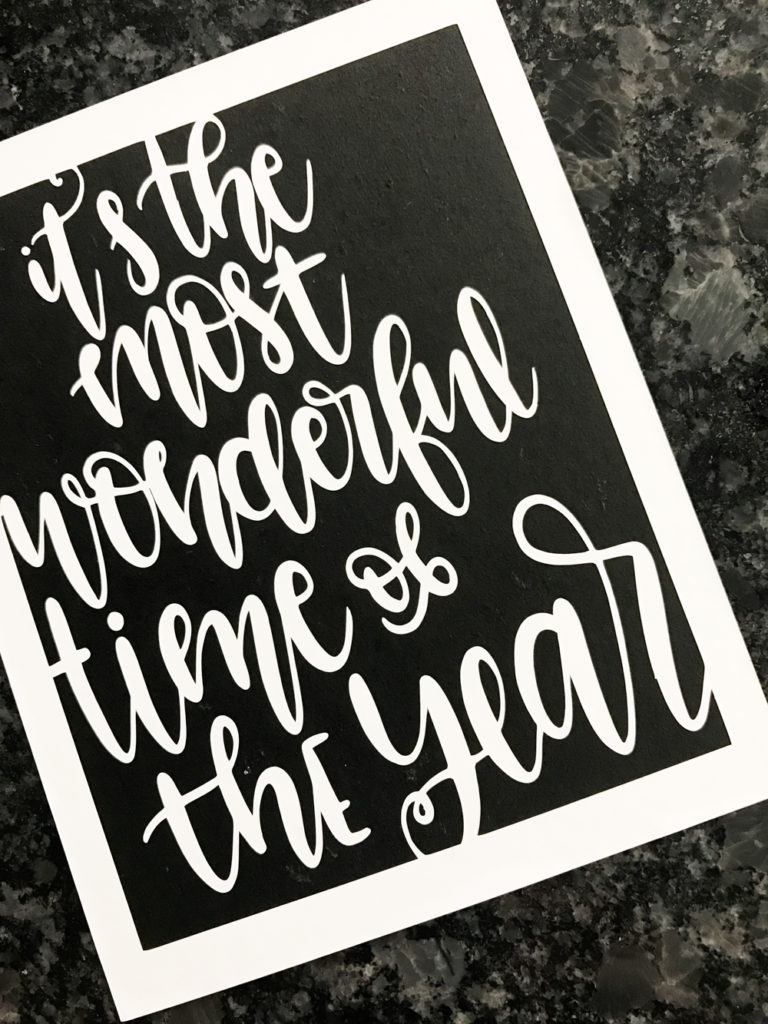
Starting with the Kraft board bottom layer of the card, glue the pieces to build the card. I used two layers of black Kraft board to create more dimension with the card. The larger one goes underneath the vinyl text layer.
Before attaching the 3D poinsettias, glue the interior liner of the card inside (it provides a professional finish and plain white layer of cardstock to write your Holiday Greetings.
Use the score lines as guides and fold all of the 3D poinsettia pieces. Folding them will give them dimension. Glue the pieces together (I find hot glue is the quickest and easiest). If your fingers get in the way like mine do, use the Quilling tool from the Paper Crafting Tool Set to push the small pieces together. They look so pretty on the front of the card!
LATEST POSTS:
- Wicked Coloring Pages to Print for Free
- Free Thanksgiving Turkey Coloring Page Printable
- Free Printable Thanksgiving Meal Planner & Grocery List
- xTool M1 Ultra Beginner’s Guide and Review
- Free Best Dad Ever Father’s Day Coloring Page
DIY Christmas Card Ideas
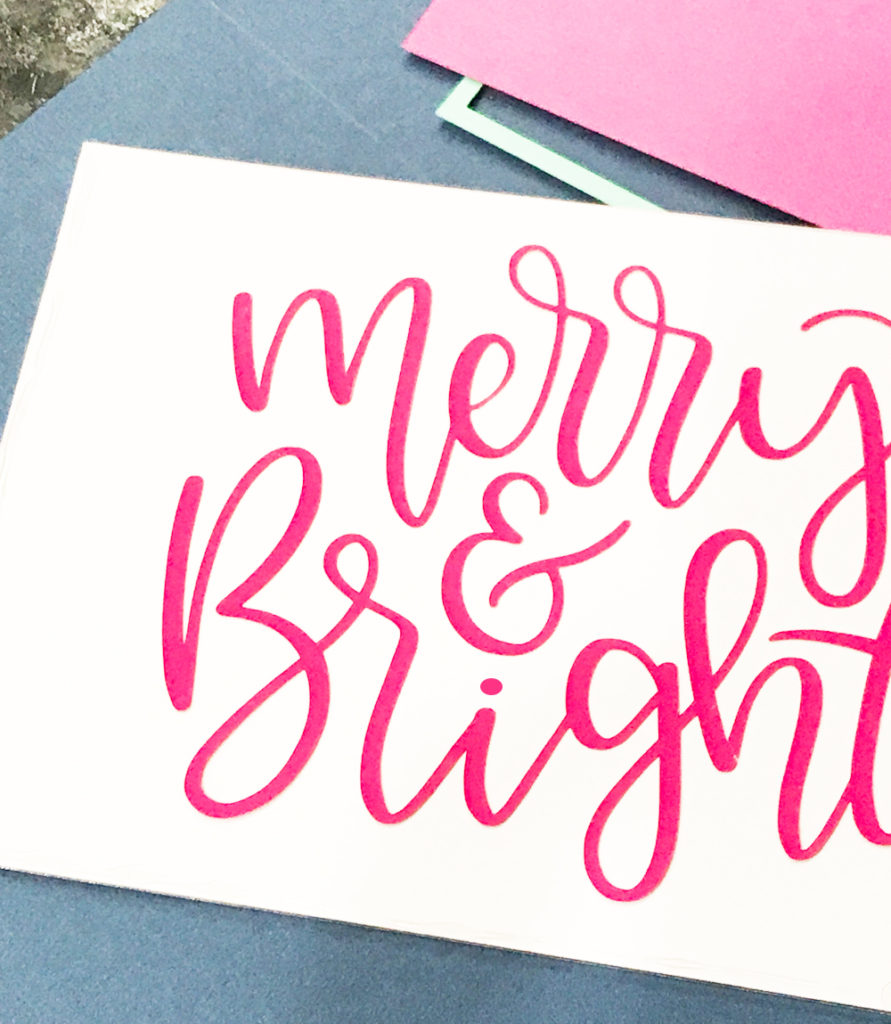
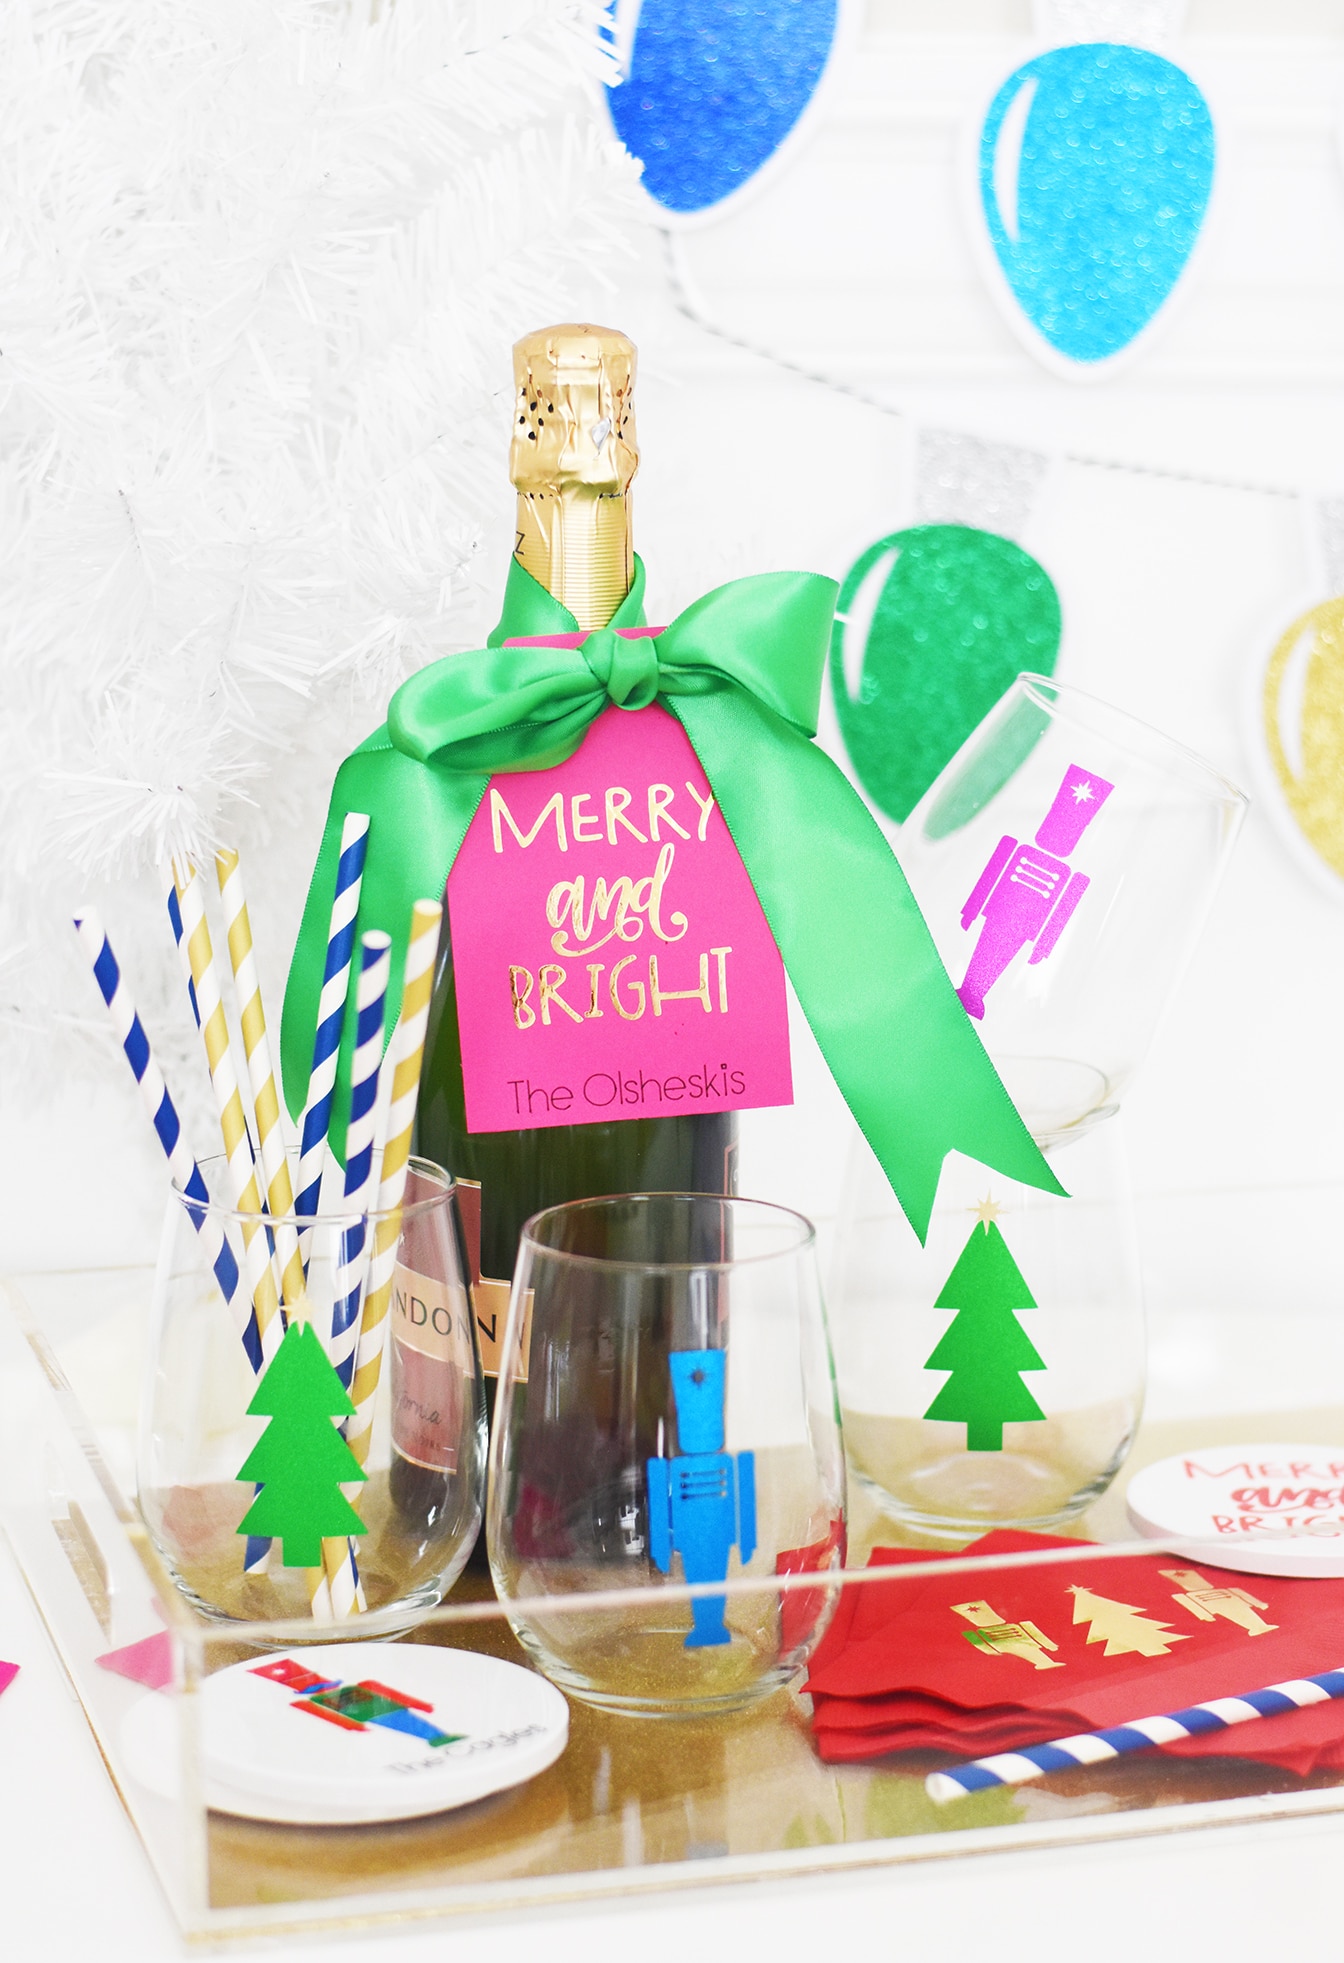
The second of three Handmade Christmas Cards I made is this “Merry and Bright” DIY Shaker Card. I used a bright color palette and gold confetti to make the card unique!

Materials Needed to Make the Merry and Bright DIY Shaker Card
- Cricut Maker
- Cardstock (Navy, Pink, Aqua, White)
- Acetate
- Pink Adhesive Vinyl
- Transfer Tape
- Gold Foil Poster Board
- Hot Glue Gun
If you haven’t tried making a Shaker card yet, you should! They are much easier to make than you’d think!
Click to Make: Merry and Bright Handmade Shaker Christmas Card
This card is designed to be 7×5″ when folded.
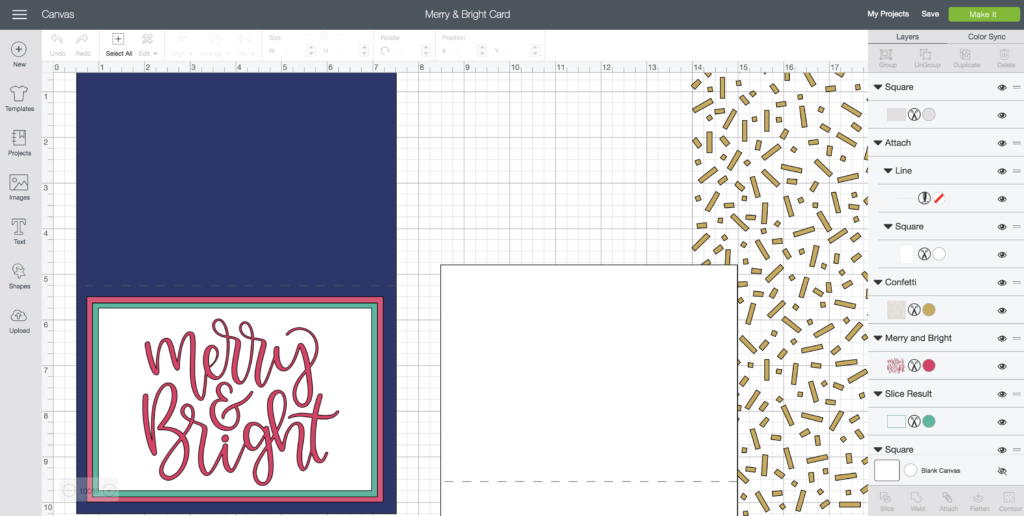
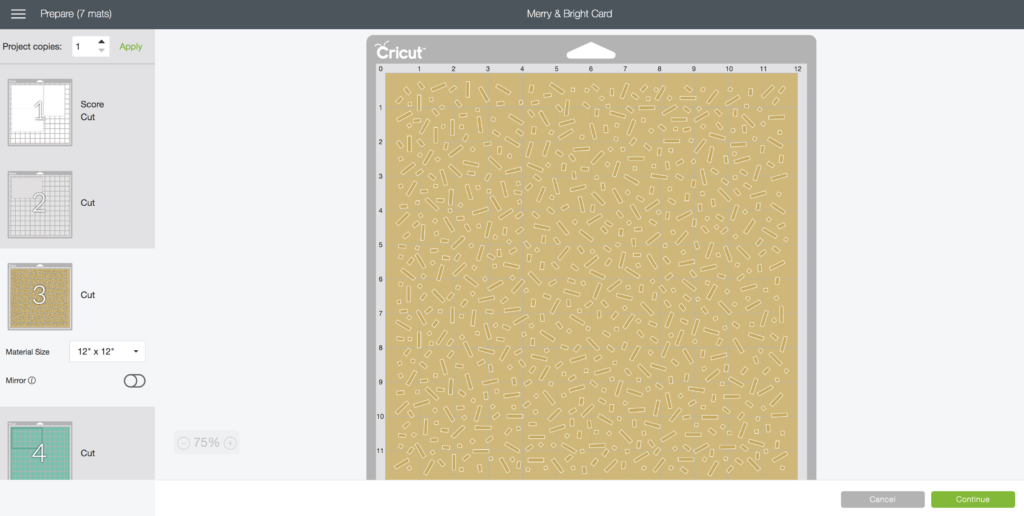
All of the card paper layers are cut from Cricut cardstock. The slightly gray layer is the Acetate layer. The confetti is cut from Gold Foil Poster Board.
You’ll have enough confetti for a few cards after this layer is done cutting. Lol!
After all of the pieces of the card are cut, start assembling the card.
Weed away all of the extra vinyl from the “Merry and Bright” and transfer to the acetate with Transfer Paper.
Although difficult to see, you’ll hot glue 3 sides (bottom, right, and left) of the acetate to the white cardstock rectangle.
Fill the card with confetti and glue the top of the acetate down, sealing in the confetti. Add the aqua border on top to hide your glue lines.

Isn’t this card the cutest with my new Flamingo ornament?!
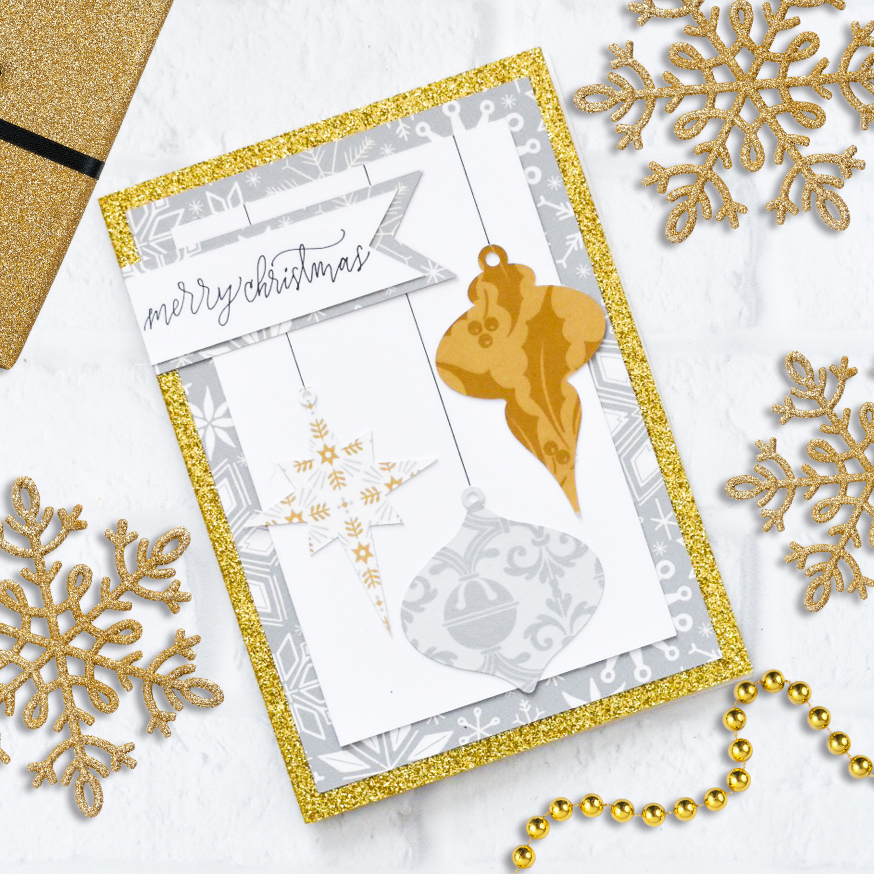
The final card I made is this traditional Metallic Traditional Christmas Card. It uses multiple layers of different kinds of cardstock, plus the new Anna’s Holiday Splendor Washi Sheet Set.
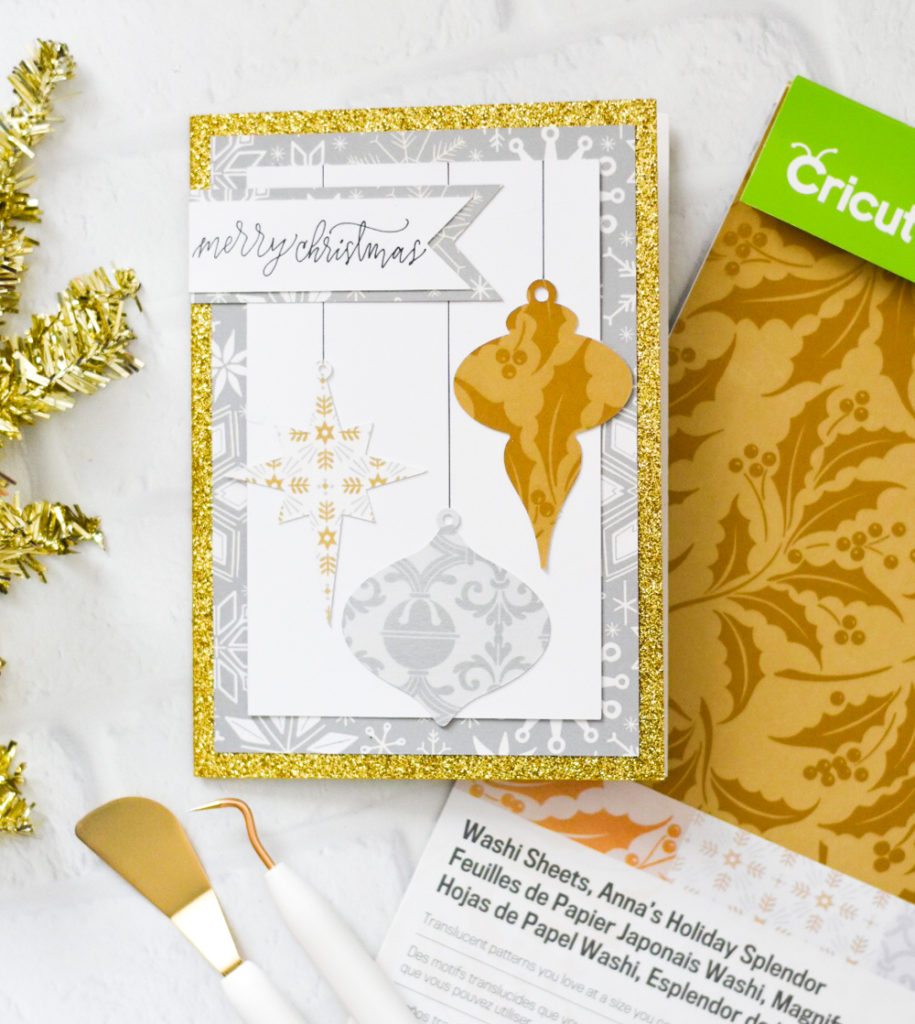
Materials Needed to Create Traditional Metallic Merry Christmas Card
- Cricut Maker
- Glitter Cardstock
- White Cardstock
- Deluxe Scrapbook Paper in colors/patterns of your choice
- Holiday Patterned Vinyl (Washi Paper Sheets are no longer available at Cricut)
- Black Cricut Pen 0.4mm
Click to Make: Traditional Metallic Merry Christmas Card
Like the others, this card is sized to 5×7″ when folded.
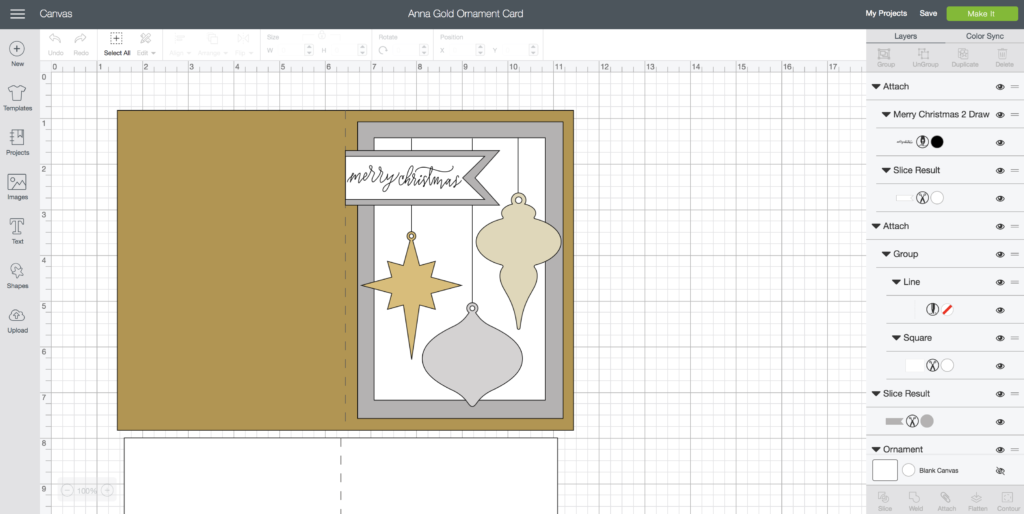
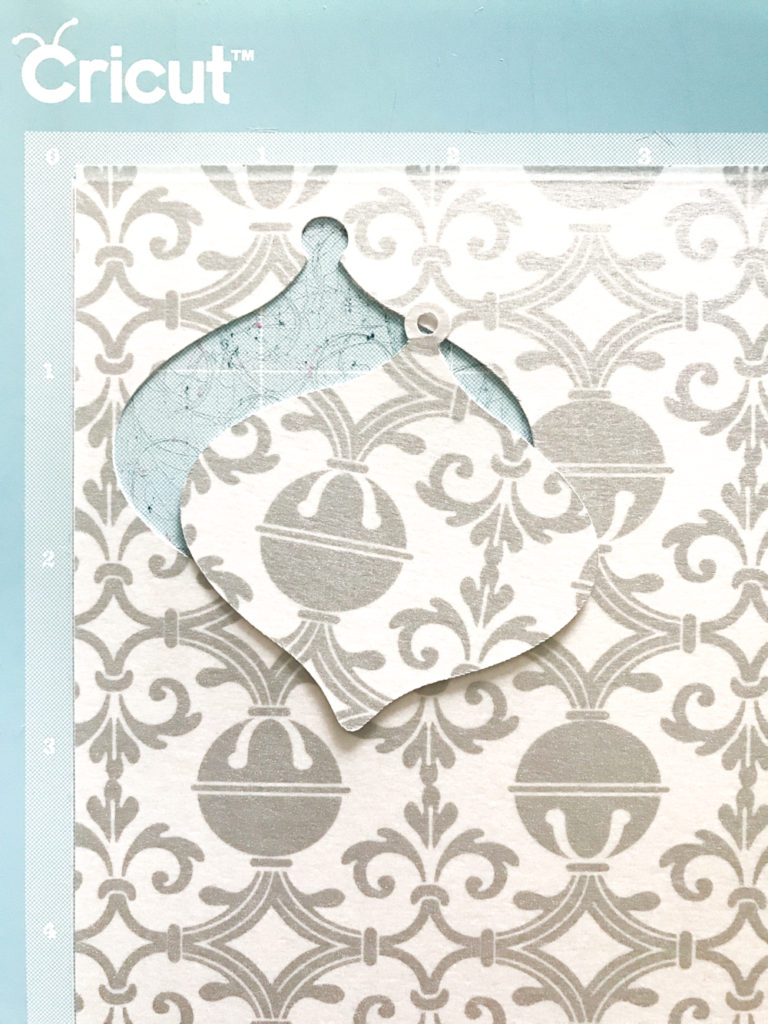
Each of the Ornament colors represents a different design of Washi sheet (or holiday patterned vinyl) applied to cardstock before cutting. Use the “Cardstock, Adhesive Backed” setting to cut.
This design also uses Cricut Pens to draw the ornament strings and “Merry Christmas” script. The gorgeous script is a hand lettered Cricut design by Natalie Malan – I love it so much!
As with the other two designs, this card also uses the Cricut Scoring Wheel to create the fold lines of the card and card liner.
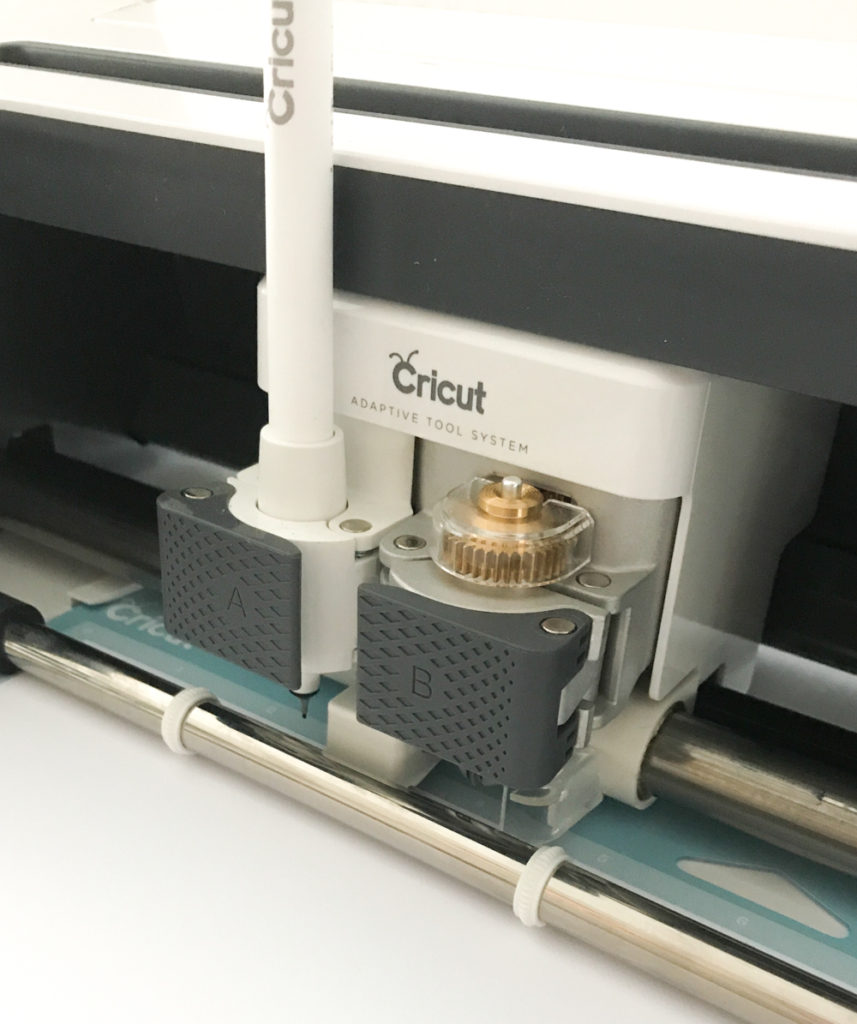
With the Cricut Maker, you can use two tools at once. Here’s my Maker hard at work with the Cricut Pen and Scoring Wheel loaded in the Adaptive Tool System.
The Washi Sheet adhered to the cardstock cuts so cleanly! (Excuse my well-used mat!)
Assemble the card pieces and admire your finished card!
IF YOU’D LIKE MORE DIY CHRISTMAS IDEAS, I THINK YOU’LL LIKE THESE POSTS:
Free Grinch SVG + Cricut Shirt DIY
Free Merry Christmas Y’all SVG
Merry and Bright Flamingo Sign + FREE SVG
Christmas Cookie Exchange with Oriental Trading
DIY Monogrammed Plaid Tote (DIY Christmas Gift Idea!)
12 Days of Christmas Countdown Boxes
DIY Christmas Tags in 15 Minutes
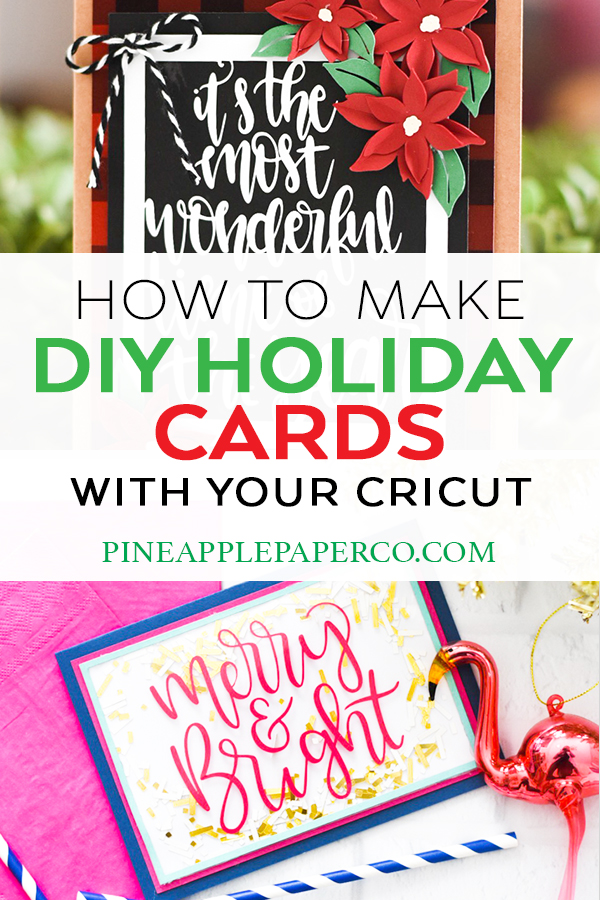
Pin DIY Christmas Card Ideas with Cricut


ABOUT CHARYNN
Hi, y’all! I’m Charynn, the owner and designer of Pineapple Paper Co. I’m a mom of four kids (two girls and two boys) living in Pittsburgh. I love hand lettering, anything southern, cocktails, and of course, pineapples! I am excited to share my SVG files, printables, and craft projects with you! The pineapple is a symbol of hospitality, and I welcome y’all to my little corner of the internet. Read more…