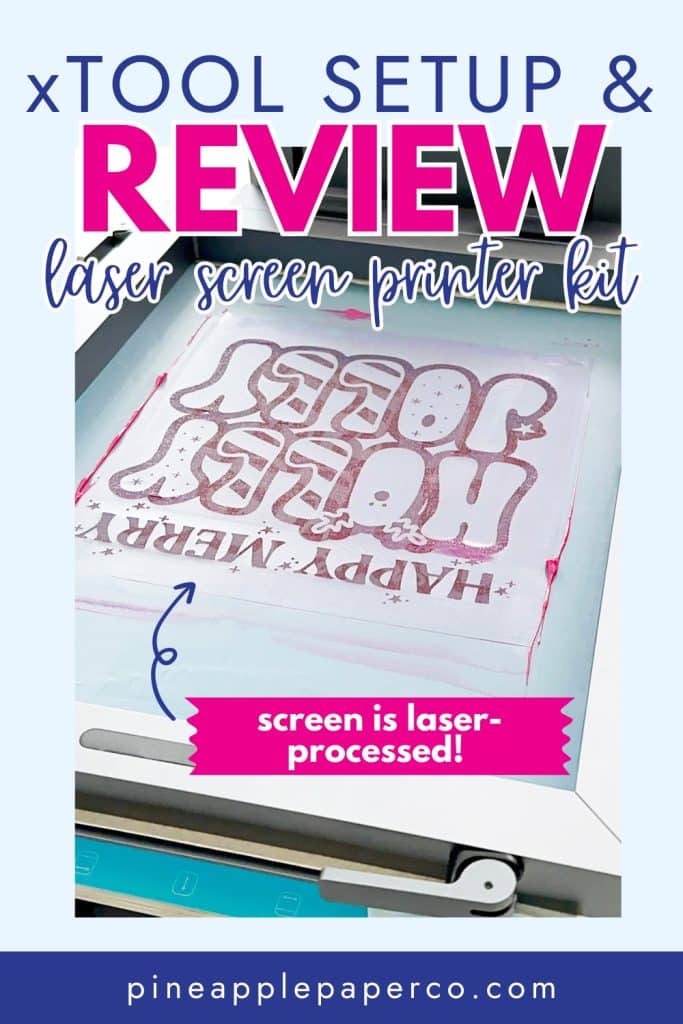
xTool Screen Printer Review: Set Up, How to Use, and Free Designs
This post and the photos within it may contain affiliate links. As an Amazon associate I earn from qualifying purchases. If you make a purchase through one or more of the links, I may receive a small commission at no extra cost to you.
The xTool Screen Printer is here! See what is in the box, everything you need to use the screen printer, and how to set it up for your first screen print! Plus, I will share what I learned about the screen printing system and what I think you should buy! Read before you make your first print!

I am so excited that I got to try the brand new xTool Screen Printer! It has made such a huge impact on Kickstarter (it raised over $1 million!) and will be available for purchase in December 2023. This review is intended for crafters that already have a laser machine OR are interested in purchasing a laser machine to learn how to make screen printed shirts and crafts.
If you are new to laser machine crafting, you will definitely want to learn more about xTool machines. I have tested and use FOUR of their laser craft machines! If you want to know whether or not you should buy an xTool machine, you are in the right place!
Start by downloading and reading my FREE Intro to Laser Craft Machines eBook below! It will walk you through all of the things you need to know about getting started: what kind of machines are available, what you can make, and how much a machine will cost. I have experience with Glowforge and xTool machines, so if you’re interested in either of those two machines, read the eBook FIRST!
Trying to decide what Laser Craft Machine is Right for You?
Download my FREE eBook: Beginner’s Guide to Laser Craft Machines! With 3+ years of experience and testing of 5+ lasers, let me teach you the basics! Learn the different types of lasers, projects you can make, potential cost, and more!
Read the guide BEFORE you buy!
If you are interested in a specific xTool machine, here are my best posts, including machine reviews:
Learn More About Laser Machines!

What is the xTool Screen Printer?
Let’s talk about the xTool screen printer kit! It is the first laser screen printing system on the craft market! xTool has reinvented the screen printing process by making a screen that can be processed on a laser craft machine. No more messy, time intense screen printing methods!
The screen printer is technically an ACCESSORY for xTool laser craft machines. You will need to purchase a laser machine like the xTool D1 Pro or xTool S1 Diode Laser Machine to use the screen printer. You can buy a bundle that includes the xTool Screen Printer and a Laser Machine. I have the xTool S1 40W, so that is the machine I will show in my post.
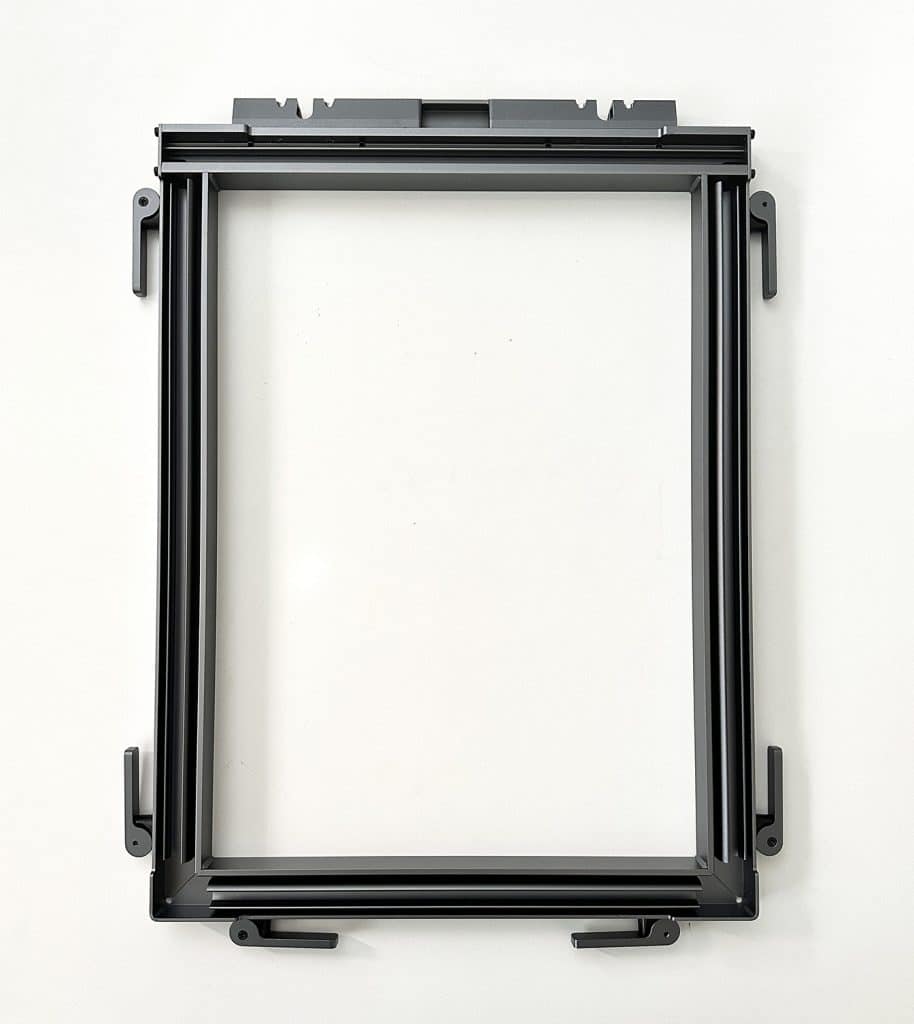
The screen printer is a press that holds a screen printing frame and a screen. The screen frame is designed to be placed in the laser machine so that you can engrave the design (burning away the coating on the screen) with your laser! You press the screen onto a blank material then pull ink through the screen to transfer a design onto the material.

What is Screen Printing?
Traditionally, screen printing is a process that requires you to apply photo-sensitive emulsion to a mesh screen, then transferring an image by processing the screen with light and washing away the unexposed emulsion.
Then the frame is inserted into a screen printing press (or just placed flat on the material) and ink is pulled through the screen to apply the design to the material.
Screen printing is a process that has been used for over 1000 years to transfer designs, and is used commercially across the world. It is used by artists (most notably Andy Warhol, who is from my hometown!), designers, and even home crafters! The process has been adapted for avid home crafters that use Cricut or Silhouette machines by using vinyl to cut designs.
One limitation of cutting vinyl to apply or “block” a design onto a screen is that you lose detail. Cricut and Silhouette machines are not able to produce intricate edges and designs like the photo emulsion system.
Although screen printing with photo emulsion can produce amazing designs, it requires a lot of time, space, and supplies. In fact, I tried the process almost 20 years ago and gave up after producing a few screens due to the expense, time, and space required. Between hand stretching the screens, applying the emulsions, waiting 1-2 days for a screen to be ready, and the mess, traditional screen printing was not for me.
xTool is revolutionizing the screen printing world by offering a screen printing system that combines laser technology with traditional printing techniques to produce detailed high quality screens in a fraction of the time, with no mess.

Important Features of the xTool Screen Printing System
Here are the features that makes this screen printing kit stand out among others, according to their website.
The xTool Screen Printing Process is FAST
Traditional screen emulsions required 1-2 DAYS to prepare for screen printing. When you engrave a pre-coated screen with a xTool laser, that process is cut down to 1-3 HOURS. Most designs will be closer to the 1 hour time frame! It just depends on the size and detail of your design.
Plus, with the multi-screen xTool screen printing kit, you can print multi colored designs in a fraction of the time by easily swapping between frames.
Stretching a Screen with the xTool Screen Printing Frame is EASY
As someone that has hand stretched screen printing screens, I can tell you that the design of the xTool frame is amazing. I am able to stretch a screen in about 30 seconds, and the quality of the stretch is really good.
The xTool frame system includes 4 tension strips and 6 quick-pull wrenches that ensures uniform tension and allows you to swap screens more efficiently.
Screen Print a Design with Industrial Level Detail
This is the first system that allows home crafters to achieve the same results as a commercial screen printing system. Since you engrave the design with a laser beam that is thinner than a strand of hair, you can achieve detail that is impossible with a Cricut or Silhouette machine.
Precise Screen Placement with 3-Axis Adjustments
You can adjust the position of your material with adjustment knobs built into the xTool Screen Printing system. This is imperative for multi-coloring printing, as you can adjust your material after it is on the press by moving the base of the press, NOT the material!
Screen Print on Thicker Materials
You can screen print on more surfaces with the x-Axis Auto Press system built into the xTool Screen Printer. Adjust the auto height of the press with one knob, allowing you to screen print on materials up to 60mm tall.

What Comes in the xTool Screen Printer Box?
The xTool Screen Printer comes in two kits: the Basic Kit and Multi-Color Kit. I received the Basic Kit. (Spoiler alert: I would purchase the Multi-Color Kit).
What is Included in the xTool Screen Printer Basic Kit
This kit includes materials to easily produce one-color screen prints.
- Screen Printing Press
- 1 – 11.5″ x 16″ Screen Printing Frame
- 3 – 11.5″ x 16″ Screen Printing Screens
- Magnetic Board
- Adhesive Mat
- 9 x 5″ Squeegee
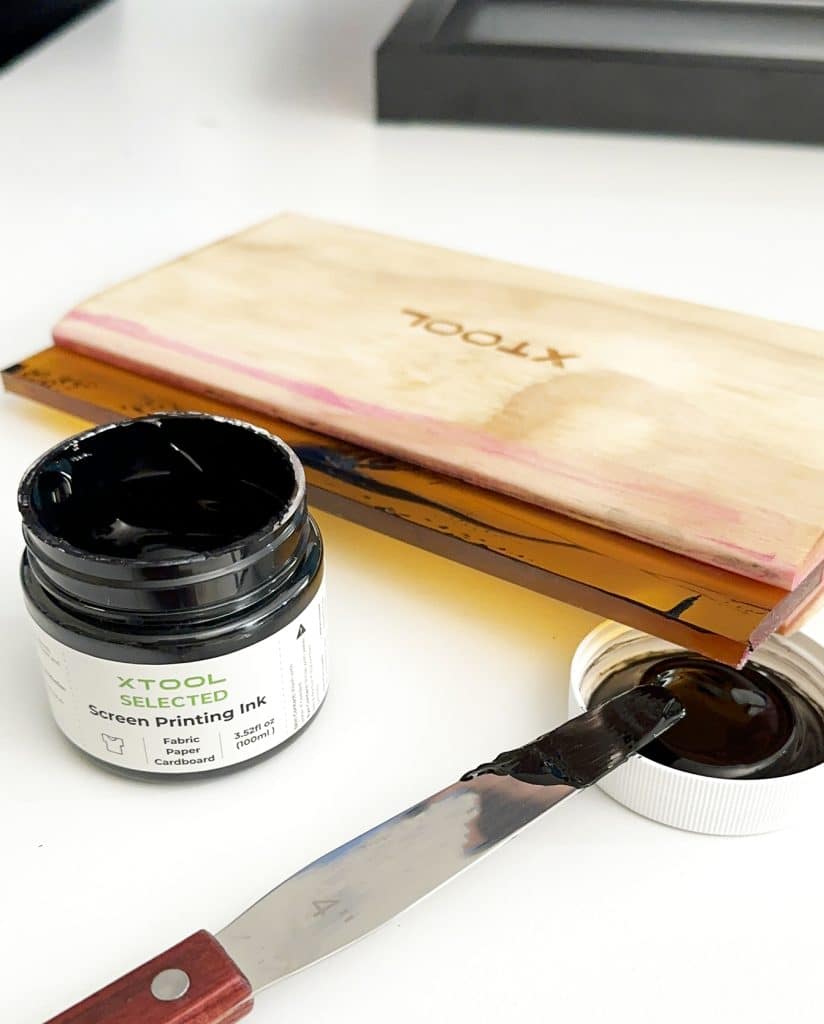
- Ink Spatula
- Water Based Ink Set (Blue, Yellow, Red, Black)
- Storage Box (I didn’t receive)
- Tote Bag
- Paper Sample
What is Included in the xTool Screen Printer Multi-Color Kit
- Screen Printing Press
- 4 – 11.5″ x 16″ Screen Printing Frame
- 12 – 11.5″ x 16″ Screen Printing Screens
- Magnetic Board
- Adhesive Mat
- Frame Fixing Piece (also included with laser machine bundles)
- 9 x 5″ Squeegee
- Ink Spatula
- Water Based Ink Set (Blue, Yellow, Red, Black)
- Storage Box
- Tote Bag
- Paper Sample
Additional Supplies for the xTool Screen Printer
Upon release of the xTool Screen Printer, you will be able to buy additional screens and screen printing frames. You will also be able to buy:
- 6 Color water based Ink Bundle
- Florescent Screen Printing Ink Bundle
- Glow In the Dark Screen Printing Ink Bundle
How Big is the xTool Screen Printer?
The size of the screen printing press with the screen frame attached is approximately 8 inches tall, 24 inches deep, and 15 inches wide with the clamps closed. Those are my measurements, not from the xTool site. It does not have a very large footprint, and can be easily moved around as needed.
How Much Does the xTool Screen Printer Cost?
At product launch, you will be able to buy the basic kit, multi color kit, as well as bundles with laser craft machines that are compatible with the screen printer (there will be various bundles with different laser models and prices may vary):
- xTool Basic Screen Printer Kit: $249
- xTool Multi-Color Screen Printer Kit: $459
- D1 Pro with Basic Kit: $549+
- D1 Pro with Multi-Color Kit: $759+
- S1 with Basic Kit: $1789
- S1 with Multi-Color Kit: $1999
How to Use the xTool Screen Printer
My basic Screen Printing Kit came with 3 screens and I have used them all! I will walk you through the process of how to use the xTool screen printer with my xTool S1 40W. This tutorial will give you an idea of how it works and hopefully help you complete your first project.
How to Stretch a Screen with the xTool Screen Printing Frame
Having manually stretched a screen printing screen before, this is the part I really loved! It is so easy.
On a flat surface, flip over the screen printing frame so that the bottom of the frame is facing up. Release all 6 wrenches around the side of the frame. That will release the screen tension system.
The screen printing screens come with cardboard adhered to protect the screen coating. xTool suggests that you place the cardboard inside the frame (cardboard side down). The cardboard will help you center the screen into the frame. All screen flaps need to be on the outside of the frame.
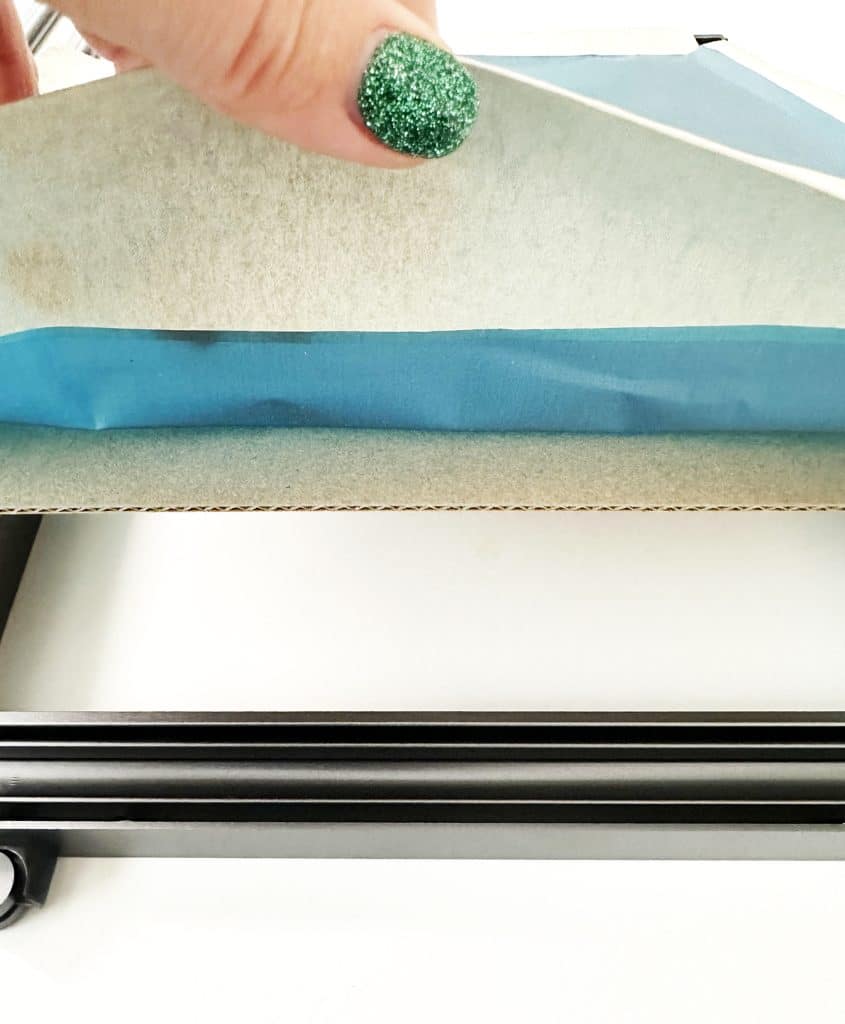
Take one of the long tension strips and hold it at a 45 degree angle while placing it into the tension slot. At the appropriate angle, it will slide in easily and then you can rotate it down so that the edge locks into the frame. Lock the wrenches on the same side of the frame. Repeat with the other 3 tension strips, maintaining a little tension on screen as you place the strips in the frame. There are no tension wrenches on the top of the frame.
NOTE: In the manual that came with the machine, xTool instructs you to place all of the tension strips in the frame, and then closing all of the wrenches. In their recent FAQs, xTool changed that instruction to tighten the wrenches on the corresponding side as you lock in the tension strips.
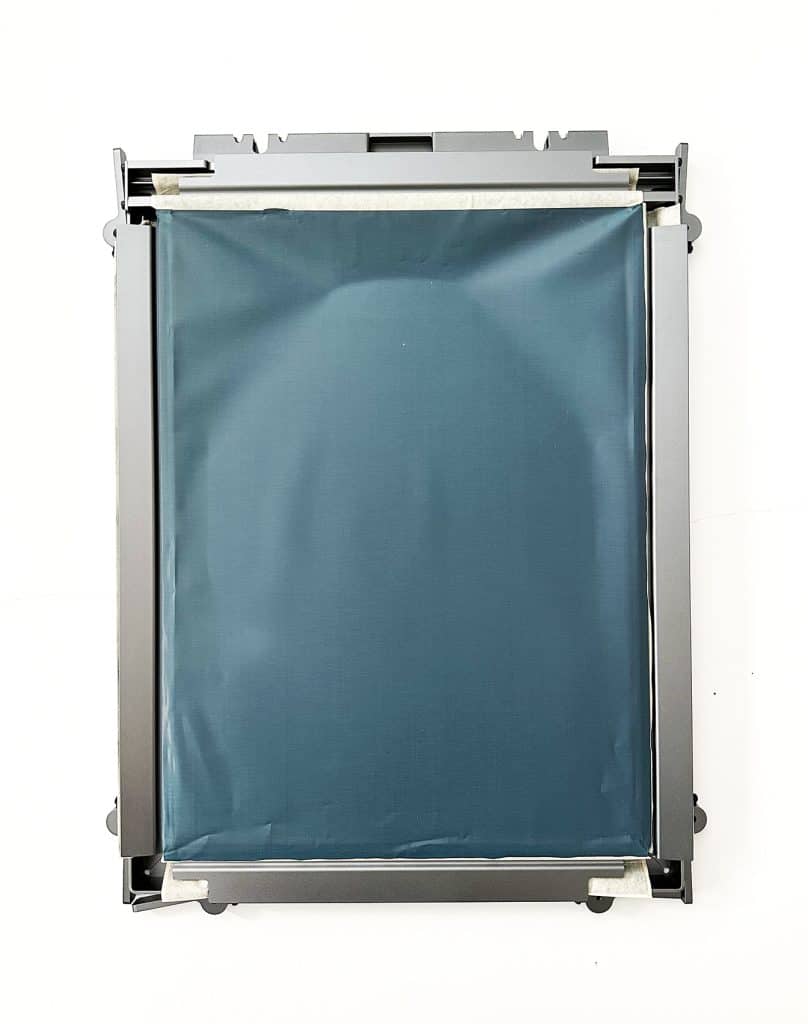
Once all of the sides are locked into place, the screen should be tight across the entire frame.
Flip the screen frame over and remove the cardboard piece.
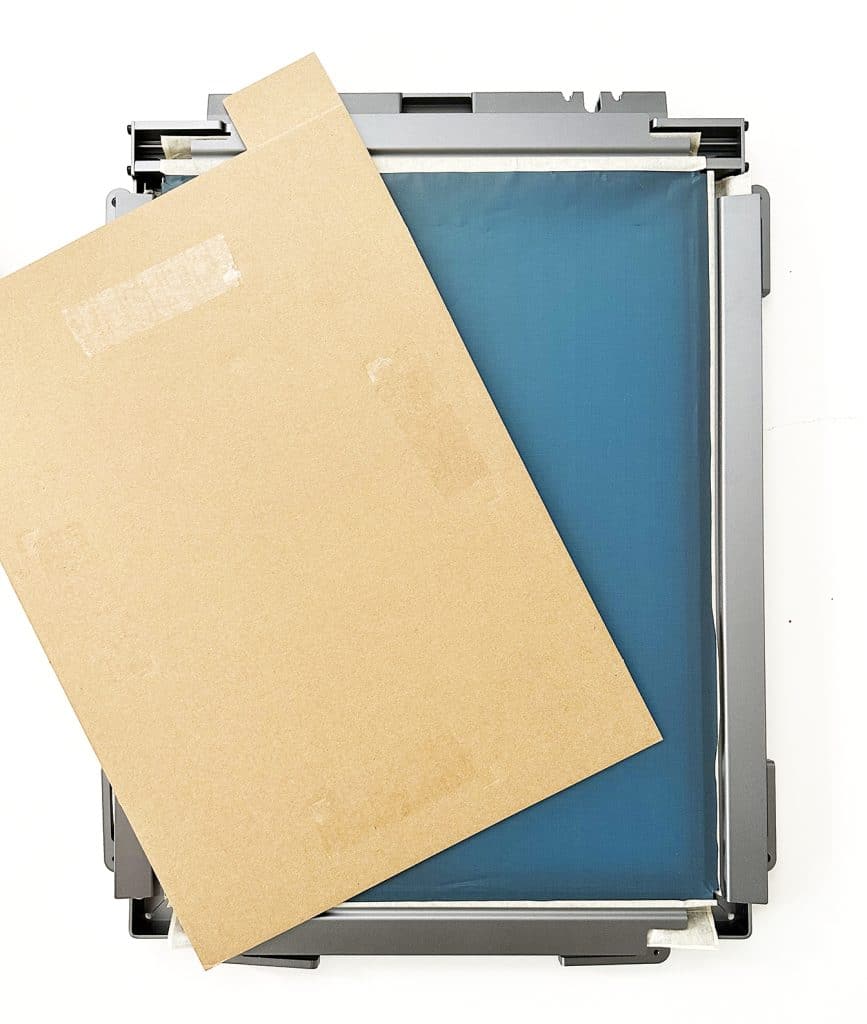
TESTING NOTE: I found that I was able to tighten my screen more effectively without the cardboard in place. I will continue to test to see if there is an advantage to using the cardboard.
How to Engrave a Screen Printing Screen with a xTool Laser
xTool has updated Creative Space so that you can choose settings for the screen printing frame and coated screen. This makes it super easy to use the screen printing kit with your laser.
Important Note: I do not have the multi-screen printing kit, so my kit did not come with the frame fixing piece for my laser machine.
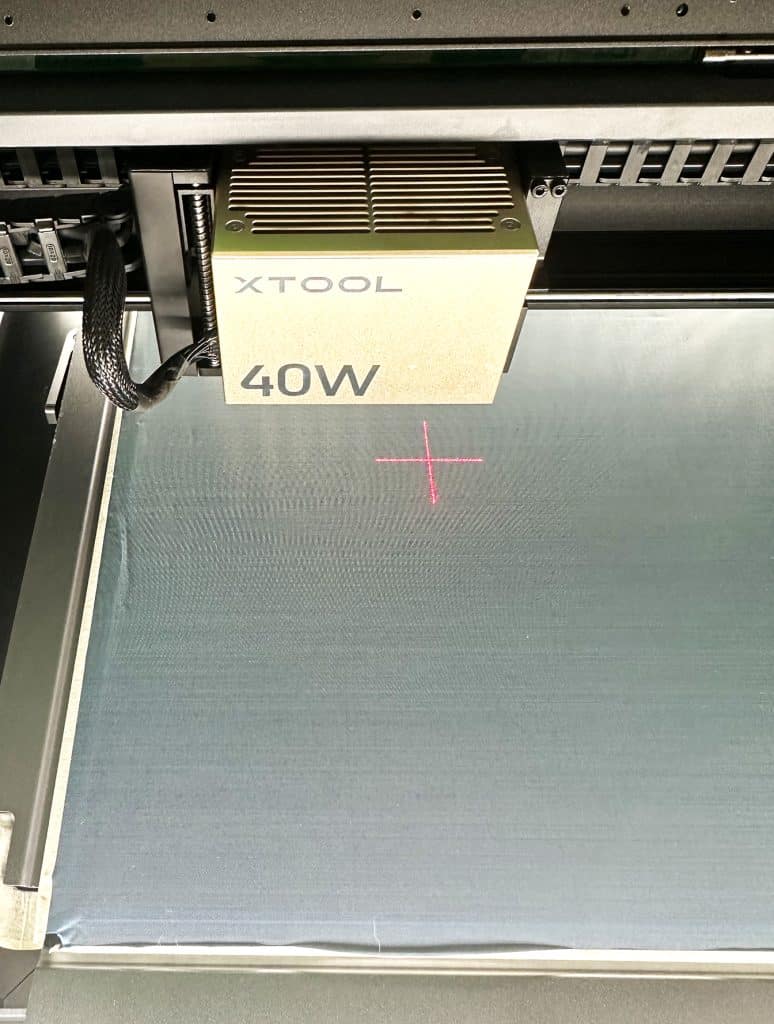
Place the Screen Printing Screen in xTool Laser Machine
Make sure your laser module is out of the way before placing your screen printing frame in your machine. With the back of the frame facing up, just place the frame with the tightened screen in the machine.
How to Set Up a Screen Printing Design in xTool Creative Space
Open Creative Space and make sure that your machine is connected.
For the laser head setting, there is now a “Screen Printing” setting instead of “Laser Flat.” This places a screen printing frame on your canvas. I would still recommend marking the position of your machine for now.
Check the auto-height using prompts in Creative Space, then set your design space with the marking tool. Remember, now you can mark areas with different shapes!
There is also a materials settings for Coated Mesh Screen.

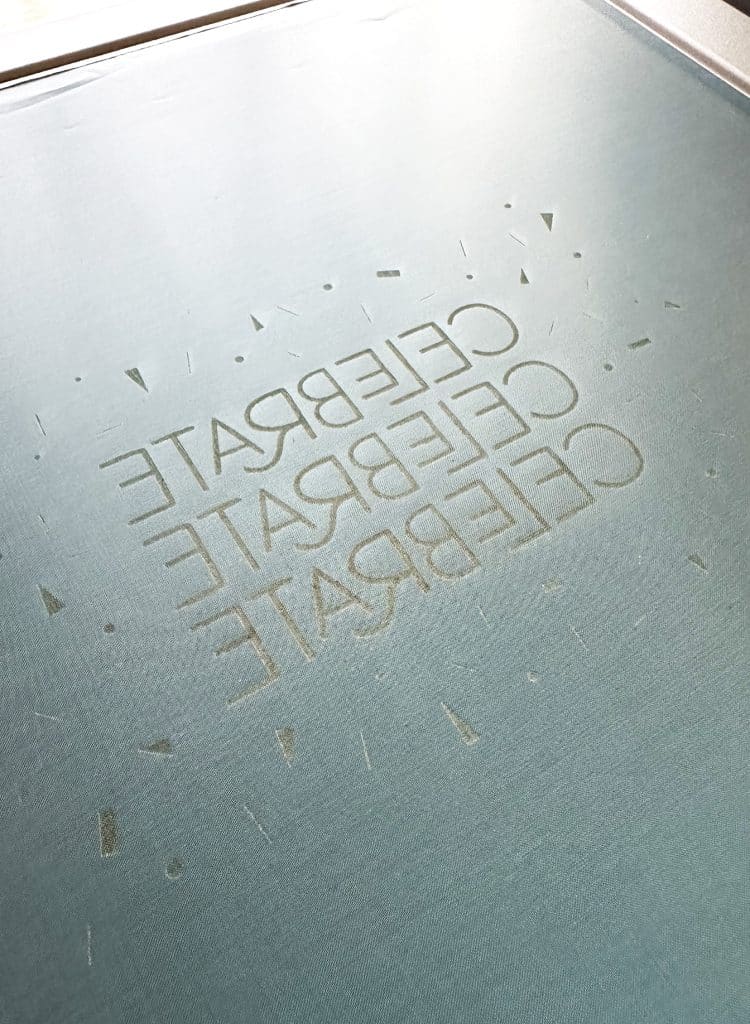
Add your image to the canvas. Since you are engraving the BACK of the screen, you need to make sure to mirror your design. Then rotate 90 degrees so that your image is in landscape mode. Center in the frame.

Select your design, then choose the laser settings for your design. Select “Engrave” and if you have your material set for Coasted Mesh Screen, you’re good to go.
If you are using a large portion of your screen, expect the design to take an hour or so to engrave. It is similar to engraving a large cutting board, time-wise.
Remember, it’s always important to not leave your machine unattended while it is running.
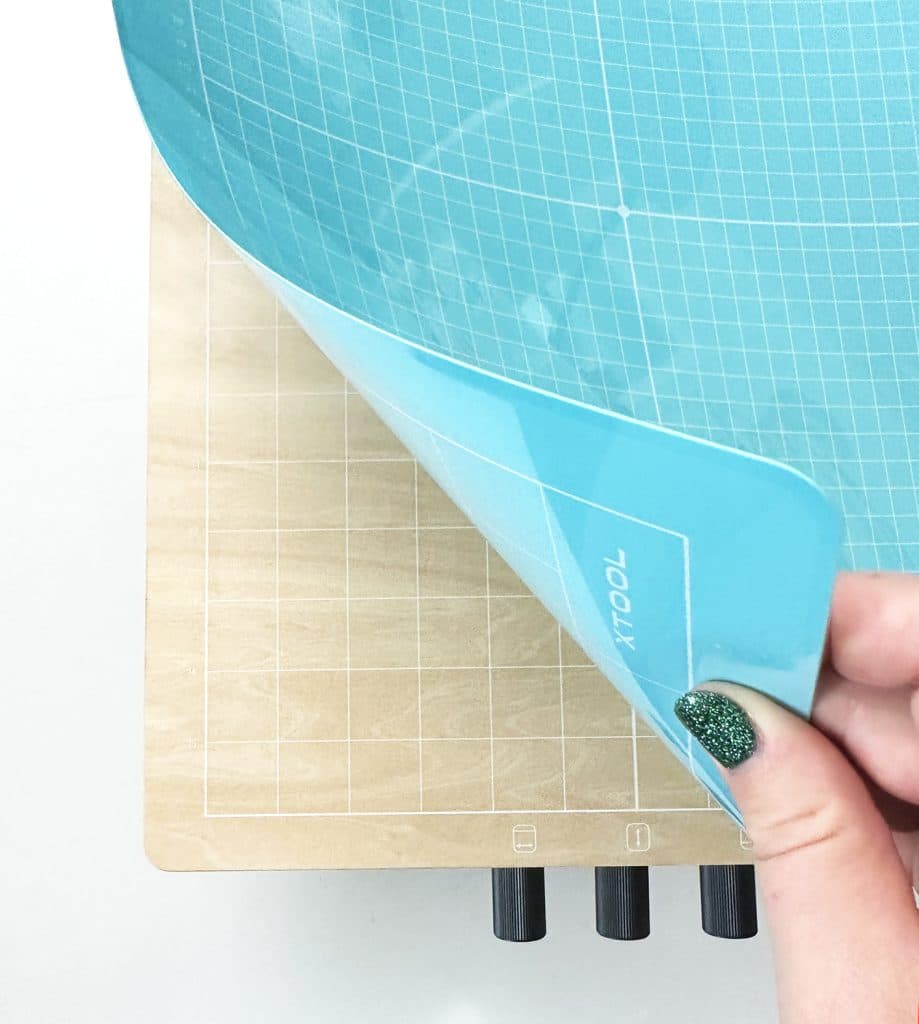
The laser will burn out the design and the rest of the coating will stay on the mat!
How to Screen Print with the xTool Screen Printer
Setting up the screen printing press is really easy! It only takes a few steps to make your screen printed project!
Remember that screen printing requires practice for optimal results, just like other crafts!
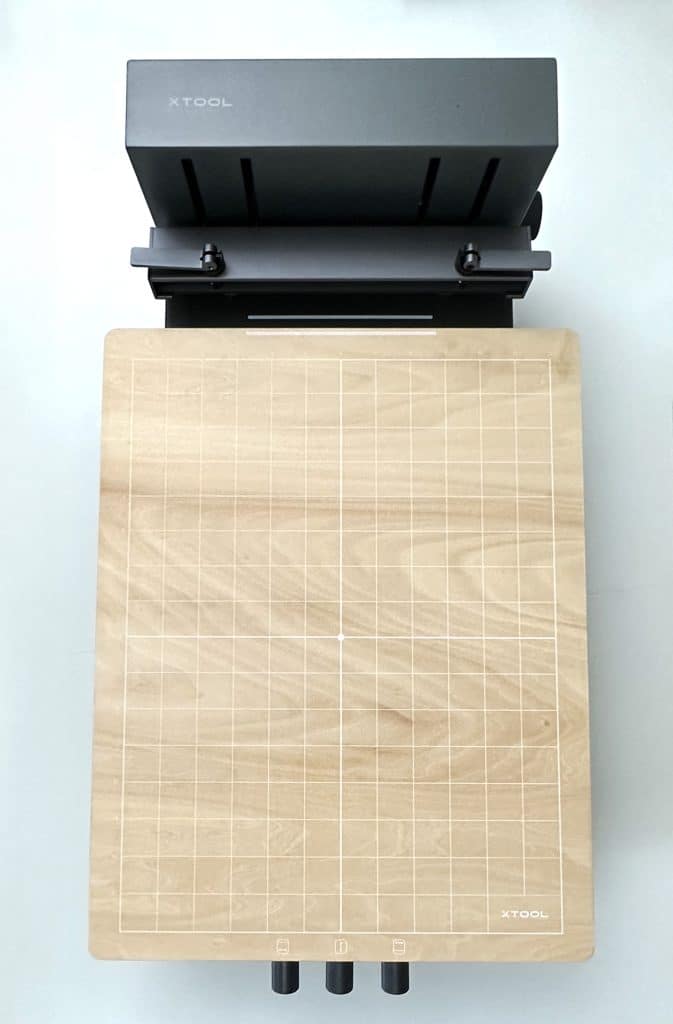
Place Material onto xTool Screen Printing Press
Decide the best way to secure your item in the screen printing press. The screen printing kit comes with a double-sided adhesive mat that you can use to secure items that may easily move.
Ideally, you only want one layer of fabric when you are printing. So for shirts, tote bags, sweatshirts, and similar materials, open them up and place them around the printing press frame.
For all of the projects I made (card, shirt, and tote bag), I used the adhesive mat on top of the magnetic board. I did place a sheet of card stock inside the shirt and tote bag to prevent ink from bleeding through the fabric onto the mat.
Place Laser Processed Screen in xTool Screen Printing Press
Unlock the wrenches on the top of the screen printing press. Slide the frame into the slots until it is fully seated and then lock the wrenches down. It is so easy!
Your frame should be inserted so that the screen rests flat against the material.
Auto-Adjust Screen Height with z-Axis Adjustment Knob
One of my favorite parts of the xTool screen printing press is that you can lock the height of the screen to match the thickness of your material.
On the right side of the press, turn the height adjustment knob counter-clock wise to loosen. With a clean screen, press it down to meet the material and while holding, tighten the knob. Now the screen frame is automatically adjusted to your material!
Adjust Material as Need with 3-Axis Adjustment Knobs
Centering the image on the screen and then centering my material on the press are the hardest parts of screen printing, in my opinion. You best believe that I will be watching traditional screen printing videos to find out how others center their screens easily!
With the 3-axis adjustment knobs at the bottom of the press, you can fine tune your material placement by moving the magnetic board to line up your design perfectly!
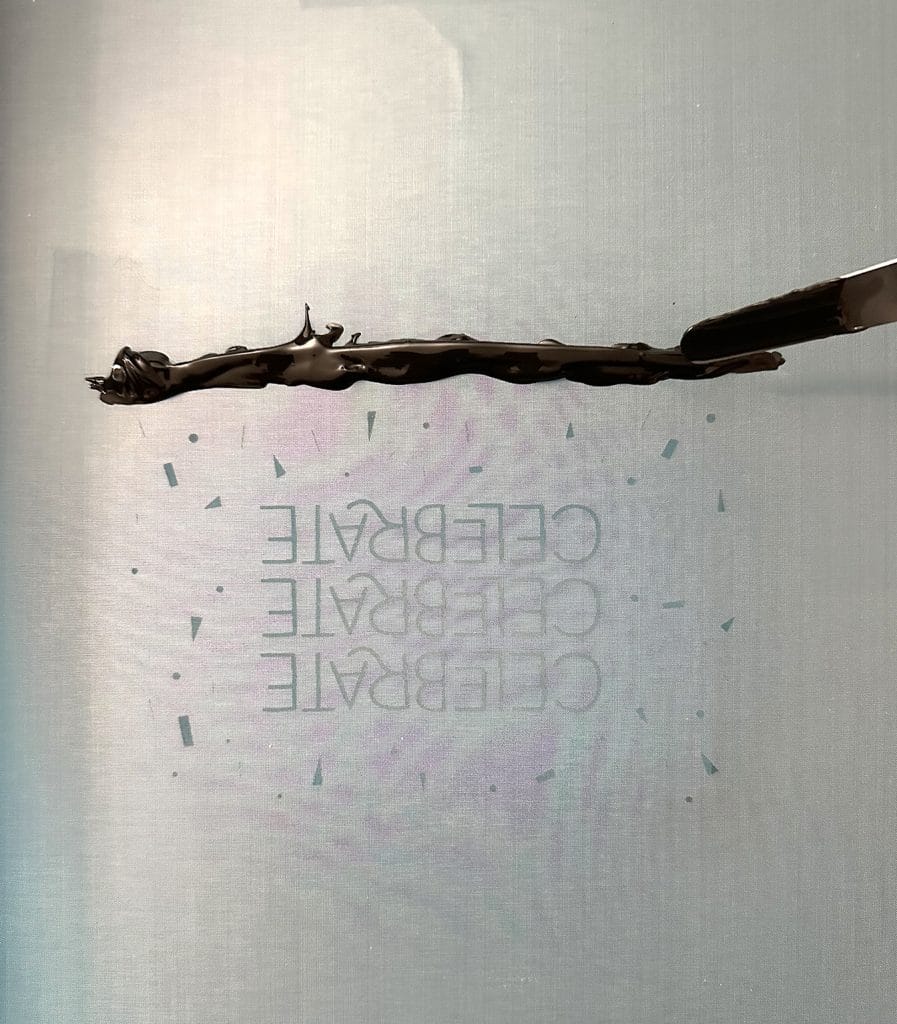
How to Apply Ink to xTool Screen Printing Screen
Apply a strip of screen printing ink above your design using the palette spatula included with your kit. You want to have enough ink to cover your design, but too much to flood the ink all over.
Pull Ink Through Screen with xTool Squeegee
Hold your squeegee at approximately a 45 degree angle and drag the ink across the screen to fill your design.

You will want your design to be smaller than the squeegee, or you may have to drag the squeegee more than once.
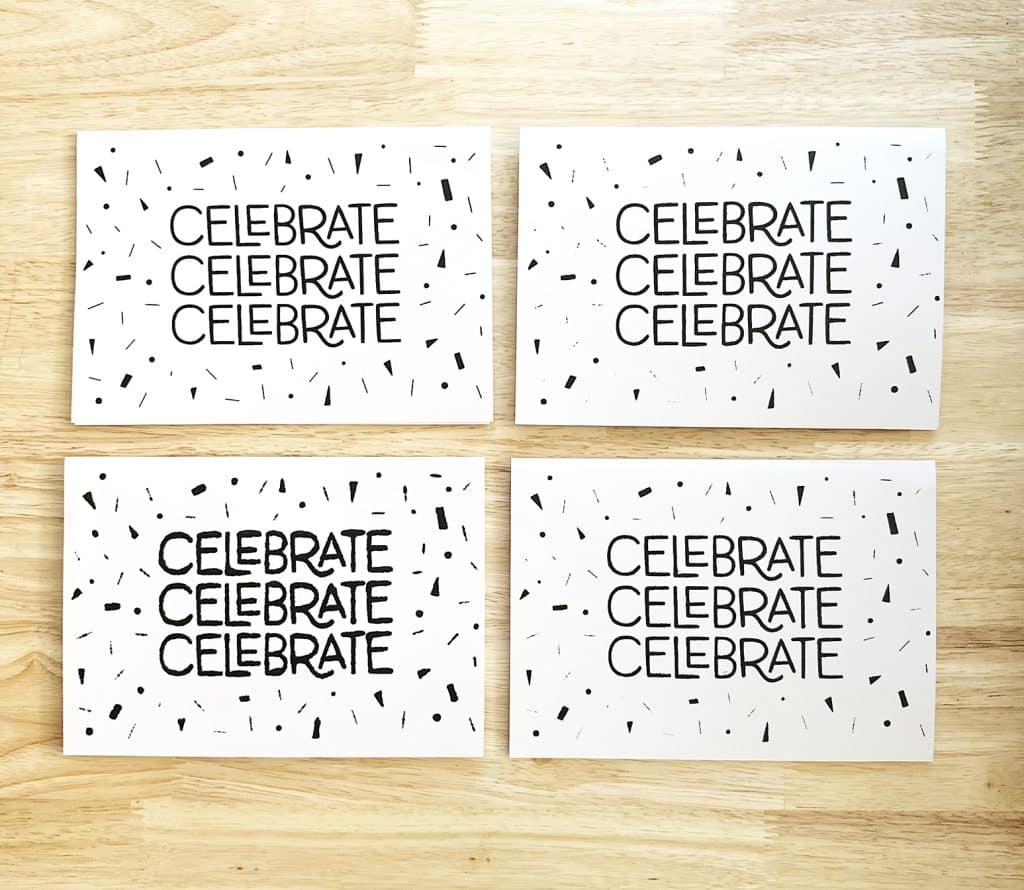
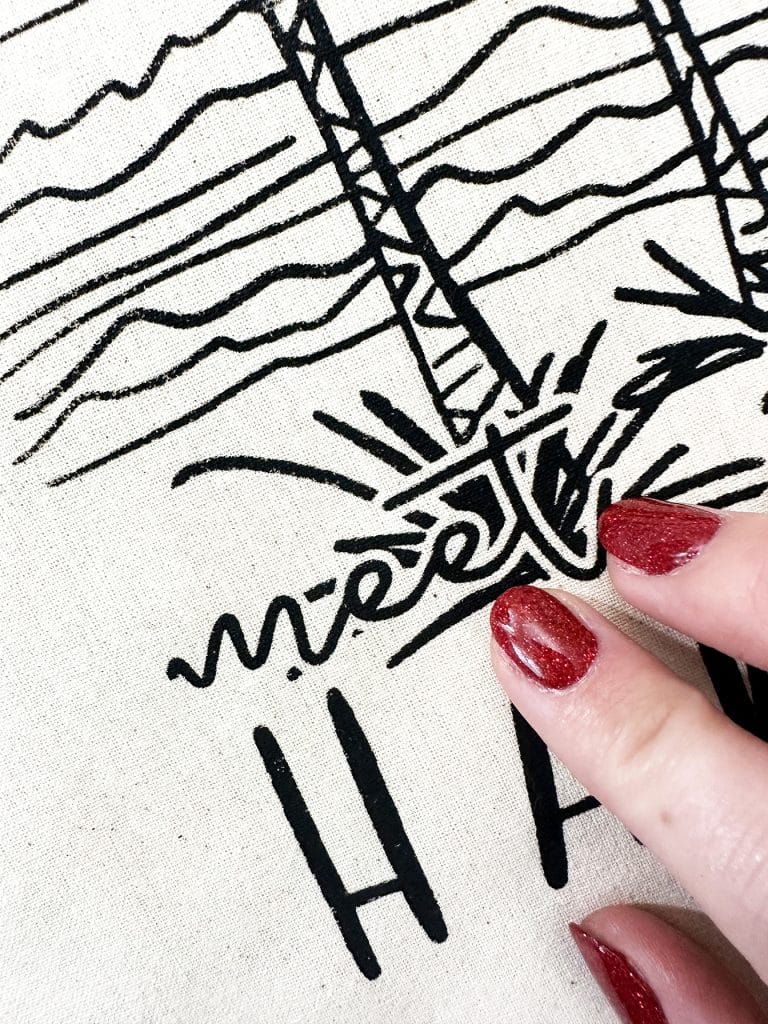
The motion and pressure needed for screen printing will require some trial and error! Start by practicing on throw away items before you move to big projects. If you look closely at the picture below you can see the variation in my prints!
Lift Screen Printing Screen to Reveal Design
Lift the screen away from the material to check the design. Be careful to not displace the material just in case you need to fill in areas you missed.
xTool Screen Printer Review
Here are my thoughts about the xTool Screen Printer! My overall review is that it does make screen printing more accessible and efficient for laser machine users. If you already are interested in making screen printed shirts and bags, this kit might be a good fit for you! The big takeaway: if you want to buy, buy the multi-color screen kit. It’s a good starter kit that you can grow into.
- Compatibility with the more affordable line of laser machines is a significant positive. I love that you do not have to invest in the latest and most expensive laser machine to use this kit. Although I do not own the D1, it has a ton of great reviews and users, and I recommend the xTool S1 diode laser machine to anyone that wants to get into laser crafts without a several thousand dollar investment in a CO2 laser machine. (Again, if you want to know the differences between the two types, make sure you download my free laser eBook).
- Practice makes perfect with screen printing. Screen printing can be “fussy.” I do have a little experience with traditional screen printing methods, and I know that the technique of pulling the ink takes a little practice. Keep that in mind, and expect there to be a little trial and error as you get started. Plan to try a variety of materials and have some fails. No system is perfect or foolproof.
- Because I received the Basic Screen Printing Kit, I was a little nervous that I only had 3 screens to test. Getting the proper results with screen printing usually takes some practice, as does getting the settings right with a laser machine. However, I was able to make a finished project with all 3 screens. Honestly, I was surprised by the results. But I would recommend for you to get the multi-color screen printing kit. I will be ordering more screens ASAP. I don’t think 3 screens is enough to start screen printing. Plan on investing a little more money off the bat, especially if you’ve never tried screen printing before.
- The screen printing kit came with good instructions. Set up was easy. Completely reasonable for beginners to get going. I still think you need more screens, though. Please see notes above. Haha!
- Works seamlessly with Creative Space, BUT I do think I need to test the settings more thoroughly. I noticed that larger engraved areas were splitting after I made my projects. This is not okay for repeat uses of the screen. Since I only have three screens, I can’t test the settings as much as I would like. As soon as I get more screens, I will update this section with further testing.
- It is not huge. I do not have a ton of space in my office, so I liked that the whole screen printing press is compact and can be set up on a table or desk and then put away in a reasonable sized box. I have seen the storage box in pictures, and I love that idea.
- Things that I think are missing: I don’t love the size of the squeegee. You get the best ink pulls by having a squeegee that is larger than your design. I will likely purchase a slightly larger squeegee to test if the screen can handle larger prints.
- You are limited to the size of the press. This really true of any screen, though. xTool did mention in a Q&A session that they are working on different screen sizes, so I am interested in seeing that. I feel like the print size might be a little small for a large sized shirt or bag to do in one pull.

Frequently Asked Questions about the xTool Screen Printer
Which xTool Laser Machines Are Compatible with the xTool Screen Printer?
The xTool D1 Pro and xTool S1 are the two laser craft machines that are compatible with the xTool Screen Printer kits at this time. If you do not own either of these machines, there will be screen printing + laser machine bundles available.
Does the xTool Screen Printer Come Assembled?
It does! Both the press and the frame are made of durable metal, and come assembled and packaged well in a large box.
What Type of Design Files Work With the xTool Screen Printer and xTool Creative Space?
Vector files (specifically SVG file) are recommended to use with the xTool screen printer kit. Those are the types of files that I tested, and they processed quickly.
xTool Screen Printer vs. Screen Printing with Cricut
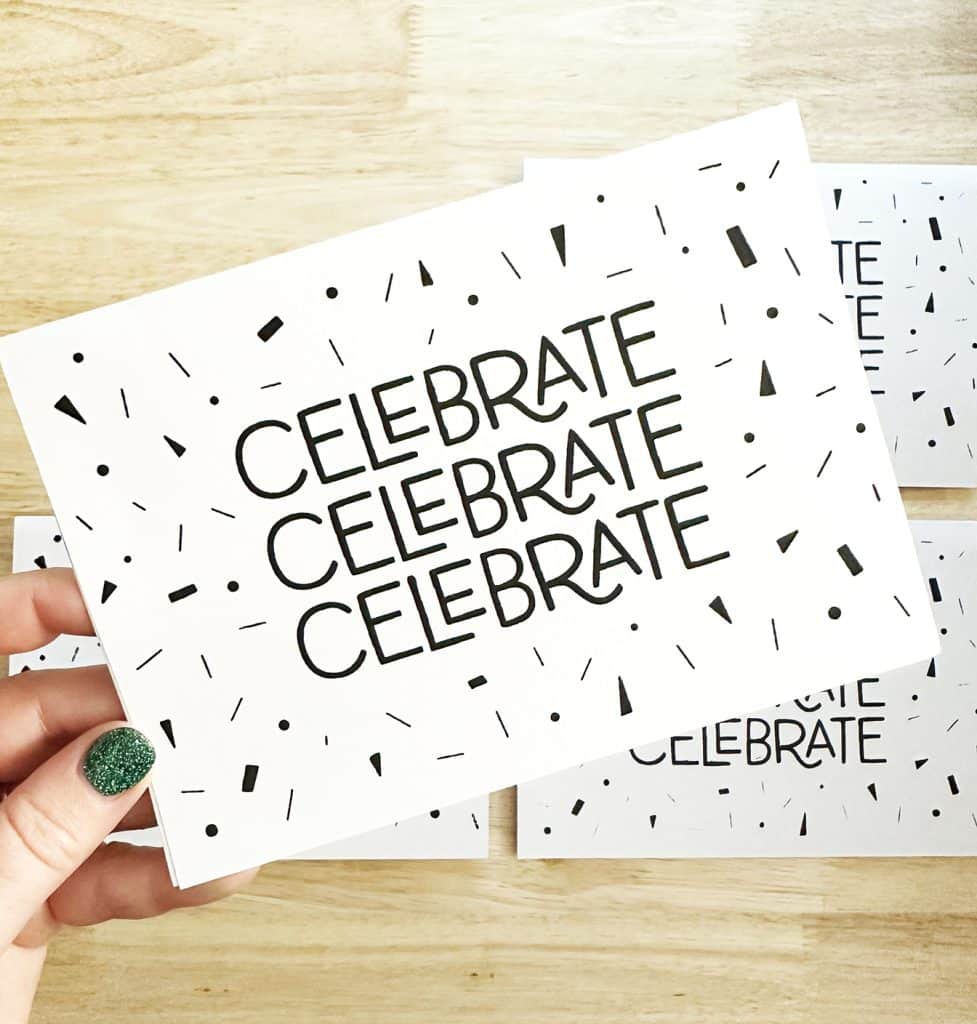
There is absolutely nothing wrong with screen printing with your Cricut and using vinyl. I do think that one advantage to using a laser to engrave screens is that you can achieve a much high level of detail. My tote bag design had rough edges with a sketched look to the design!
Can You Buy Extra Screens and Frames for the xTool Screen Printer?
Yes, after the Kickstarter launch, additional screens and frames will be available from xTool. The price has been projected to be $24.99 for 4 screens and $59.99 for an additional frame. I think this is a pretty good value! And yet another reason to start with the multi-color kit.
Can I Reuse an xTool Screen Printing Screen?
Yes! This is something I am really interested in. It has been mentioned in xTool documentation that you can reuse a processed screen by refilling it with emulsion. I am definitely interested in trying this!
How Long Does a xTool Screen Printing Screen Last?
xTool states that each screen can handle at least 100 prints. The current screens that I have will not come close to that. This is why I think my settings need dialed in when I get more screens.
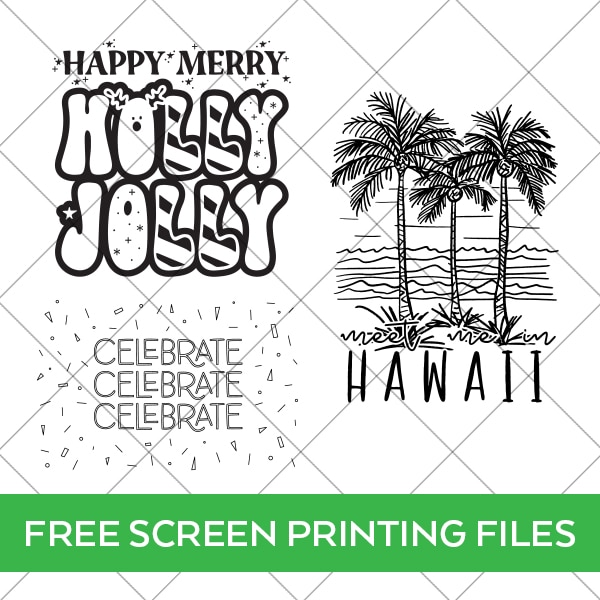
Download Free Screen Printing Design Bundle
Did you like the projects I made with the xTool screen printer? You can download all 3 of the files here!
This file is DOWNLOAD #291 in my FREE DOWNLOADS LIBRARY.
Get the password below! (If you have the password, head over to the library to download the file.
You will NOT be sent an email with the file. Free SVG files available for download are for PERSONAL USE ONLY. SVG file is included to use with xTool Creative Space, Glowforge App, and other laser specific software. The “Holly Jolly” file can also be used for cutting vinyl or HTV, and the “Celebrate birthday card” can also be used as a single line file for use with pen tools or foil transfer. You can read more about this process in the original Cricut Foil Transfer Birthday Card post.
Don’t forget to pin this post to your favorite crafty board on Pinterest!


Charynn,
I have the Glowforge Basic model. Will this Screen Printer work with the Glowforge?
Thank you.
Tawn
Hi! Sorry, I just saw this 🙂 I wouldn’t exactly recommend it, but I think it could be done – it would just take some testing. Right now, the settings are available for the diode laser, but a Glowforge Basic is a CO2. My guess is that the power would have to be dialed waayyy down, if it would work. I’d be afraid the CO2 might blow right through the screen. I believe they are supposed to get it ready to use with the P2, and at that point, I would be a little more confident in testing the settings. The dimensions should be fine, though!