How to Make Coasters with your Cricut
This post and the photos within it may contain affiliate links. As an Amazon associate I earn from qualifying purchases. If you make a purchase through one or more of the links, I may receive a small commission at no extra cost to you.
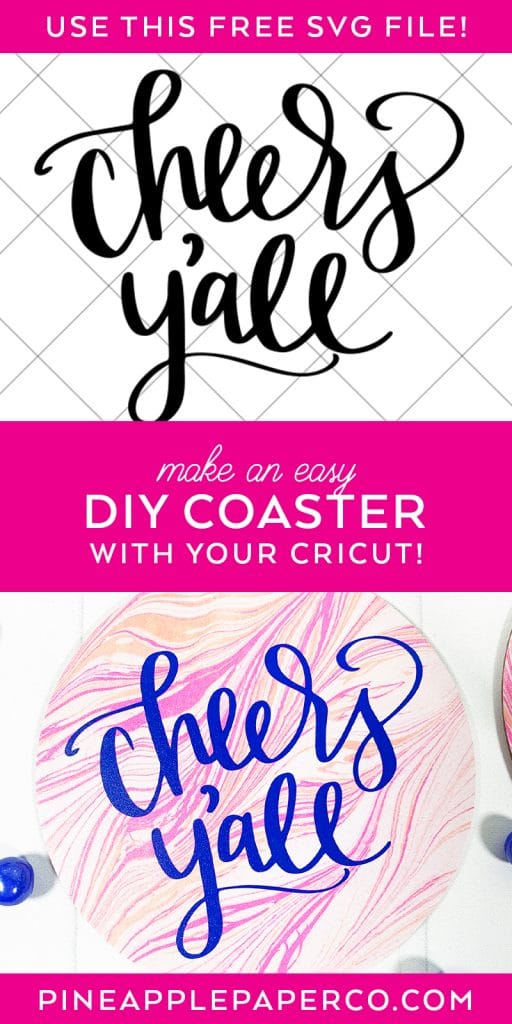
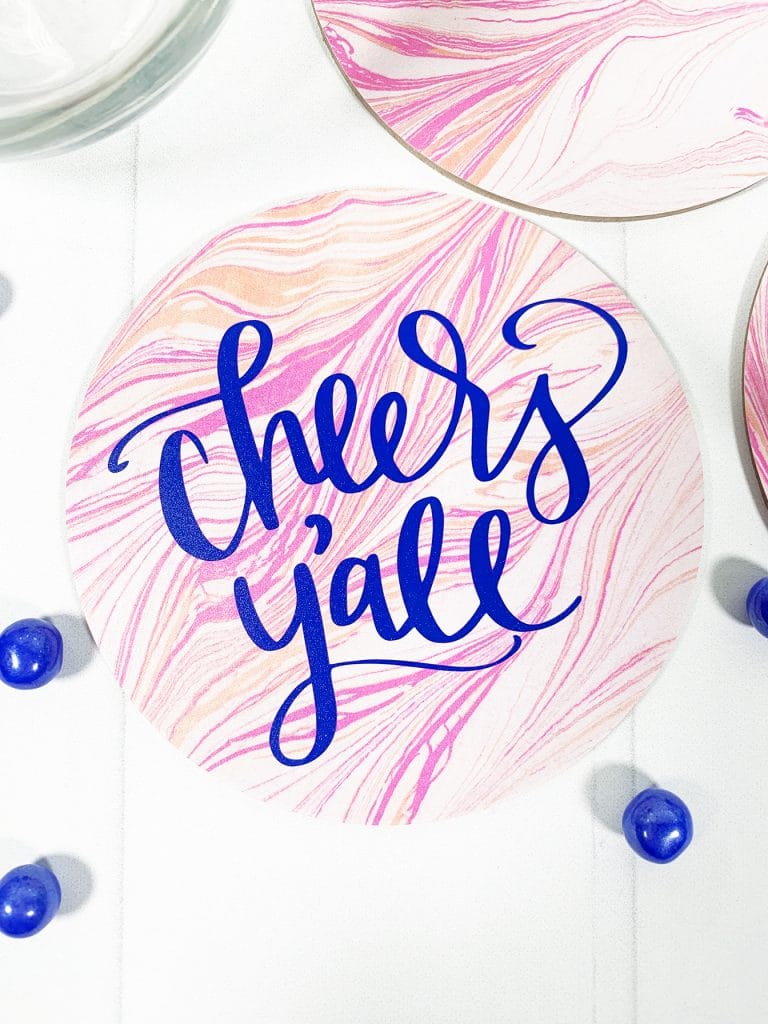
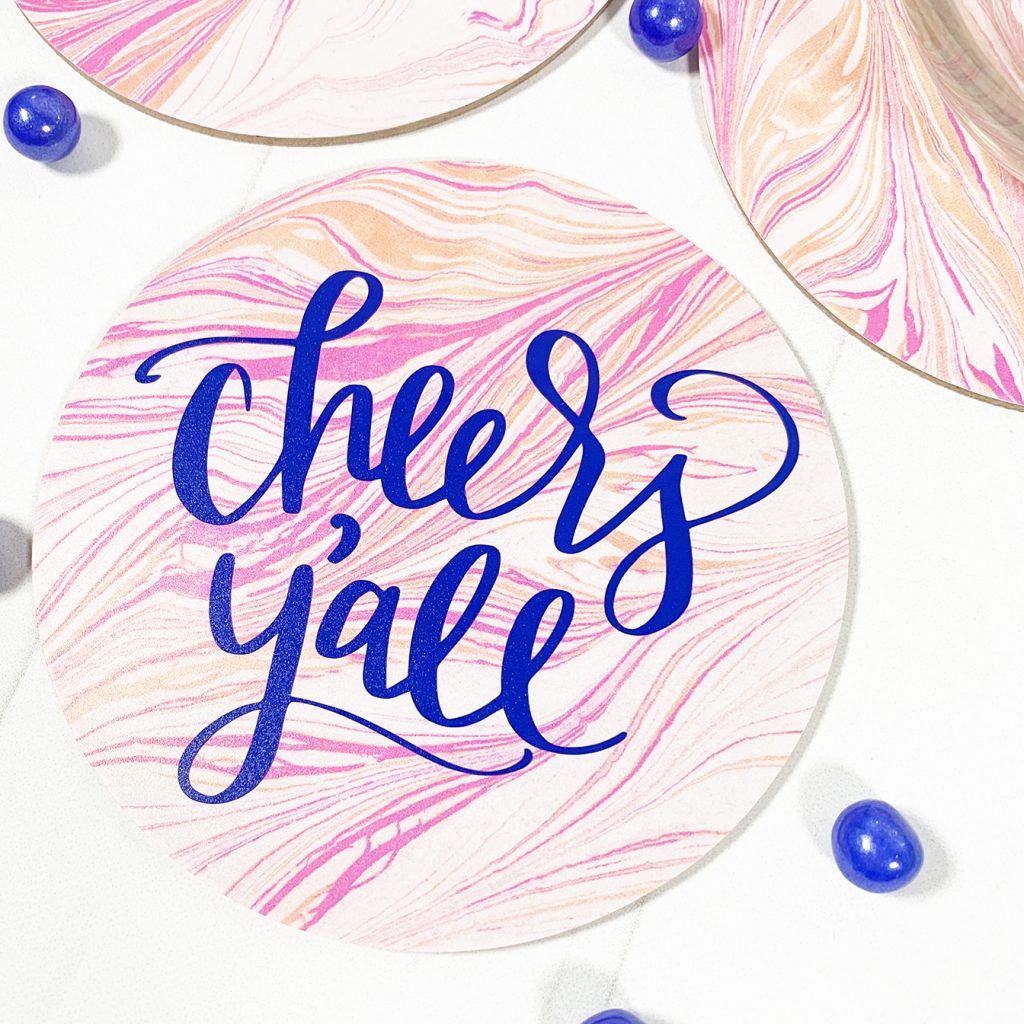
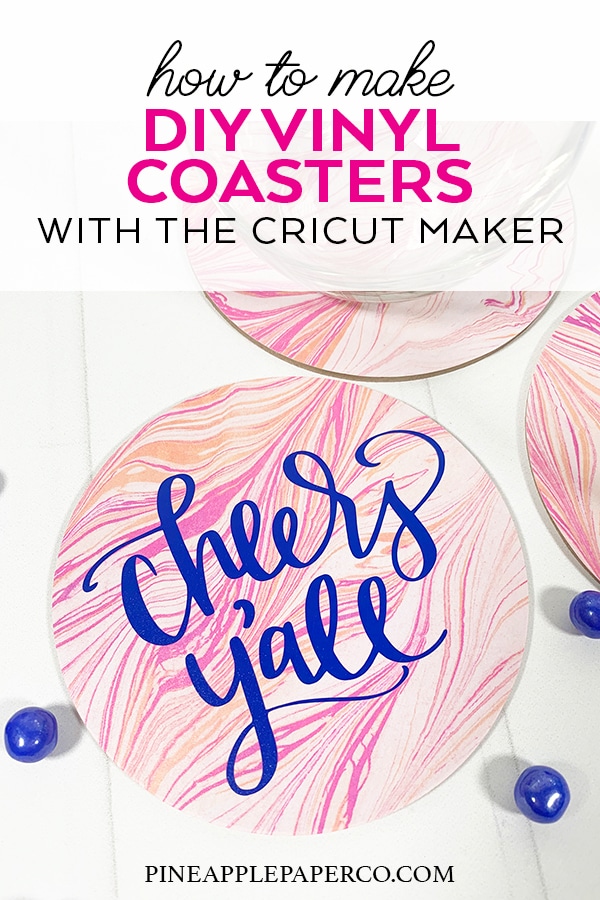
Making your own DIY Cricut Coasters is really easy ! You can use a variety of materials and they are cute and functional. For this project, I used my Cricut Maker to make quick and easy DIY Coasters out of Cricut Chipboard and vinyl – and you don’t have to seal them with Mod Podge! Find out how I made my Cheers Y’all DIY drink coasters below.
How to Make DIY Cricut Coasters
This week, I’m cohosting the “Use Your Cricut” Instagram Challenge with Hey Let’s Make Stuff, where we make Cricut projects based on a weekly theme. This week’s theme is “Drink” and I made this set of EASY DIY Coasters with my Cricut Maker! I used chipboard and covered the entire surface of the coaster with vinyl. They are essentially waterproof without having to be covered with a sealant like Mod Podge.
The Cricut Instagram Challenge hosted by Cori from Hey Let’s Make Stuff is a great way to try new projects with your Cricut, and if you are on Instagram FOLLOW US – @pineapplepapercompany and @heyletsmakestuff and share your projects!
RELATED POST: Make Coasters with Cricut Infusible Ink
What Do You Need to Make your Own DIY Coasters?
You’ll need the following supplies to make the cute coasters pictured above:
–Cricut Vinyl in Marbled Pink (Martha Stewart branded Cricut Vinyl) and Blue
–Cricut StrongGrip and LightGrip Mats (purple and blue)
-Masking Tape
Cricut Chipboard requires the Cricut Maker and the Cricut Knife Blade! If you don’t have a Maker, it’s a great time to get one – the Cricut online store is always having sales, plus there are great bundle deals on Amazon.
How do you a Make Coaster with a Cricut?
If you’re new to using SVG files with your Cricut machine, make sure you read my full post on How to Upload an SVG to Cricut Design Space.
Open the DIY Coaster Cricut Design Space file that I’ve created for blank coasters. First, upload the Free Cheers Y’all SVG to Cricut Design Space.
Add the “Cheers Y’all” image and resize to fit your coasters. Copy and paste the image so you have 4 “Cheers Y’all” designs, like I did:
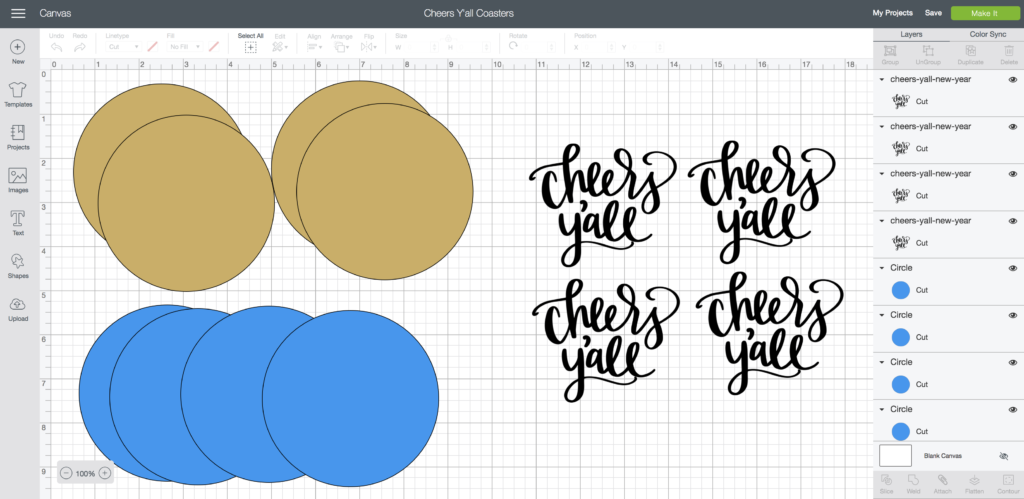
Next, cut out the coasters and vinyl. Since these are simple circle shapes, the Cricut Knife Blade will cut out the coasters from chipboard in about 5 minutes.
Weed away the extra vinyl from the “Cheers Y’all” designs. Place the vinyl circles on top of the chipboard, and then use transfer tape to place the “Cheers Y’all” on each coaster.
You’re done! Since the coaster is covered with vinyl, it’s really not necessary to seal these coasters with anything. That’s what makes them so easy and so quick to make – no drying time!
LATEST POSTS:
- Wicked Coloring Pages to Print for Free
- Free Thanksgiving Turkey Coloring Page Printable
- Free Printable Thanksgiving Meal Planner & Grocery List
- xTool M1 Ultra Beginner’s Guide and Review
- Free Best Dad Ever Father’s Day Coloring Page

More Cricut Coaster Ideas
- DIY Watercolor Coasters
- Cricut Infusible Ink Coasters
- Modern Cricut Coasters
- DIY Tile Coasters with Cricut Permanent Vinyl
- Personalized Slate Coasters
- Plaid Coasters with Cricut Explore Air 2
- DIY Spider Monogram Coasters with Foil Iron On
Pin this post for later:


Hi Charynn,
I love your coasters but I don’t know how or where the SVG goes when I click on the file. Could you please help?
Thanks,
Kara
Hi Kara! Here’s a quick article I wrote that will walk you through uploading an SVG 🙂 https://pineapplepaperco.com/upload-svg-cricut-design-space/
Let me know if you have any other problems!