How to Make Cricut Infusible Ink Coasters
This post and the photos within it may contain affiliate links. As an Amazon associate I earn from qualifying purchases. If you make a purchase through one or more of the links, I may receive a small commission at no extra cost to you.
Learn how to make your own coasters that look like you bought them at the store! Cricut Infusible Ink transfer sheets and pens provide a professional finish that you’ll be using over and over to make ceramic coasters! See my step-by-step tutorial to make Cricut Infusible Ink Coasters with transfer sheets, plus all of my tips and tricks for making DIY coasters with Infusible Ink!
After making a lobster tote bag and a baby onesie with Infusible Ink, I couldn’t wait to try making a set of ceramic coasters! The results I had seen while at the Cricut launch were SO impressive that I couldn’t wait to get my hands on a set! I decided to first make a set with Infusible Ink transfer sheets.
Don’t Miss these AMAZING Watercolor Infusible Ink Coasters I made with Infusible Ink Pens!
How to Use Cricut Infusible Ink to Make Coasters
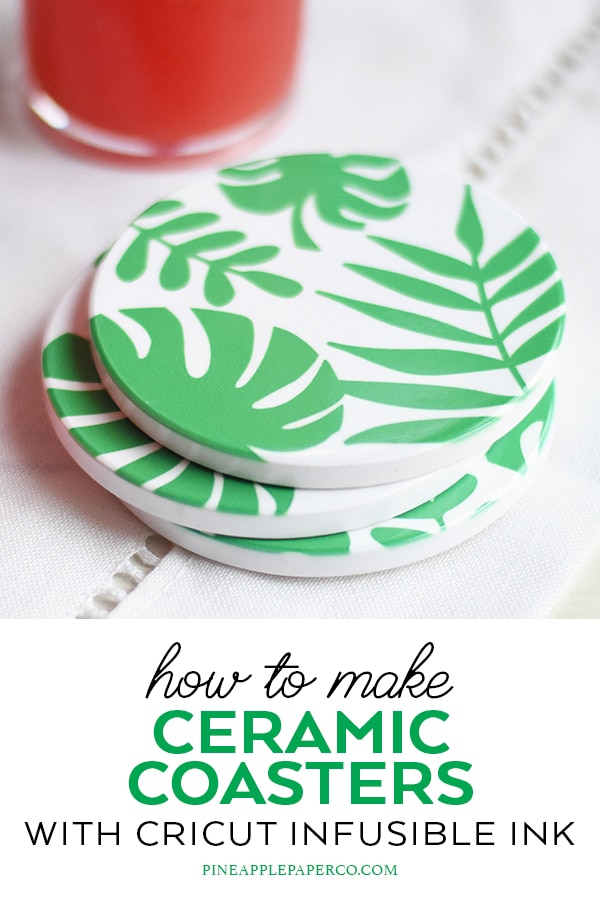
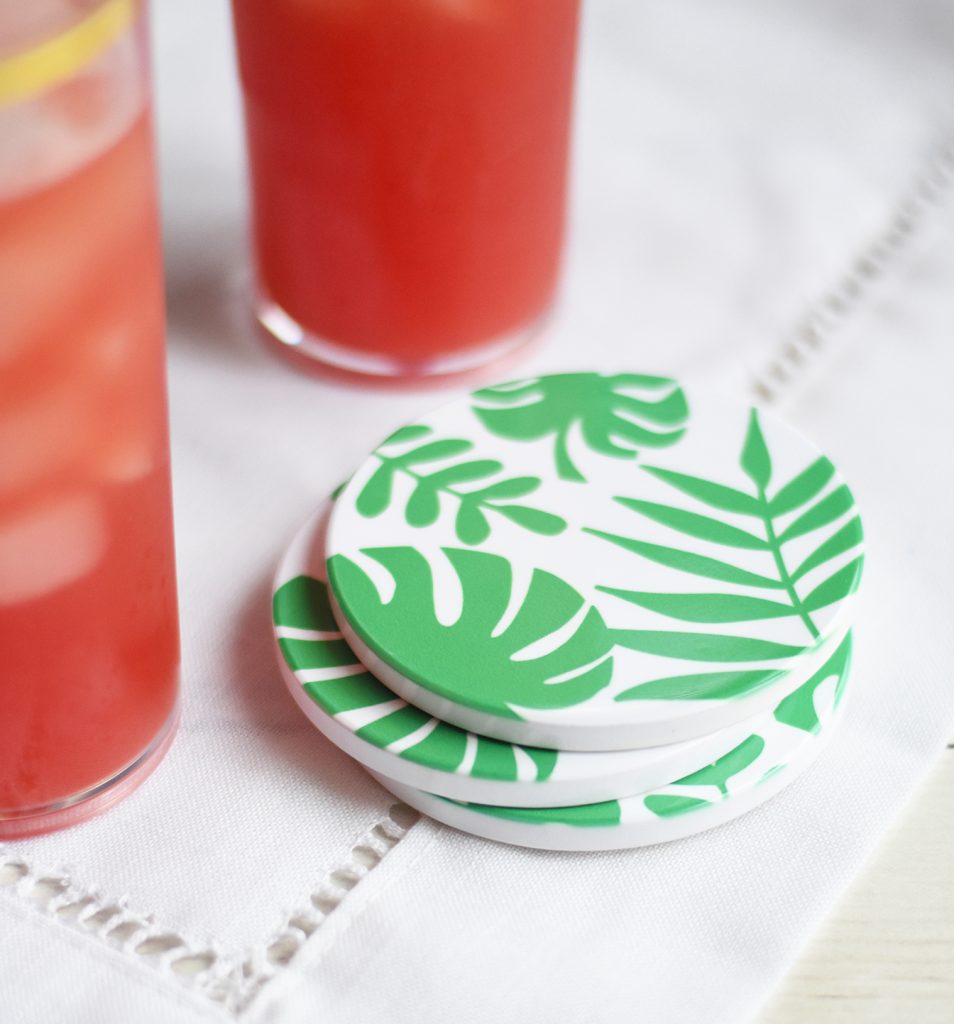
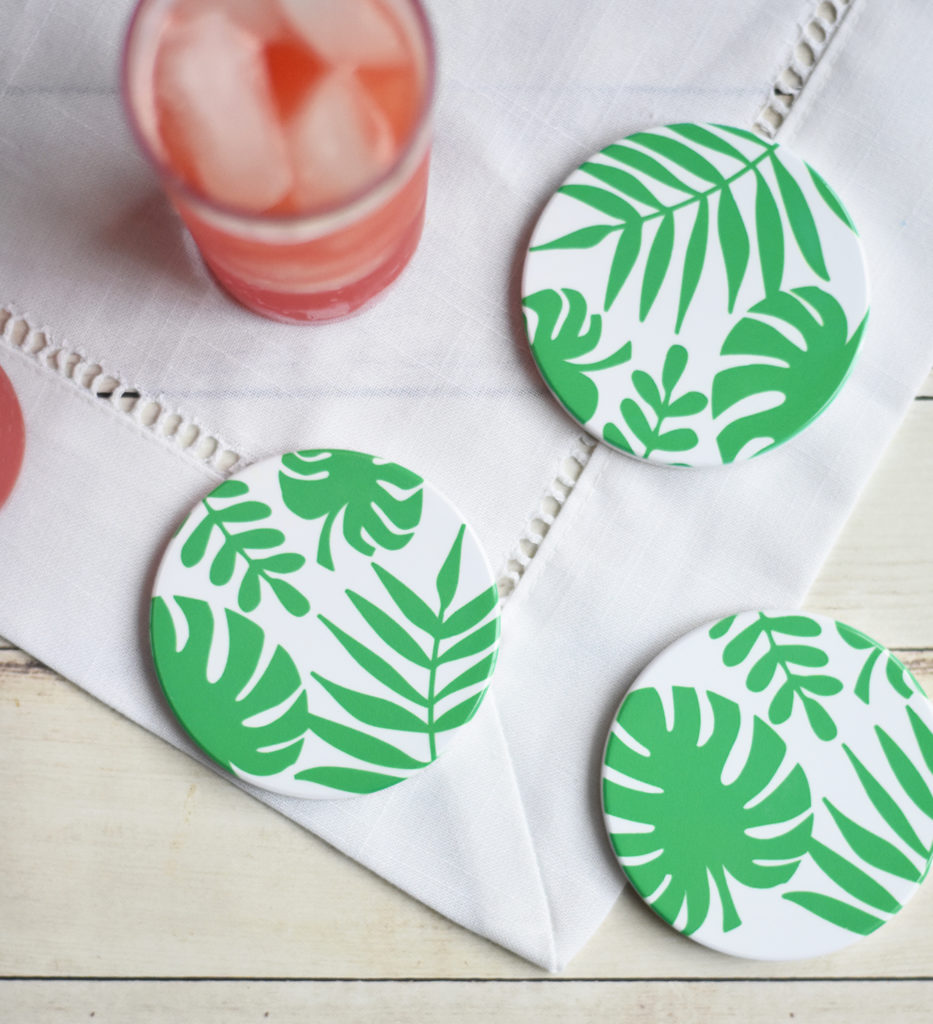
I love making DIY Coasters for parties and gifts, and I have to admit that I was skeptical about how I could use Cricut Infusible Ink transfer sheets with ceramic coasters. I am pleased to report that the results are INCREDIBLE and is definitely my favorite project to make with Infusible Ink and Infusible Ink Compatible blanks. In fact, these coasters might just be my new favorite Cricut project of all time! I made these ceramic coasters with a tropical leaf pattern for my summer parties and I adore how they turned out.
Materials You Need to Make Ceramic Coasters with Cricut Infusible Ink
- Cricut Maker
- Cricut Standard Grip Mat
- Cricut EasyPress 2
- Cricut EasyPress Mat
- Cricut Infusible Ink Transfer Sheet, available at Michaels
- Cricut Ceramic Coaster Blanks
- Lint Free Cloth
- Butcher Paper (comes inside of Transfer Sheet package)
- White Cardstock (not colored!)
- Tweezers
How to Make Coasters with Cricut Infusible Ink Transfer Sheets
First, create an image in Cricut Design Space to fit your coasters, or use the images that I created in Design Space if you would like to make the tropical leaf coasters!.
Click to Make: Cricut Infusible Ink Coasters with Tropical Leaves
Place your Infusible Ink Transfer Sheet on the Standard Grip Mat, liner side down. Notice that the Transfer Sheet color seems dull now, but wait until you see the finished project. The process of transferring the infusible ink makes the color SO vivid!
When you’re ready to cut, click the “Make It” button.
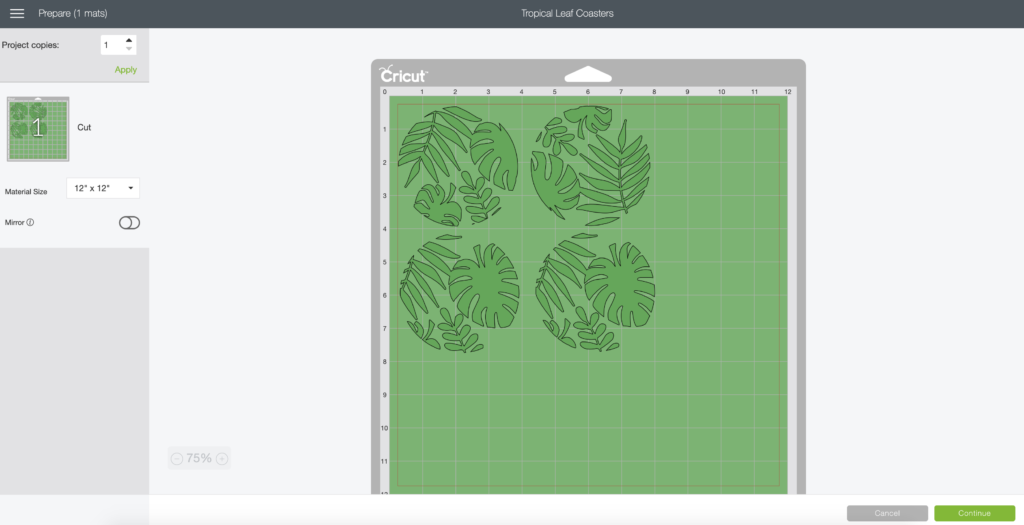
*Make sure to MIRROR your design so it can be transferred to your blank product correctly.*
Select “Infusible Ink Transfer Sheet” from the list of materials. If using a Cricut Explore Series machine, make sure you turn your dial to “Custom.” Load mat and press the flashing “C” button when you’re ready to cut.
When it’s finished cutting, weed away the extra material from the transfer sheet liner. Keep in mind that it is more like paper than vinyl, so it weeds a little differently. You can use tweezers like those available in the Essentials Tools Kit to remove small unwanted pieces of paper from your design. You can also use your fingers to weed – but MAKE SURE that your fingers are dry! Moisture can produce negative results.
LATEST POSTS:
- Wicked Coloring Pages to Print for Free
- Free Thanksgiving Turkey Coloring Page Printable
- Free Printable Thanksgiving Meal Planner & Grocery List
- xTool M1 Ultra Beginner’s Guide and Review
- Free Best Dad Ever Father’s Day Coloring Page
How to Apply Cricut Infusible Ink to Ceramic Coasters
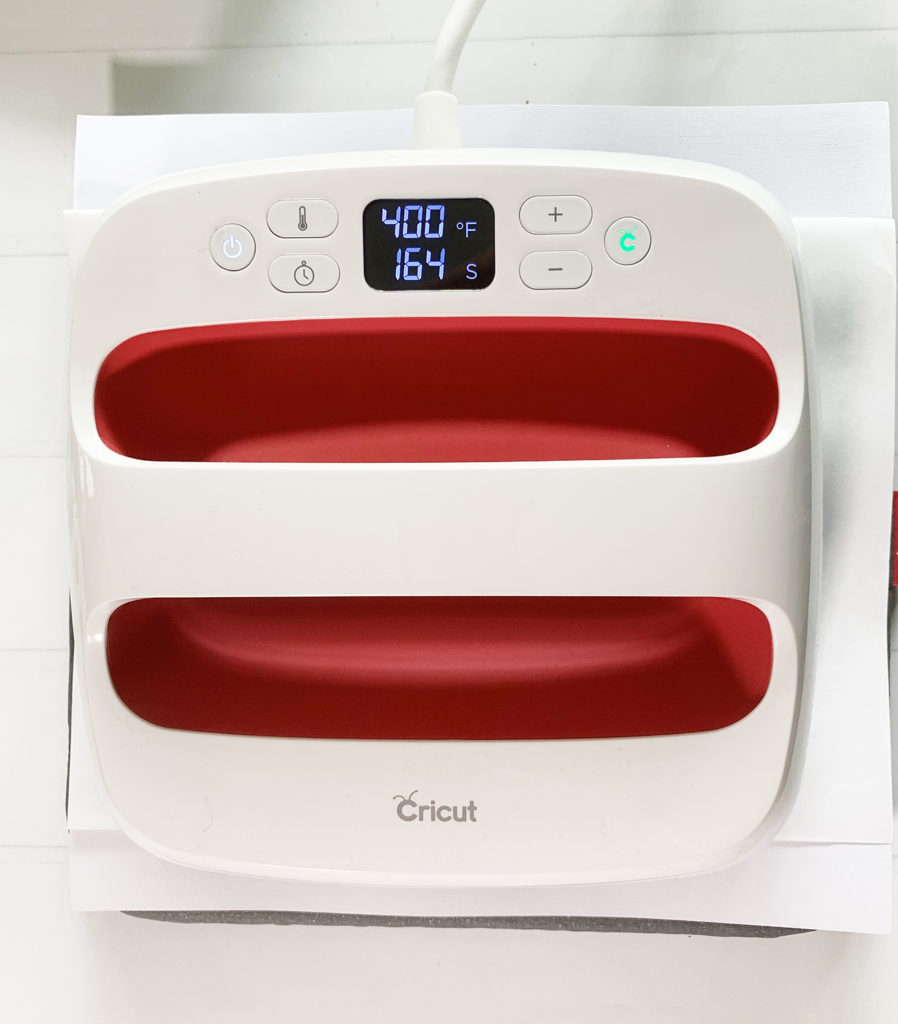
Prep your EasyPress 2: For this project, you will preheat your EasyPress 2 to 400 degrees F and set the timer for 240 seconds. This is why having an EasyPress 2 is important!
Prep your blank Cricut Ceramic Coaster: Use a lint free cloth to clean the surface of your coaster. It’s important to remove all lint and tiny little debris.
Place your Cricut EasyPress Mat down on your surface, and cover the mat with card stock. This is important – you don’t want to damage your mat!
Place your transfer down on the coaster so the liner is now face up and the printed side of the transfer sheet is down. Your design should no longer look mirrored. FLIP the coaster over so the design and top of coaster are FACE DOWN on the mat, and the bottom of the coaster is face up. Flipping everything over helps ensure the design remains in full contact with the coaster. Place butcher paper on top of the coaster.
Press for 240 seconds using no pressure (hands off!). This is important, and is different from using Heat Transfer Vinyl.
After 240 seconds, slowly lift your EasyPress. Try not to move the butcher paper or transfer sheet. DO NOT TOUCH THE COASTER. It will be really hot! If you need to move it to continue pressing your other coasters, DO NOT USE YOUR BARE HANDS. I used an oven glove to move mine to cool so I could continue on with making my coasters.
Repeat each step above for each of your remaining coasters.
Look how amazing they turn out!
To show how different Cricut Infusible Ink is in comparison to vinyl, I applied a pink permanent vinyl design to one of my coasters. Look at the difference between the Infusible Ink that is now EMBEDDED in the coaster, and how the vinyl sits ON TOP of the coaster! It’s such an amazing process!

Pin Cricut Infusible Ink Coasters Tutorial for Later


ABOUT CHARYNN
Hi, y’all! I’m Charynn, the owner and designer of Pineapple Paper Co. I’m a mom of four kids (two girls and two boys) living in Pittsburgh. I love hand lettering, anything southern, cocktails, and of course, pineapples! I am excited to share my SVG files, printables, and craft projects with you! The pineapple is a symbol of hospitality, and I welcome y’all to my little corner of the internet. Read more…