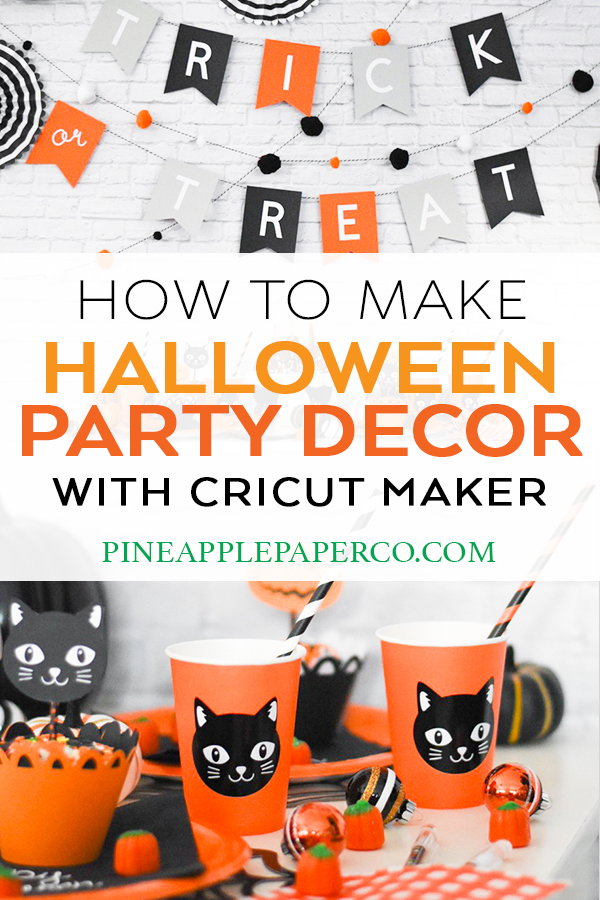
Trick or Treat Halloween Party Ideas with Cricut
This post and the photos within it may contain affiliate links. As an Amazon associate I earn from qualifying purchases. If you make a purchase through one or more of the links, I may receive a small commission at no extra cost to you.
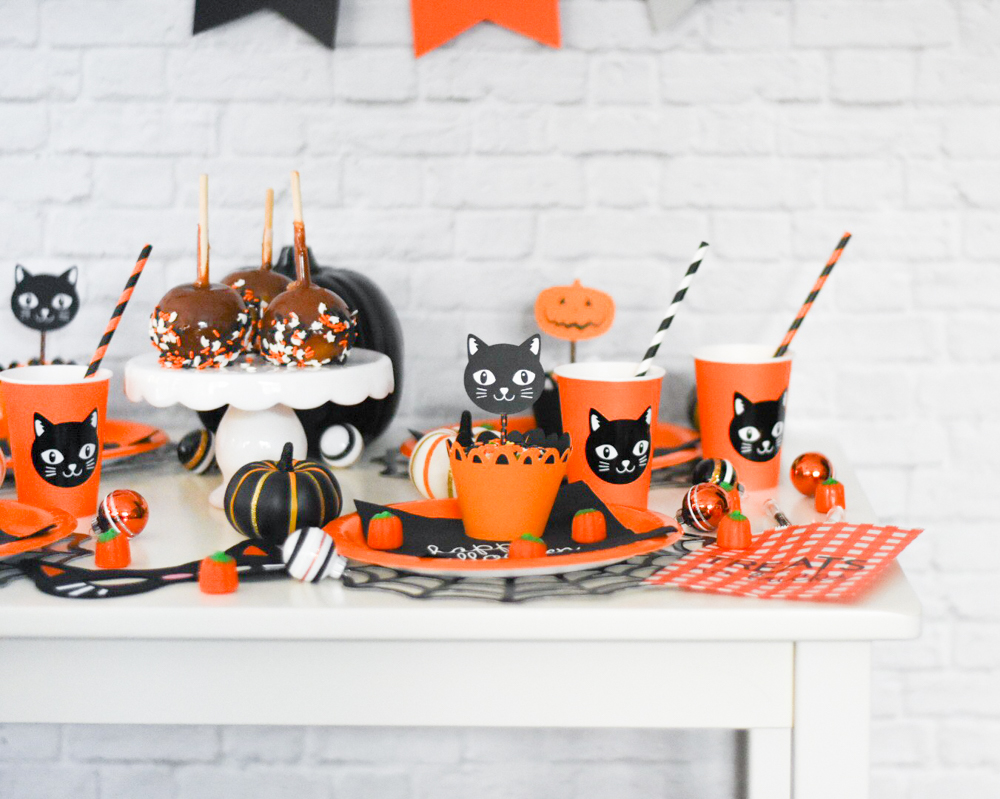
Today we are sharing the most adorable DIY Halloween Party that is full of DIY Halloween Party Ideas and Crafts that you can create with your Cricut Maker! Keep reading to find out all of the Halloween Party Supplies I made with my Cricut Maker and how I cut vinyl, cardstock, iron on, felt and more to create this Halloween Party Tablescape!

When I first got a Cricut machine a couple of years ago, I never thought that I would use it as much as I do. I use it for EVERY party that I plan. And now that I have the Cricut Maker, I can personalize or create custom party decor for each of my parties, including this Trick or Treat Halloween Party that I created especially with kids in mind.
I even made awesome party decor for a Hocus Pocus Halloween Party! Use the ideas to plan a Hocus Pocus 2 viewing party!
Although my two older tween kids would love to have a scary Halloween party, our other two kids are still toddlers, so we generally plan kid-friendly designs.
The Cricut Maker is an incredible asset to my craft room. What sets it apart from other cutting machines is the adaptive tool system – including the Knife Blade, Rotary Blade, and Scoring Wheel. Having these different tools to cut hundreds of materials from delicate tissue paper and fabric to felt, leather, and chipboard has made it so I can craft virtually anything my imagination can create.
For this Trick or Treat Halloween Party, we created several projects using a variety of materials that you can use for inspiration for all of your Halloween Party crafts, including card stock, vinyl, felt, and iron on!
I’m going to share a lot of the Halloween Party Ideas I made in separate posts, which you will be able to find via the links below as I post them! In this post going to show you how I used the rotary blade, scoring wheel, and my EasyPress 2 to make a Halloween Cat Mask, DIY Paper Rosettes, and Halloween Napkins with Iron On!
RELATED POST: 35+ Trunk or Treat Ideas for This Halloween
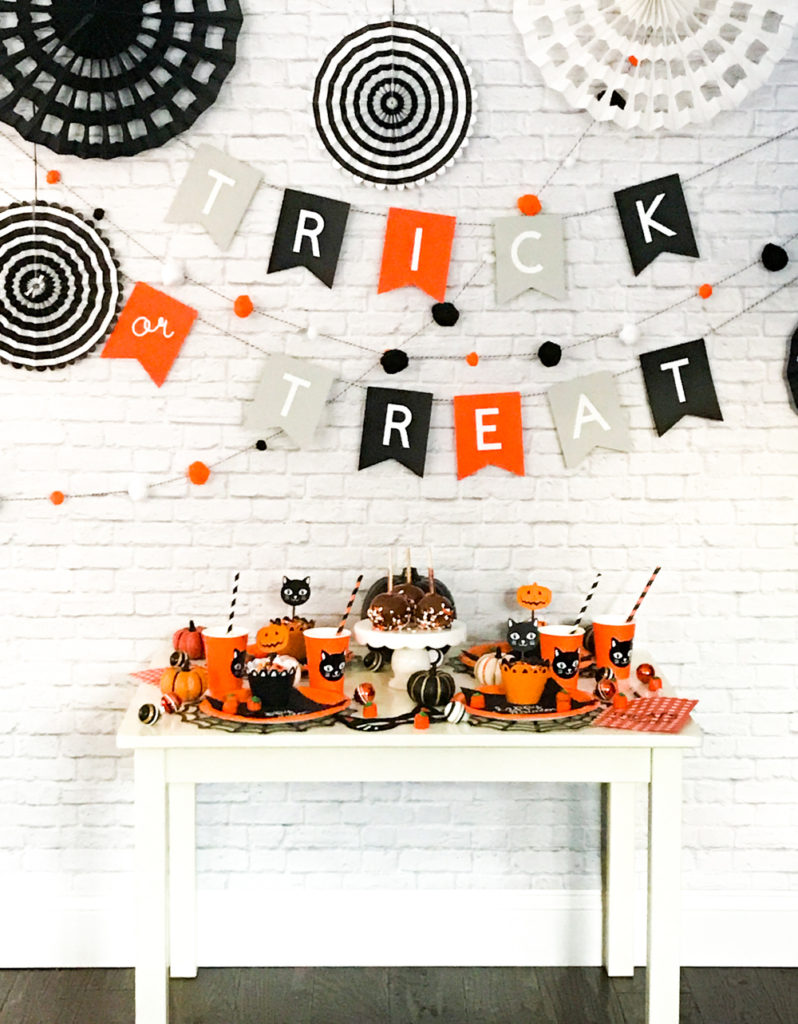
DIY Halloween Party Ideas to make with your Cricut Maker
DIY Black Cat Halloween Balloons
Trick or Treat Halloween Banner
Treats No Tricks Halloween Treat Bags
DIY Pumpkin and Black Cat Halloween Cupcakes
Halloween DIY Paper Rosettes (keep reading!)
DIY Black Cat Mask (keep reading below!)
DIY Personalized Halloween Napkins (at the end of the post!)
What you need to Make DIY Halloween Paper Rosettes
–Cricut Maker
–Blue or Green Mat
–Cardstock
–Cricut Scoring Wheel
-Glue of choice
-String, to hang the rosettes
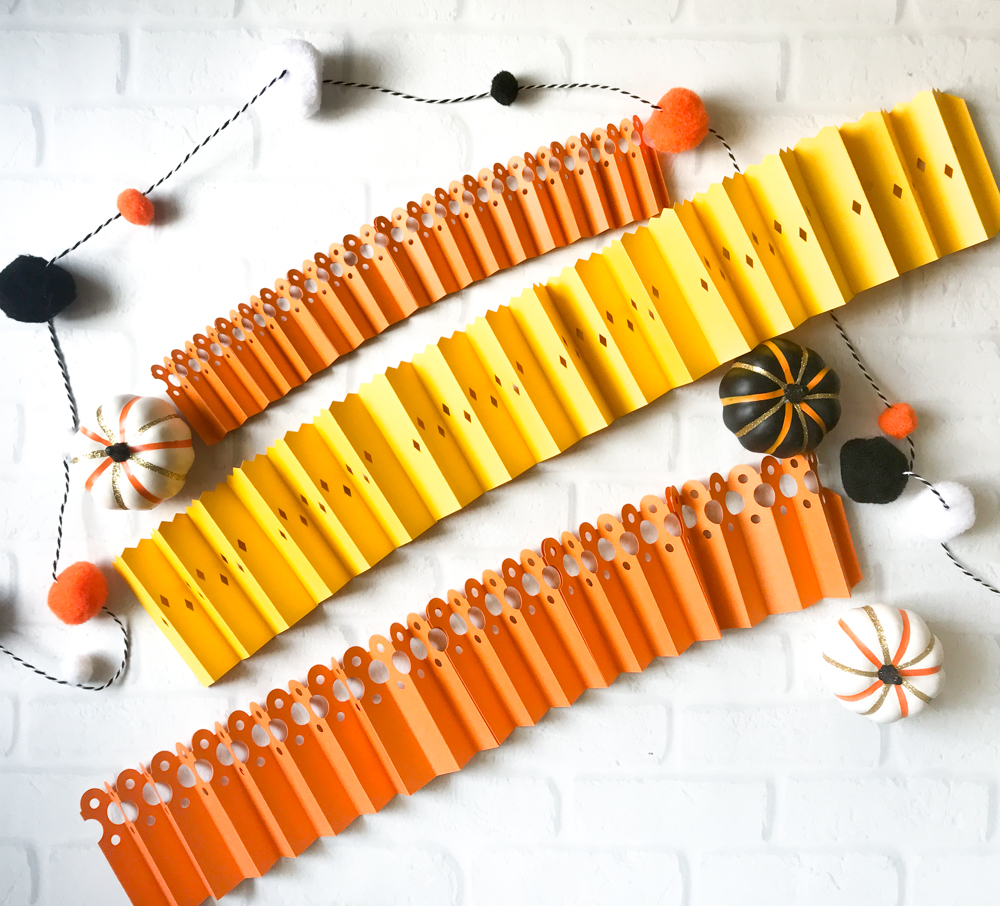
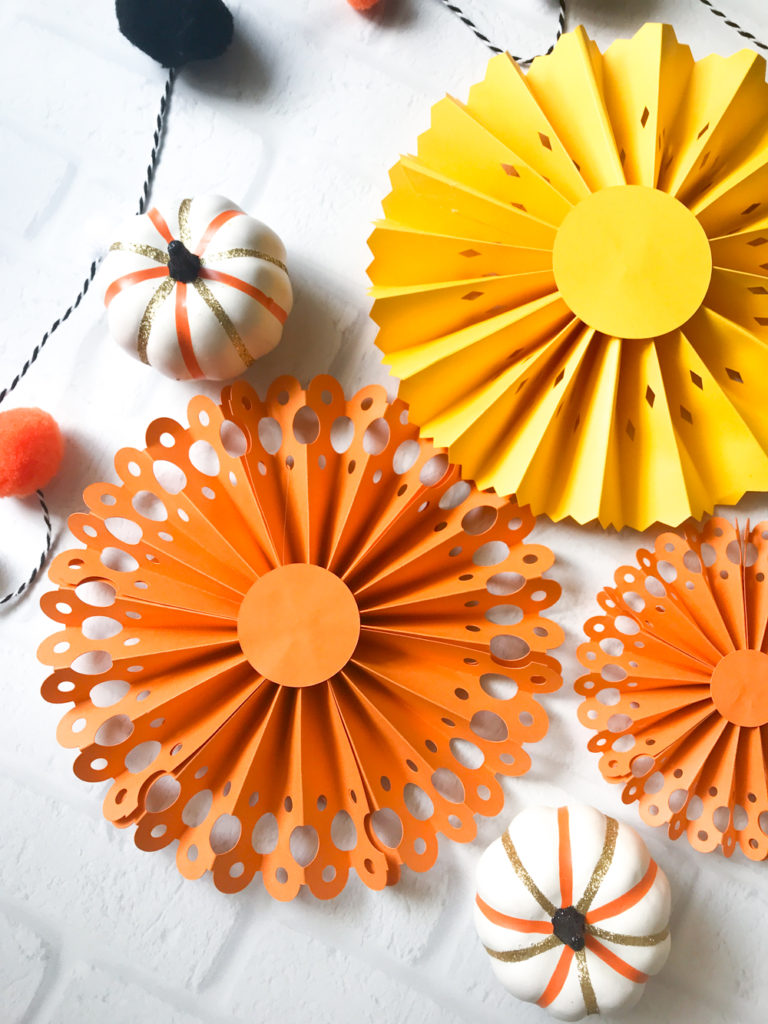
Open the Paper Rosette Designs in Cricut Design Space. You can resize the pieces of the rosette as needed to get varying sizes of rosettes for your party. We’ve selected two different designs of rosettes that you can choose from – just make the rosettes in a few colors and you’ll quickly have a collection for your party.
DIY PAPER ROSETTE #1
DIY PAPER ROSETTE #2
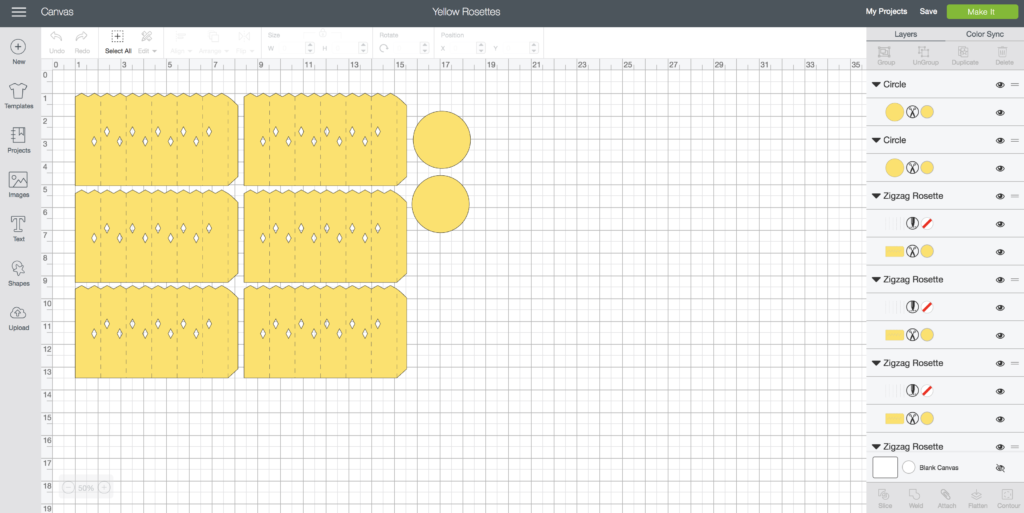
The 6 pieces pictured + the two circles for the center (front and back) are for ONE rosette. Click “select all” and copy then paste the designs to create multiple rosettes. You can then change the colors of the pieces as desired to make different colored rosettes on separate mats.
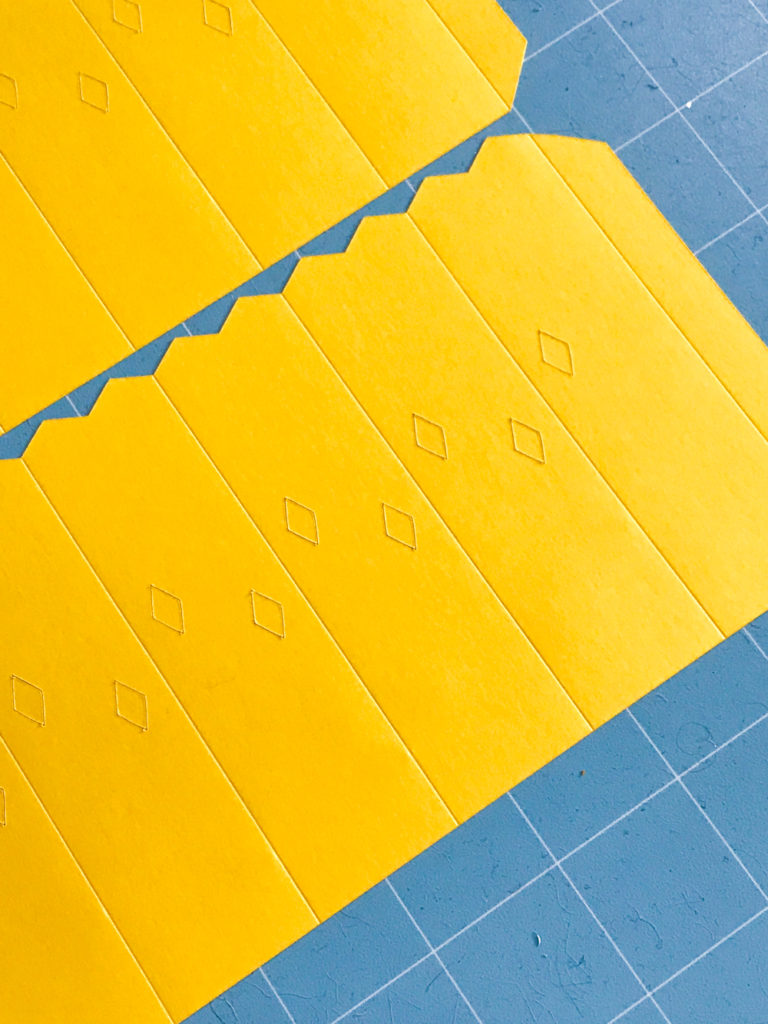
Making DIY Paper Rosettes is much easier with the new Cricut Scoring Wheel, available only for the Cricut Maker! The Scoring Wheel makes PERFECT folding lines, allowing you to make rosettes in just a few minutes. The Scoring Wheel kit actually comes with 2 wheels – one for single scoring (“01” is marked on the tool), and a double one for scoring thick materials.
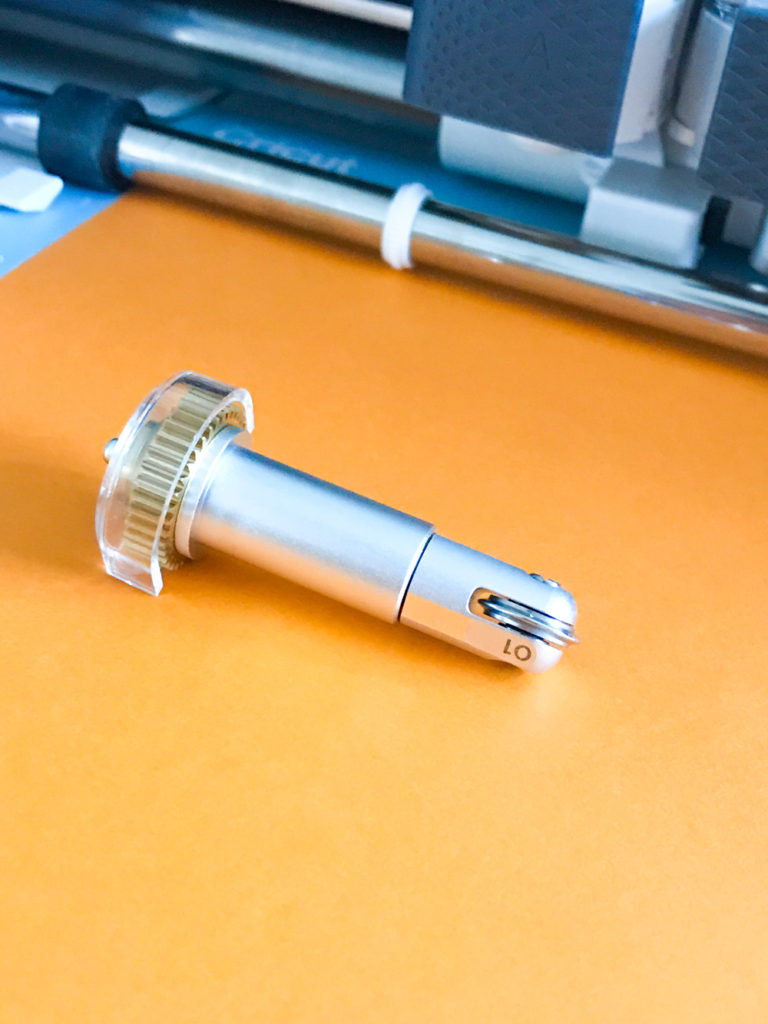
First, you’ll load the Scoring Wheel in the Maker, and then Design Space will prompt you to load the fine point blade. I used Cricut Cardstock, so I needed the “Medium Cardstock” setting.
Look at how precise the score lines are! They almost look like cut lines, but they’re not. Those lines make for easy folding!
Once you have all of your rosette pieces cut, you need to fold them like you would a fan, and connect the 6 rosette pieces end to end. I prefer to use hot glue, because I’m not patient enough to wait for regular glue to dry. Hey, it works 🙂
Then, bring the two ends together and glue to create a circle. Use the two paper circles to secure the middle of the rosette on the front and back.
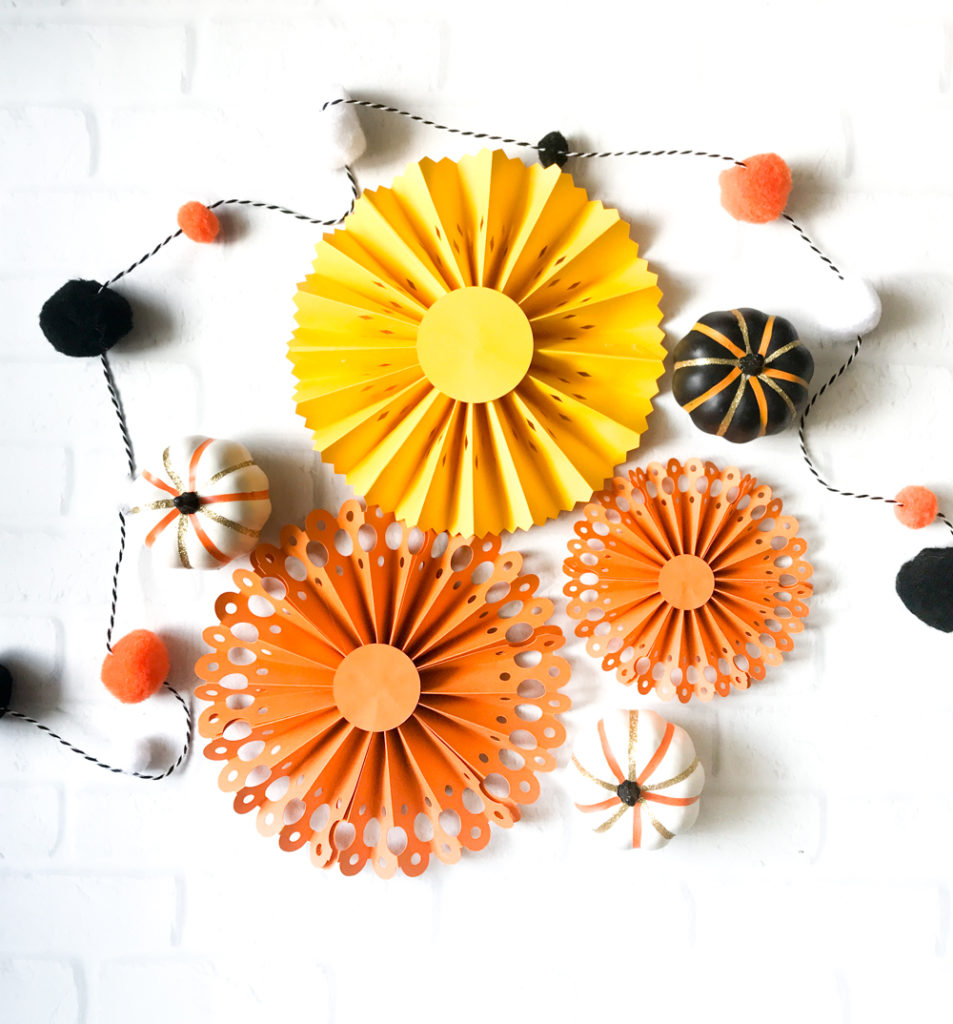
I made rosettes in black, orange and yellow for my Halloween Party Decor.
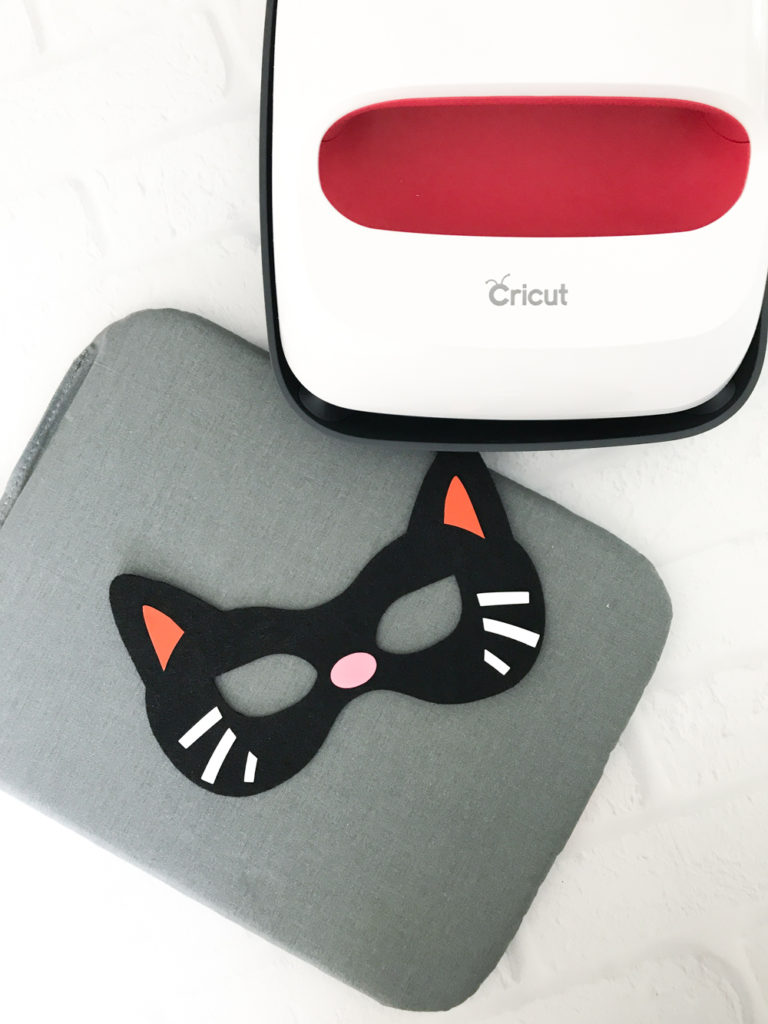
DIY Halloween Black Cat Mask
What you Need to make the Halloween Black Cat Mask
–Cricut Maker
–Cricut Rotary Blade
–Felt
–Iron On Vinyl
–EasyPress 2 (instructions are provided for a Cricut EasyPress; you can also use a regular iron but the EasyPress is awesome!)
Open the Cat Mask Design in Cricut Design Space
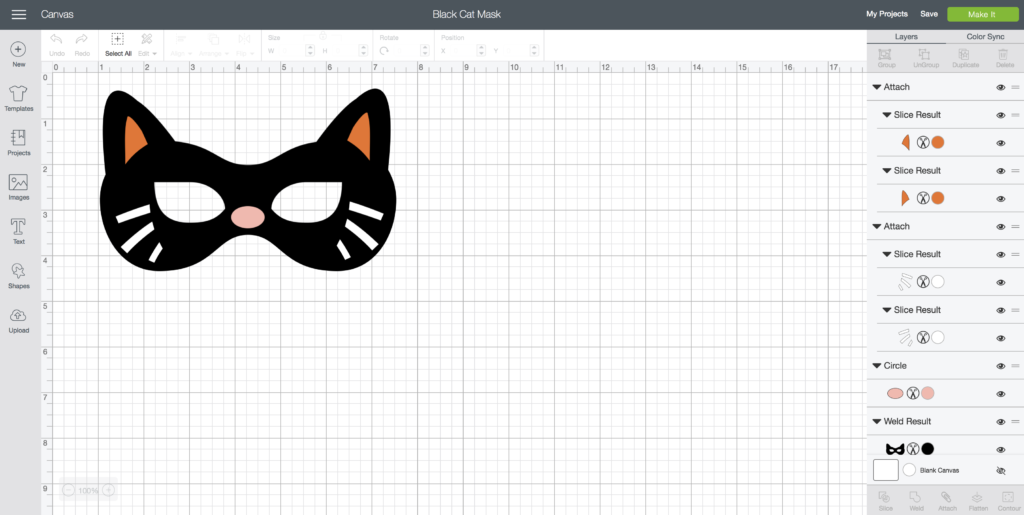
The Cat Mask is sized to a little over 6″ wide and fit my 10 yr old pretty well. Make sure to resize your design before cutting if you wish to make it for a toddler or older child.
Click the green “Make it” Button and make sure you set the Material selection for the appropriate pieces of the design – the black cat mask itself is felt, but the other pieces are Iron On Vinyl.
For this felt, I used the Cricut Rotary Blade, which is also only available for the Cricut Maker. I wanted a thicker felt for my masks so it would be more stable, so I’m using my blue mat here with the felt. Most felt can be used with the pink mat, but if you don’t want to ruin your mats with all of the felt fuzz (Cricut felt doesn’t really do this, but other brands do. I learned the hard way.) – put transfer tape down on the mat, and then put your felt on top of that.
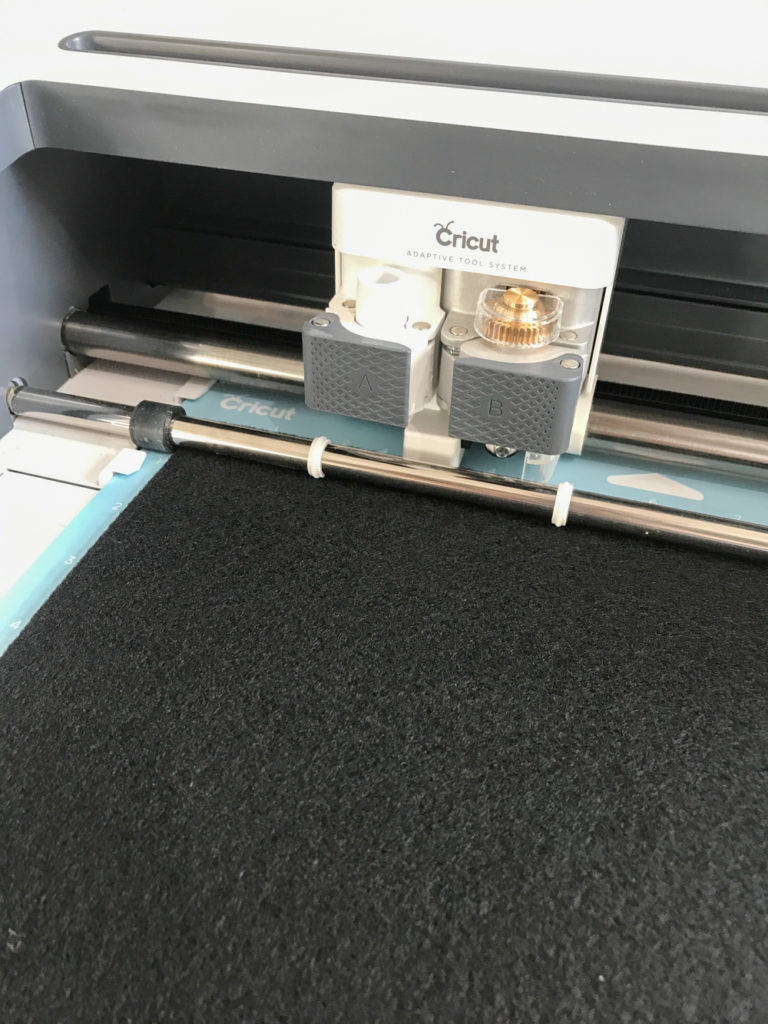
The Cricut Rotary Blade cuts felt like butter. I love using it for felt as well as other fabrics. My quilter friends love it, too!
Once you have your mask and iron on vinyl pieces cut, next you need to weed out the extra vinyl and press the cat face pieces on to the felt. I just got a new Mini EasyPress 2 (9×9″), and I love it! It heats faster and to a higher temperature than the original EasyPress, and also remembers your last setting, which is incredibly convenient. I honestly wasn’t sure I needed another EasyPress, but I love this little size! It’s easy to store and works perfect for small projects. No more burning my fingers on the iron!
Check out the Cricut EasyPress recommended settings HERE.
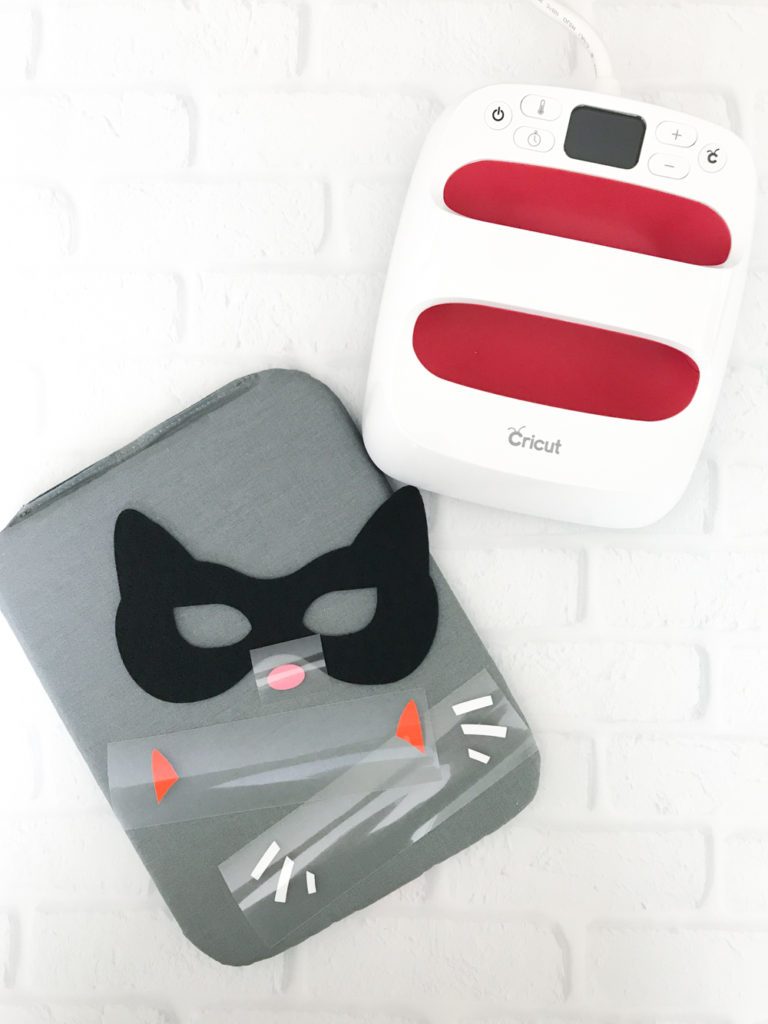
I used the lowest setting – 250 degrees F with the Cricut protective teflon sheet to iron on the cat face pieces to the black cat face mask.
Press all of the pieces of Iron On on to the mask, and you’re done! You can then attach a ribbon so that it can be tied around your child’s head.
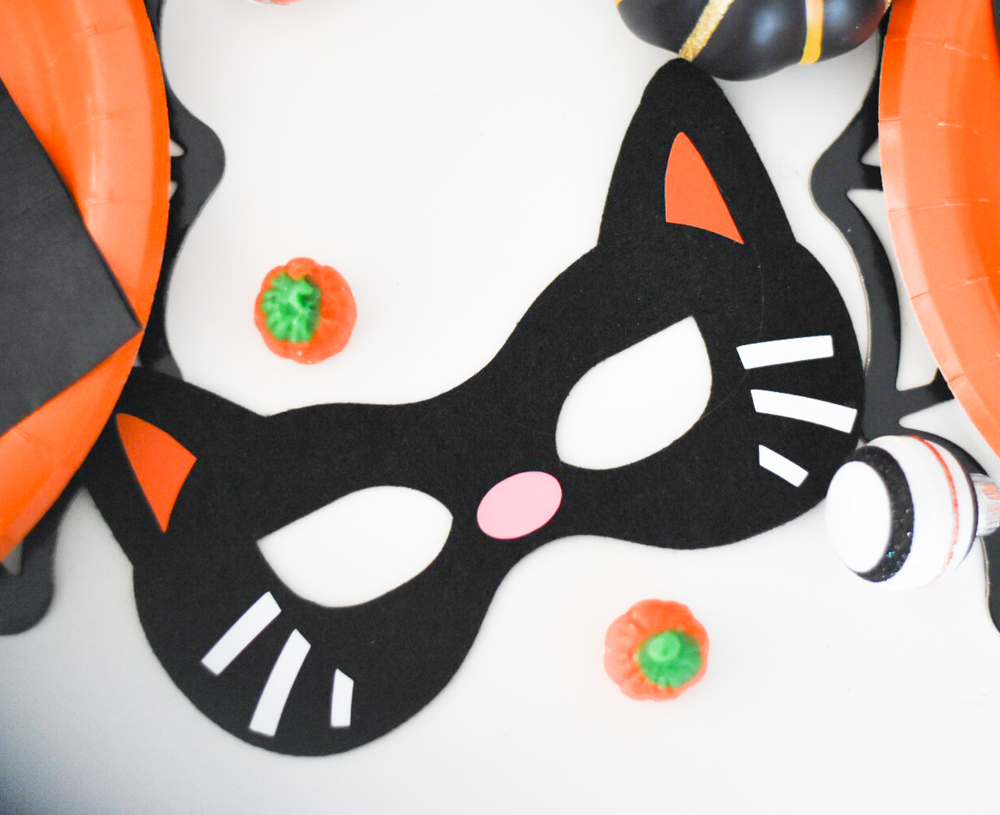
The DIY Black Cat Mask works great as a DIY costume idea, but I used it as a DIY Halloween Party Favor for our Trick or Treat Party.
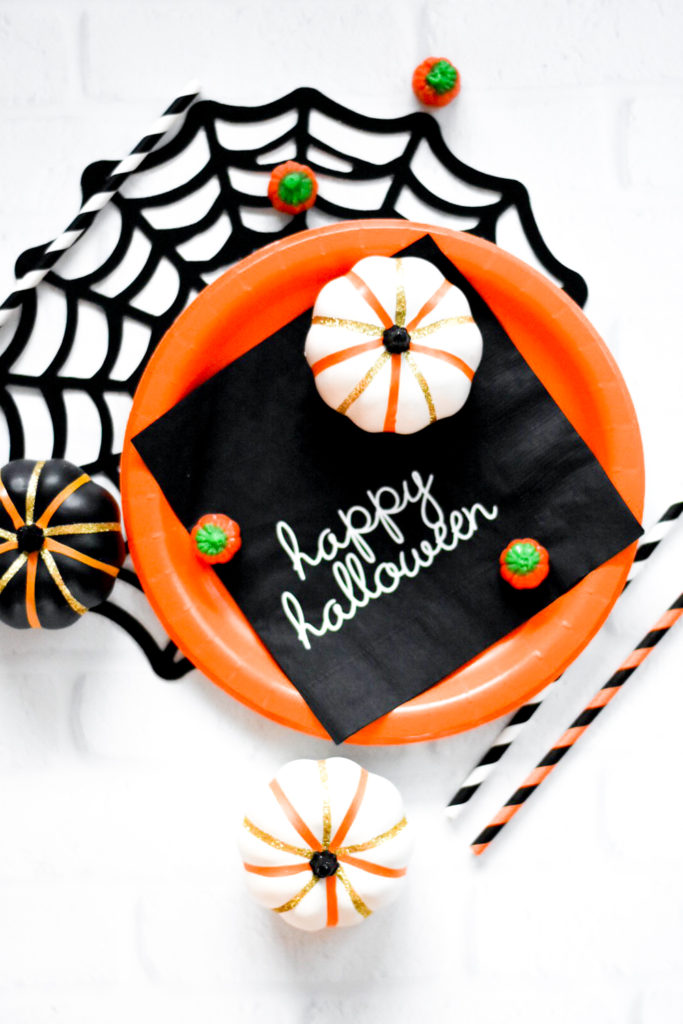
Halloween DIY Personalized Napkins
One of my favorite new projects is to make custom personalized paper napkins for all of my parties. Did you know that you can use Iron On Vinyl for other things other than T Shirts?! You can use Iron On Vinyl on everything from wood, to fabric, and even paper! By applying Cricut Iron On to cheap paper napkins, I can make DIY Personalized Napkins for ALL the parties.
For the Trick or Treat Party, I wanted to make a simple “Happy Halloween” script on black paper napkins (that I bought at Target in the Halloween section).
Open the Happy Halloween Napkin Design in Cricut Design Space

I designed the Happy Halloween script to fit a lunch size paper napkin, so you’ll need to resize the design if you want to use it for cocktail napkins.
Click the green “Make It” button when you’re ready to cut them out.
Make sure when you cut the design out of Iron On, that you click the “Mirror” button so the text will read correctly when it is placed on the napkin.
After the vinyl is cut, weed out all of the unnecessary vinyl. Preheat your EasyPress to the lowest setting, which is 250 degrees F.
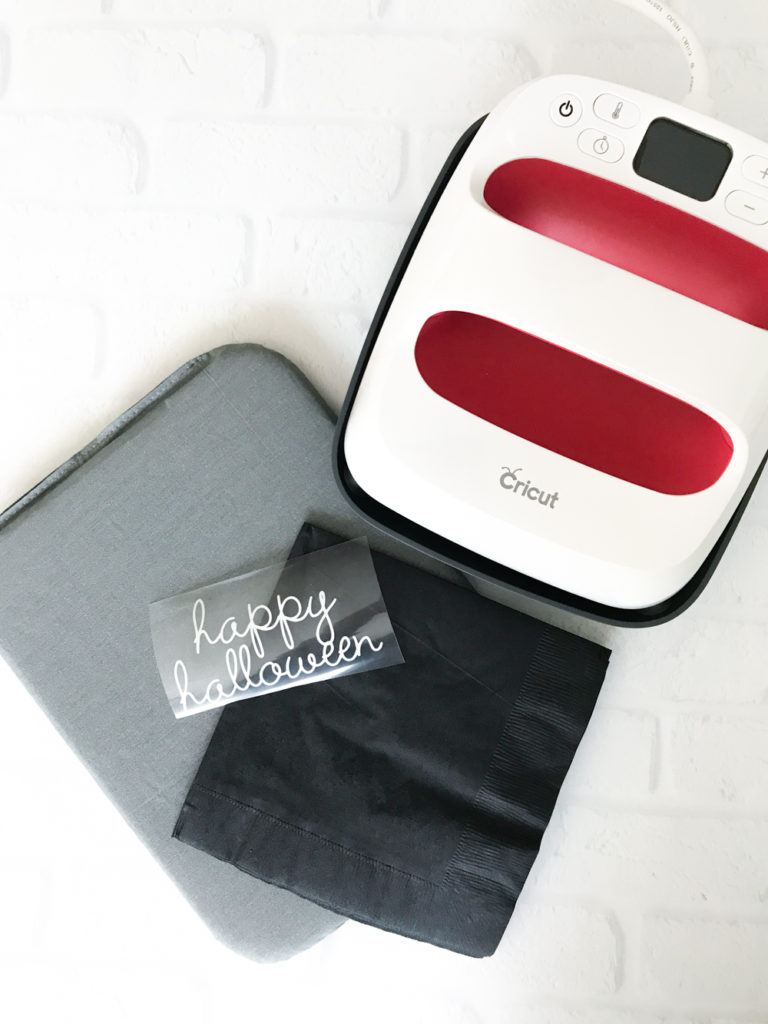
Place the Iron On Vinyl on the napkin, cover with the Cricut Protective Teflon Sheet, and heat for 10-15 seconds.
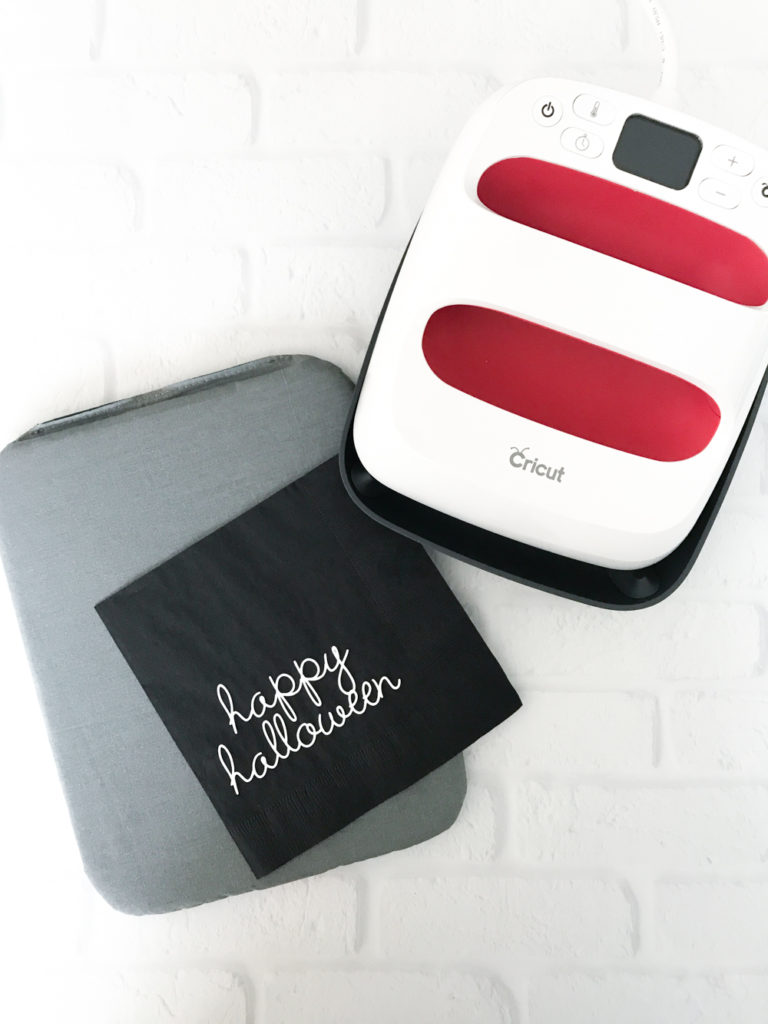
You can make a ton of Personalized Napkins in just a few minutes! It’s one of my favorite DIY Party Ideas and I’ve used Cricut Everyday Iron On and Foil Iron On with equal success. You’ll be making iron on napkins all the time, now. You’re welcome! Haha!
That’s 3 quick and easy DIY Projects made with my Cricut Maker for the Trick or Treat party. I look forward to sharing the rest of the DIY Halloween Party Ideas so you can plan all of your Halloween Party Projects to make before Halloween! And you’ll get to see more of our own crazy and humongous Halloween black cat, Finn! That’s him hanging out below. He was trying to get all of the pom pom balls hanging on the wall.

If you need a reminder of the Cricut Supplies we used above, here are the links for you:
–Cricut Maker
–Mats
–Cardstock
–Cricut Scoring Wheel
–Felt
–Iron On Vinyl
–Cricut Rotary Blade
–Cricut EasyPress 2
We have a ton of DIY Halloween Ideas for you to make this year! Check out our most popular Halloween posts:
Hocus Pocus Trunk or Treat Ideas
Trick or Treat Reverse Canvas Project for Martha Stewart, Michaels, and Cricut
This is a sponsored conversation written by me on behalf of Cricut. The opinions and text are all mine.
Pin Trick or Treat Halloween Party Ideas:


ABOUT CHARYNN
Hi, y’all! I’m Charynn, the owner and designer of Pineapple Paper Co. I’m a mom of four kids (two girls and two boys) living in Pittsburgh. I love hand lettering, anything southern, cocktails, and of course, pineapples! I am excited to share my SVG files, printables, and craft projects with you! The pineapple is a symbol of hospitality, and I welcome y’all to my little corner of the internet. Read more…