Adobe Illustrator Basics: How to Convert Text to Outlines
This post and the photos within it may contain affiliate links. As an Amazon associate I earn from qualifying purchases. If you make a purchase through one or more of the links, I may receive a small commission at no extra cost to you.
Want to make your own SVG cut files? One of the most important steps is to convert text to outlines and save as a vector file. I’ll show you How to Vectorize Text in Illustrator in just a few easy steps! Soon, you’ll be making your own SVG files for Cricut and Silhouette machines!
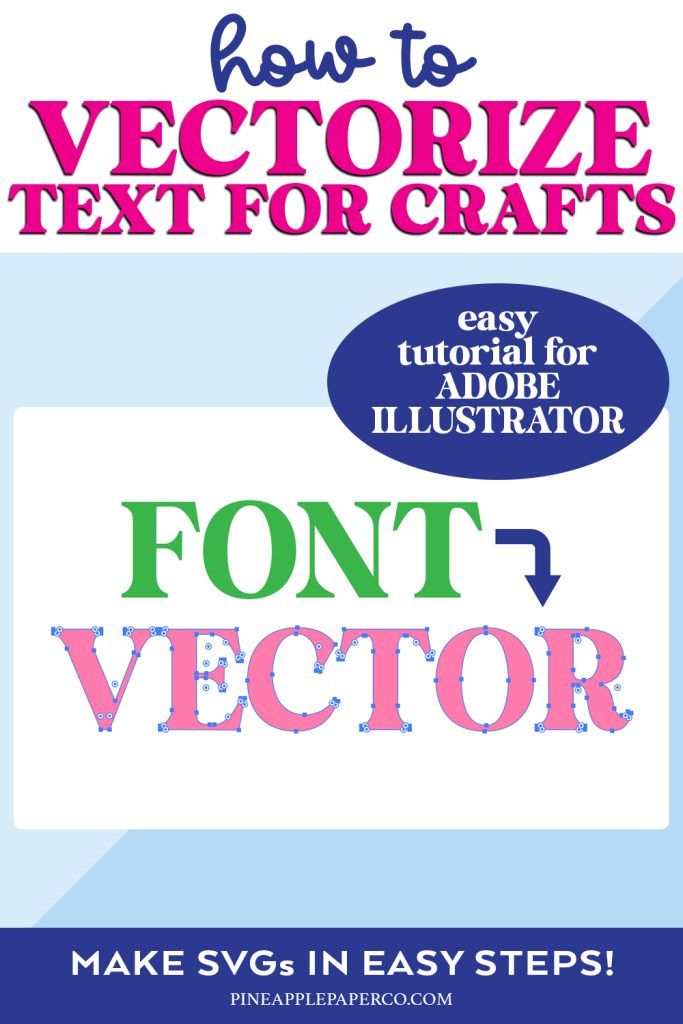
How to Vectorize Text in Illustrator
If you want to learn how to vectorize text for crafting, you will love this easy tutorial! I use these exact steps nearly every day to create all of my SVG files. I will show you how to place text in Illustrator, convert it to a vector file, and share easy tips for creating quality SVG files!
What is a Vector Graphic?
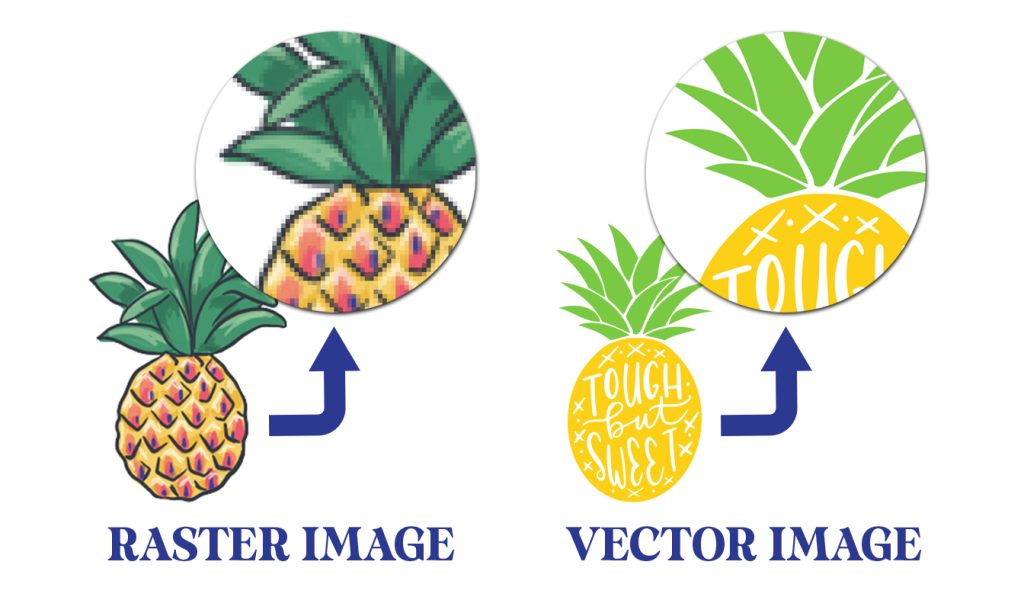
Vector graphics are an important part of creating your own cut files for your Cricut or Silhouette. A vector file uses mathematical formulas to create shapes with lines and curves. In comparison, a raster graphic is comprised of tiny little squares called pixels.
What are the Differences Between a Raster File and Vector File?
The image quality of raster files is dependent on the number of pixels per square inch (resolution). Raster images are used for detailed digital artwork, photography, or images used for display only.
The quick way to visualize how they are made is to take a very small raster image and make it very large. It will become blurry! A raster file is saved as .jpg file or. gif file, among others file types.
In contrast, vector graphics can be resized up or down without a loss of quality. They do not depend on the resolution of where they are displayed. Because of this, they are used for line art graphics.
RELATED POST: How to Upload Fonts to Cricut Design Space
For the best results, you will want to use vector graphics to create cut files. They are smaller files, which are smaller for everyone to download and store on their computers. Vector graphic elements are usually saved as an AI file, SVG file, EPS file, or DXF file.
-

-
-
Product on saleCelebrate Everything SVG Cut File BUNDLEOriginal price was: $125.00.$14.00Current price is: $14.00.
What is a SVG File?
A SVG file, or scalable vector graphic, is a type of vector image that is used by Cricut Design Space and Silhouette Studio. Additionally, Silhouette Studio performs well with .dxf files.
You can even use SVG files for laser cutting machines such as the xTool M1. It’s my new favorite (affordable!) laser machine for crafts!
These design programs tell your electronic cutting machine what to cut based on the SVG design. As you change the size, the integrity of the design will remain the same. Plus, SVG files maintain separate layers – so that your Cricut or Silhouette knows which color to cut different design elements from!
When you design a SVG file with fonts, you will need to vectorize the text. You will create outlines of the text to convert the font into vector format.
If you’re new to using SVG files with your Cricut machine, make sure you read my full post on How to Upload an SVG to Cricut Design Space.
How to Create Text Outlines in Illustrator
Adobe Illustrator is the premier professional design program for graphic designers and cut file designers. And there’s a Free Trial for it over at Adobe! There are other design programs out there (including a couple of free ones), but their capabilities are limited in comparison to Illustrator.
Don’t worry, you can turn fonts into a vector object with a simple process! It’s the first step to designing your own SVG files, and I will show you how easy it is in this step by step tutorial.

First, open a new document. If you are creating an SVG file, I would recommend a 12×12″ art board. That is the size of a standard cutting mat for a Cricut or Silhouette machine.
Use the type tool to create a text layer. The text tool will create an editable layer of text – you can change the text, font size, or font style as much as you want.

To turn the text into a vector shape, select all of your text using the Selection Tool (V, Open Arrow). Your text elements will be surrounded by a blue line box.
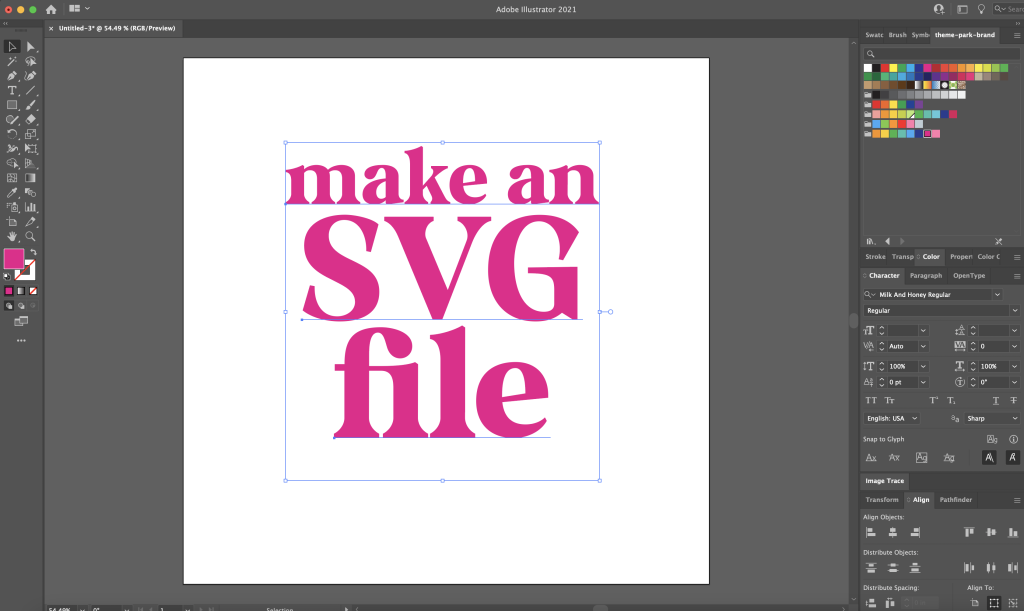
The next step is to go to the top menu and click Type > Create Outlines. The keyboard shortcut to create outlines of text in Illustrator is: Shift + Command + O for Mac; Shift + Control + O for PC).

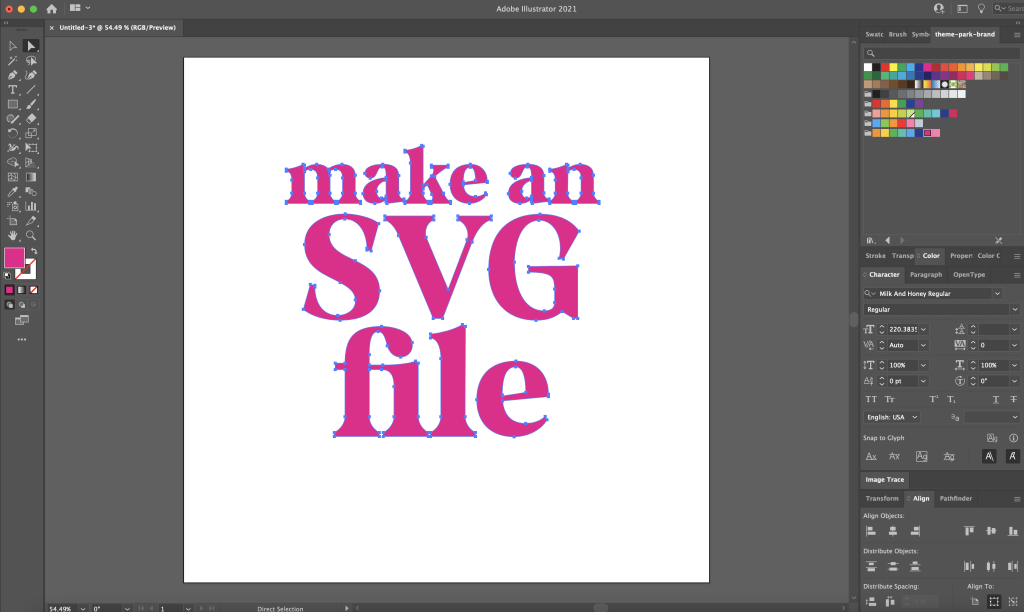
With those simple steps, your text characters are vectorized! To see the anchor points in your text outline, use the Direct Selection Tool (A, Closed Arrow).
Repeat steps for additional text.
Tips to Convert Text to Outlines in Illustrator
If you are planning to create cut files with your text, here are some tips you should follow:
1. Some fonts are more appropriate to use for vector cut files than others. The best way to verify how well your text will cut is to use the Direct Selection Tool.
2. The number of dots, or anchor points, that a font has is directly correlated to the number of cuts or “corners” that your Cricut or Silhouette will make. Fewer anchor points = less corners and smoother cut. More anchor points = more cuts and more detail.
3. You can usually tell if a font will translate well to a cut file by looking at the edges of the letters. For example, a watercolor brush font will never cut as cleanly as a font with clean edges (as in Times New Roman).
Font designers that design fonts to be used with cutting machines will be aware of this. Nearly all fonts in Design Space or Silhouette Studio will cut cleanly, but if you use your own fonts you will have to check the outlines manually.

4. If you can, definitely choose a font with fewer anchor points. You will be guaranteed a clean cut, which is especially important when cutting small letters and details.
5. Once you have vectorized your text, you will have editable paths but NOT editable text. You can not change the font after you create outlines. You can however change the size as much as you would like. Remember – your font is now powered by math! You can enlarge it without losing any quality.
6. If you plan to cut all or some of your text from one material or color, I recommend taking this process one step further to create a more user friendly file. Select all of the text that will be the same color and in the same area (a whole word or phrase). Then create a compound path by selecting Object > Compound Path > Make (Command + 8 or Control + 8). Then select the new path and fill color if needed.
7. When you have finished your vector outline, you can save your illustrator in SVG format to cut. I usually keep two files: one as a working Illustrator file, and the other as a SVG file type that is ready to cut. You now have your own design file from text to use with your cutting machine!
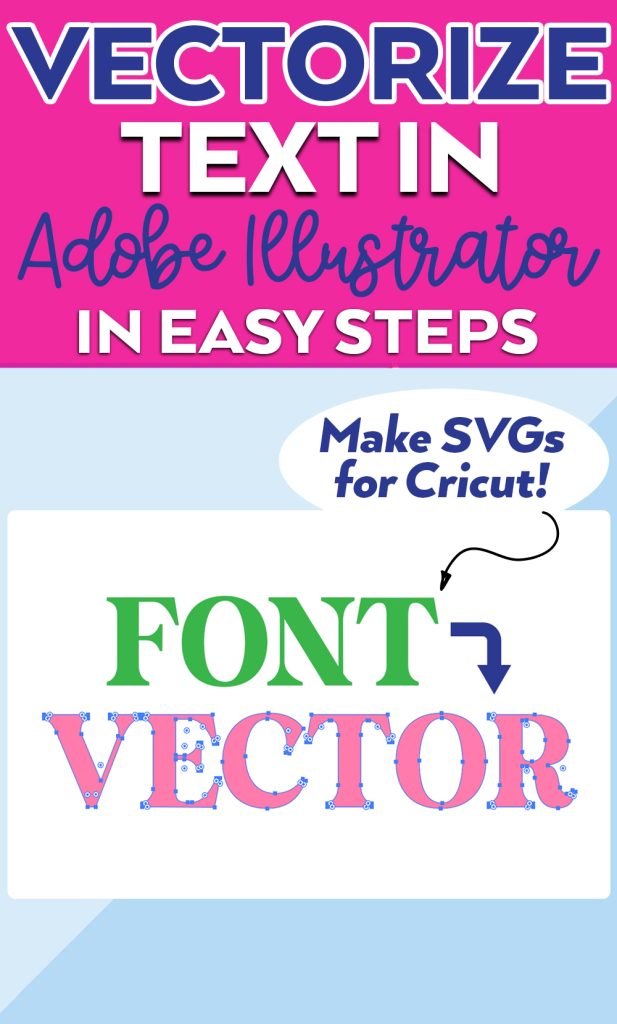
Pin How to Create a Text Vector File


ABOUT CHARYNN
Hi, y’all! I’m Charynn, the owner and designer of Pineapple Paper Co. I’m a mom of four kids (two girls and two boys) living in Pittsburgh. I love hand lettering, anything southern, cocktails, and of course, pineapples! I am excited to share my SVG files, printables, and craft projects with you! The pineapple is a symbol of hospitality, and I welcome y’all to my little corner of the internet. Read more…