Easy DIY Leprechaun Trap Idea with Cricut
This post and the photos within it may contain affiliate links. As an Amazon associate I earn from qualifying purchases. If you make a purchase through one or more of the links, I may receive a small commission at no extra cost to you.
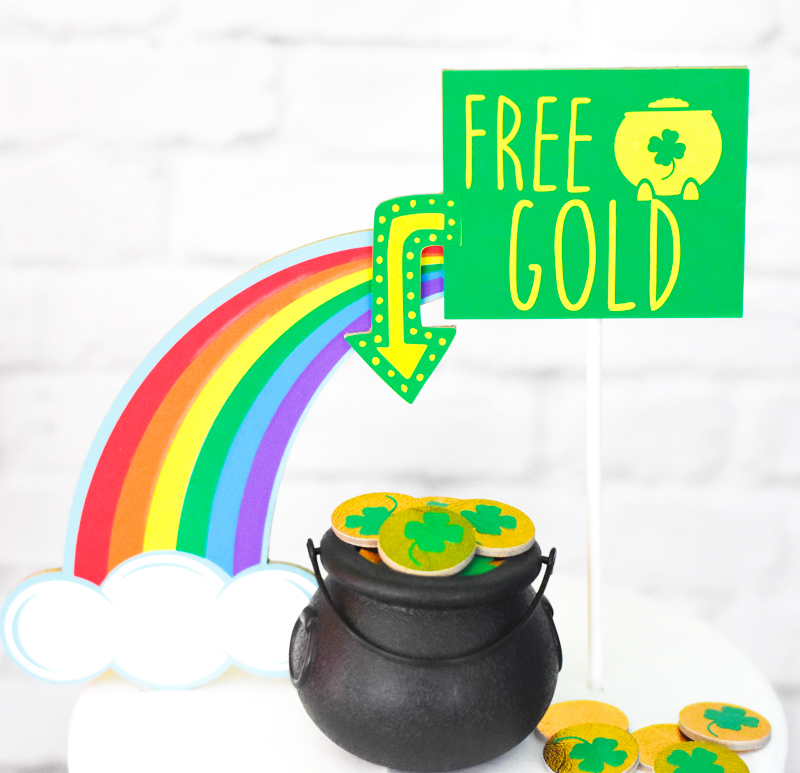
I made the cutest Easy DIY Leprechaun Trap Cake Topper with my Cricut Maker for a St. Patrick’s Day Party! Leprechaun traps are one my kids’ FAVORITE St. Patrick’s Day crafts, and this Leprechaun Trap cake topper is unique and easy for kids to help make! Keep reading for more St. Patrick’s Day party ideas and a tutorial on how to make this DIY Leprechaun Trap with your Cricut!
This post and the photos within it may contain affiliate links. If you make a purchase through one or more of the links, I may receive a small commission at no extra cost to you.
Leprechaun Traps are so popular right now. My two older kids are already planning their trap for St. Patrick’s Day. They have so many ideas for this year’s trap! When I was planning this St. Patrick’s Day party for Cricut, they insisted that I include a leprechaun trap. I wanted to make something different, so I decided to make it on top of a cake! When the leprechaun gets on top of the cake to get his free gold he’ll get stuck. Or at least that’s the theory that my kids have!
Related Post: FREE Hand Lettered Lucky Charm SVG + 16 More FREE SVGs!
This cake topper would have been incredibly difficult to make if it weren’t for my Cricut Maker! I cut Cricut Chipboard with the Knife Blade to make this sturdy cake topper. The Cricut Knife Blade is only compatible with the Maker, and it cuts thick materials like chipboard and basswood. It’s game changing!

Buy a Cricut Maker!
The Cricut Maker, with it’s expandable set of adaptive cutting tools, makes DIY St. Patrick’s Day party projects an easy task. There are so many materials that the Maker can cut, plus with the Scoring wheel, you can create St. Patrick’s Day party decor that would be too time consuming without the Maker. I can achieve professional results with the affordability of making everything myself. Plus, my kids like to help plan DIY party ideas, like this Leprechaun Trap! They get motivated to help craft and decorate for parties when they know my Cricut Maker is involved.
I was able to make an entire St. Patrick’s Day Party full of DIY Decor, Food, and Favors – check out the full post:
Related Post: DIY St. Patrick’s Day Party Ideas with Cricut
How to Make a DIY Leprechaun Trap
This DIY Cake Topper uses a couple of different materials, including several colors of vinyl. Here are the supplies you need to make your leprechaun trap:
–Cricut Premium Vinyl (in all colors of the rainbow!)
–Cricut StrongGrip and LightGrip mats (purple and blue)
-Lollipop Stick
-Hot Glue
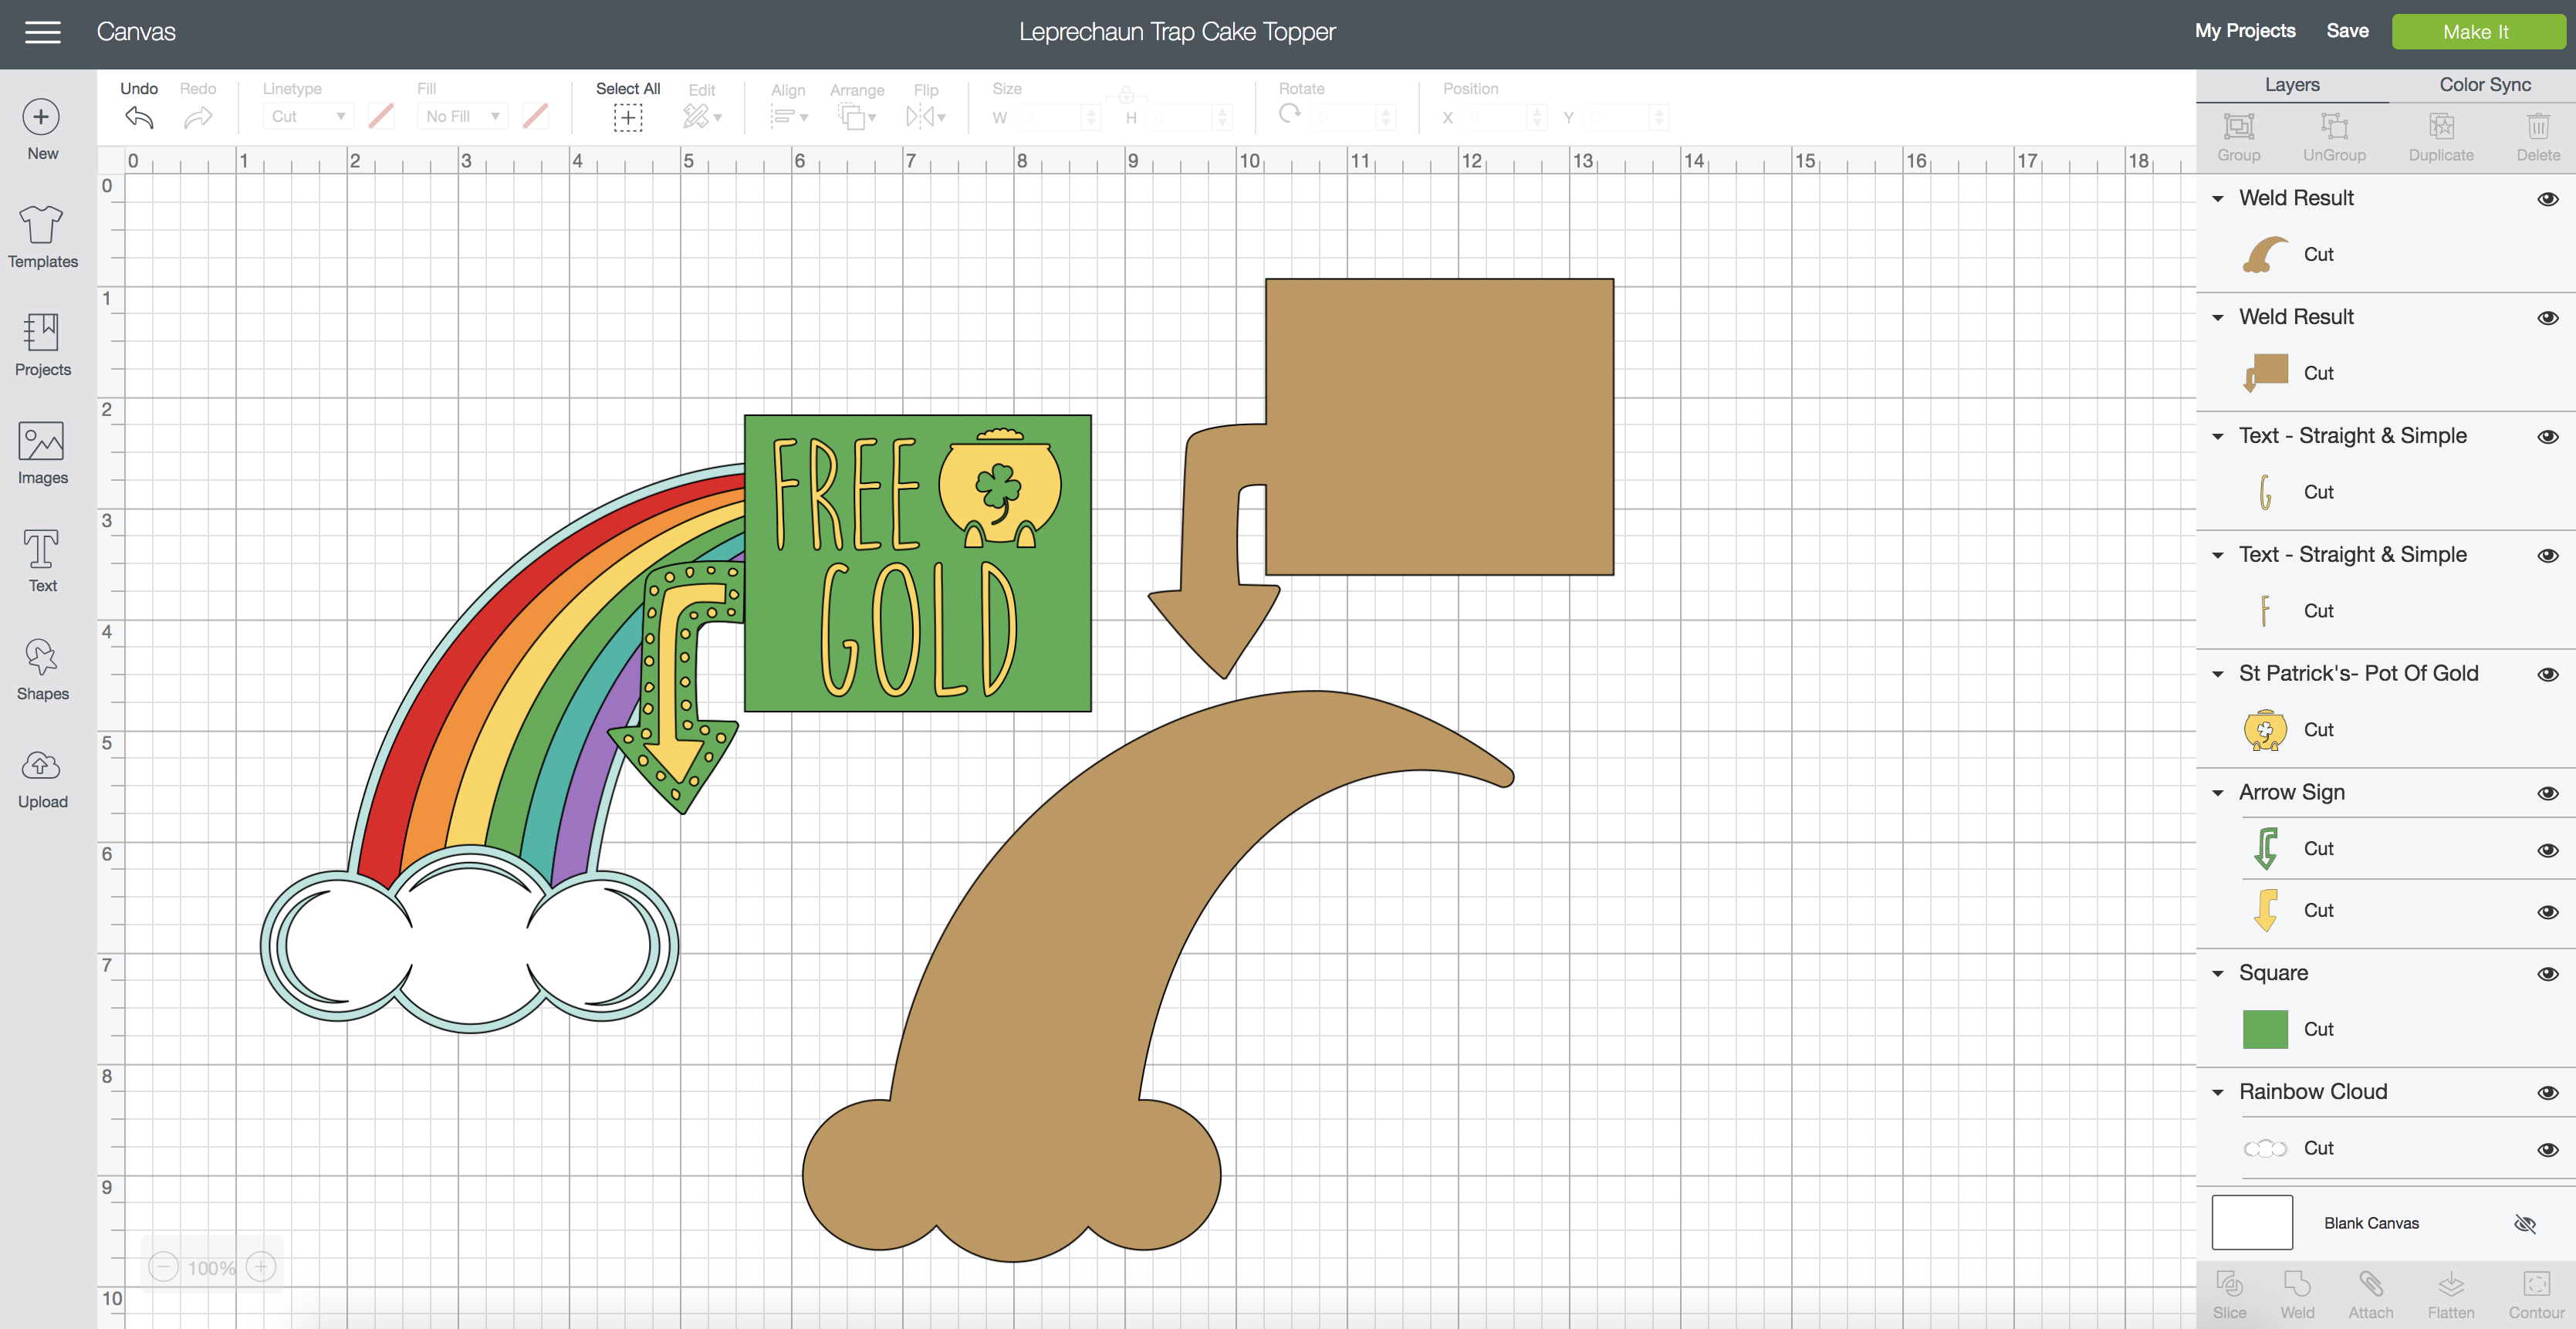
All of the components of this design are available within Cricut Design Space, so you can just click on the project to get started! It is sized for an 8 inch cake.
Click to Make: DIY Leprechaun Trap Cake Topper
If you’d like to change the size of the cake topper, click “Customize” and resize as necessary. Make sure you select ALL of the components so everything will resize at once.
When you’re ready to cut, click “Make It.”
Since Cricut Chipboard is only 11×11″ square, you’ll need to make sure that your chipboard pieces fit within that space. They’ll default to this layout:
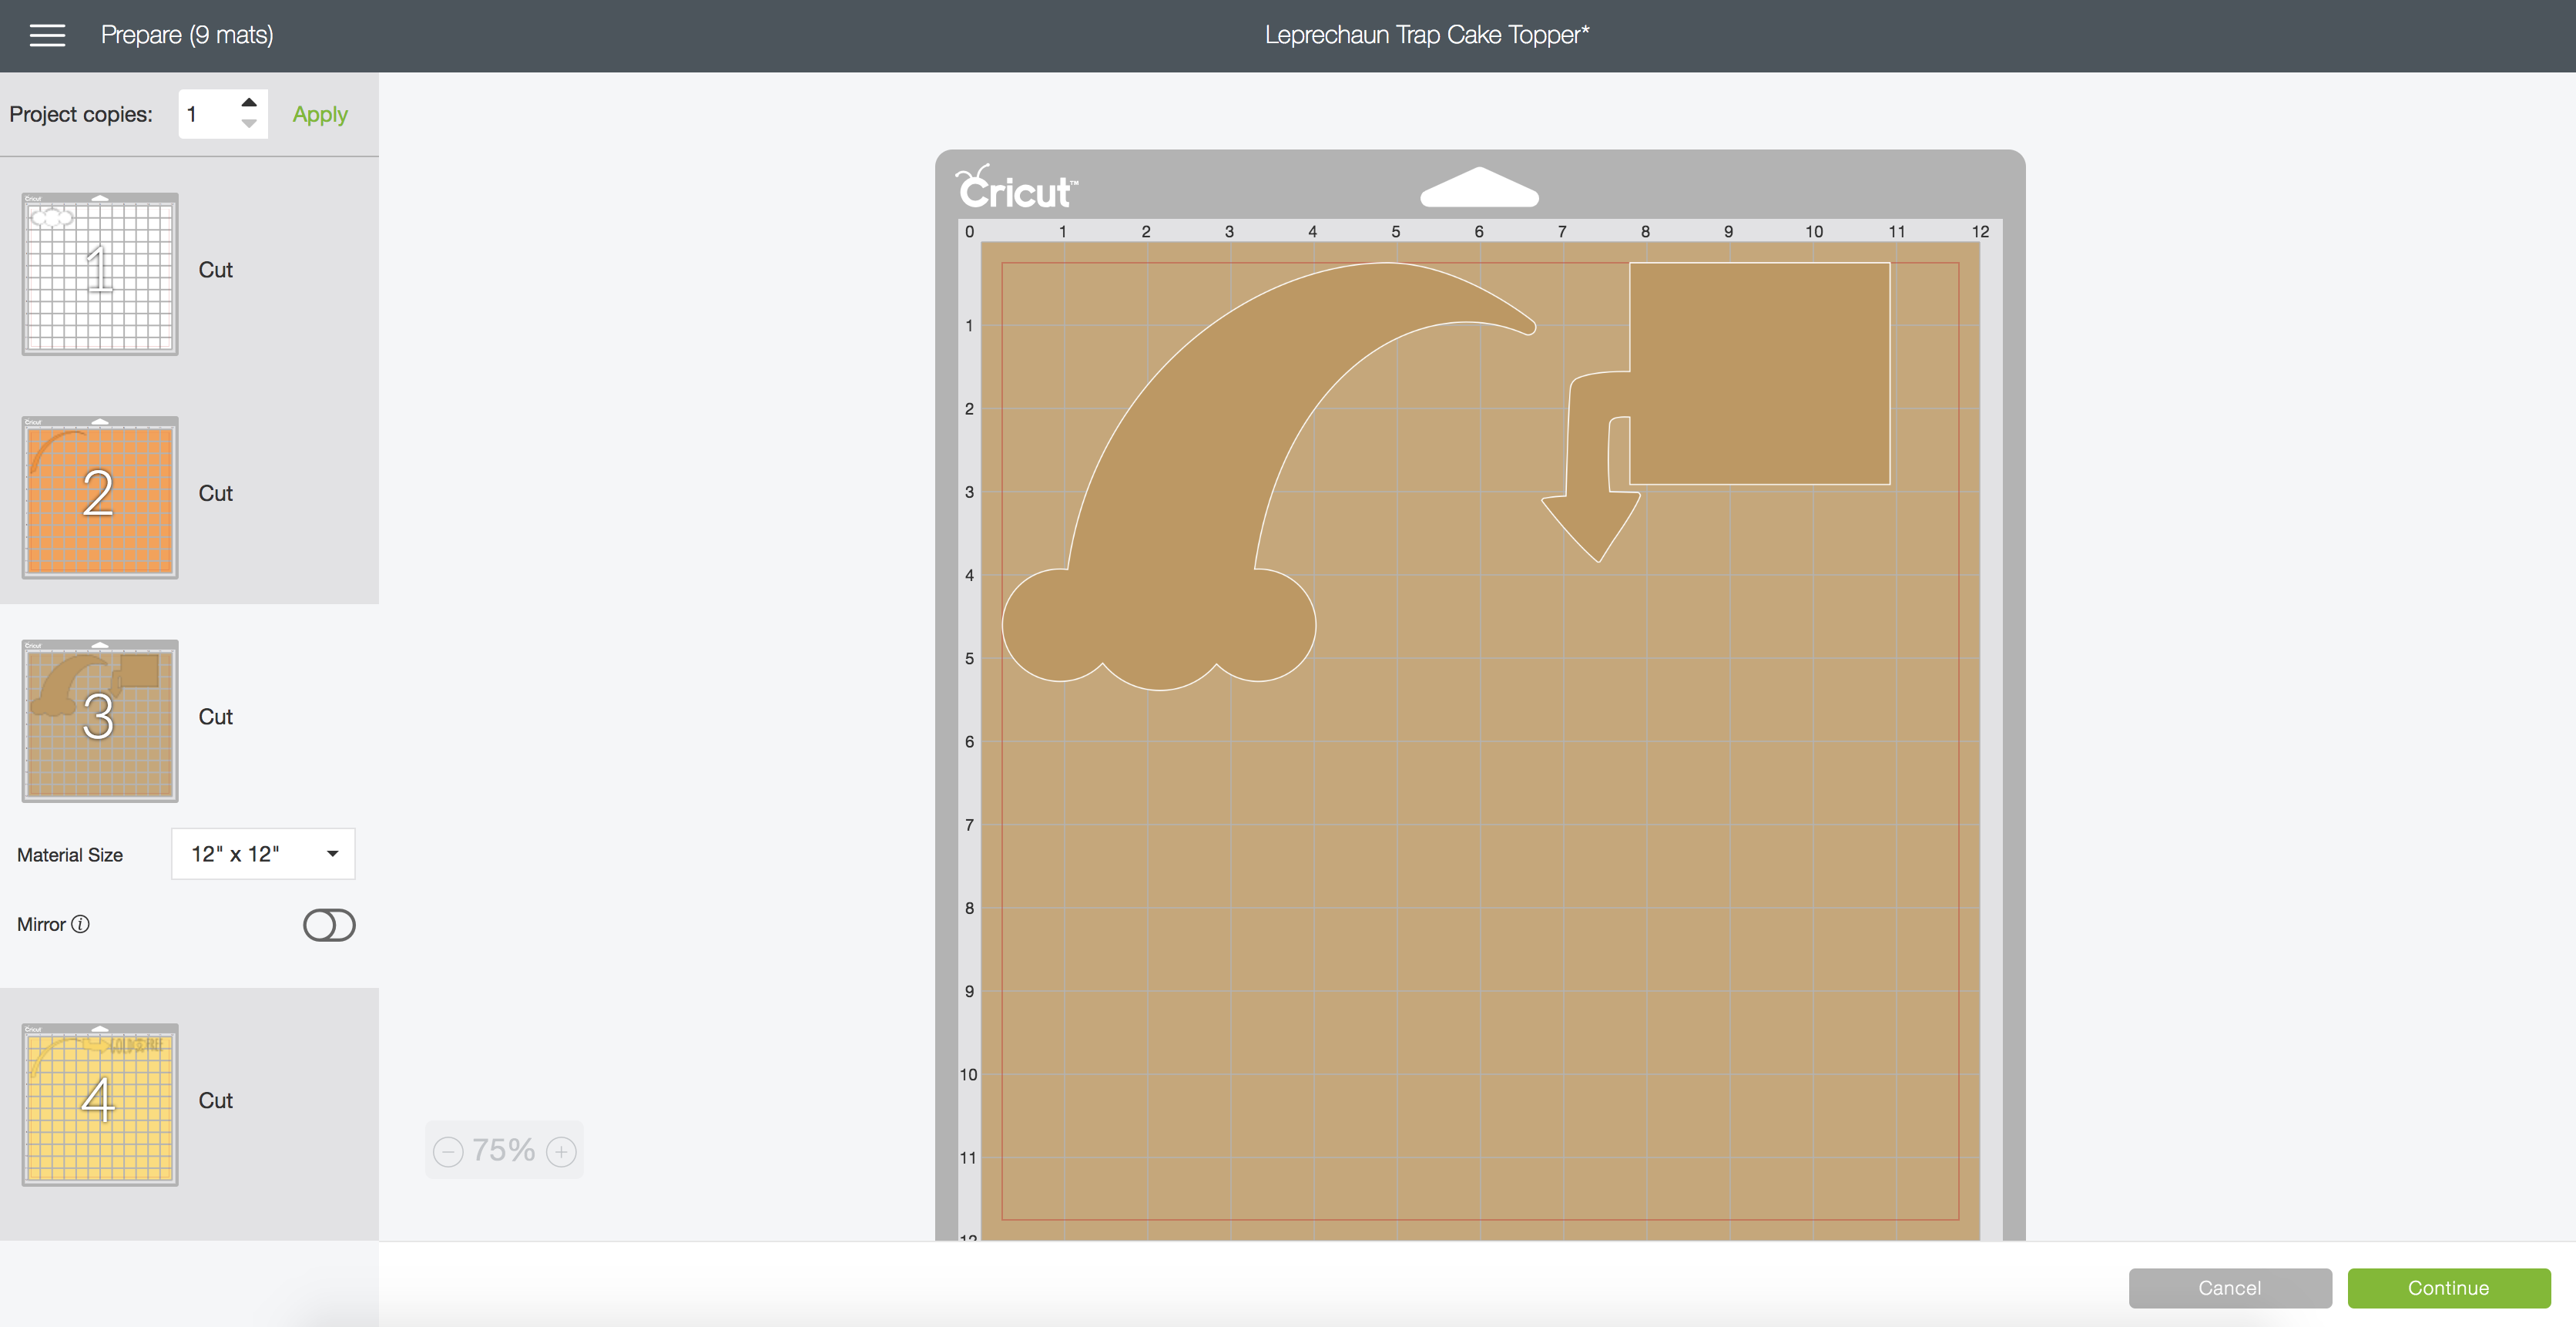
If you try to cut it, the sign piece would be VERY close to the edge of the chipboard and your knife blade will likely get stuck. You can select the designs and move them around on the mat to fit:
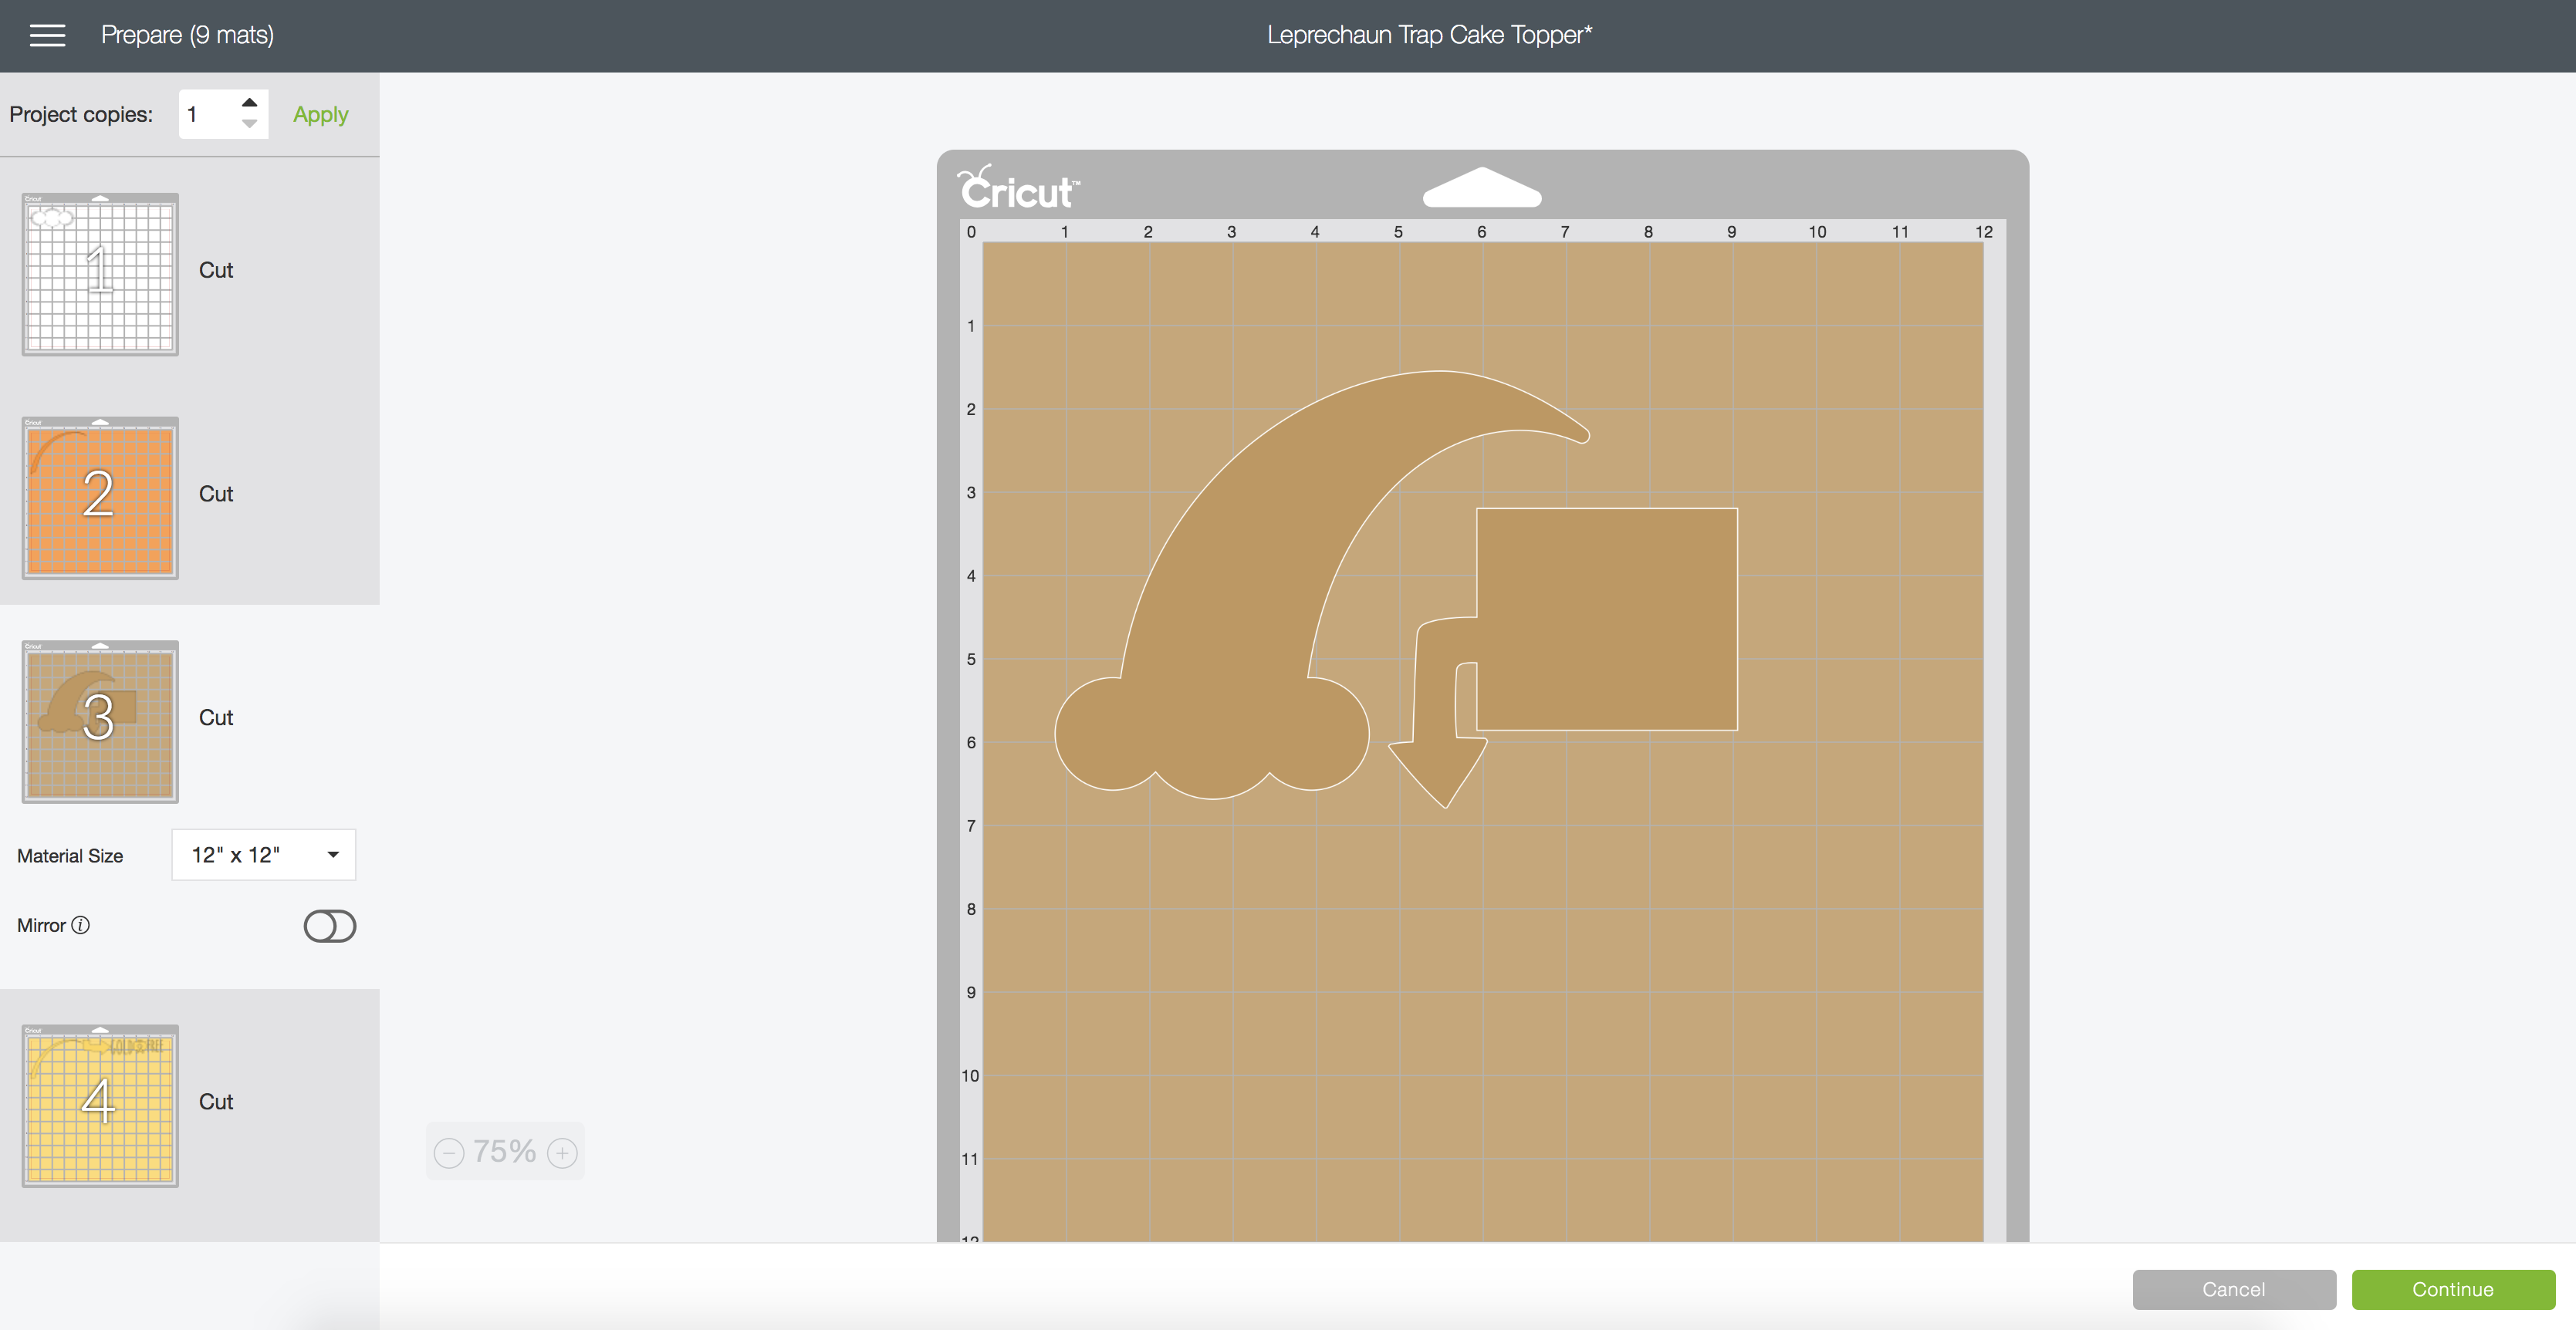
I made the sign and rainbow two separate pieces so it would be easier to apply the vinyl.
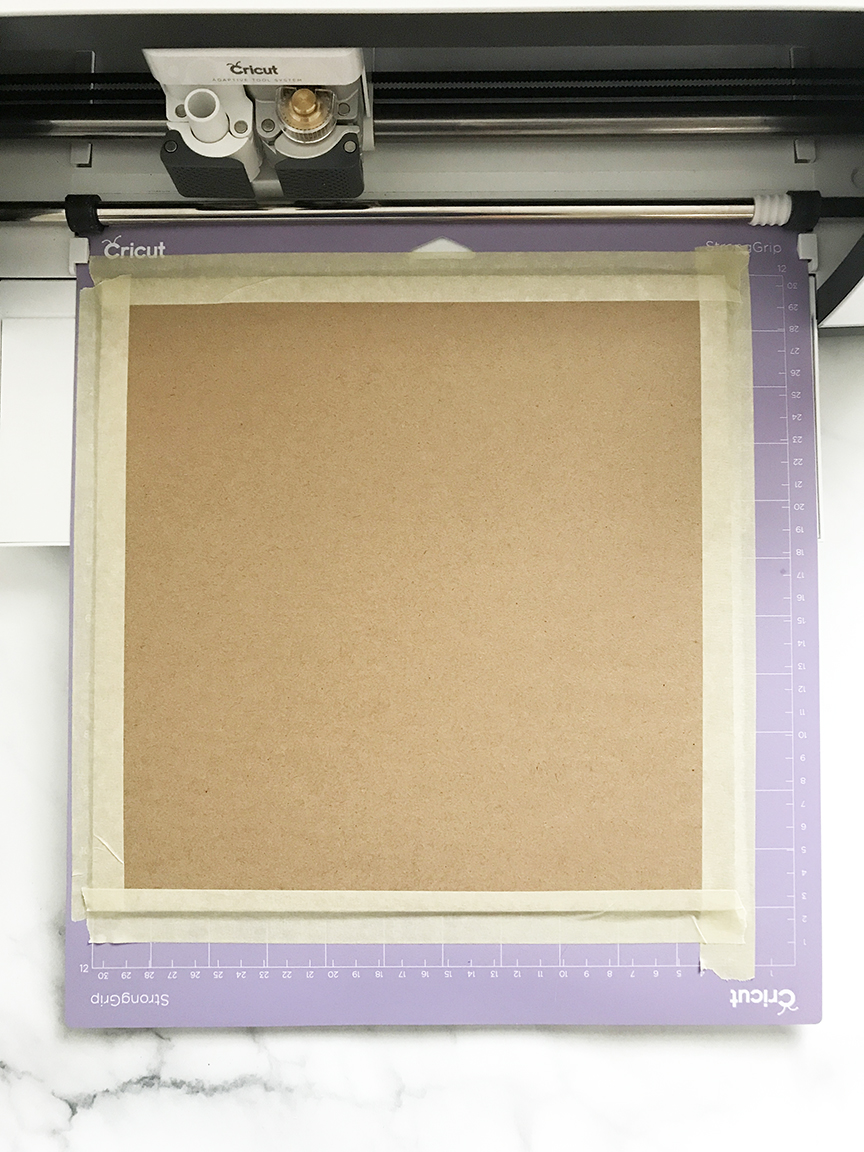
Keep in mind that chipboard will take a little longer to cut (about 15 minutes or so for this piece). In addition, chipboard has to be taped down to your StrongGrip mat with masking tape so it won’t move during the cutting process. If you look at the above picture, I moved the designs towards the middle of the mat so to avoid the masking tape. This isn’t necessary (or always possible), but I like to keep the blade away from the tape if I can.
When you’re done cutting all of the pieces, apply the vinyl to the chipboard. Use transfer tape to apply the “Free Gold” sign decal, as it’s easier than applying piece by piece.
Hot Glue your finished pieces together, then attach a lollipop stick, and you’re done!

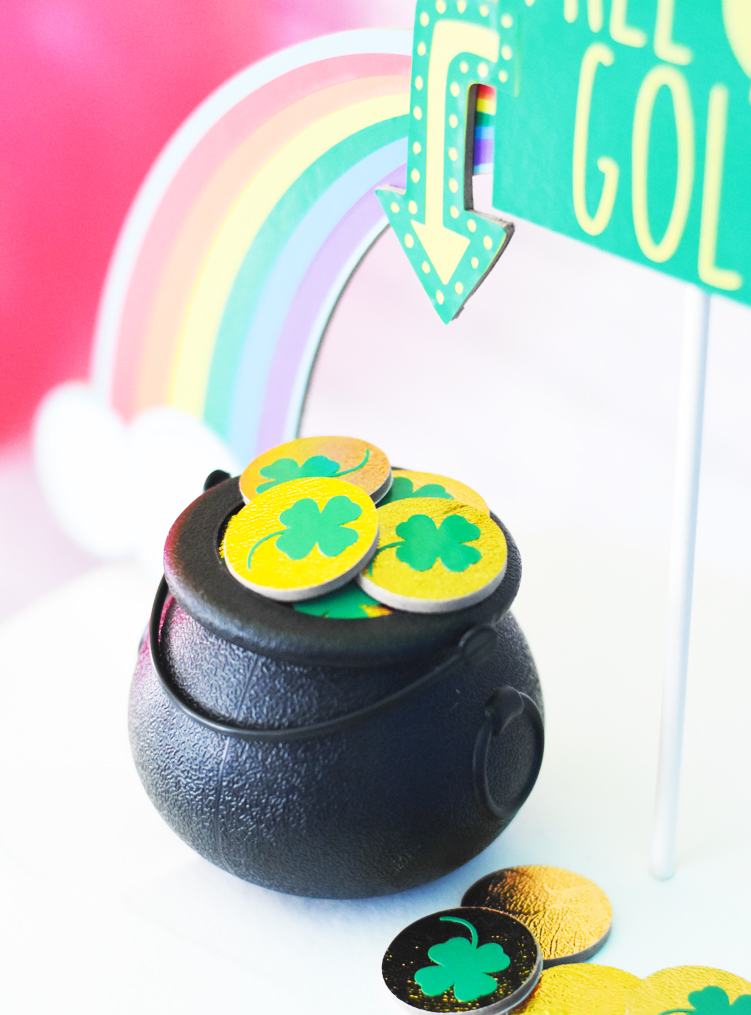
I also added these DIY Leprechaun Gold Coins to create a Pot of Gold to entice your Leprechaun. These coins were also made using Cricut Chipboard and Cricut Textured Metallic Vinyl.
Click to Make: DIY Leprechaun Trap Gold Coins
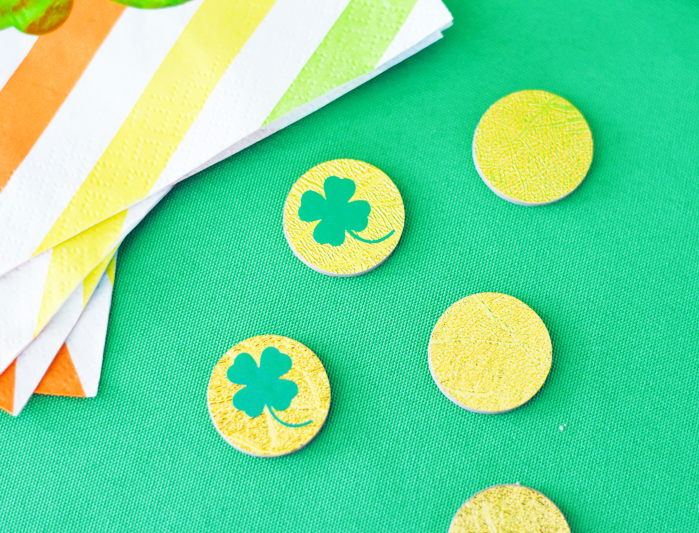
Place the coins in a container (I used a mini cauldron from Halloween haha!) and stick your Cake Topper in the top of a cake to make an easy DIY Leprechaun Trap!
FOR MORE INSPIRATION, CHECK OUT SOME OF MY MOST POPULAR POSTS!
DIY Can Koozies with Cricut Iron On
Free “Love You More” SVG + 14 More Free SVGs
Unicorn Birthday Party Ideas with Martha Stewart, Cricut, and Michaels
DIY Dinosaur Party Ideas that Kids Will Love
Harry Potter Patronus SVG – Free Download
This is a sponsored conversation written by me on behalf of Cricut. The opinions and text are all mine.


ABOUT CHARYNN
Hi, y’all! I’m Charynn, the owner and designer of Pineapple Paper Co. I’m a mom of four kids (two girls and two boys) living in Pittsburgh. I love hand lettering, anything southern, cocktails, and of course, pineapples! I am excited to share my SVG files, printables, and craft projects with you! The pineapple is a symbol of hospitality, and I welcome y’all to my little corner of the internet. Read more…
2 Comments