How to Make a Greeting Card with the Cricut Joy
This post and the photos within it may contain affiliate links. As an Amazon associate I earn from qualifying purchases. If you make a purchase through one or more of the links, I may receive a small commission at no extra cost to you.
This is a sponsored post written by me on behalf of Cricut. All opinions are 100% mine.
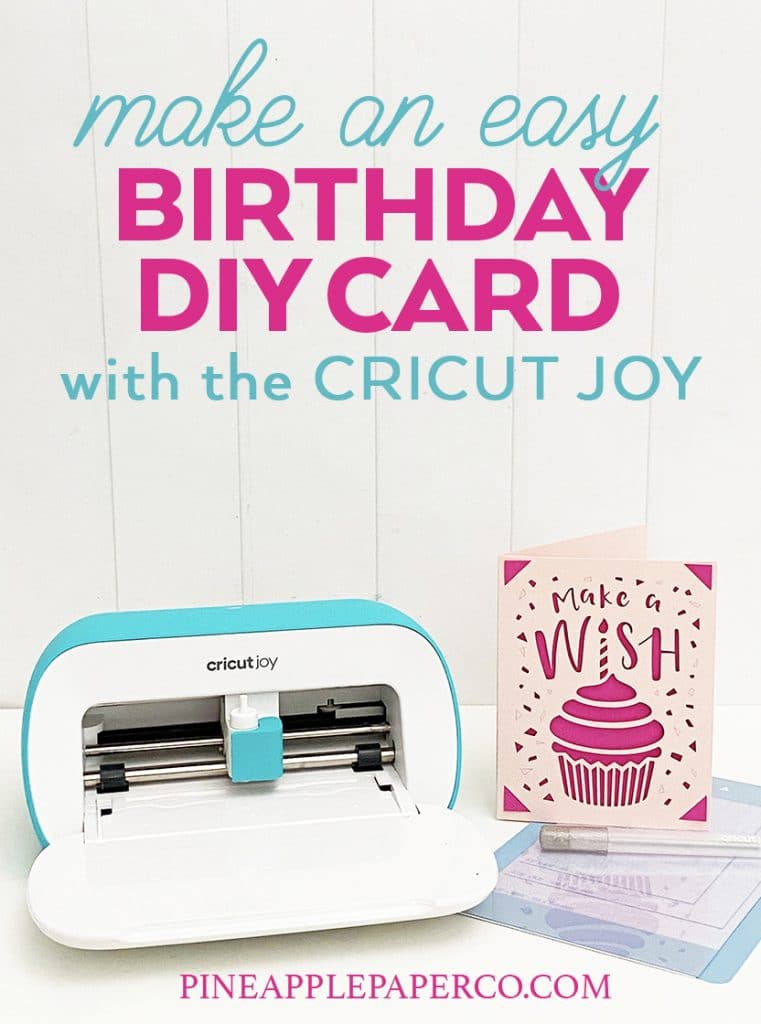
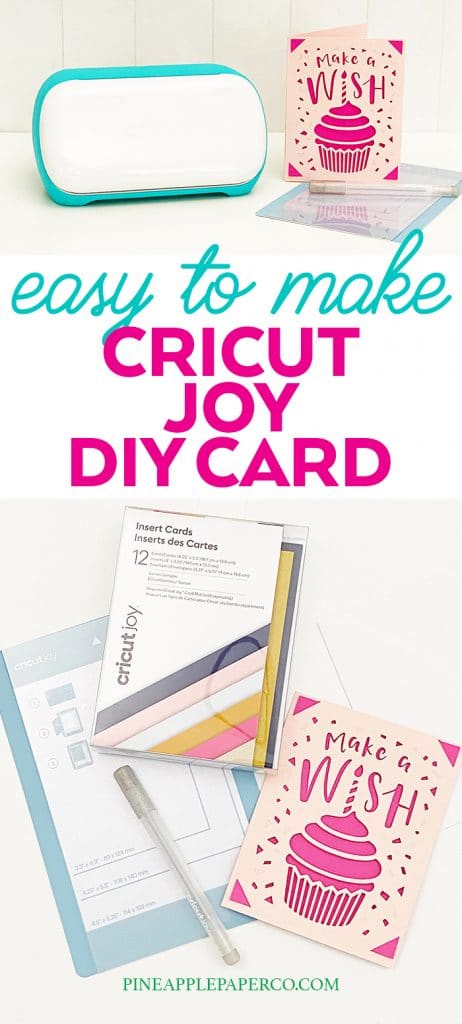
Learn how to use the new Cricut Joy machine and Card Mat to make a homemade card to send to friends and family. These DIY Greeting Cards are SO easy to make with a Cricut Joy and everyone will love getting them for birthdays, anniversaries, and more!
In a time where connecting to our friends and family has become more difficult, sending homemade cards is a great way to share a little “joy” with those you love. I love making my own cards, and have designed a lot of them with my Cricut machines including Christmas cards with my Cricut Maker, Christmas cards with my Explore Air 2, DIY Valentine’s Day cards, Cricut Halloween Cards, and more! If you can’t get out to buy a birthday, anniversary, baby, or even a “thinking of you” card, a homemade card is the perfect idea to send to family, friends, or even strangers. Make DIY greeting cards to spend some time relaxing or crafting with your kids, and the using Cricut Joy makes it SO EASY and fun!
I recently got a Cricut Joy, and I love how seamlessly it fits into my home. It’s small enough that I can use it anywhere – even the kitchen or living room. It packs away it in a cute little tote bag or in the closet and I can set it up instantly wherever I’m crafting for the day. No big mess or space required. It really is perfect for everyone with limited crafting space!
Related: See all of the Cricut Joy products available now!
In addition to being able to cut Cricut Smart Vinyl without a mat and cut repeated designs up to 20 feet long (Yes! 20 feet!), Cricut Joy also comes with the unique ability to create greeting cards in just a few minutes – without having to craft your own envelope and card base. With the brand new exclusive Card Mat and card insert blanks, I’ve been obsessed with making cards!
Cricut created a unique and groundbreaking way to craft pre-folded greeting cards by designing a double layered mat that allows the Joy to draw on and then cut the card in a single step. I was SO excited to try the process out, and I’m here to tell you that it’s really as cool as it appears. You can genuinely make unique and stunning cards for all occasions in a moment’s notice.
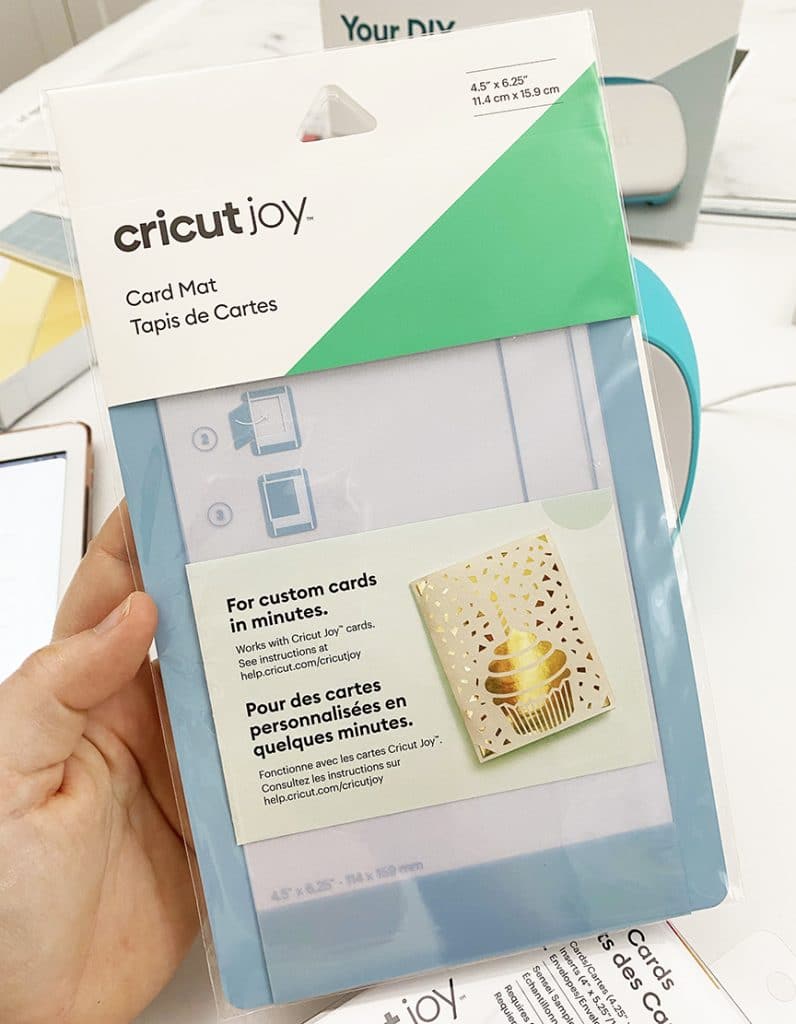
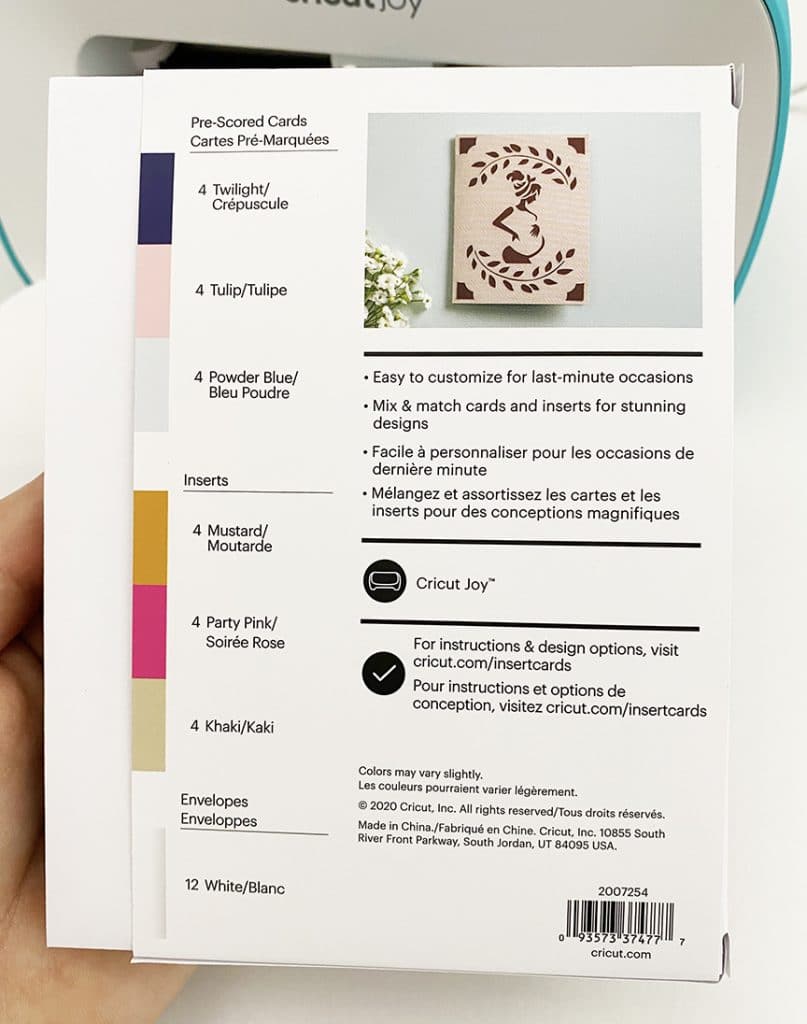
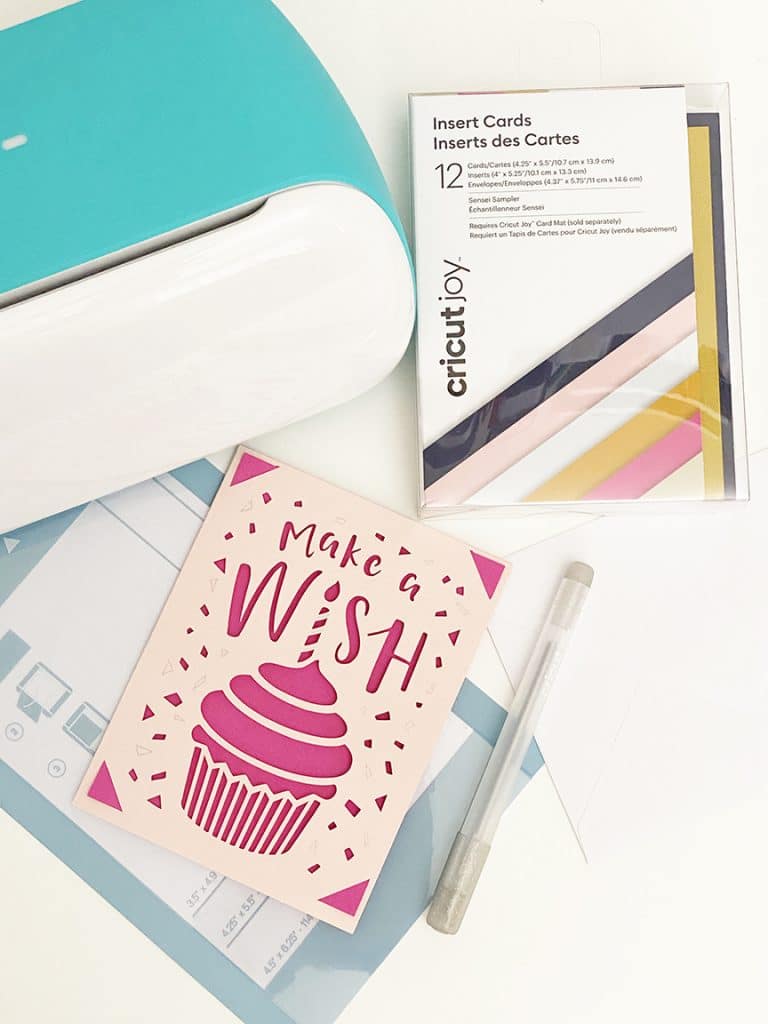
In addition to the new card mat, you can purchase blank insert card sets that come in a variety of colors. The cards come pre-folded and include envelopes.

I love this particular set of blank cards (the Sensei sampler). These colors can be used for a variety of occasions. The back of the packaging shows the card colors as well as the insert colors included.
Related Post: DIY Easter Cards with the Cricut Joy
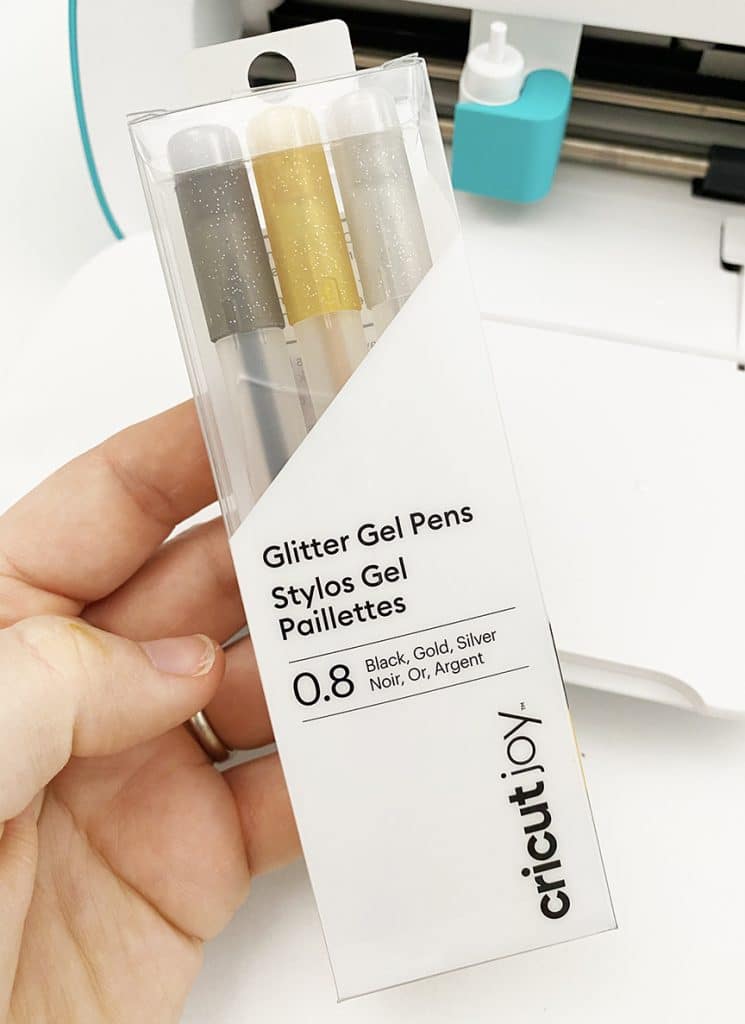
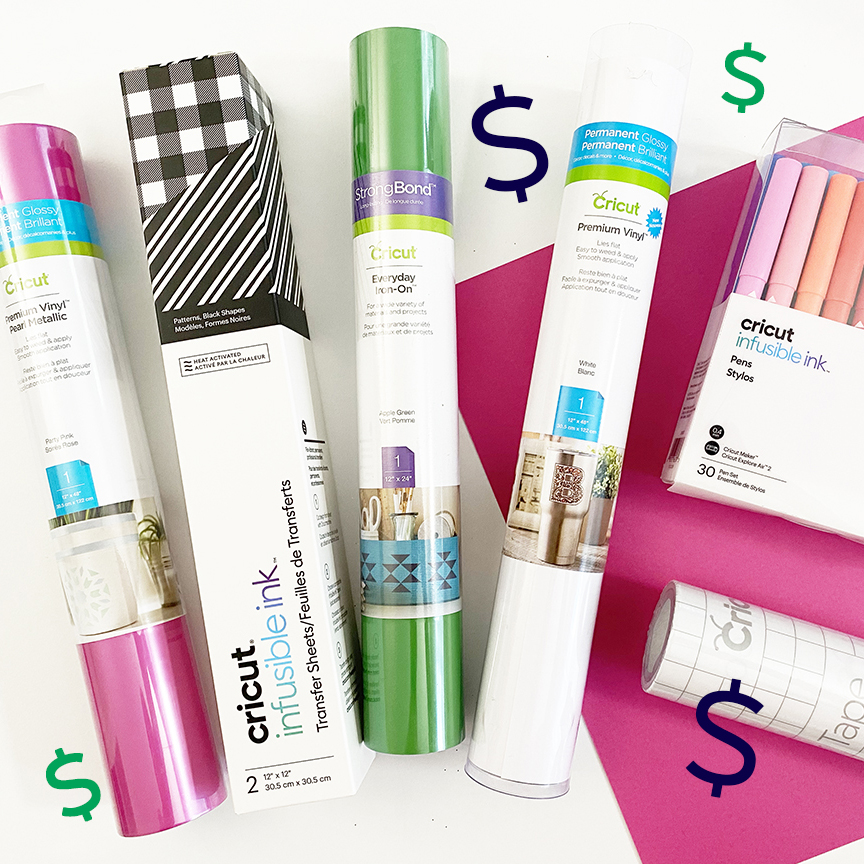
A new range of pens are also available for the Cricut Joy. They are a slightly different size than those used for a Cricut Maker or Explore Air 2, so you must buy Joy-specific pens.
Supplies You Need to Make a Card with the Cricut Joy
The best part about making a card with Cricut Joy is that you really only need a few items to get started with making cards. And you can have everything shipped right to your door from the Cricut Online Store. No need to buy multiple colors and weights of paper to craft a beautiful card! To make a simple card with the Joy, you’ll need:
- Cricut Joy Machine
- Cricut Joy Card Mat
- Blank Card Insert Set
- Pens (depending on the design, but they are used for the “Make a Wish” card)
- Scraper and/or Spatula Tool (helps to get the card off of the cutting mat)
Do you Need a Computer to Make a Cricut Joy Card?
You can use a computer to connect via bluetooth to your Cricut Joy machine, but I found that the mobile Cricut app was preferable! You can leave your computer in another room and use your phone or tablet for everything.
I’ll be providing screenshots that show step by step how to use your tablet to make a Cricut Joy card. I used an iPad, but the app will work the same with your phone or other device.
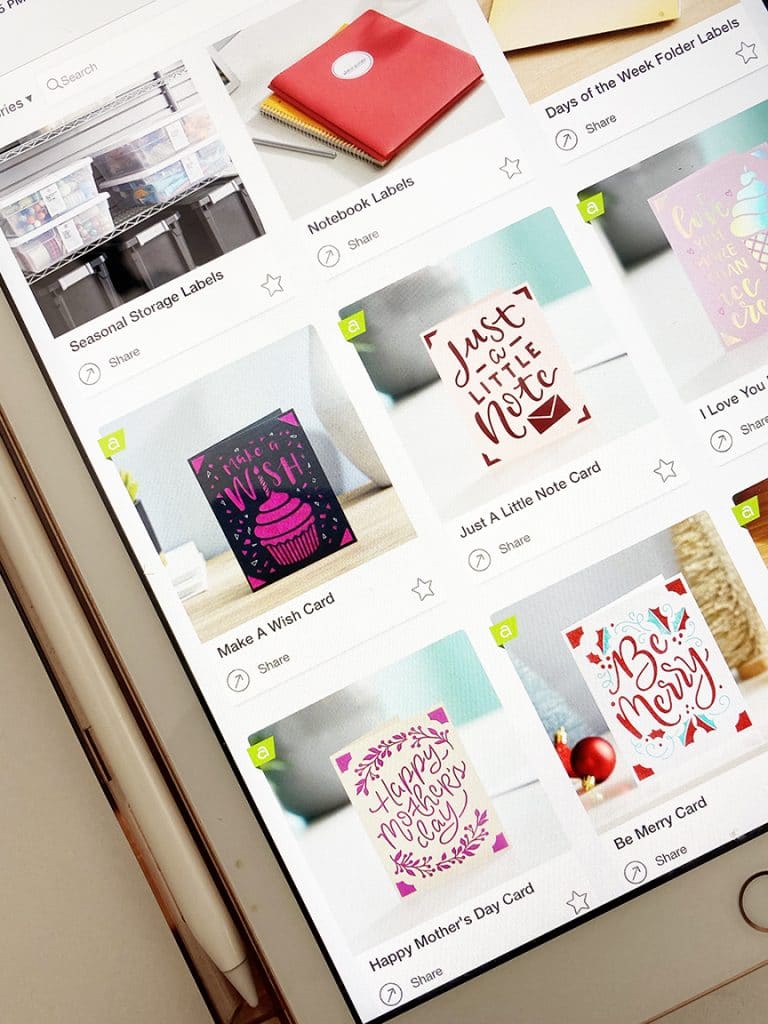
Cricut Design Space has TONS of new and amazing projects that are specifically designed for the Joy. The card designs are gorgeous and offer a lot of options for different occasions. You’ll have no problem finding a design that you love!
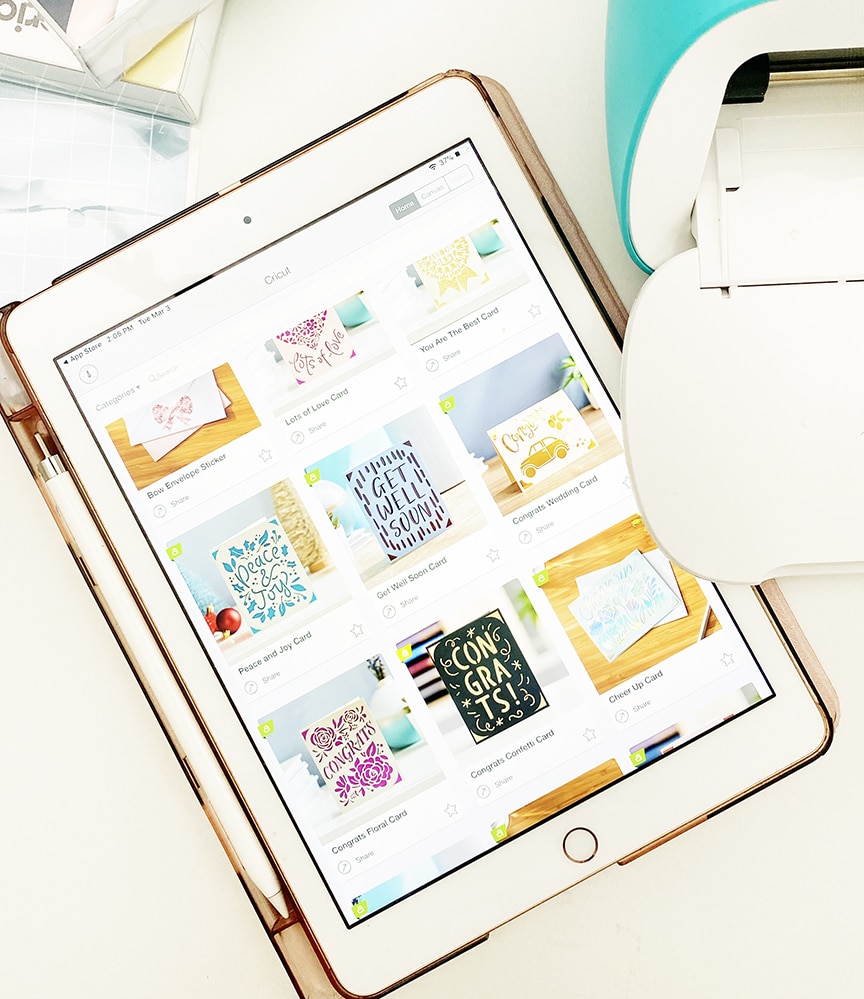
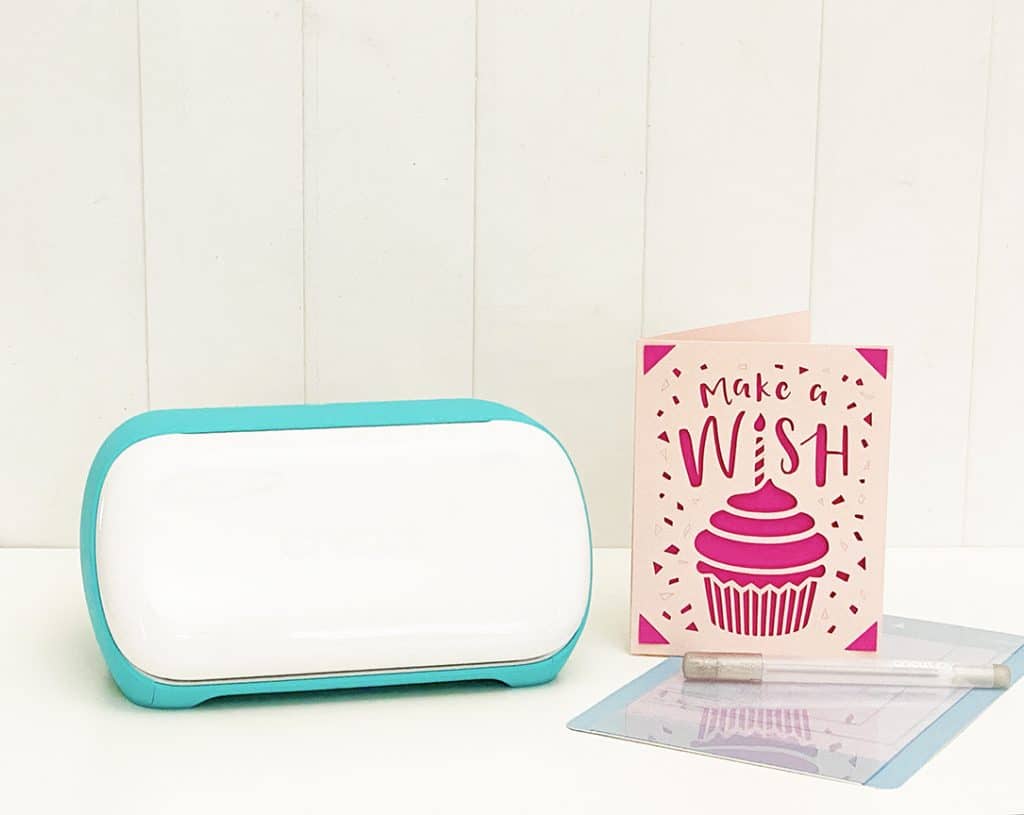
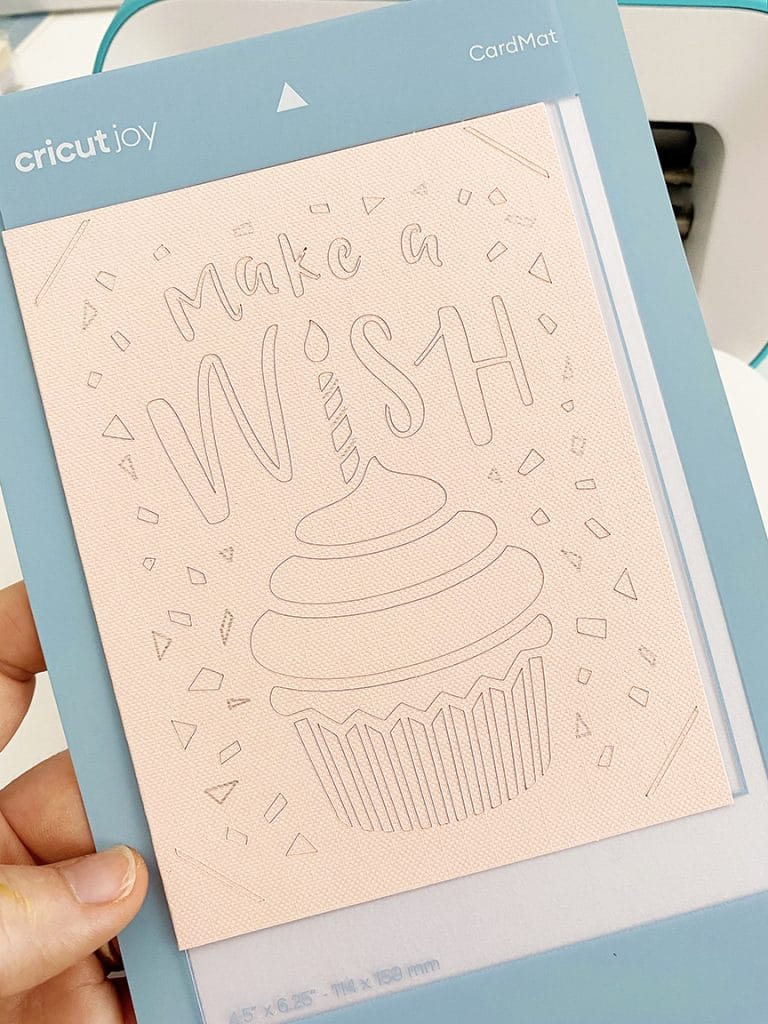
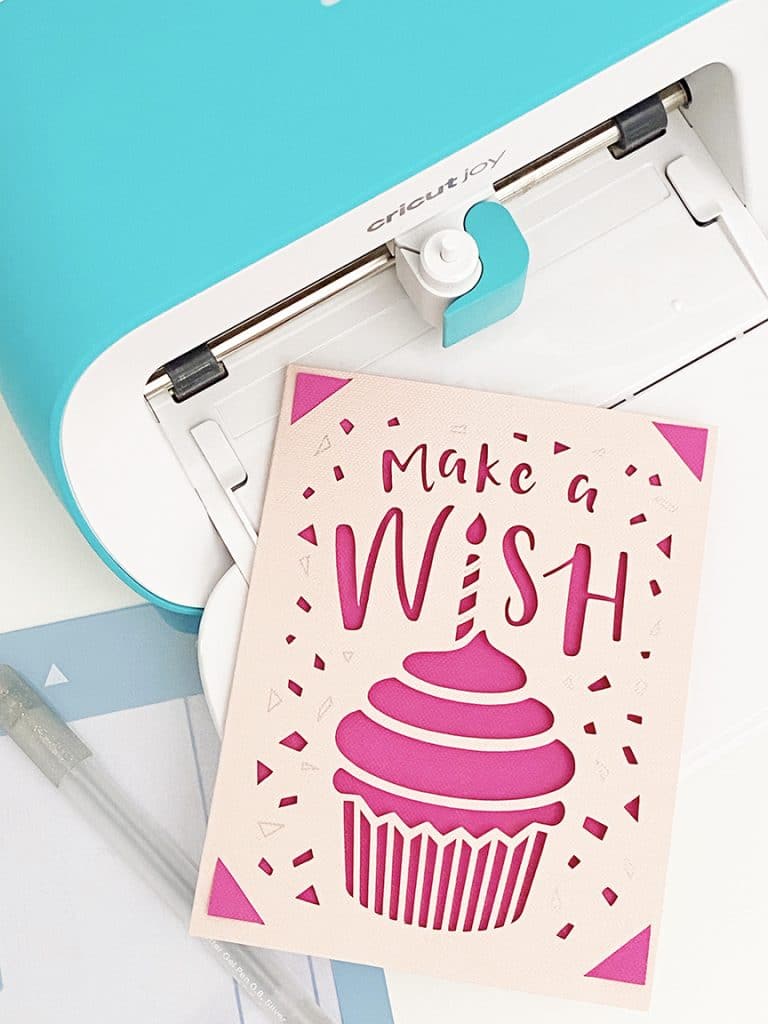
One of my favorite birthday card designs in Cricut Design Space is this “Make a Wish” birthday card. It’s great for both kids and adults! Since we can’t be with my niece this year to celebrate her birthday, I thought my kids would like to make this card to send to her.
I’ve already picked out several other cards that the kids and I want to make to share with family members that we can’t be around right now.
Step by Step Tutorial to Make a DIY Card with the Cricut Joy
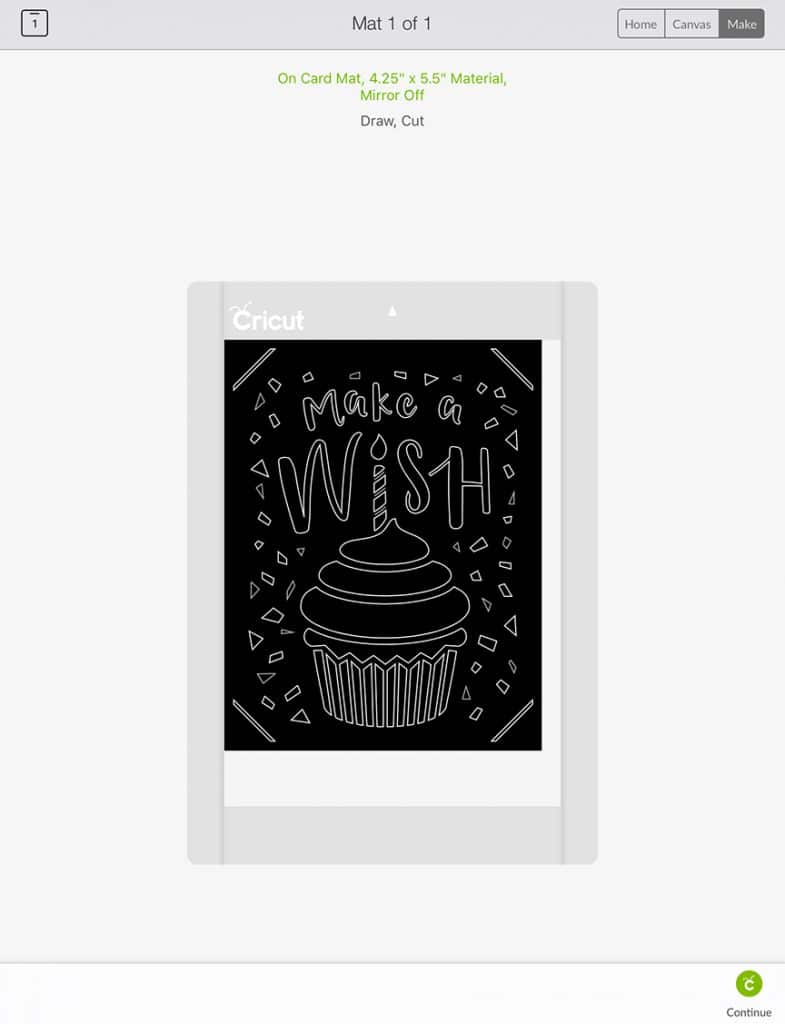
When you select the design of the card that you would like to make, a window will open showing you the details of the supplies you need, as well as the size of the finished card as designed.
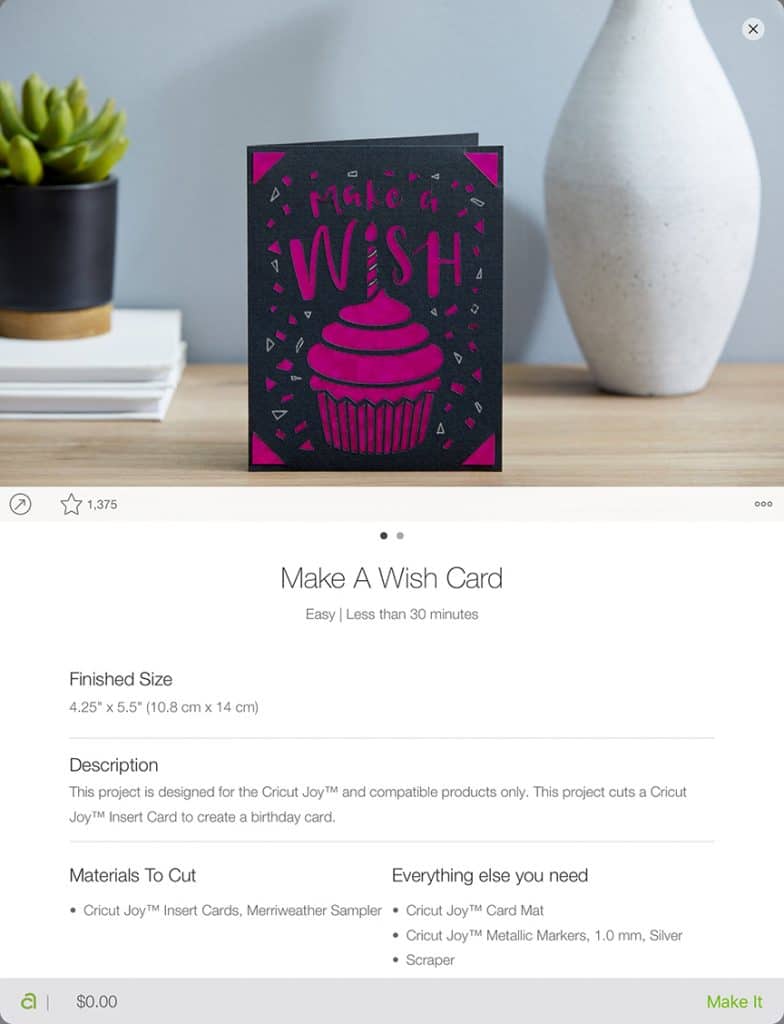
The size of the finished blank cards are 4.25×5.5″, which means no resizing is necessary. Once you select your project, you can just click the green “Make It” link.
The screen will load to show you the details of your mat – since it’s a predesigned project, all of these default options are fine.

Click the green “Continue” button with the Cricut logo to continue.
The cut screen is next, where the first step is to choose your material – for this project I chose the first one – “Insert Card.”
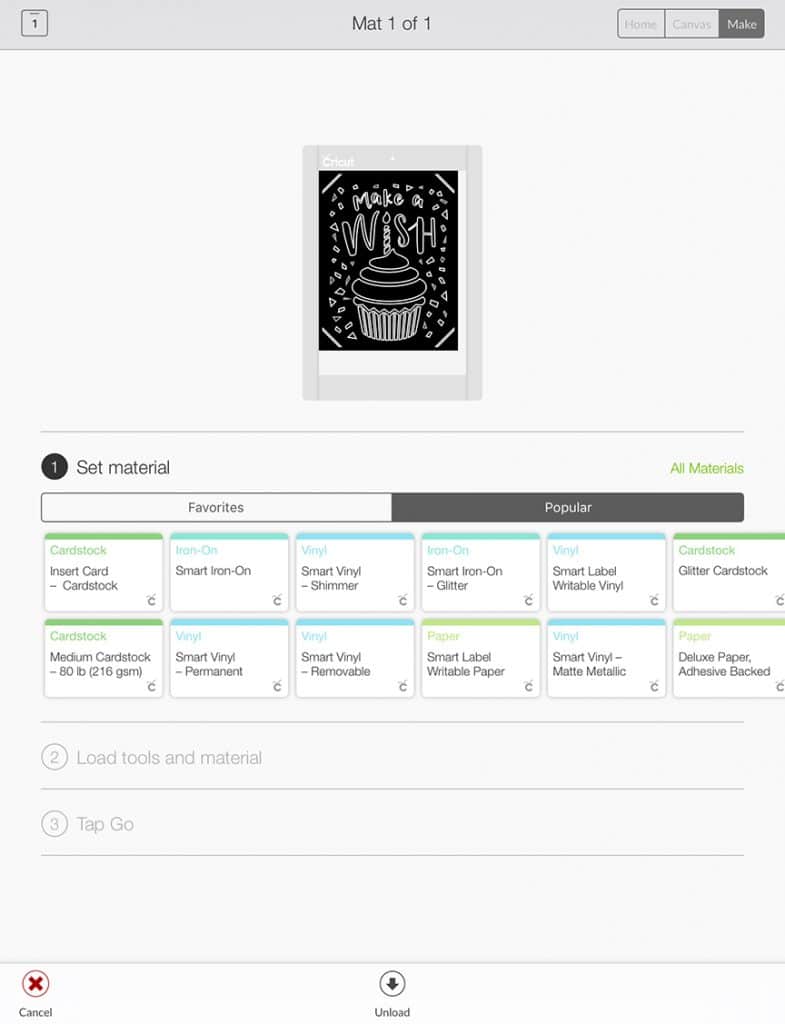
In the second section, the app tells you that you need to load your pen in the clamp first, and then load your material in the machine.
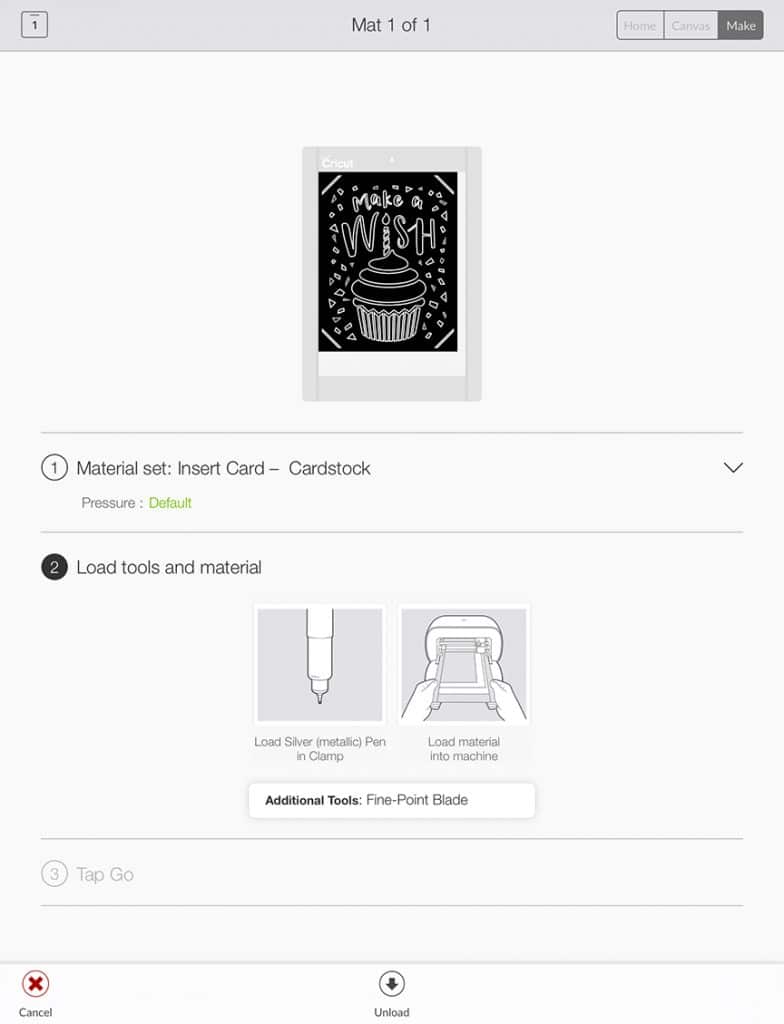
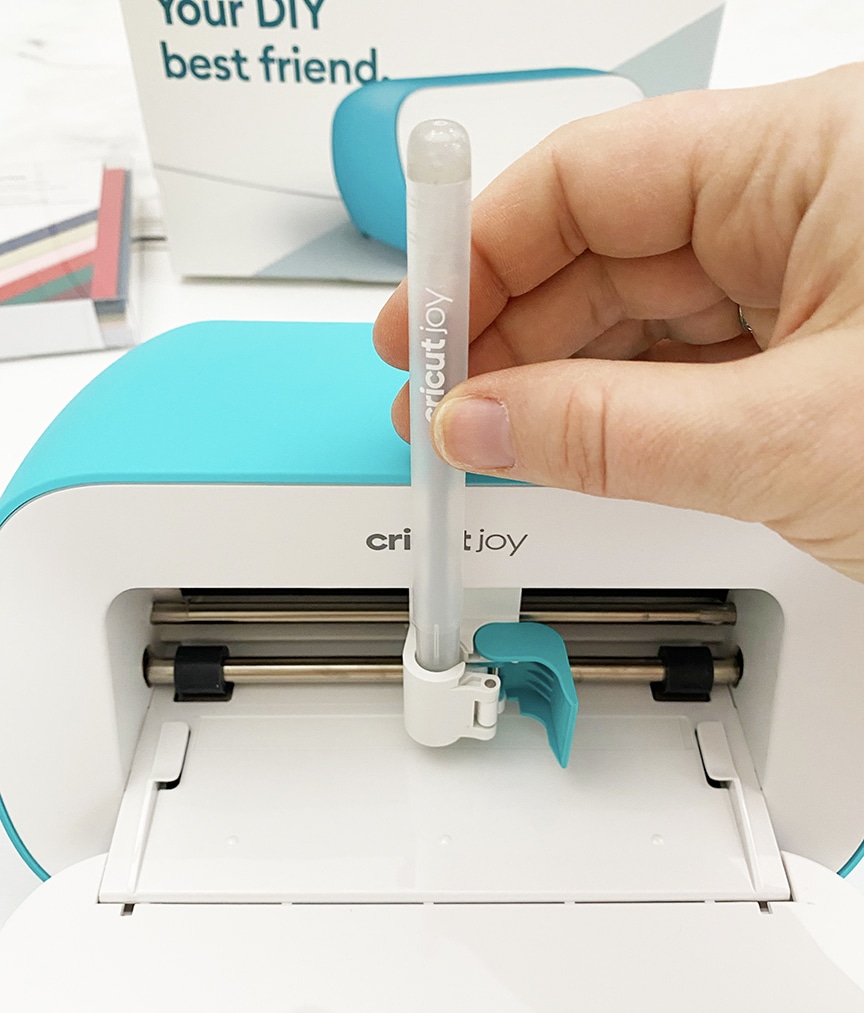
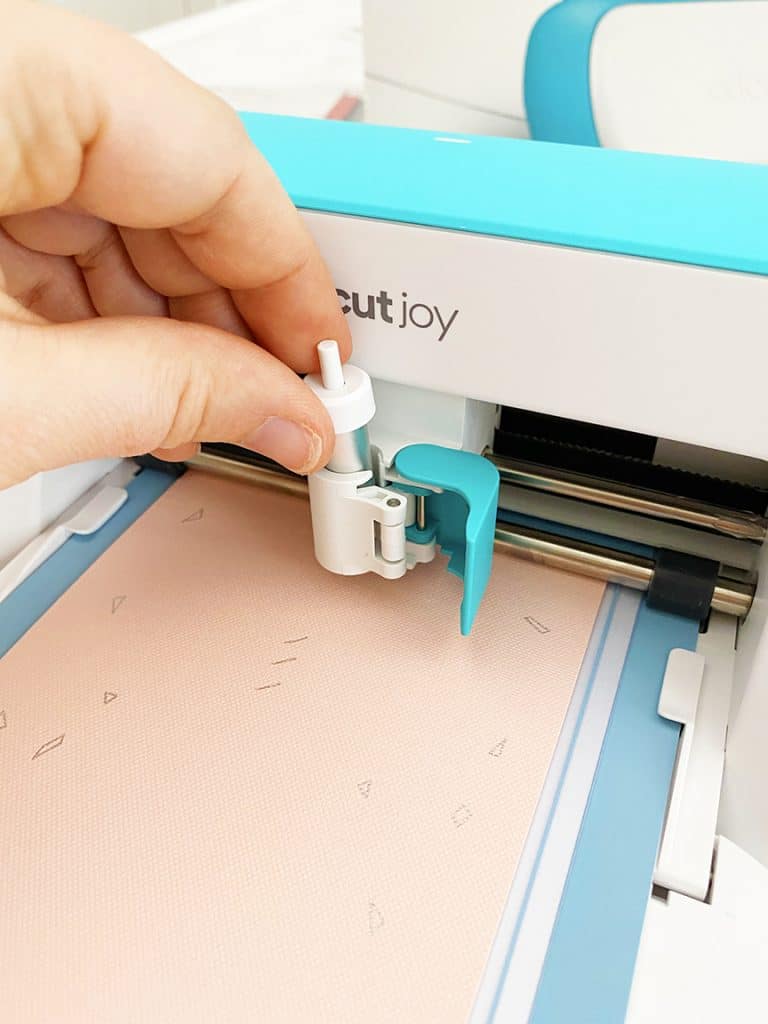
Insert the gel pen as you would in the other Cricut machines by gently pushing down so it’s in the whole way, then close the clamp.
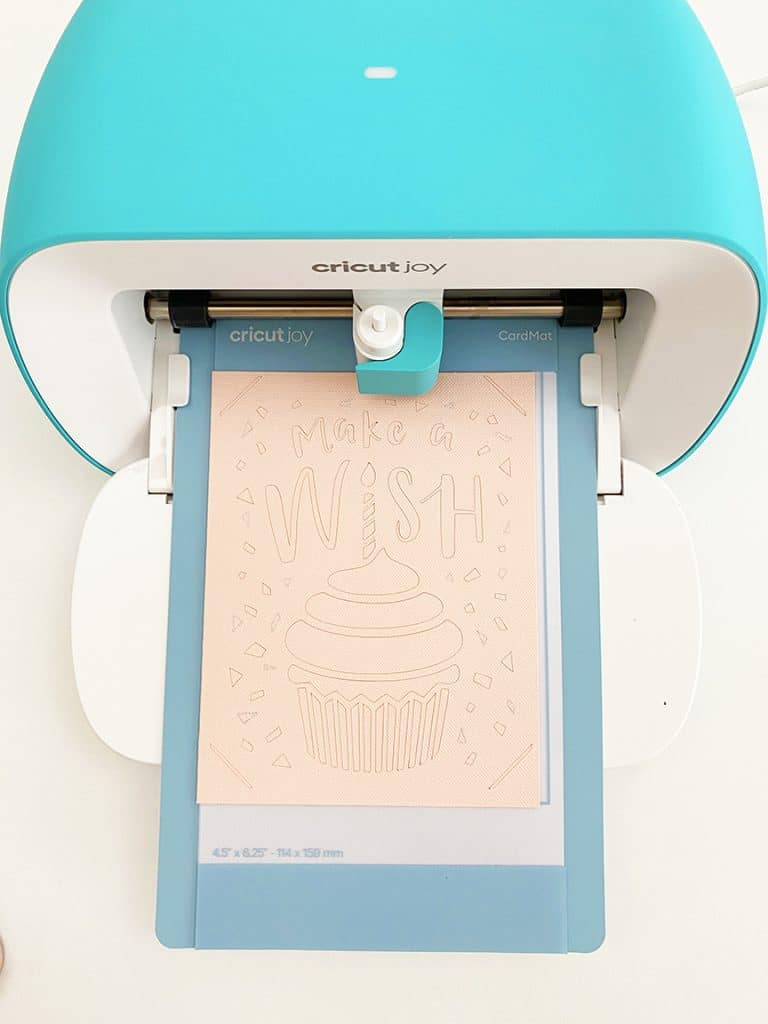
Before you can load your material into Cricut Joy, let’s discuss the Cricut Joy Card Mat! It is a special double layered mat that your FOLDED card SLIDES into! It’s such a cool design. NOTE: Before you insert the card, MAKE SURE that you take the clear protective sheet off of the mat! It’s easy to miss!
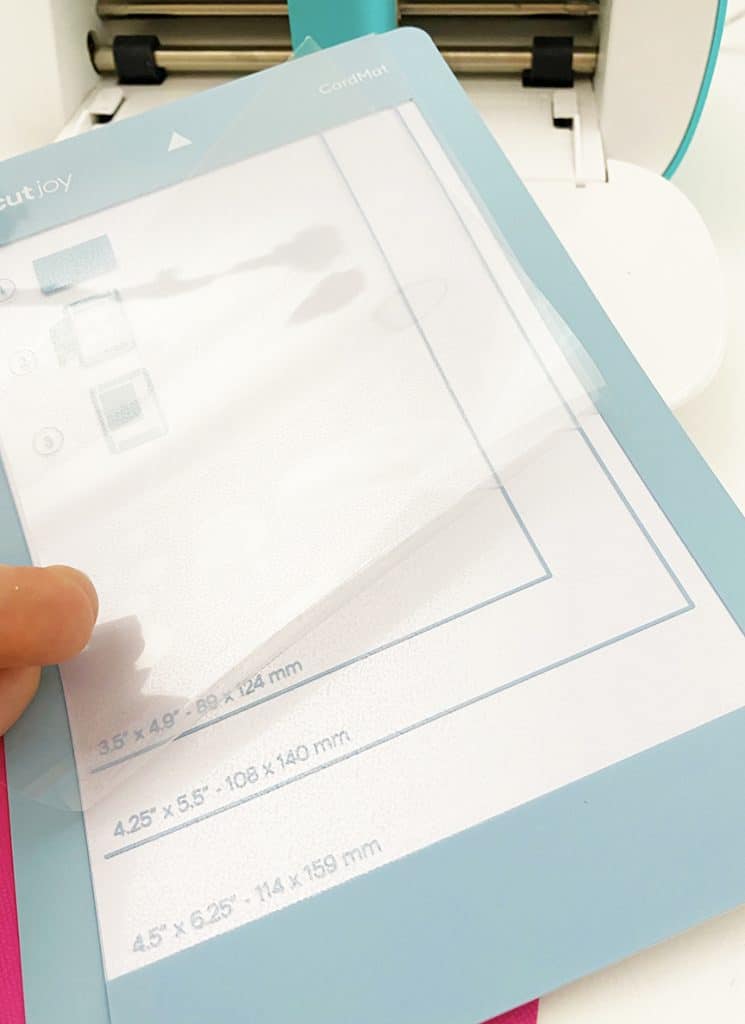
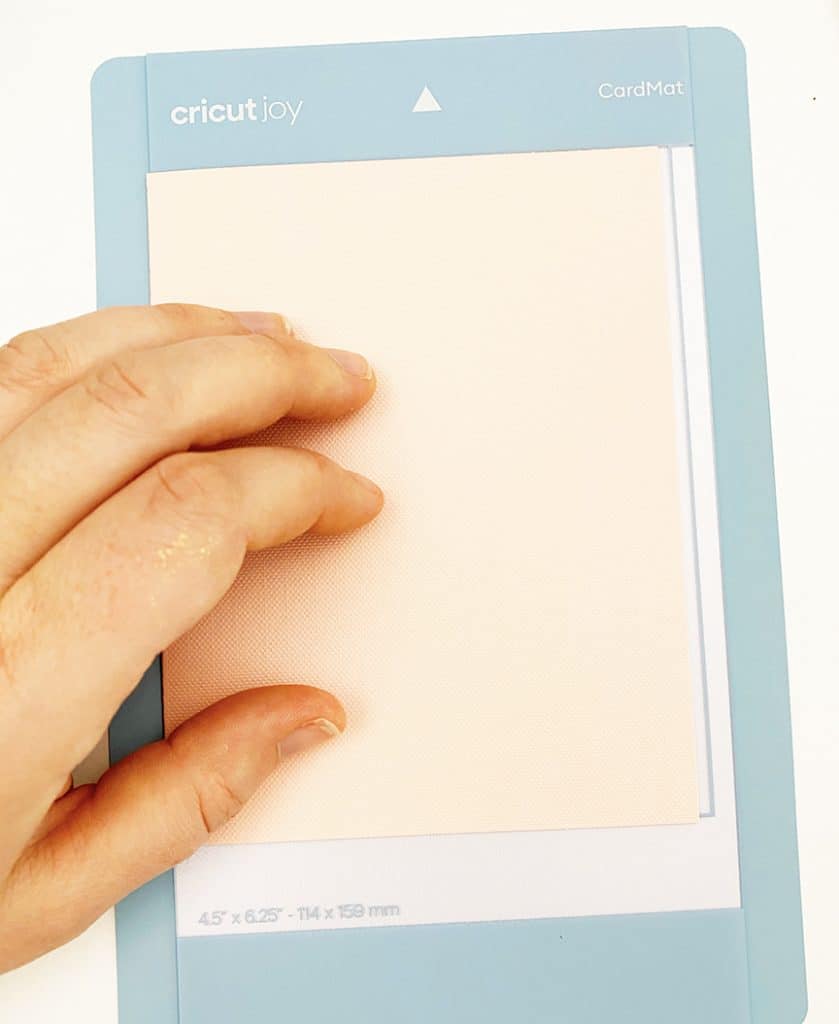
Open the folded card blank and insert the bottom (what will be the inside/back layer of the finished card) underneath the top layer.
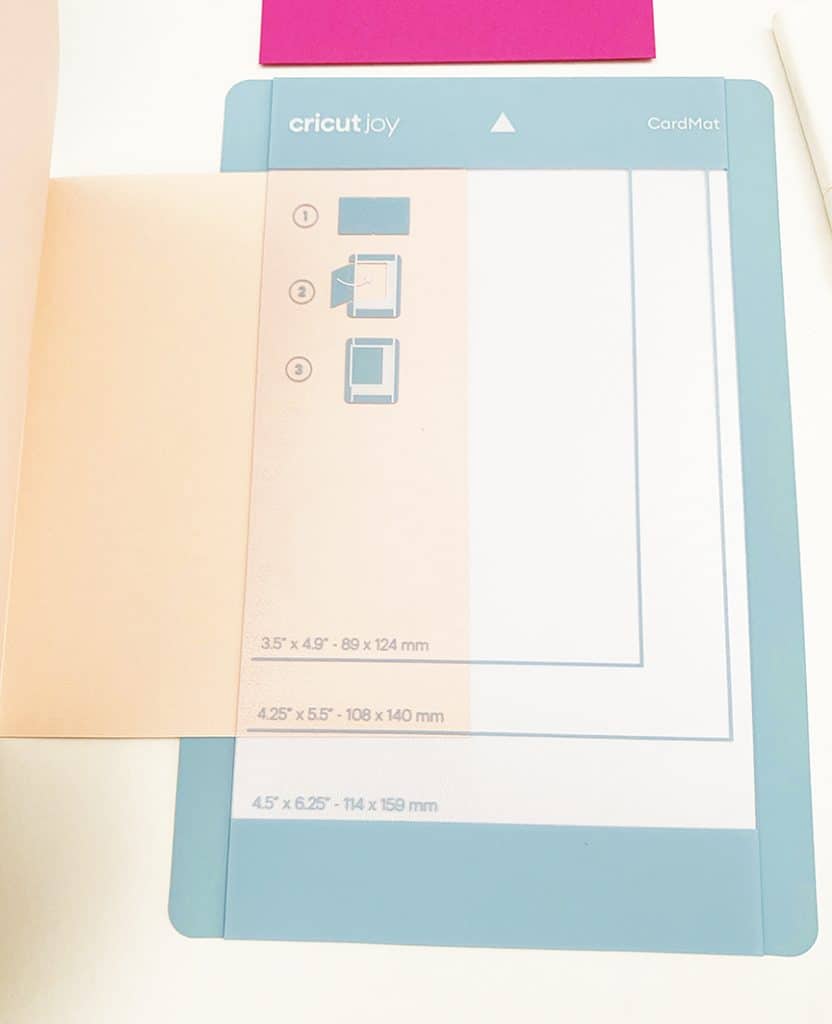
Use the guides on the Card Mat to make sure you’ve inserted the card blank properly.
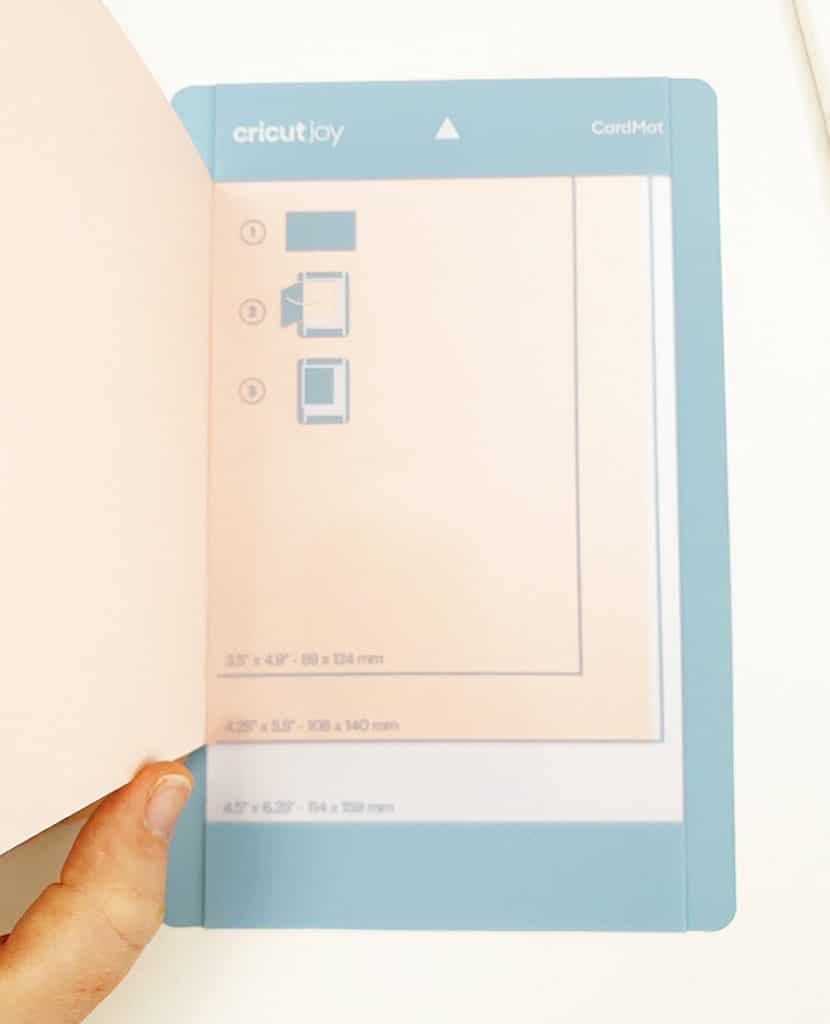
Now fold the top layer of the card (like you are closing the card) down onto the sticky part of the Card Mat. The Cricut Joy will cut the top layer of the card, but the underneath will be protected. It’s such a cool design!
Another thing that’s cool about Cricut Joy is that you don’t have to push any buttons to load your mat into the machine – it senses when you insert the mat and it loads all on it’s own.
When your mat is loaded, click “GO” right on your phone, tablet, or computer. You’ll notice there are no buttons on the machine!
First, Cricut Joy will draw the pen designs on your card. When it is finished, the app will prompt you to load the blade in the machine.
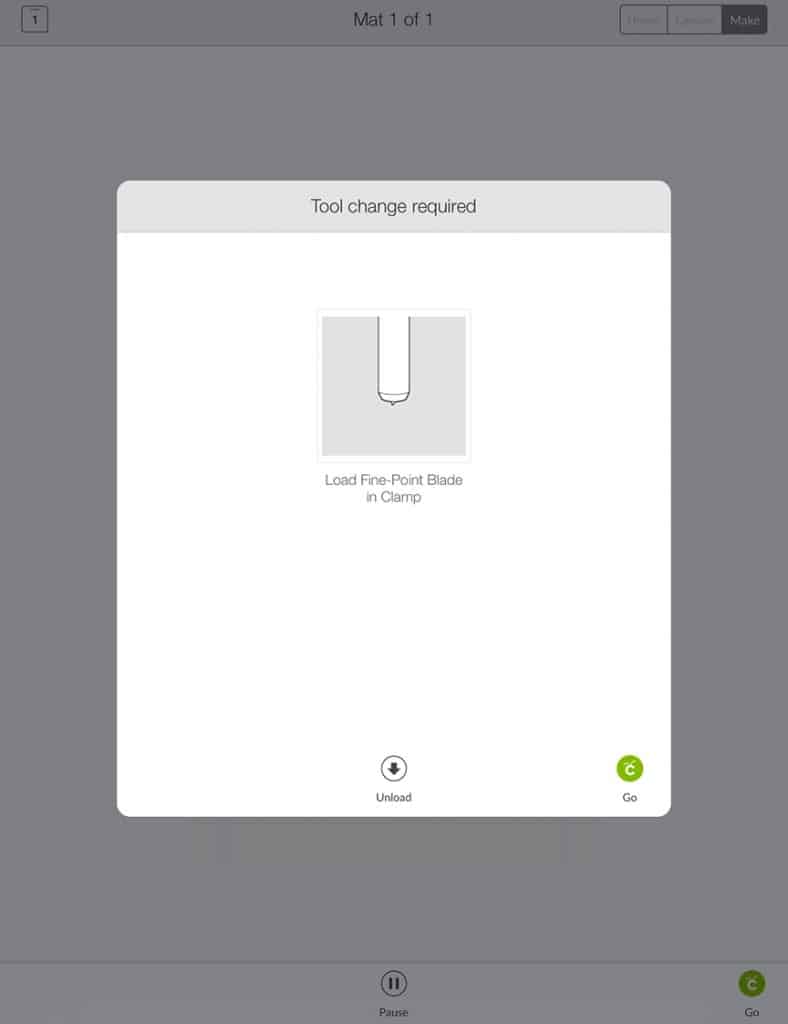
Unload the pen, insert the fine point blade, then close the clamp.
Then let Cricut Joy work it’s magic!
When your card has finished cutting, the app will prompt you to unload your project.
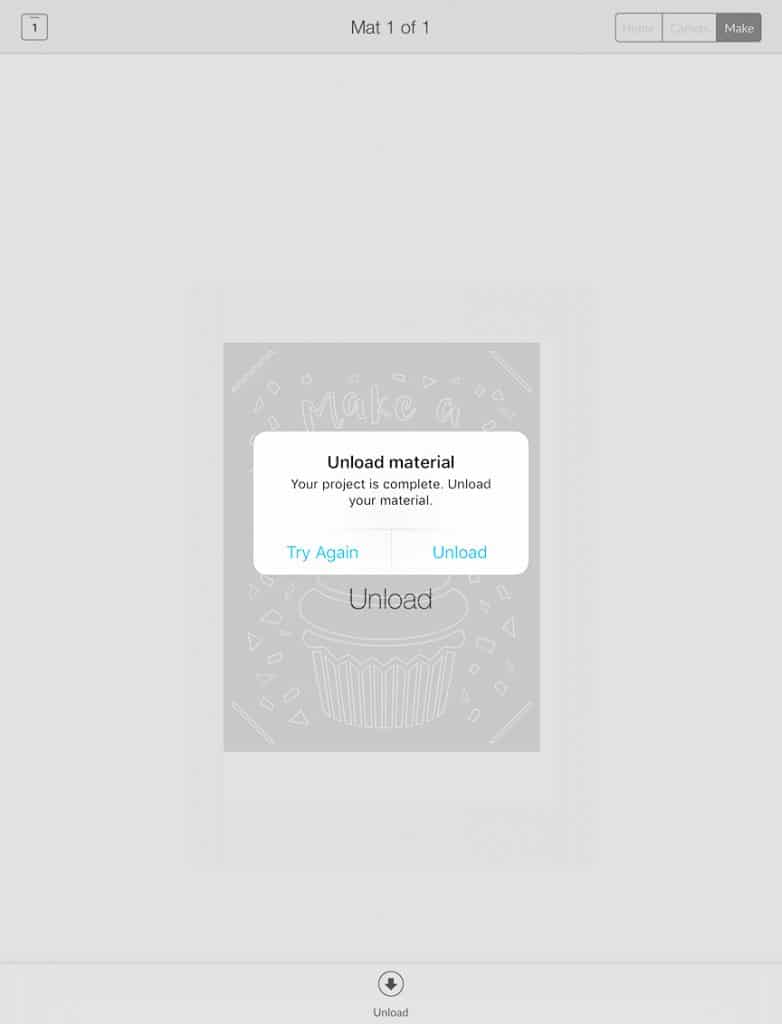
Click the “Unload” button and the Joy will unload the mat.
Next is the only tricky part of this process – removing the card from the Card Mat without tearing the card. I have found that using a scraper or the spatula tool is helpful, but is not necessary.
Start by slowly lifting one edge of the card from the mat.
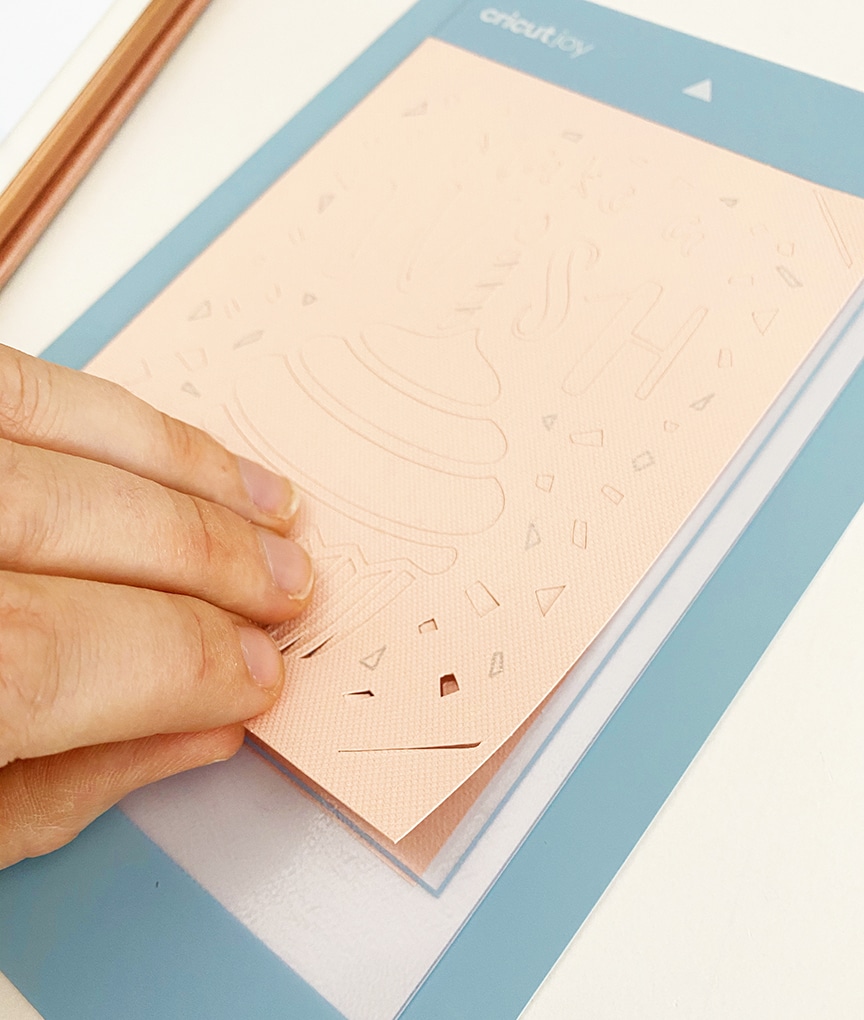
Continue to lift carefully, using the scraper or spatula as necessary to prevent small areas from tearing.
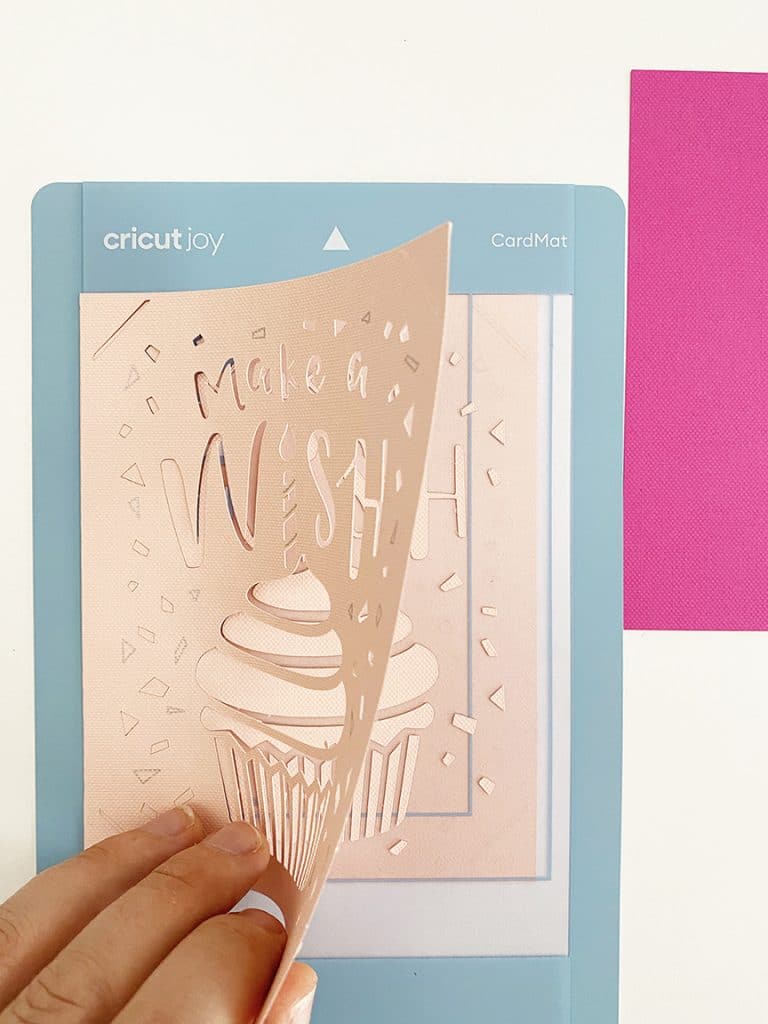
At the end, you will be left with just the small cut pieces stuck to the mat.
Once the top layer of the card is completely lifted, slide the card out of the mat.
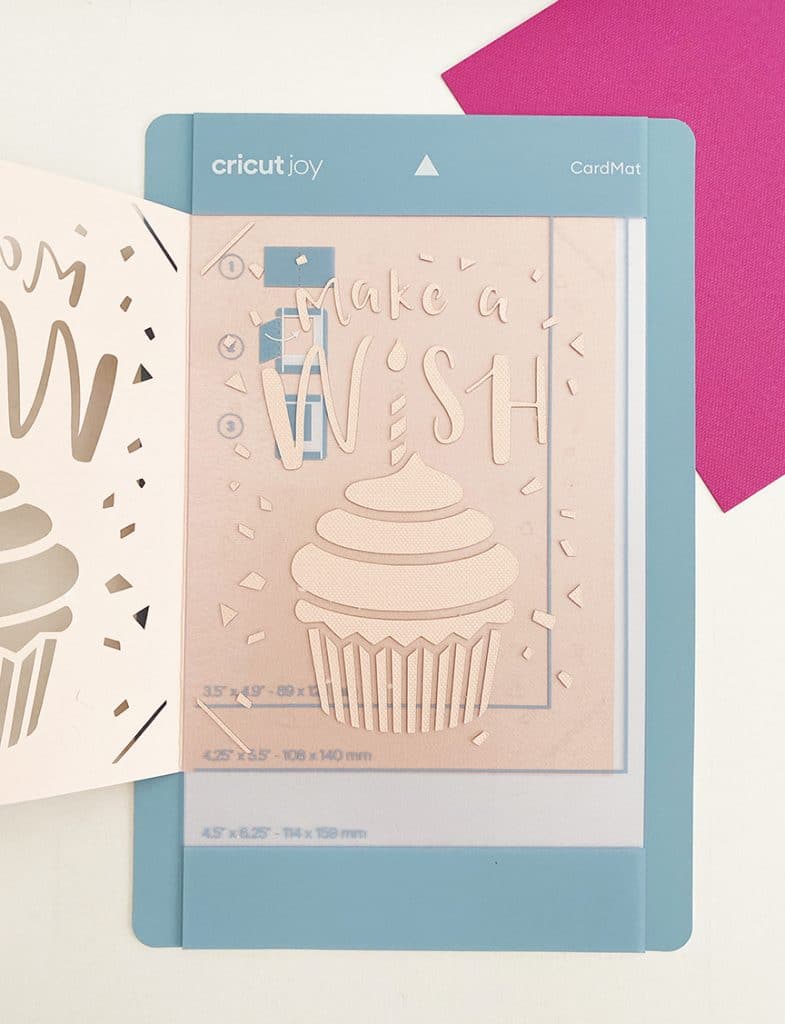
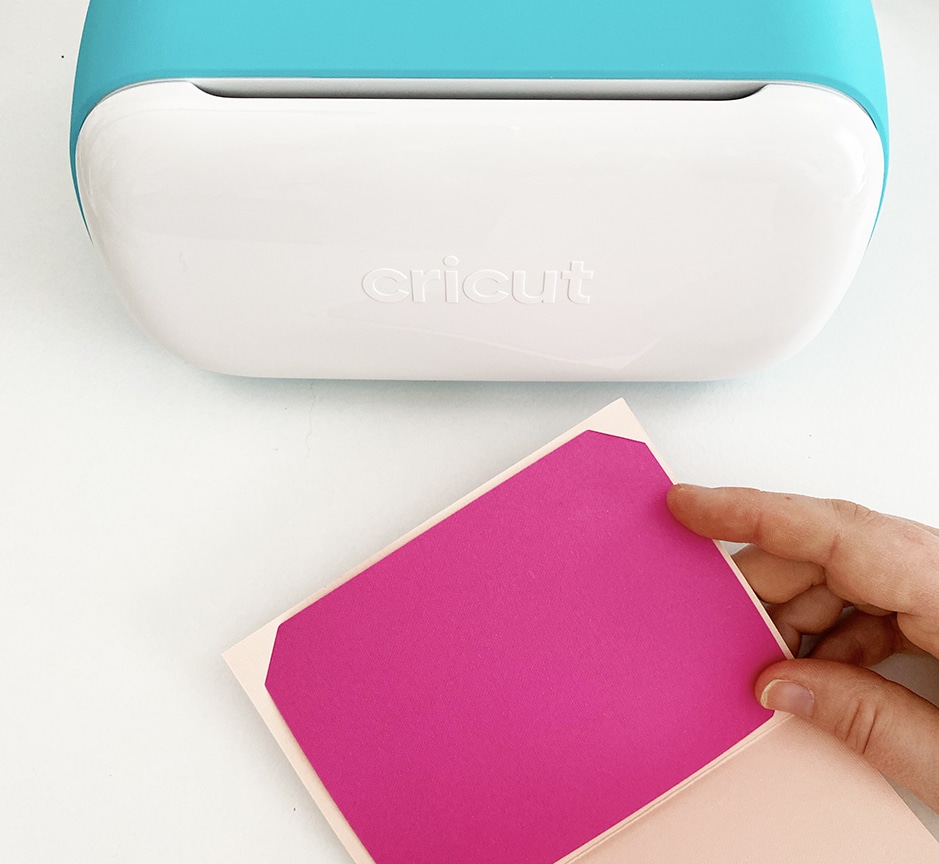
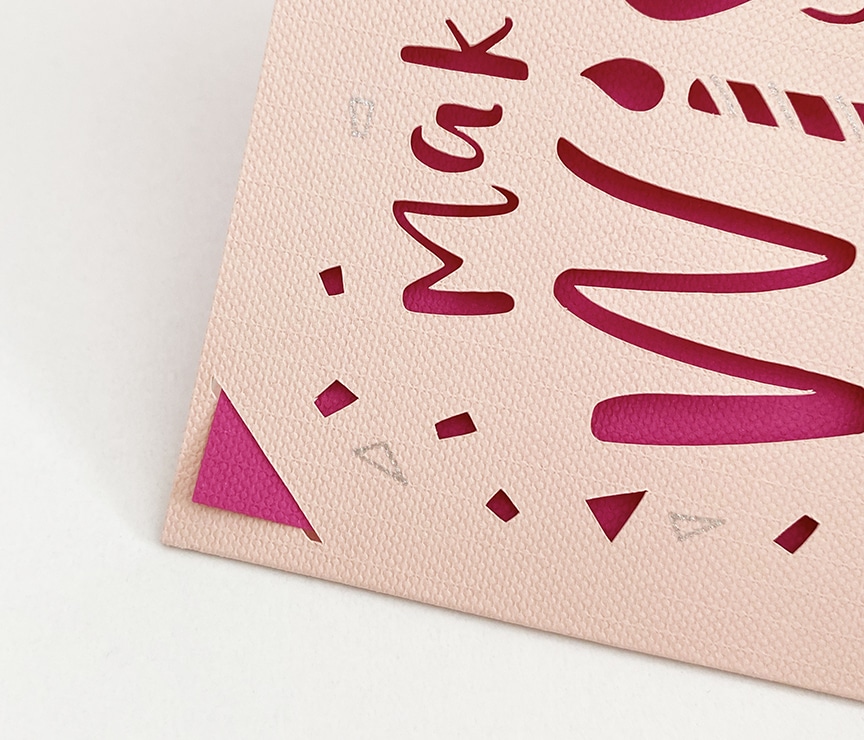
Next, select an insert card color from the blank card sets. I chose a fuchsia color to complement the light pink. You can mix and match however you’d like. The design includes a “notch” in each corner for the card insert to be placed.
From the front, the corners of the card will look like this:
That’s how easy making a card is. Cricut Joy does all of the work for you and you don’t have to worry about cutting on multiple mats or crafting your own envelope (envelopes are the worst!)
I have to admit, I was hesitant at first about having to buy a set of blank cards to use the machine effectively. I was pleasantly surprised at how much I loved how EASY it is to use the card blanks. Plus, with one set you can make 12 cards – it’s a great value considering how expensive greeting cards are!
I also appreciate that these blank card sets are PERFECT for those of you that may be intimidated to create a card entirely from scratch. The Insert Cards make this project SO fast and approachable.
I mentioned above how easy it is to store Cricut Joy – and it really is! I have entire post about Cricut Craft Room Organization and it’s a great idea for creating a small, dedicated space for your Cricut machine. But look at how small Cricut Joy really is! It fits in a small storage bin along with all of the supplies!
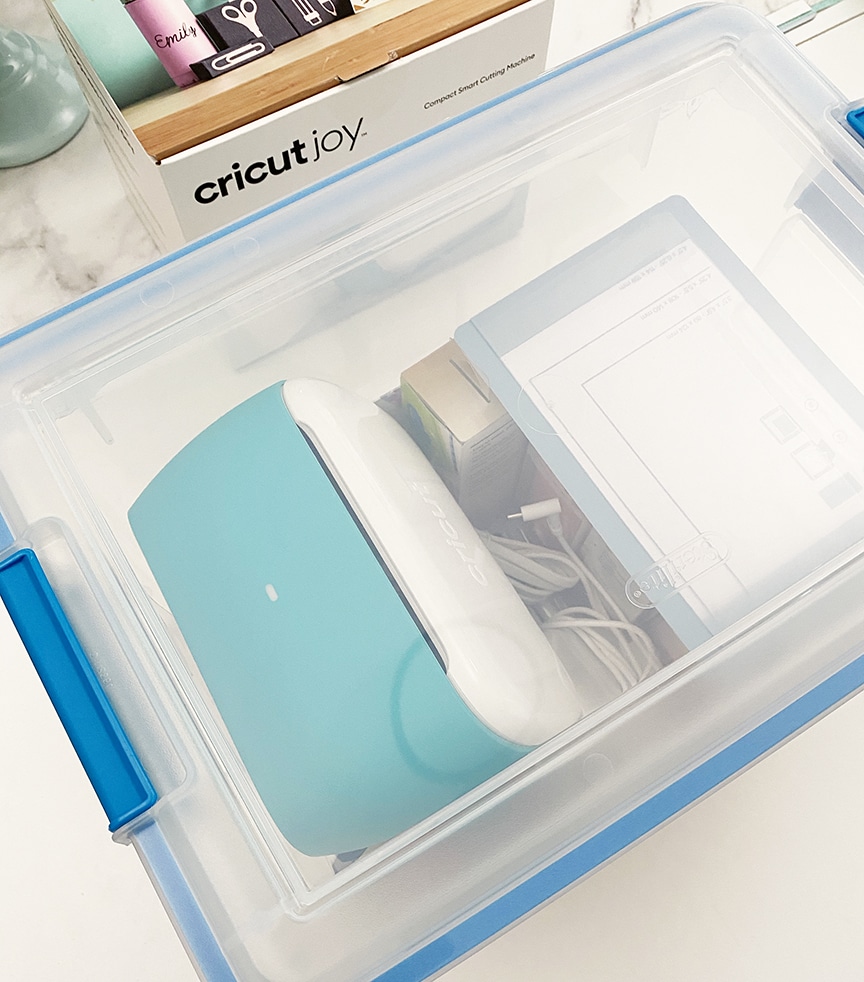
I was able to put everything in the bin and store it in the closet until I take it out for my next craft. It’s so small you could even leave it on the kitchen counter or an end table and no one would notice that it’s a craft cutting machine.

I hope this tutorial encourages you to make some cards of your own to send to loved ones. Enjoy your crafting time and spread some Joy during this difficult time! Make sure you check out these other great tutorials that show different Cricut Joy cards:
- Cricut Joy Cards from Happiness is Homemade
- Using the Cricut Joy Card Mat with a video by The Country Chic Cottage
LATEST POSTS:
Pin this DIY Cricut Joy Card Tutorial for Later


ABOUT CHARYNN
Hi, y’all! I’m Charynn, the owner and designer of Pineapple Paper Co. I’m a mom of four kids (two girls and two boys) living in Pittsburgh. I love hand lettering, anything southern, cocktails, and of course, pineapples! I am excited to share my SVG files, printables, and craft projects with you! The pineapple is a symbol of hospitality, and I welcome y’all to my little corner of the internet. Read more…