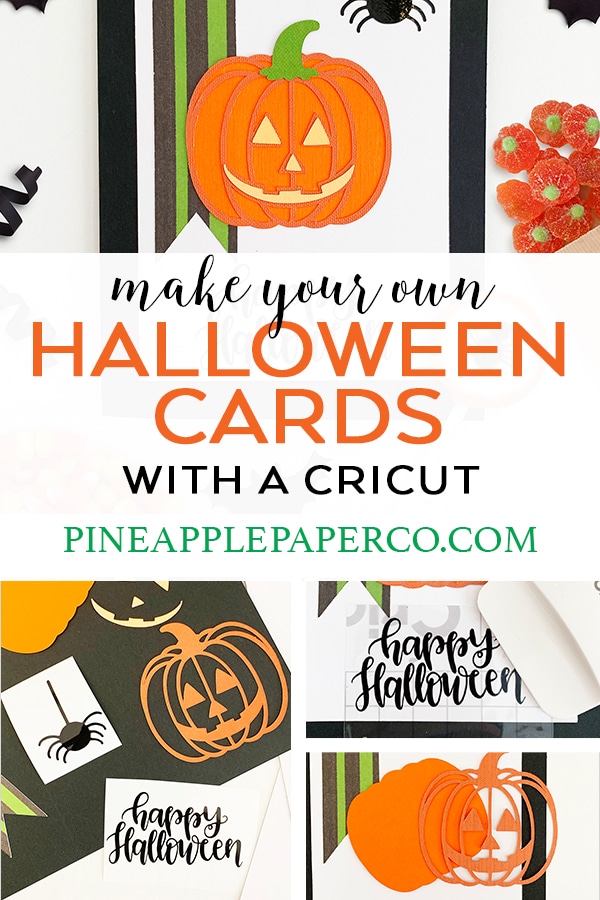
Handmade Halloween Cards with the Cricut Machine
This post and the photos within it may contain affiliate links. As an Amazon associate I earn from qualifying purchases. If you make a purchase through one or more of the links, I may receive a small commission at no extra cost to you.
Sending Halloween greetings to family and friends? Make these DIY Halloween Cards using your Cricut machine! Everyone will love getting handmade Halloween cards in the mail!
Halloween is not a typical holiday to send greeting cards, but sending handmade cards can make the holiday even more special! I designed two Halloween cards in Cricut Design Space that you can make with craft supplies any Cricut crafter will have in their craft room – card stock and vinyl! Check out the spooktacular cards I created and make your own before Halloween! If you don’t want to make a homemade Halloween card with your Cricut, make sure you download my FREE Printable Halloween card – all you do is print and cut!
DIY Halloween Card Ideas
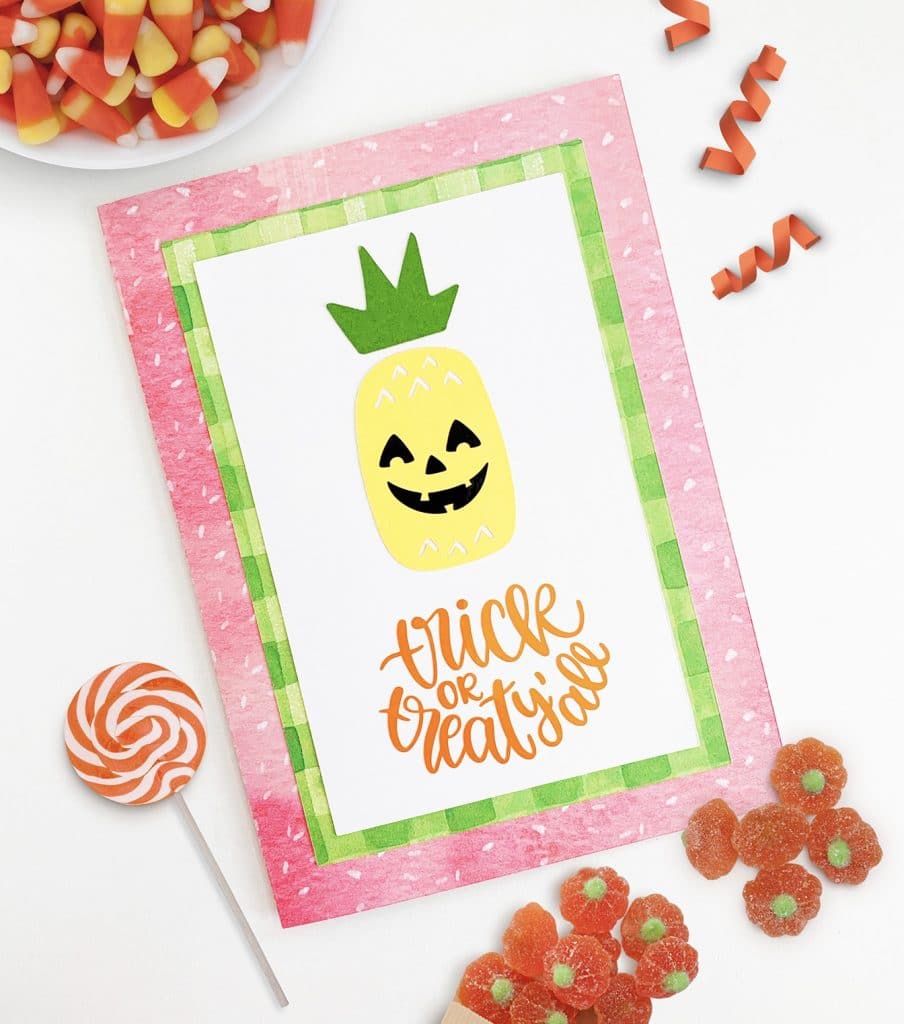
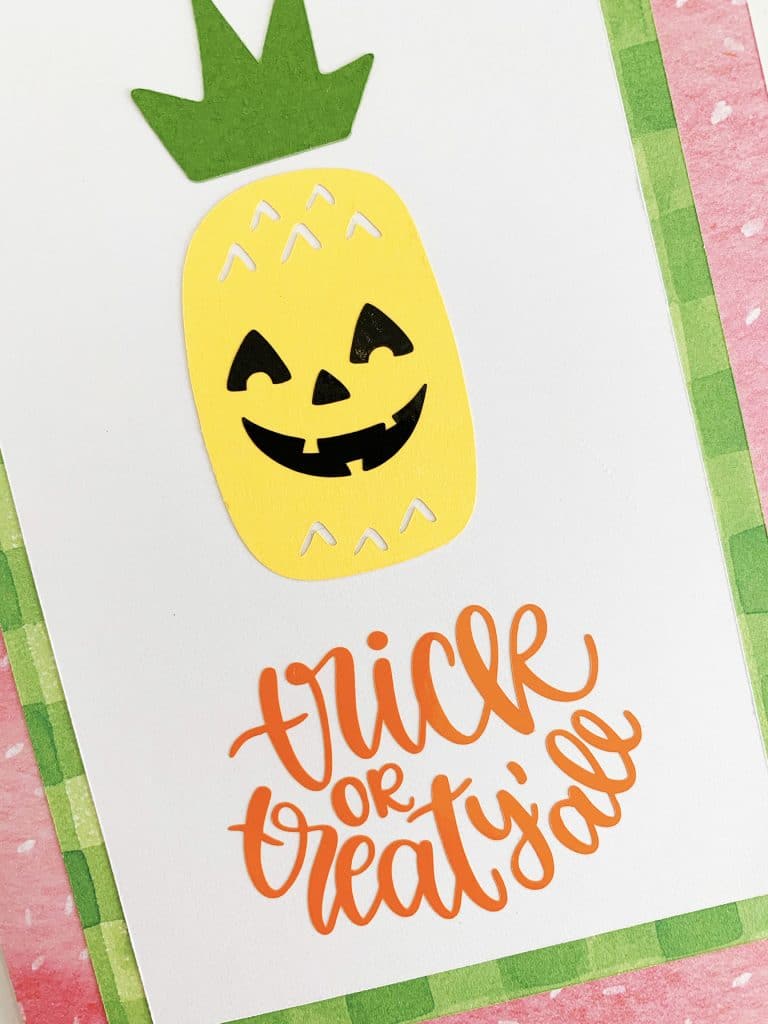
Each of my Halloween cards is unique – and one is obviously not a typical Halloween card! But everyone knows how much I love pineapples, so I couldn’t resist making a jack o’lantern out of a pineapple! And of course adding “Trick or Treat Y’all!” to the front of the card. I even used non-traditional colors, courtesy of the Cricut papers that my friend Natalie Malan designed! I love how unexpected the colors and patterns are for a Halloween greeting!
RELATED POST: Don’t miss my FREE Halloween Card SVG you can use with your Cricut Joy!
What You Need to Make a Trick or Treat Y’all Halloween Card
- Cricut Machine (either the Explore Air 2 or Maker will work!)
- Cricut Paper
– Natalie Malan Deluxe Paper, Divine Peonies
– White Card Stock
– Yellow Card Stock
– Green Card Stock
– Black Card Stock - Orange Adhesive Vinyl
- Transfer Tape
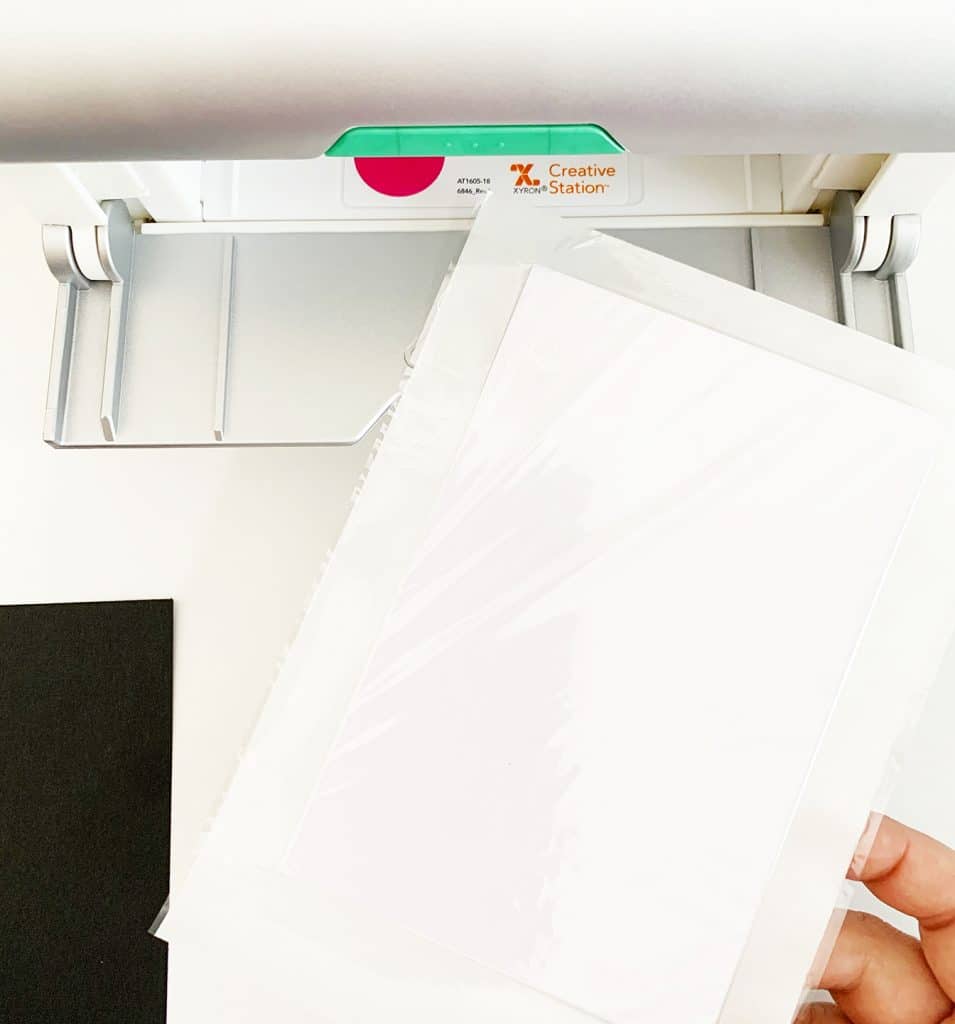
- Xyron Creative Station and Adhesive cartridge, available on Amazon (to apply adhesive to the large pieces)
Here’s the direct link to my Pineapple Trick or Treat Y’all Halloween Card in Cricut Design Space:
Pineapple Trick or Treat Y’all DIY Halloween Card
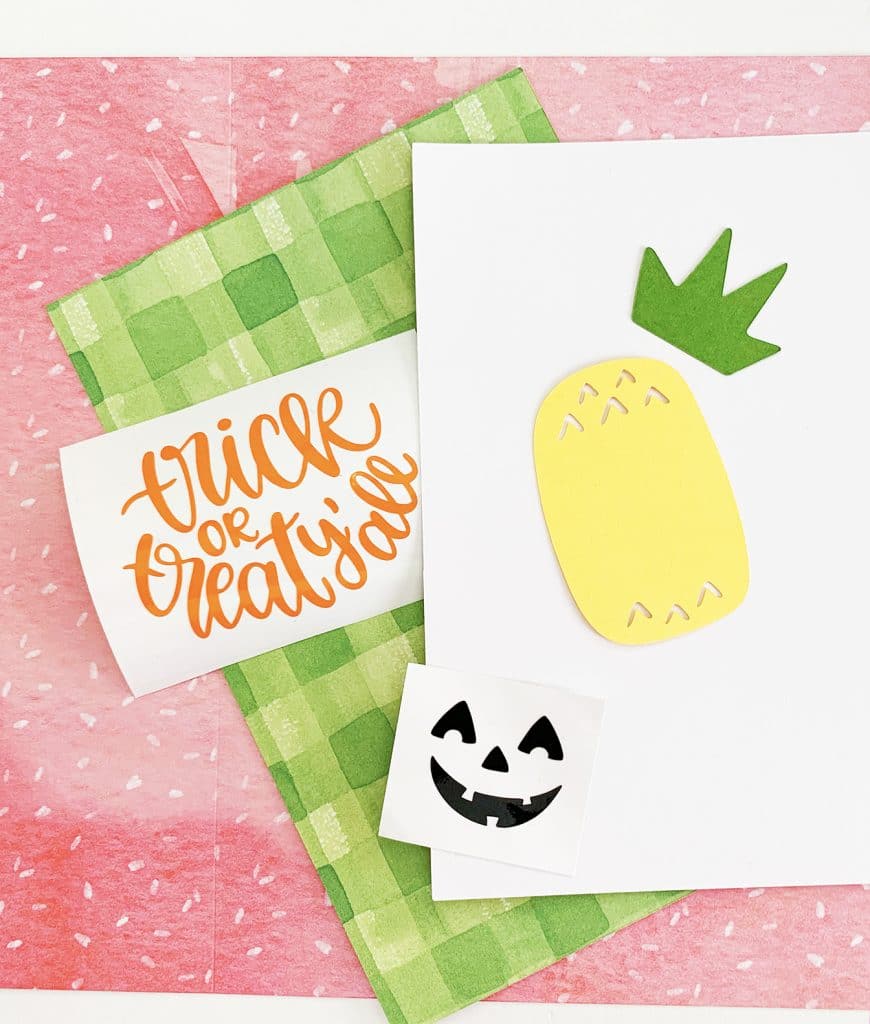
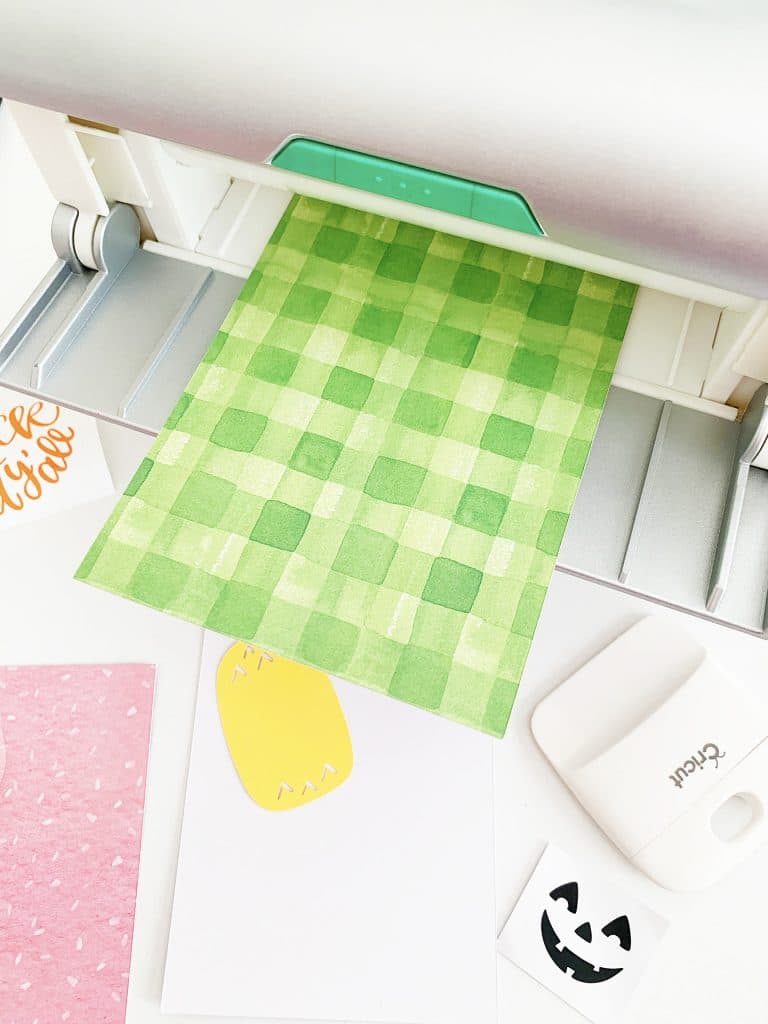
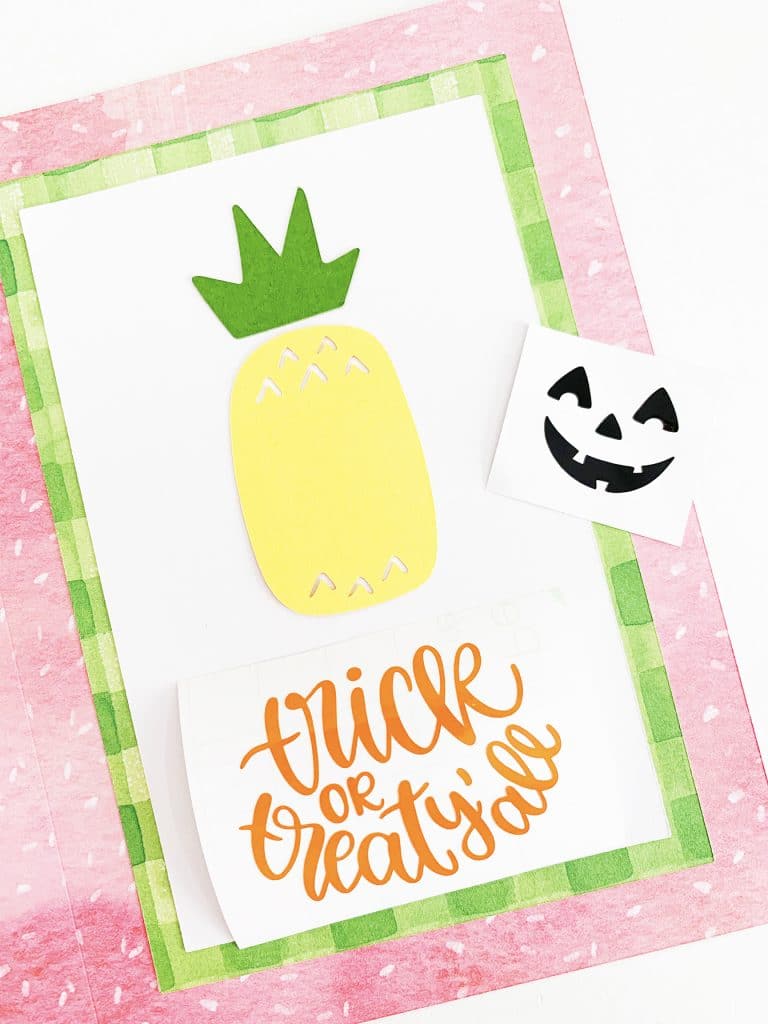
Open the project and gather the paper and vinyl you’ll be using for all of the card pieces. The jack o’lantern face and the script “Trick or Treat Y’all” are the vinyl components.
Cut all of the pieces. Weed away the extra vinyl.
Using the Xyron Creative Station and a permanent adhesive cartridge, apply adhesive and attach the inside of the card (completely covering the inside paper), and then the two front pieces of the card.
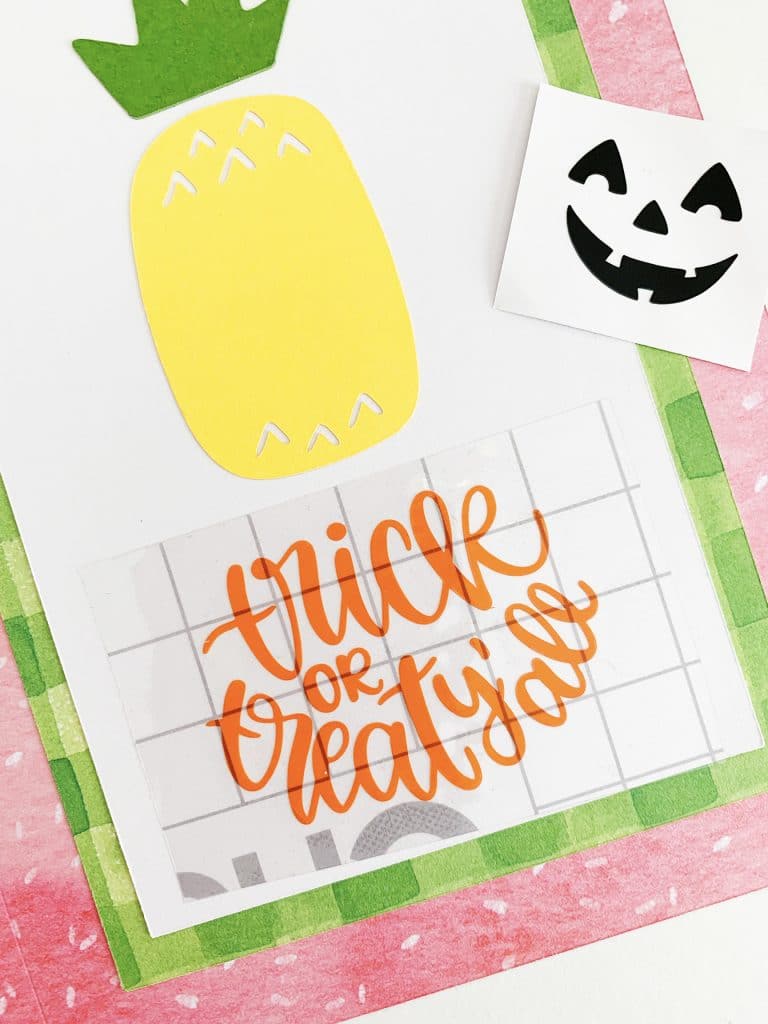
Apply adhesive to the pineapple pieces and attach, using the
“Trick or Treat Y’all” vinyl as a guide for placement of the shapes.
Use transfer tape and apply the vinyl jack o’lantern face and text to the card, carefully removing the transfer tape so you don’t tear the card stock. Alternatively, you can use Iron On Vinyl (yes, Iron On on paper!) See these handmade cards with Iron On Vinyl for more instructions.)
This cute Halloween greeting card is so unexpected and adorable I think anyone would love receiving it!
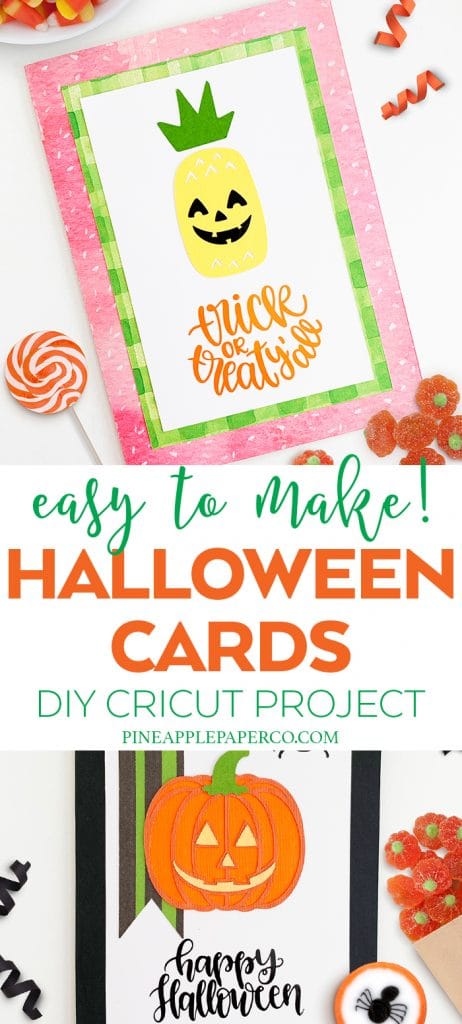
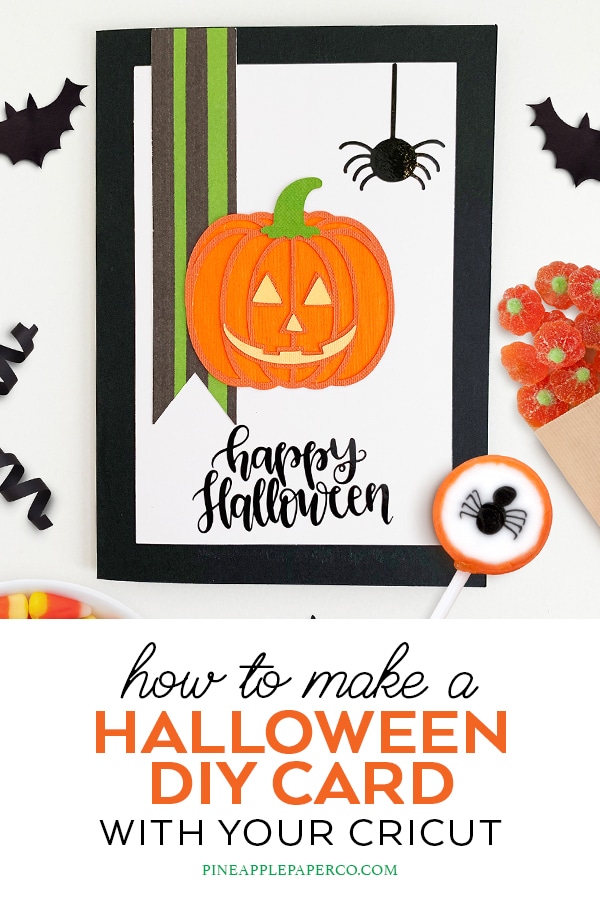
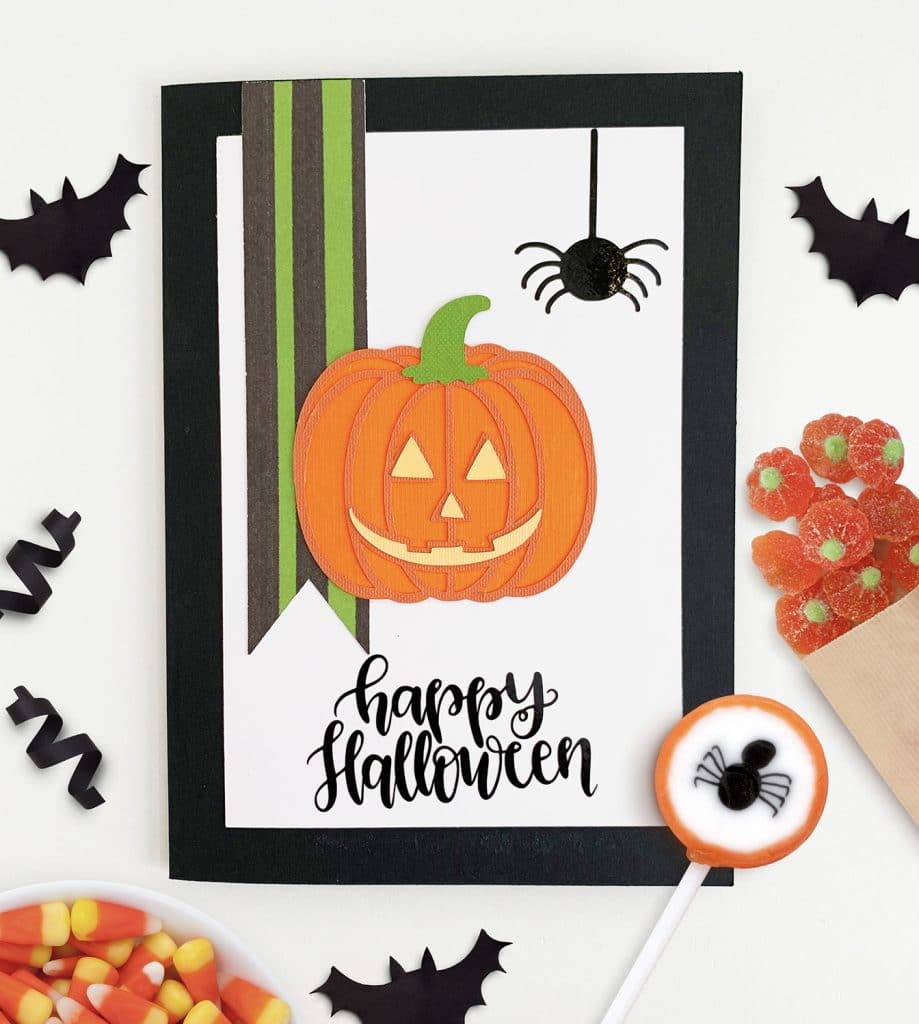
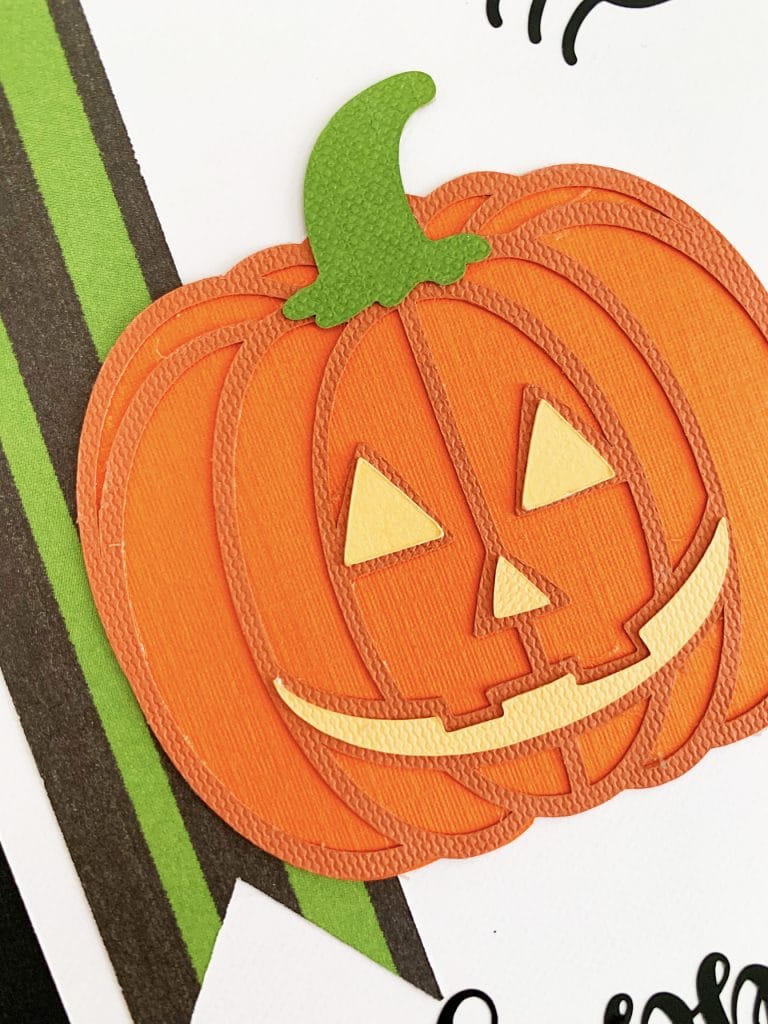
How to Make a Happy Halloween Card
This Halloween card design is much more traditional, and is truly perfect for EVERYONE. You can use it for kids, adults, or teachers!
This card design is also uses all Cricut Design Space components. if you have Design Space, click the link below to get the full project:
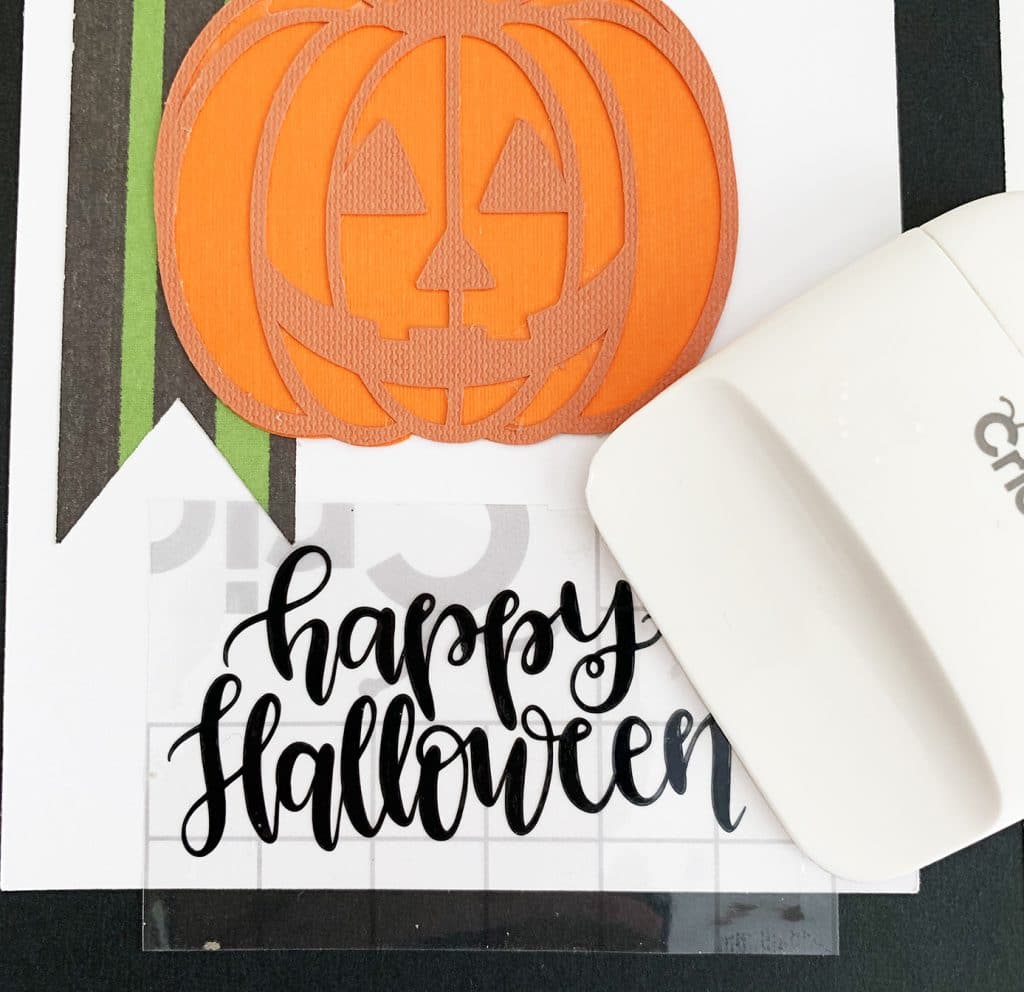
Open the project and gather the paper and vinyl you’ll be using for all of the card pieces. The “Happy Halloween” text is vinyl and the rest of the pieces are Cricut paper.
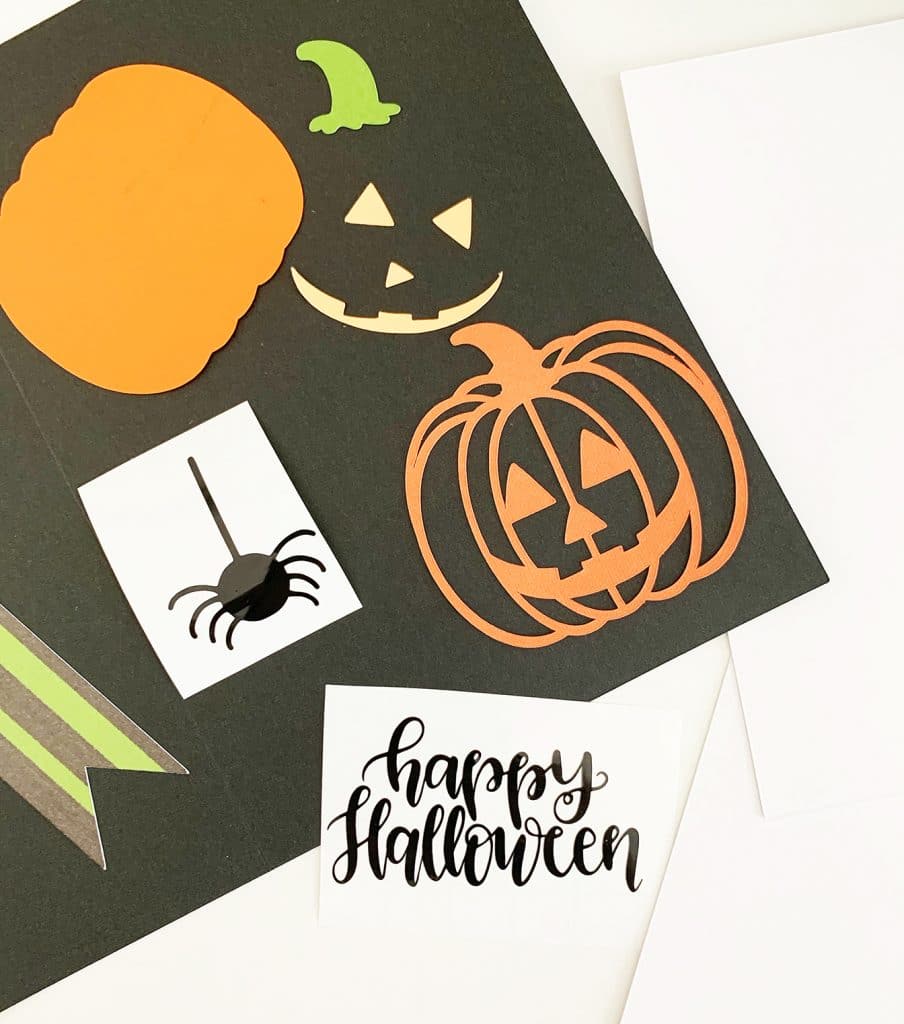
Cut all of the pieces and weed away the extra vinyl from “Happy Halloween.”
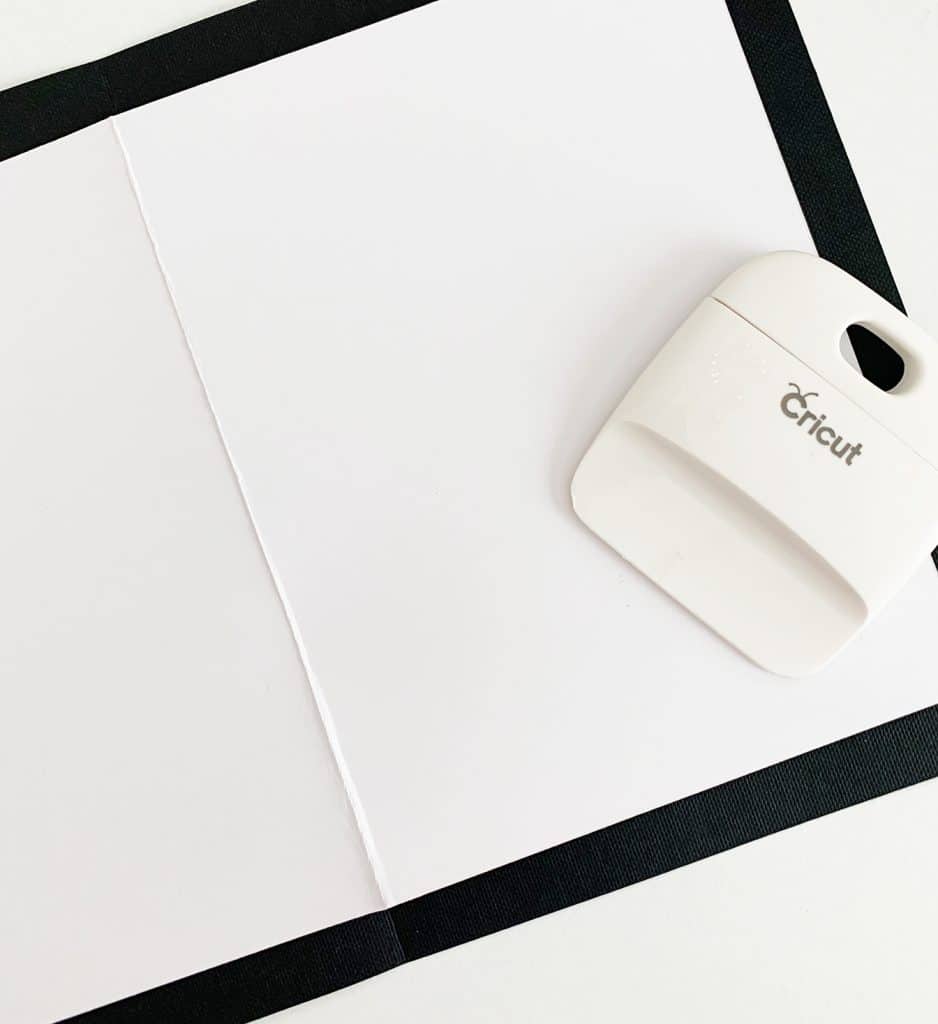
Use the Xyron Creative Station to apply adhesive to the white insert of the card and attach to the inside of the card.
Apply adhesive to the front white piece of the card and the banner piece, and attach to the front of the card.
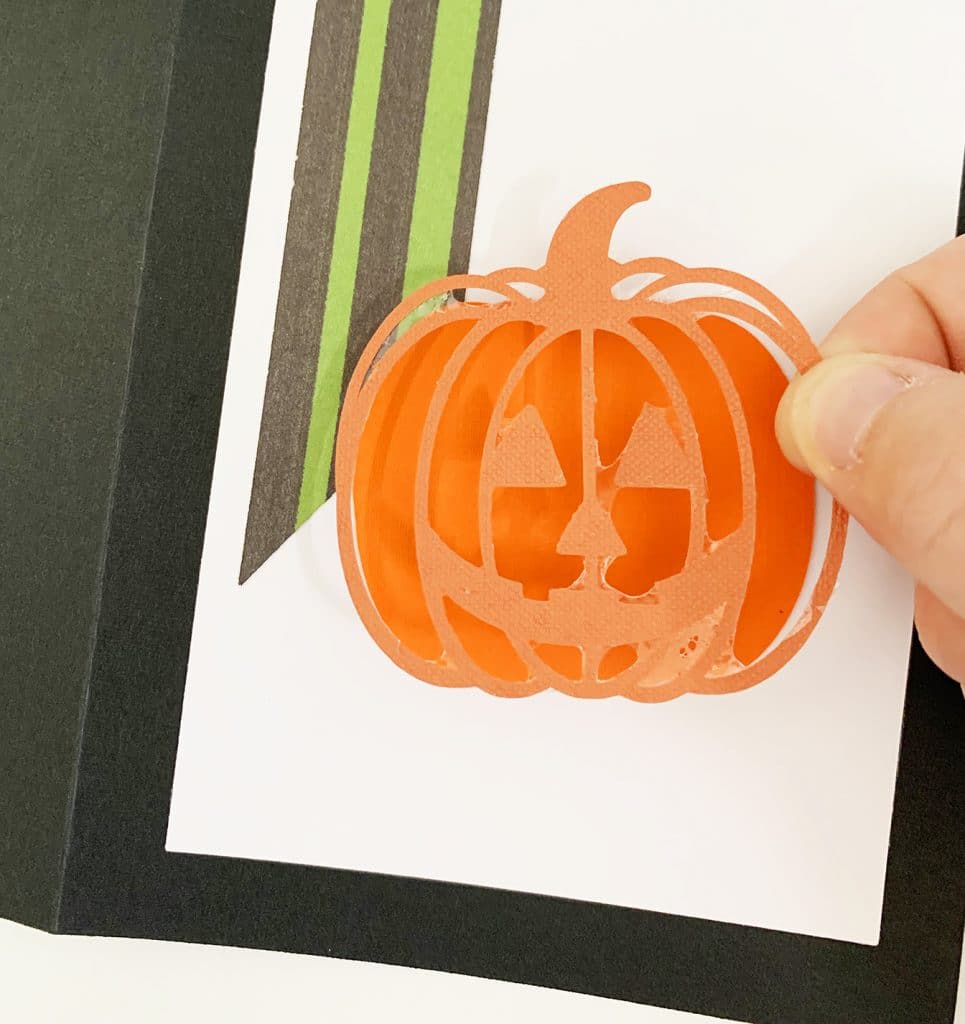
Apply adhesive to the pumpkin pieces and attach them on top of the other front pieces. Make sure you rub the surface of the pumpkin to remove extra adhesive material.
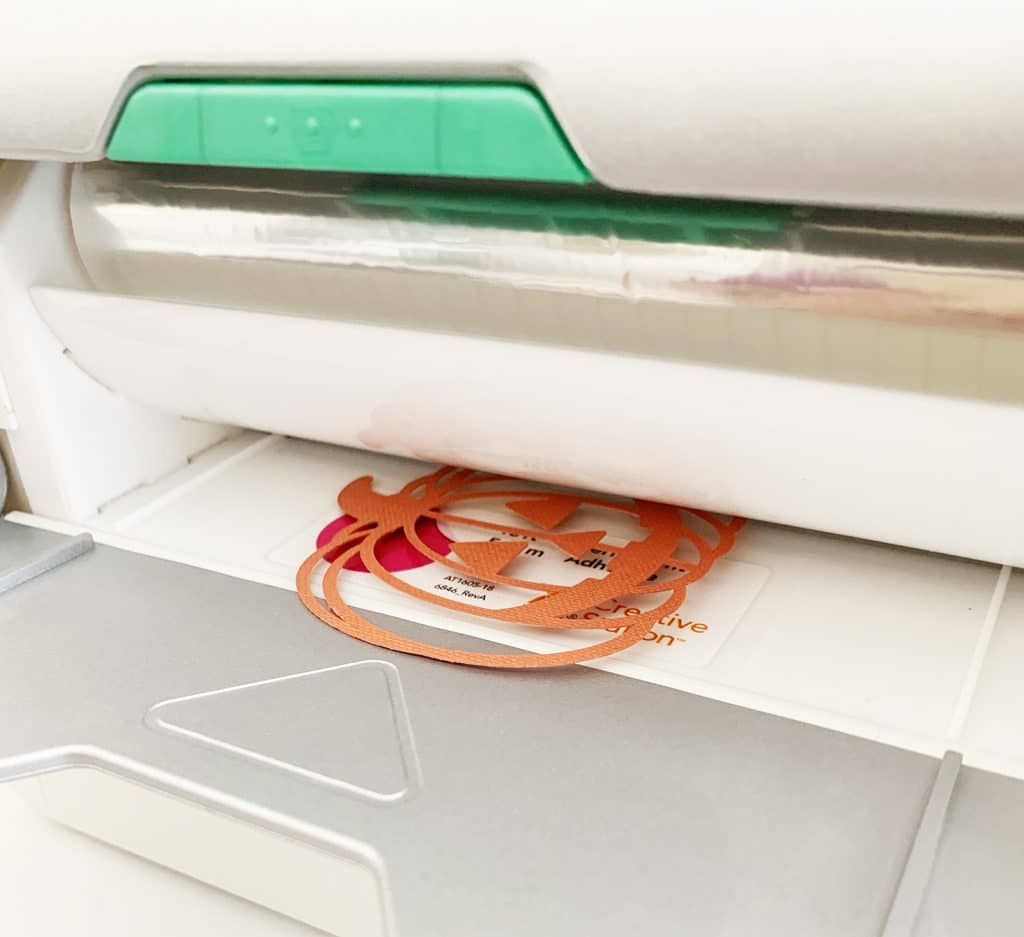
Using the Xyron Creative Station is a quick way to apply adhesive. After you attach the pieces, just rub away the extra adhesive (see the pumpkin below).
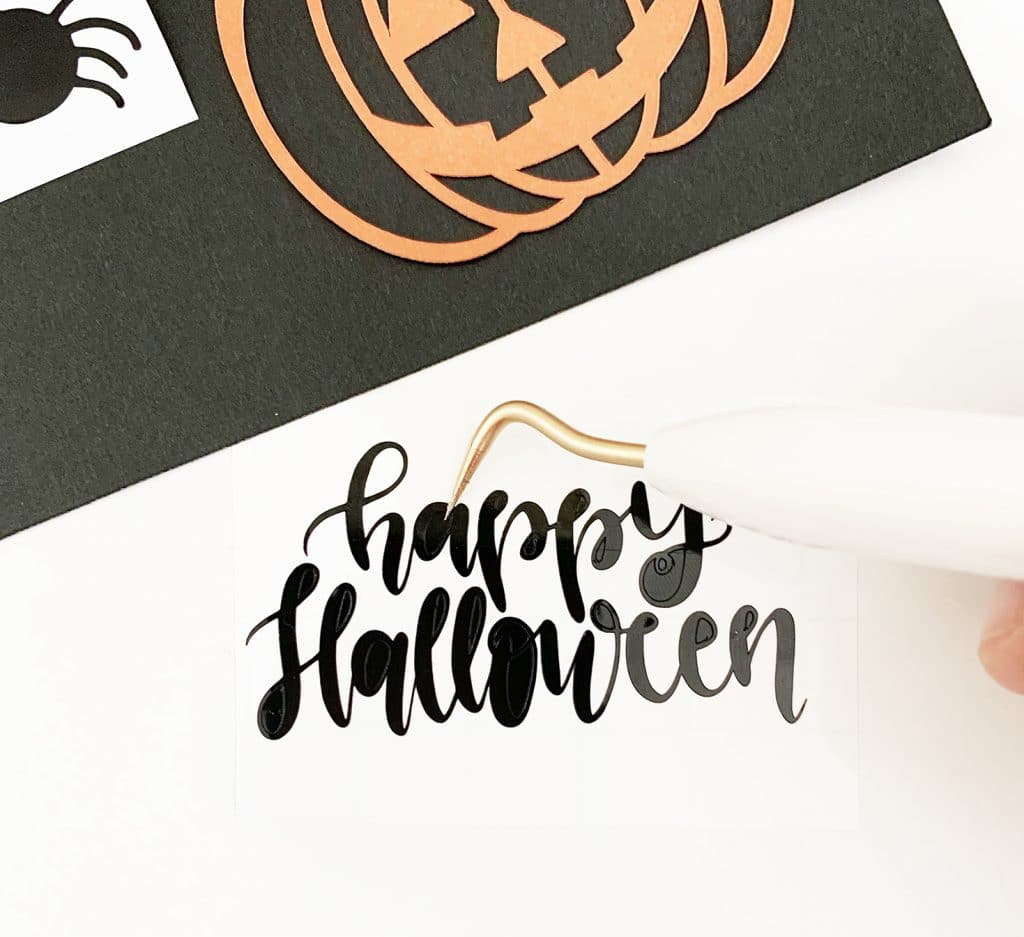
Use transfer tape to remove the “Happy Halloween” font from its backing and transfer it to the front of the card. Remove the transfer tape carefully so you don’t tear the card stock.
This Handmade Halloween greeting card can be made in just a few minutes, and is perfect for anyone!
LATEST POSTS:
- Wicked Coloring Pages to Print for Free
- Free Thanksgiving Turkey Coloring Page Printable
- Free Printable Thanksgiving Meal Planner & Grocery List
- xTool M1 Ultra Beginner’s Guide and Review
- Free Best Dad Ever Father’s Day Coloring Page
Pin Cricut Handmade Cards for Halloween


ABOUT CHARYNN
Hi, y’all! I’m Charynn, the owner and designer of Pineapple Paper Co. I’m a mom of four kids (two girls and two boys) living in Pittsburgh. I love hand lettering, anything southern, cocktails, and of course, pineapples! I am excited to share my SVG files, printables, and craft projects with you! The pineapple is a symbol of hospitality, and I welcome y’all to my little corner of the internet. Read more…