Make a Cricut Gift Tag with a Free Handwritten SVG
This post and the photos within it may contain affiliate links. As an Amazon associate I earn from qualifying purchases. If you make a purchase through one or more of the links, I may receive a small commission at no extra cost to you.
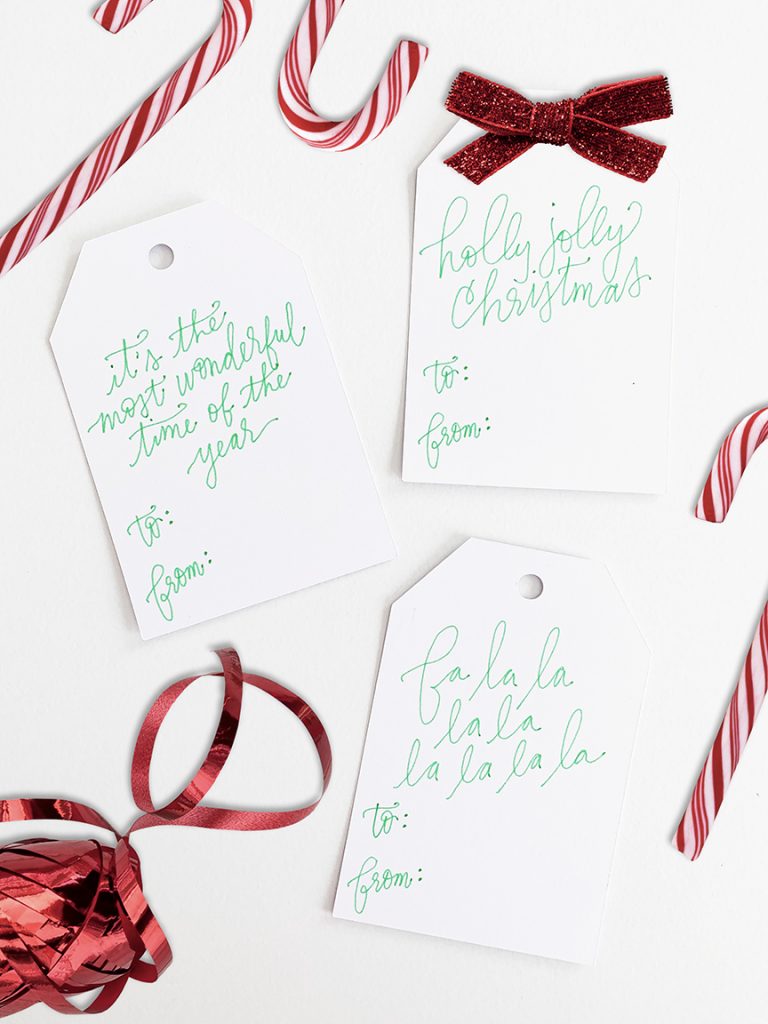
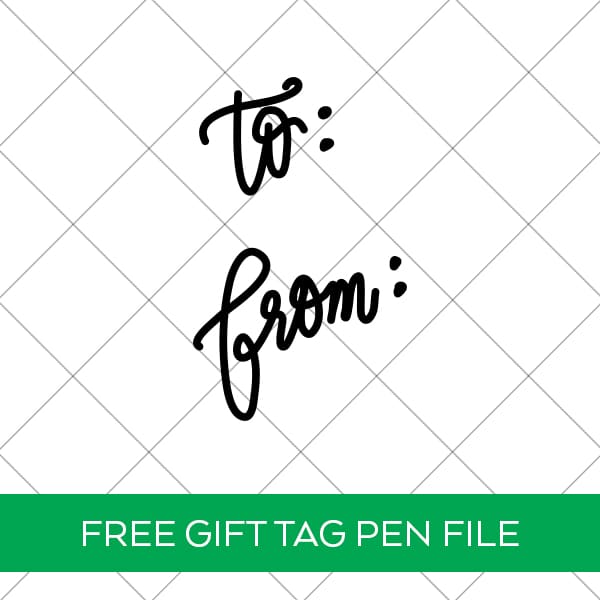
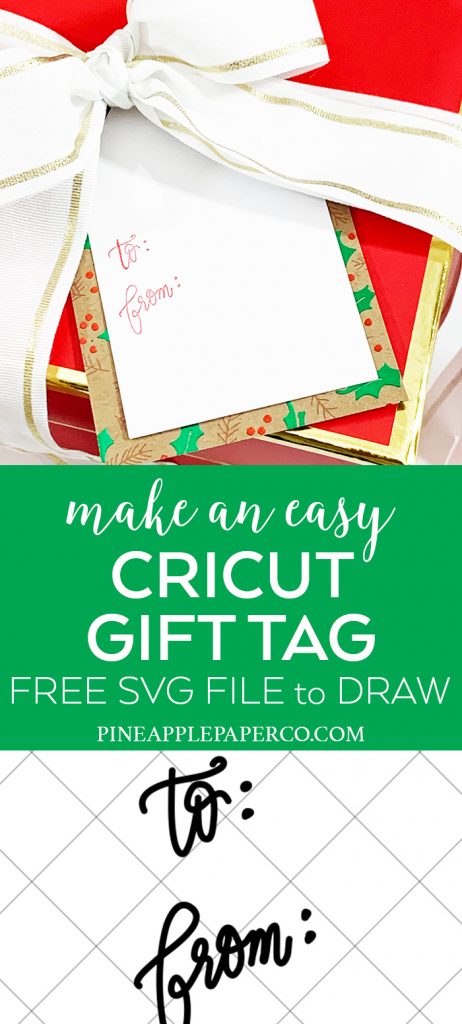
Need a last minute gift tag? Make gorgeous Cricut gift tags with a special detail – hand lettered “To” and “From” written with a Cricut Pen! Get the FREE Cricut Gift Tag SVG to DRAW with your Cricut machine. You can use it for Christmas gift tags or gifts all year round!

It’s the second week of December, and at the top of my to-do list is getting the rest of my gifts on my shopping list. This week, I’ve teamed up with some of my favorite Cricut bloggers to share last minute gift ideas that you can make with your Cricut machine.
I love wrapping my gifts with a handmade gift tag, so I designed an easy file that you can use to make last minute gift tags that will take only a couple of minutes! Head to the end of the post to download the file and check out the rest of the last minute holiday ideas from the rest of the group!

One of my favorite features of my Cricut Machine is the ability to use pens (or the foil quill!) to write or draw on my projects. Earlier this year, I designed a hand lettered “Happy Birthday” single line file that works perfectly with Cricut pens, and I wanted to make something for Christmas as well. I also wanted to keep it simple so you could use it year round, too!
Although buying a huge package of gift tags at the store may seem easier, I really like when my gift tags coordinate with the wrapping paper I use. By using a simple gift tag design in Cricut Design Space, I created a double layered gift tag that you can use with any combination of paper to match your gifts.

Supplies Needed to Make Cricut Gift Tags
- Cutting Machine (Buy a Cricut on Amazon or on the Cricut Online Shop.
- StandardGrip (Green) cutting mat
- Cardstock – two different kinds. I used white card stock and this Foiled Christmas Kraft paper from Cricut.
- Cricut Pens
- To/From Free SVG (Download in the gray box at the end of the post)

You can even add embellishments, stickers, or additional hand lettered details! The options are endless!
How to Make a Last Minute Cricut Gift Tag with Free SVG
Making a gift tag is really easy – it’s a perfect project if you’re a beginner or never used the Cricut pens.
Click on the link to open the gift tag file I designed in Cricut Design Space: Cricut Gift Tag Template
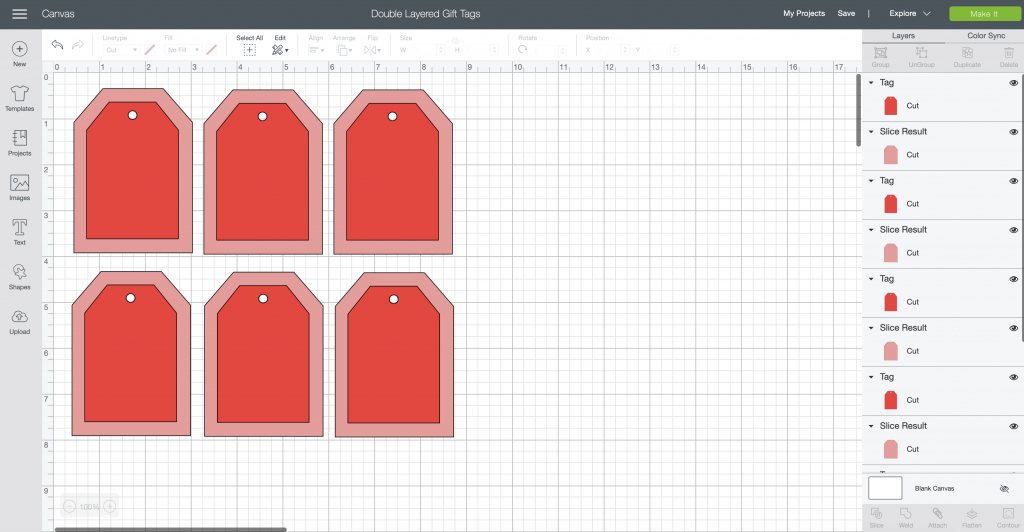
You want to customize the design, so click the “Customize” button to open the canvas to edit the design. I created the file to make 6 gift tags at once. Delete any gift tags that you don’t need, or add more using the “Copy” and “Paste” function.
On the left side of the screen, click the “Upload” button. Locate the To/From SVG file (that you can download at the end of the post) on your computer and choose the file. Once uploaded, click to select and add it to your project.
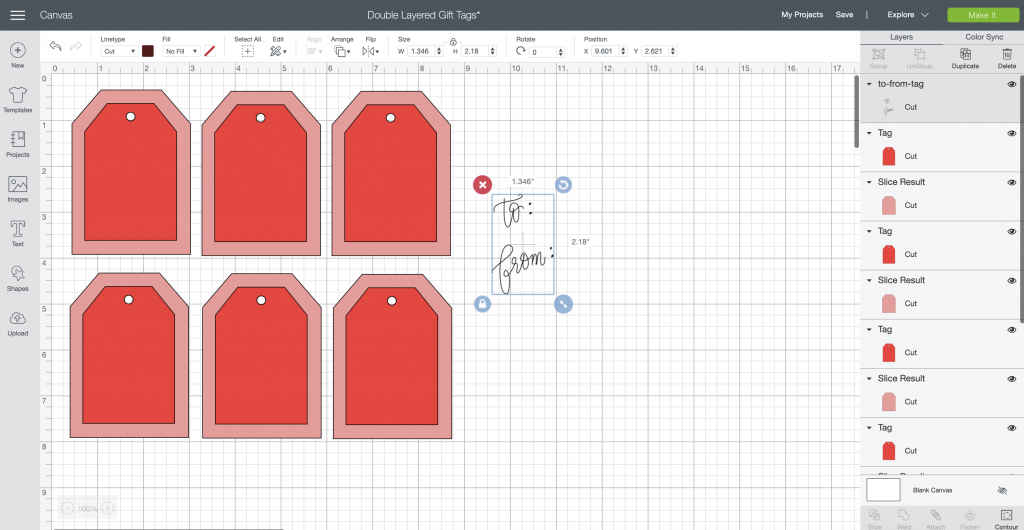
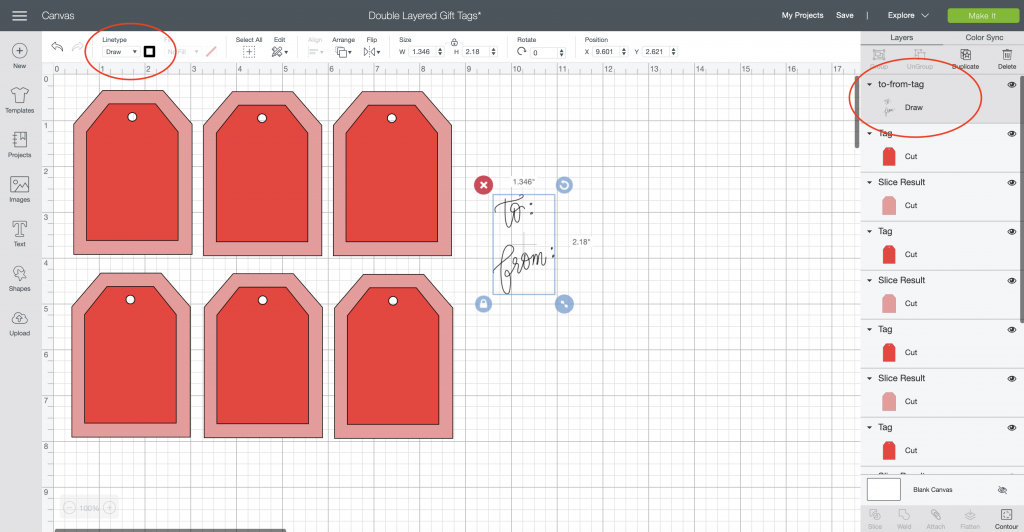
Cricut Design Space will bring the file in as a “Cut” file – but we don’t want it to cut. Select the To/From design, and in the top toolbar, change “Cut” to “Draw.”
At this point, you can also “copy” and “paste” the hand written design depending on how many tags you’re making.
The next step is really important and will make sure that your tag cuts and draws perfectly – you need to “Attach” the draw file to the top layer of the tag. Move the To/From design on to the tag and resize it to fit. Place it exactly where you want it on the tag, and then select the To/From design AND the top layer of the gift tag. In the bottom right corner, click “Attach.”
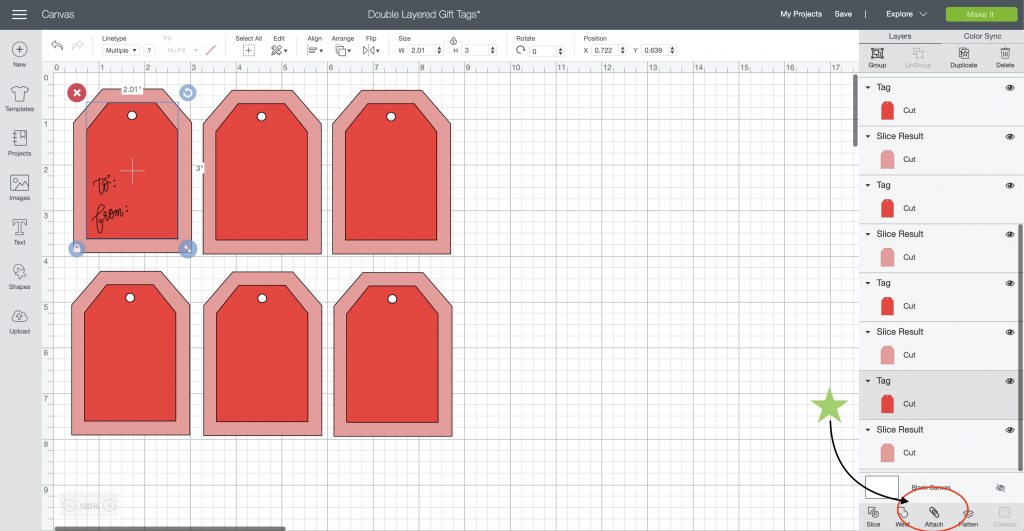
That will let your Cricut know that you want that design drawn on that exact tag before it cuts it. If you’re creating multiple gift tags, just place each hand written design on the gift tags and repeat the “Attach” process.
When you’re ready, click “Make It.” If you’ve done it properly, you’ll have two mats – one for the larger gift tag that will only be cut out, and another that will have the smaller gift tag with the writing on it.
The Cricut Explore Air 2 and Cricut Maker have a double tool holder -place your Cricut pen on side “A” and the fine point blade on side “B.” Proceed with the rest of the drawing and cutting process. Follow the instructions onscreen and make sure that you select the proper setting for the paper you’re using (if using two types of paper, you’ll have to change the cut material in between mats).
When finished, remove the pieces from the cutting mat. Attach the top layer of the gift tag to the bottom, or just tie together with ribbon on your gift. You’re done!
LATEST POSTS:
- Wicked Coloring Pages to Print for Free
- Free Thanksgiving Turkey Coloring Page Printable
- Free Printable Thanksgiving Meal Planner & Grocery List
- xTool M1 Ultra Beginner’s Guide and Review
- Free Best Dad Ever Father’s Day Coloring Page
See the rest of the last-minute Christmas Cricut ideas by visiting the following blog posts:
- Personalized Snow Man Mug by Happy Go Lucky
- Upcycled Felt Pouch by Celebrating Every Day Life
- DIY Sloth Travel Pillow by Hello Creative Family
- Custom Fabric Coasters by Kingston Crafts
- Personalized Candy Jars by Everyday Party Magazine
- Have your Own Snowball Fight by Me and My Inklings
- Christmas Gift Card Holder by Artsy Fartsy Mama
Download Free Cricut Gift Tag SVG
This file is DOWNLOAD #101 in my FREE DOWNLOADS LIBRARY.
Get the password below! (If you have the password, head over to the library to download the file.
You will NOT receive an email with the download file. SVG files can be used with Cricut Design Space and upgraded versions of Silhouette Studio.
Don’t Forget – Pin Easy Cricut Gift Tag with Free Hand Lettered SVG for Later:


First time here, I was using your FREE gift tags double for Christmas and when I go to Make it it says I need to purchase… how is that free? false advertisement.
I offer the handwritten SVG as a free download. If you are a Cricut Access user, the gift tag design is also free. There are many free designs in Cricut Design Space – please feel free to look for a different tag design that suits your needs! Merry Christmas!