‘Twas the Night Before Christmas Table with Cricut
This post and the photos within it may contain affiliate links. As an Amazon associate I earn from qualifying purchases. If you make a purchase through one or more of the links, I may receive a small commission at no extra cost to you.
Looking for DIY Holiday or Christmas Party Ideas? I used my Cricut Maker to make DIY Holiday Party Supplies for this Kids’ Christmas Party, including DIY Christmas Ornaments, DIY Placemats, DIY Santa Drink Glasses, and a DIY Santa Bag! Keep reading for all of the Cricut Design Space links (YES! you can make these designs in Design Space!)

This post and the photos within it may contain affiliate links. If you make a purchase through one or more of the links, I may receive a small commission at no extra cost to you.
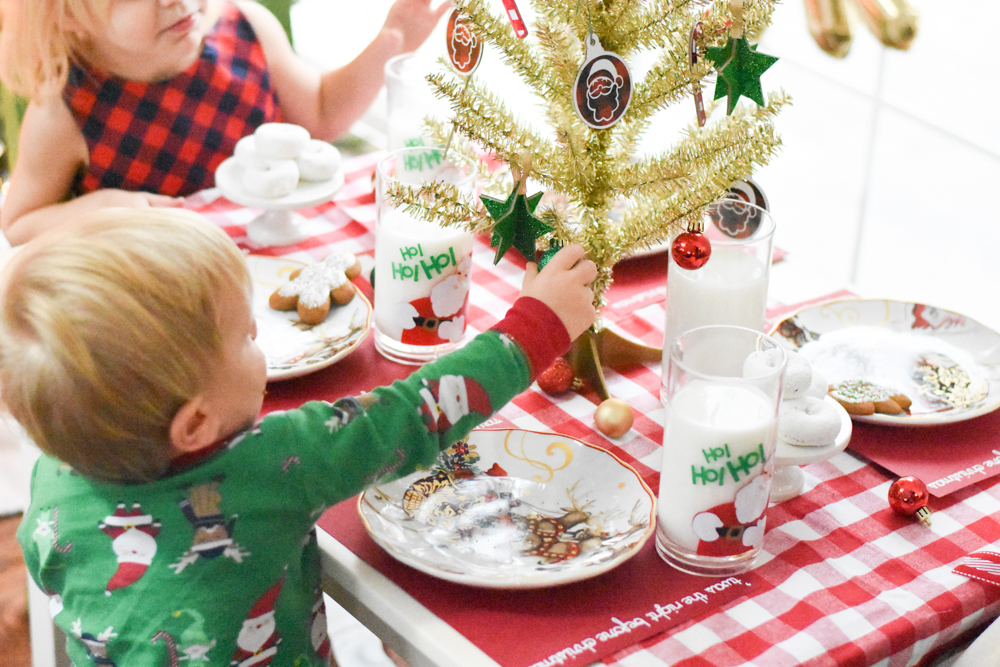
When Cricut asked me to design a holiday tablescape, I automatically thought of this idea for a Kids’ Christmas Party. I have these awesome Santa dishes from Williams Sonoma and I have been dying to use them for a Christmas tablescape. Since I have four kids, I am constantly planning fun activities for them during the Christmas season. I planned this simple ‘Twas the Night Before Christmas or Santa themed party for them, and they loved it! I used my Cricut Maker and a variety of Cricut cutting materials to make all of the party decorations. With the Cricut Maker, I can make party supplies that I can’t with my Cricut Explore Air 2, like the ornaments on the tree I used for the centerpiece. They’re all made with Cricut Chipboard and the new Cricut Knife Blade!
Related Post: Decorate your Christmas Tree with the Cricut Maker
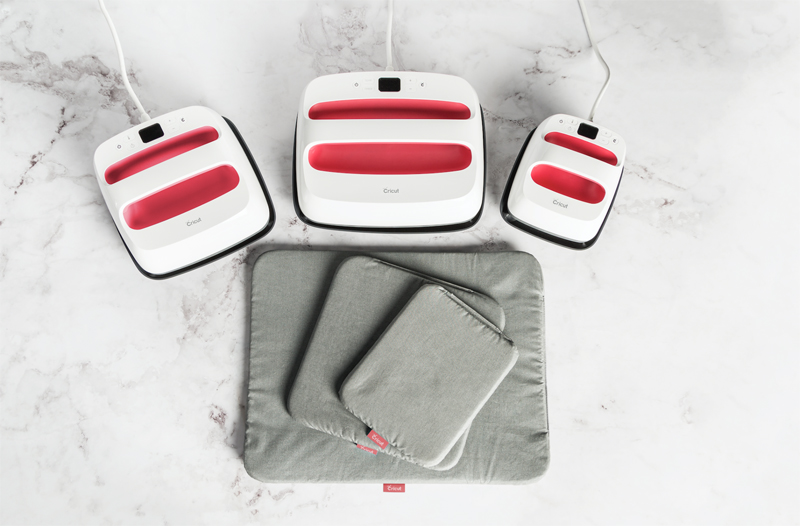
When I’m coming up with Christmas and holiday party ideas, I immediately include my Cricut Maker. There isn’t a tool I use more (although the new EasyPress 2 is a close second) in my craft room. Buying personalized or custom party supplies can get SO expensive, but when I make my own with my Cricut, I can make professional party supplies at a fraction of the cost. And with the Adaptive Tool System that is exclusive to the Cricut Maker, I have tools like the Knife Blade, Rotary Blade, and Scoring Wheel at my disposal to cut materials that I couldn’t cut before!
Plan Kid’s Christmas Party Ideas with your Cricut
Even on a small kids’ table, there’s plenty of room for making Christmas party decor with your Cricut! There are no less than 5 projects made with my Cricut Maker in this photo:
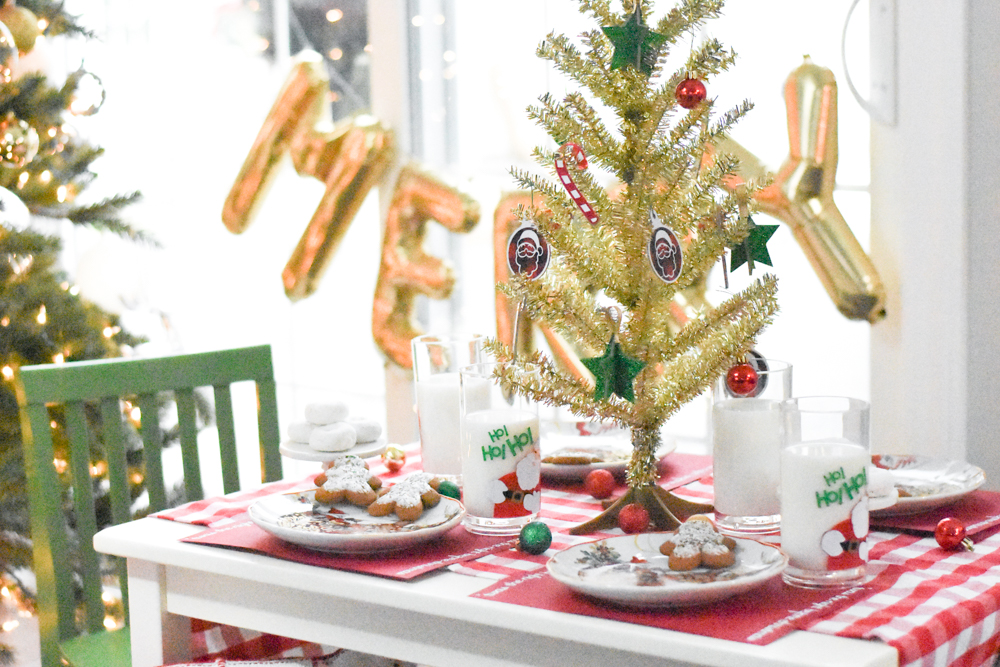
These custom Santa drink glasses (filled with milk!) are the perfect touch to any party table. My kids absolutely adored these and asked to use them every day!
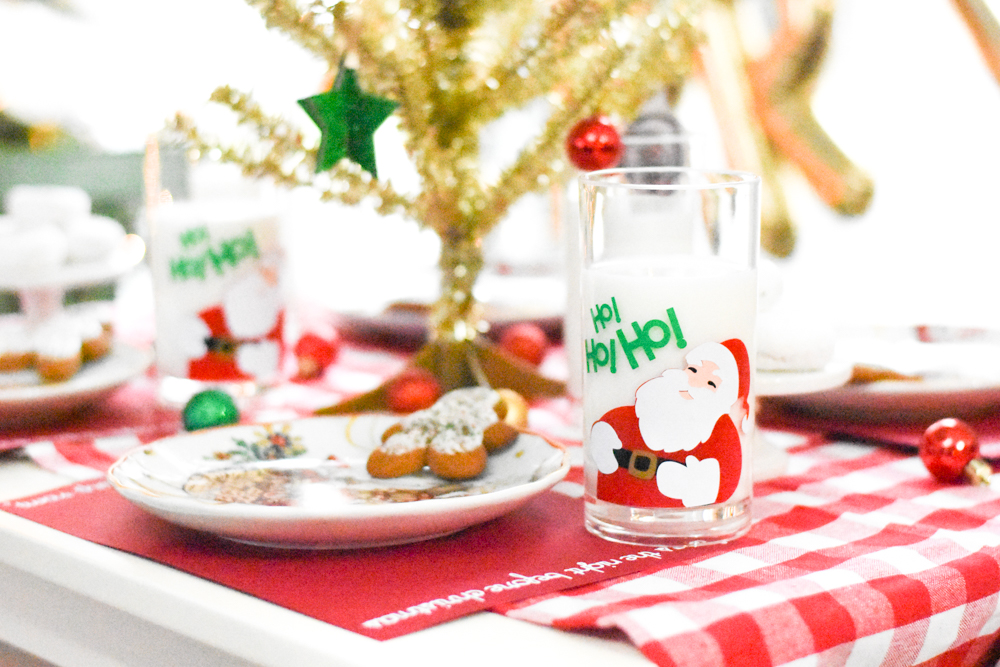
And because I used Cricut Removable vinyl, I can easily take the design off of the glasses after the holidays, and plan my next party!
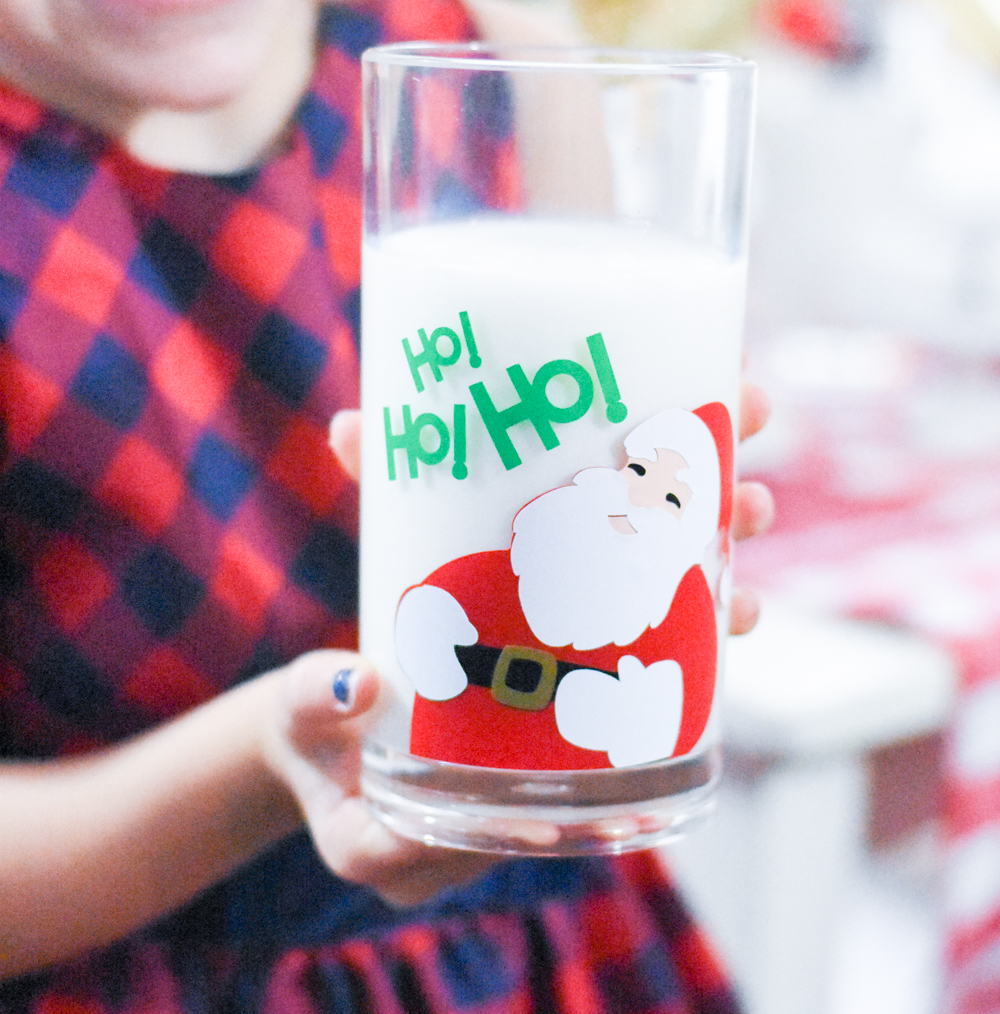
Click to Make: DIY Christmas Party Santa Glasses
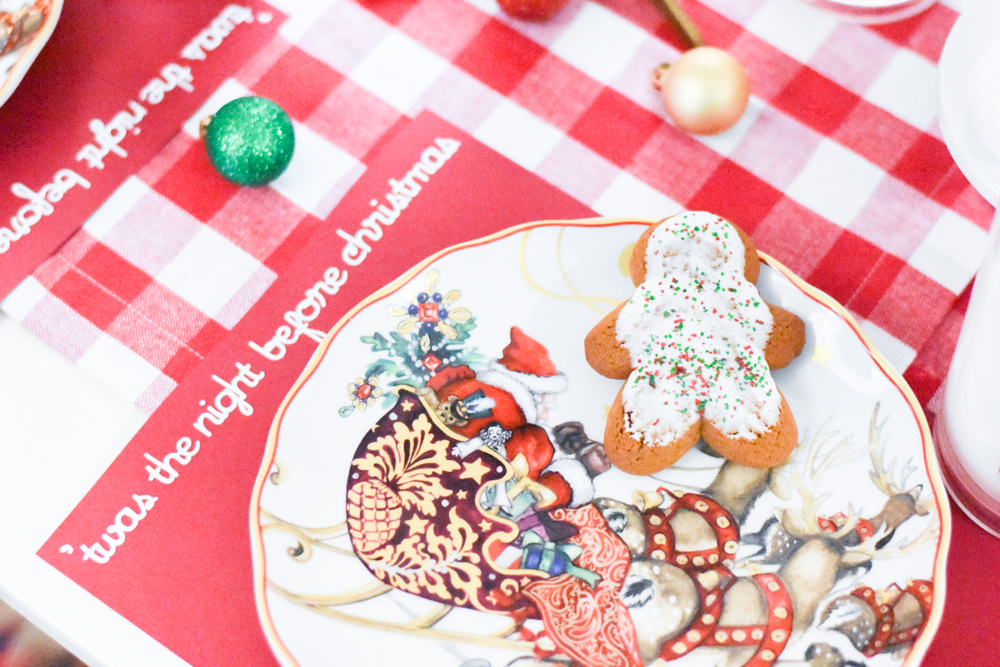
I also added a DIY Christmas Placemat to my Santa Plates:

They’re made out of a simple piece of cardstock and Iron On vinyl! Yes you can use Iron on Vinyl on paper! The EasyPress 2 makes it so easy to apply and you don’t have to worry about transfer tape ripping your cardstock.
Related Post: Make DIY Personalized Take Home Bags + FREE SVG with your Cricut and EasyPress 2
Click to Make: ‘Twas the Night Before Christmas DIY Placemats
These little gingerbread man cookies make the perfect addition to the plates!
I also made this DIY Personalized Santa Bag using Cricut Iron On Vinyl – it’s perfect for small gifts that you don’t want opened until Christmas!
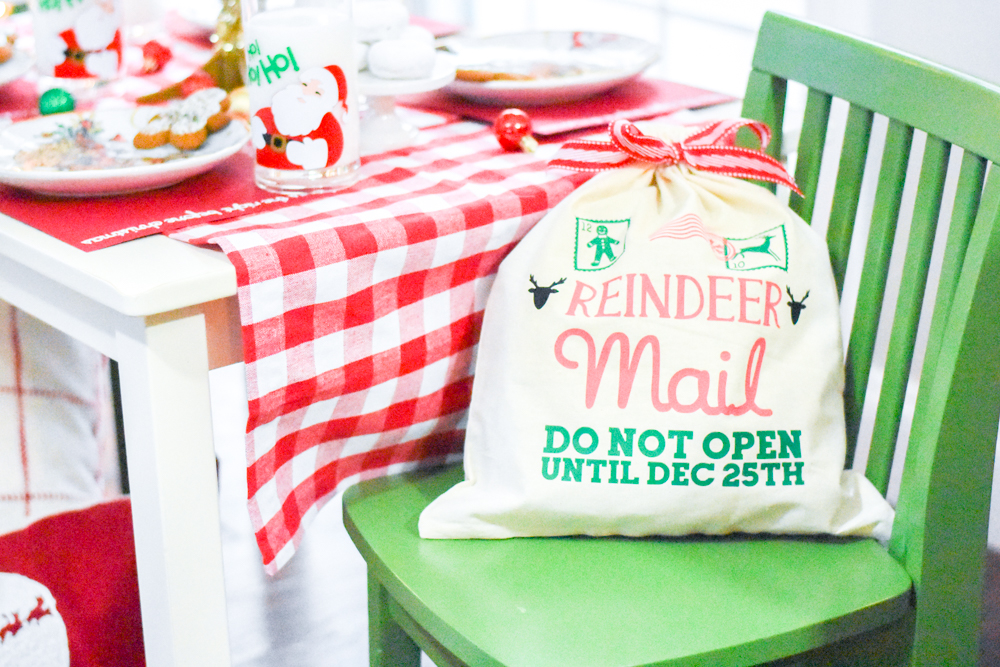
Here’s the Design Space link so you can make your own. Resize it to fit your gift bags!
Click to Make: DIY Personalized Santa Bags
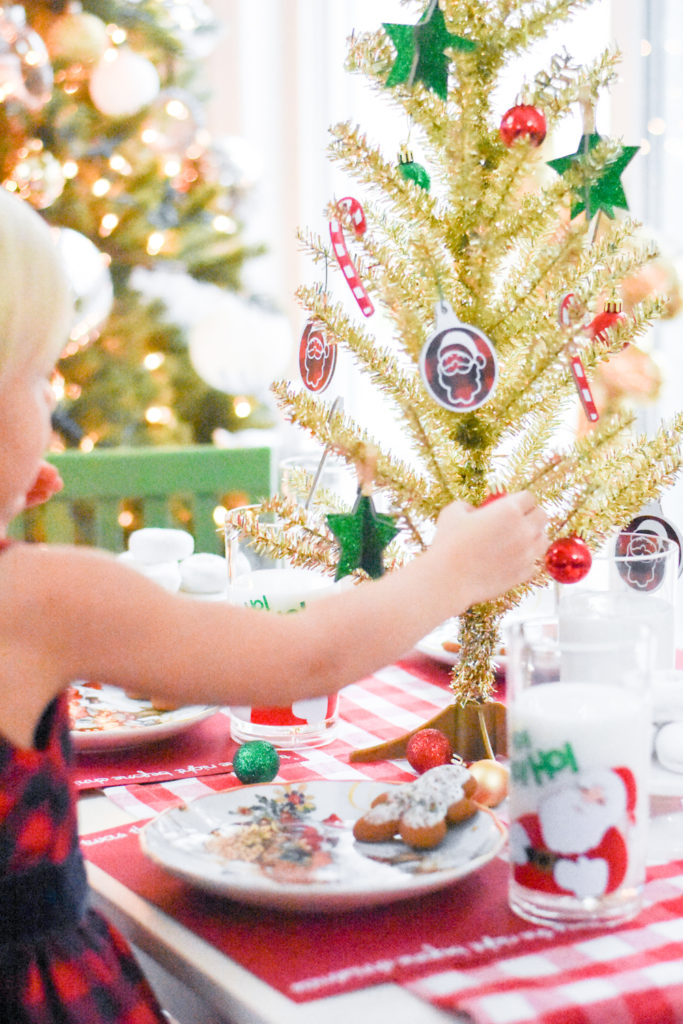
For the centerpiece, I used an inexpensive gold tree that I decorated with a few small ornaments plus these awesome hand made ornaments that I made with the Cricut Maker and Cricut chipboard! I let my youngest daughter help decorate the tree, and since these ornaments aren’t breakable, you don’t have to worry about letting the kids help!
I made 3 different styles of ornaments for the tree. A candy cane with Cricut Adhesive Foil details (I love how shiny they are!):

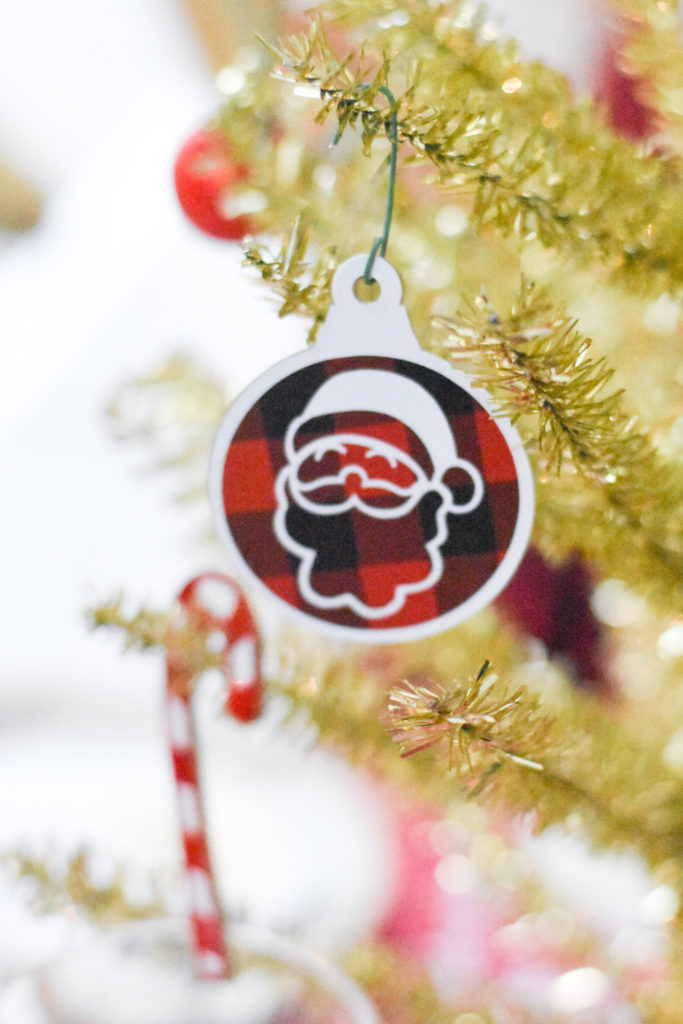
Buffalo Plaid Santas (these seriously look like they are ceramic!):
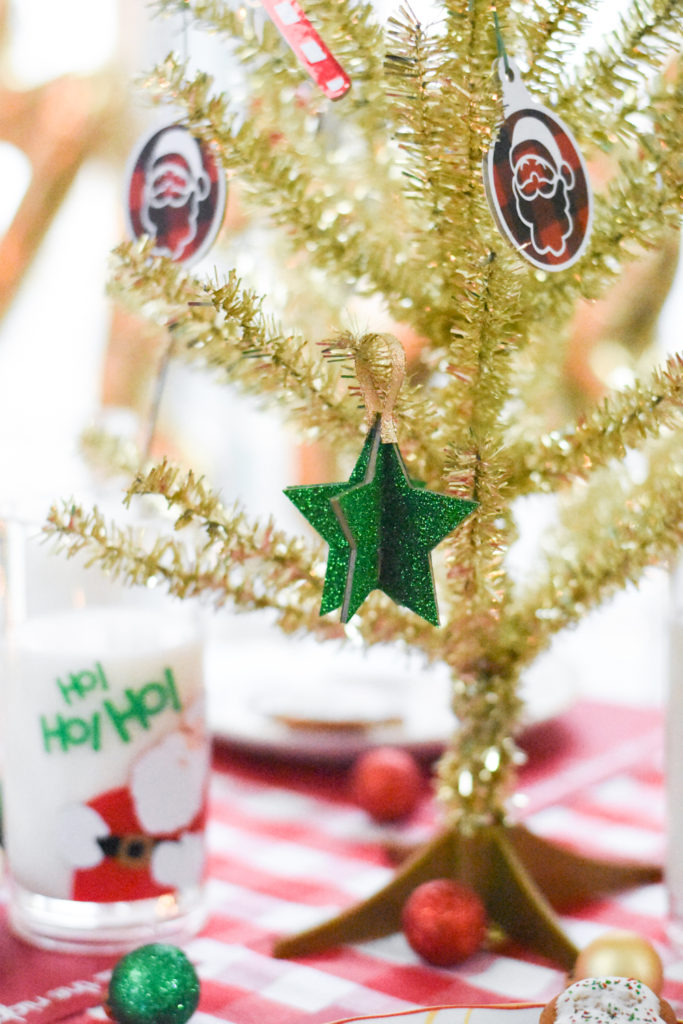
The third ornament I made is this 3D chipboard star that is covered in green Cricut Glitter Iron On. These were my daughter’s favorite because they are so sparkly:
You can make all of these chipboard Christmas ornaments with these supplies:
–Buffalo Plaid Patterned Vinyl, Removable
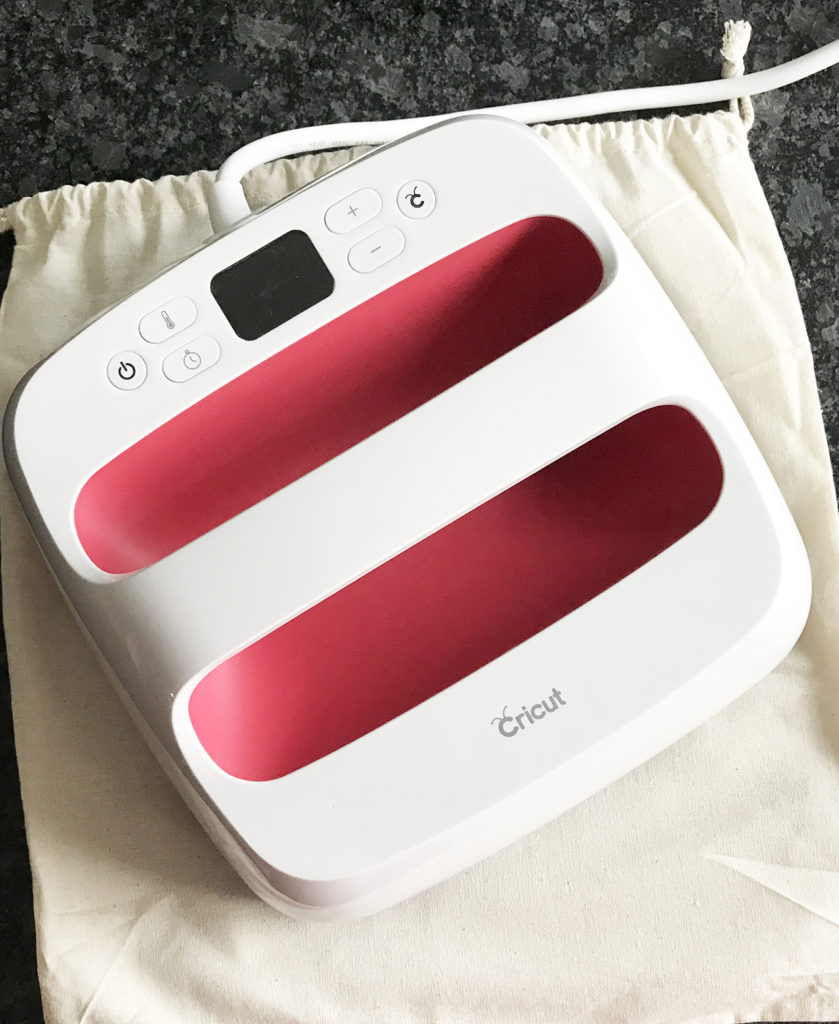
–Cricut EasyPress 2 (the new small size is perfect for this project!)
-Cricut Protective Iron On Sheet
You can access all of the DIY Christmas ornament designs in this file on Cricut Design Space:
Click to Make: ‘Twas the Night Before Christmas Table Centerpiece Christmas Ornaments
Open the designs in Cricut Design Space. You’ll notice that there are a TON of shapes. There are the chipboard designs and also the vinyl pieces to cover both the front and back of each ornament. The beige color is the chipboard layer – you’ll need to know that when cutting.
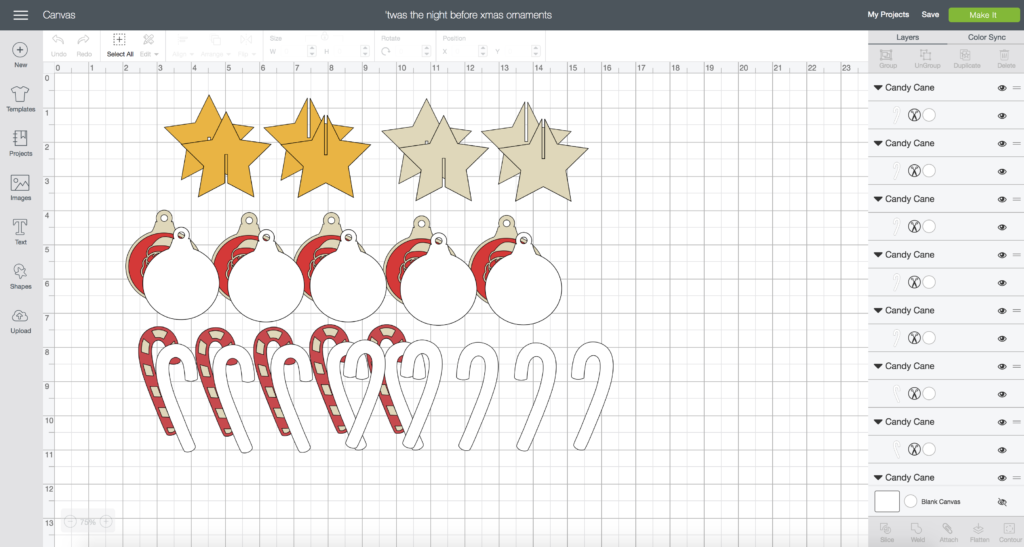
The shapes are relatively small because my tree that I used as the centerpiece is only a couple of feet high. You can resize the ornaments to fit your needs; just make sure that you choose ALL of the layers when you resize them. Click “Make it” when you’re ready to cut them.
Remember I said to remember the color of the chipboard layer? Now is when you need to use that information. Long story short: Cricut chipboard is smaller than other cutting materials so your designs have to fit within a 11×11″ space. But Design Space doesn’t know that you’re using chipboard so it tries to cram as many ornaments on one page as possible. You have to move them around to make sure the designs will fit on a chipboard sheet.
This is what the mat set up looks like on default:
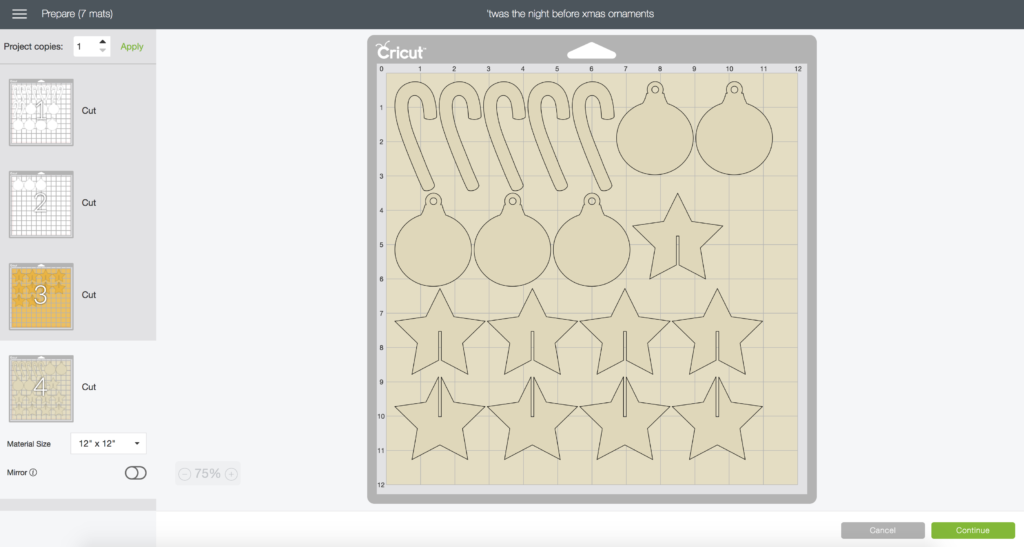
You can see that the ornaments cross the the 11″ line on both the right and bottom of the mat. Did you know that you can move items on your mat? You can! Just click on the design you want to move and click the “. . .” button.
Then you can click “Move to Another Mat.” Since I need to add another piece of chipboard, I clicked the “New mat” button and selected it to be the same color as my chipboard layer (beige). It is Mat 4 in the photo below:
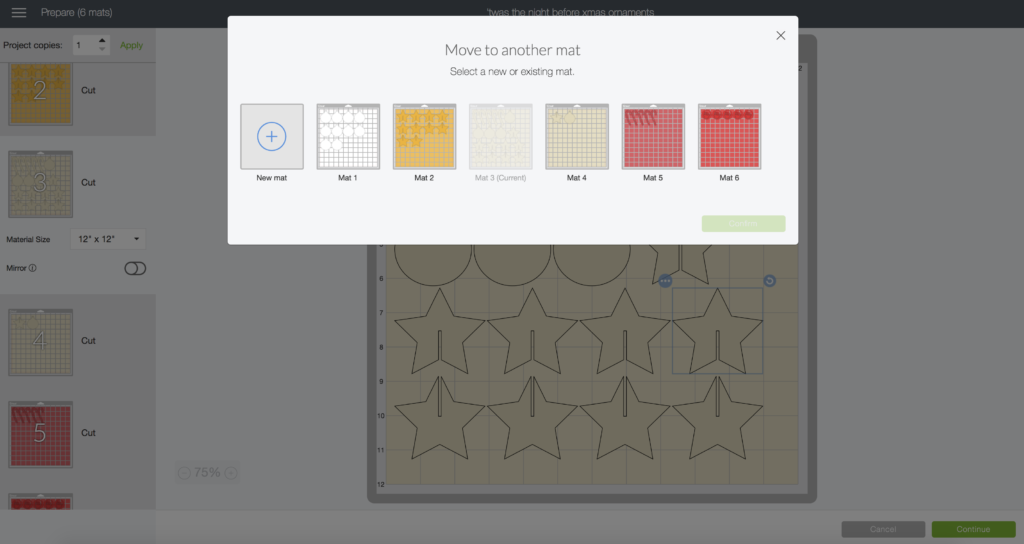
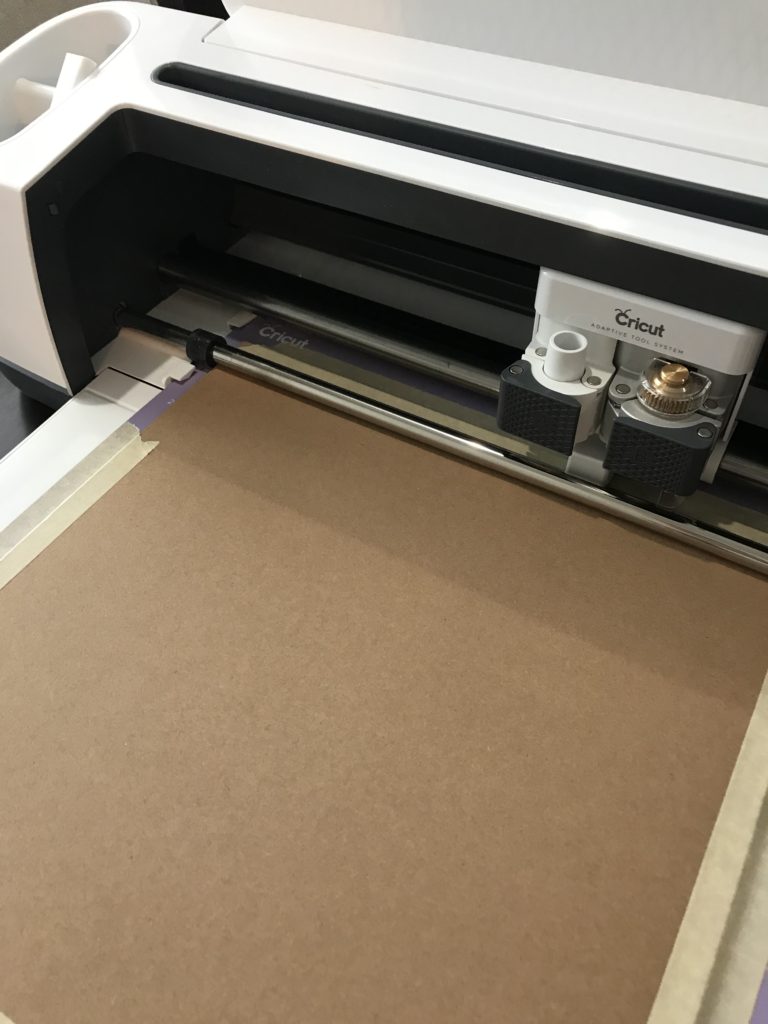
Move all of the designs to that mat that are crossing the 11″ line and then you can get ready to cut. Since the chipboard uses the Knife Blade, and it takes a while to cut, I like to do those mats first. Make sure the chipboard is on a Strong Grip Mat, and all 4 sides are taped down. I use masking tape to secure my chipboard sheets.
These chipboard ornaments took about 45 minutes and 12 rounds of cutting to get the whole way through. You can pause the cut and check the chipboard throughout the cutting process to see if they are done cutting – if they go too far they may cut through your mat! I like to err on the side of caution, and if there are a few areas that aren’t cut the whole way through, I use my Cricut TrueControl Knife to finish!
When they are all finished cutting, you can start construction. Apply the layers of vinyl to all sides of the ornaments. For the Santa Plaid ornaments and Candy Cane Ornaments, use Cricut Transfer Tape to move the designs, especially the Santa faces. If you’d like, since the full ornament covers are one piece, you can just move them without transfer tape.
For the 3D stars, first use the Cricut EasyPress 2 to cover the front and back of the stars with Glitter Iron On Vinyl. The new EasyPress 2 comes in 3 sizes – the small version is perfect for small projects like ornaments!
But when you need to make a larger project, like my Santa bag, I used my original size – it’s heating surface is 9×9″
Once your 3D stars are covered in vinyl, you can slide them together (it takes some effort with the glitter vinyl!) and then hot glue a small piece of ribbon to create an ornament hanger.
Even my little guy wanted to help hanging ornaments on the tree!
IF YOU’D LIKE MORE DIY CRICUT IDEAS, I THINK YOU’LL LIKE THESE POSTS:
Free Cheers Y’all SVG File + DIY Wine Glass
Make DIY Christmas Cards with the Cricut Maker
Free Grinch SVG + Cricut Shirt DIY
Free Merry Christmas Y’all SVG
Merry and Bright Flamingo Sign + FREE SVG
Christmas Cookie Exchange with Oriental Trading
DIY Monogrammed Plaid Tote (DIY Christmas Gift Idea!)
This is a sponsored conversation written by me on behalf of Cricut. The opinions and text are all mine.


ABOUT CHARYNN
Hi, y’all! I’m Charynn, the owner and designer of Pineapple Paper Co. I’m a mom of four kids (two girls and two boys) living in Pittsburgh. I love hand lettering, anything southern, cocktails, and of course, pineapples! I am excited to share my SVG files, printables, and craft projects with you! The pineapple is a symbol of hospitality, and I welcome y’all to my little corner of the internet. Read more…