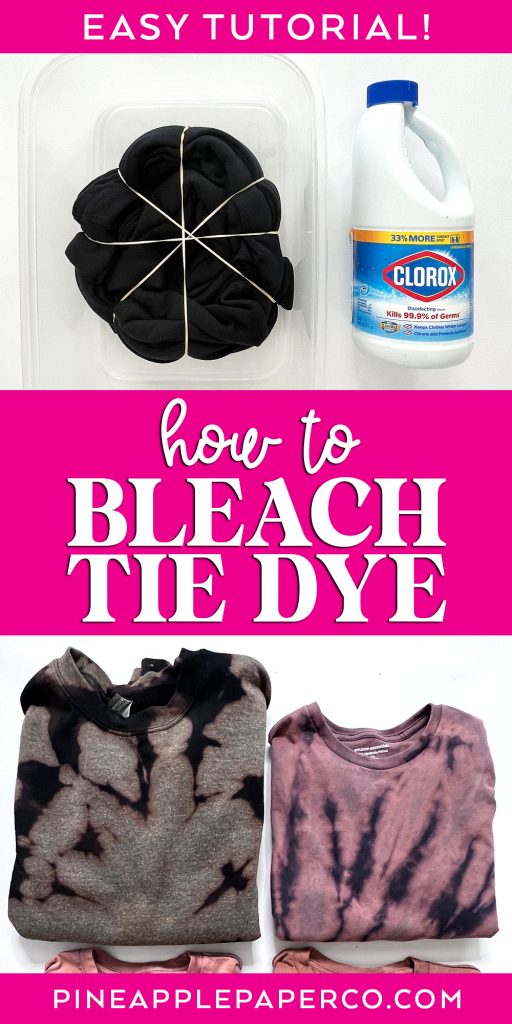
How to Tie Dye with Bleach
This post and the photos within it may contain affiliate links. As an Amazon associate I earn from qualifying purchases. If you make a purchase through one or more of the links, I may receive a small commission at no extra cost to you.
Make a unique tie dye shirt using household bleach instead of dye, known as Reverse Tie Dye! With a colored shirt and bleach solution you can learn How to Tie Eye with Bleach. I will show you how to us the reverse tie dye technique as well as fun ways to fold your shirts!

Bleach tie-dyeing or reverse tie dyeing is a cool way to take your tie dye to the next level! It’s so easy and you only need a few simple supplies to make a reverse tie dye project. Even if it’s your first time trying a tie dye project, you will be excited about the results.
Love this look but don’t want to mess with bleach? Learn How to Tie Dye a Colored Shirt!
Unlike traditional tie dye, when you color white shirts using fabric dye, I will show you how to bleach areas of dark colored shirts to create different patterns.

What You Need to Tie Dye with Bleach
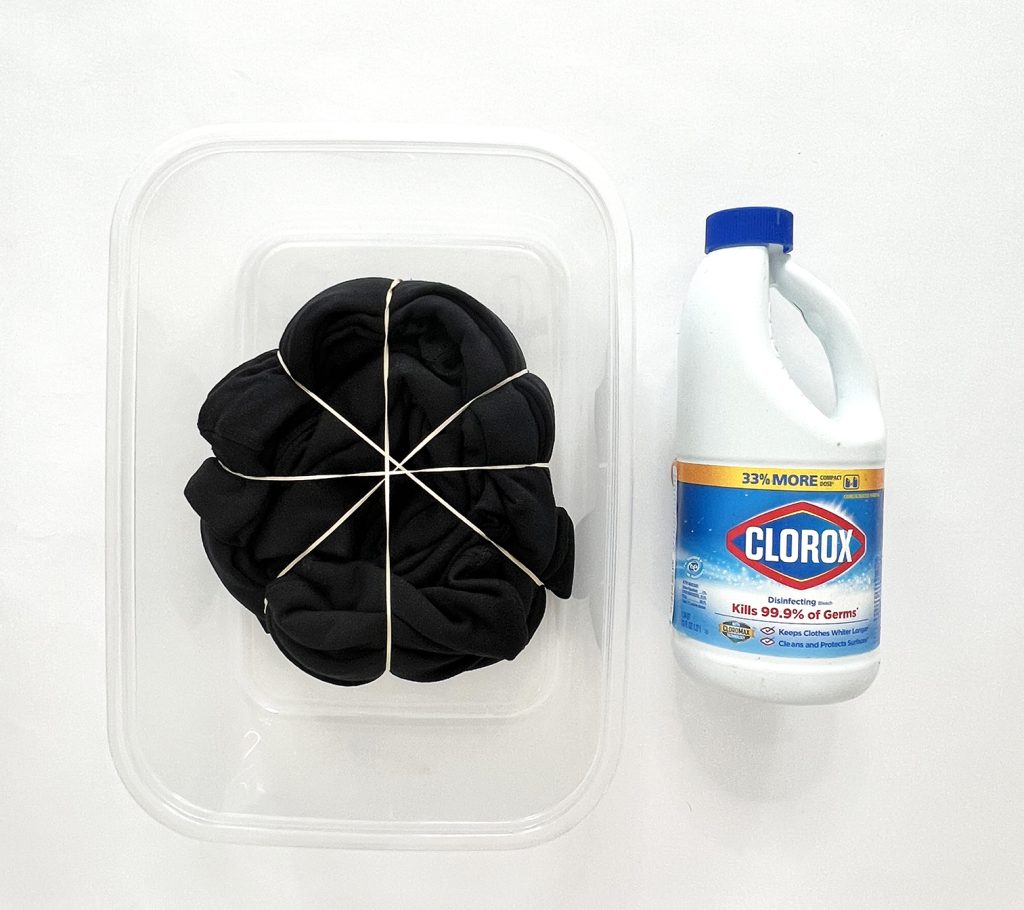
First, collect the supplies that you will need to bleach tie dye. Here’s what I use with all of my bleach reverse tie-dye projects:
- Dark Colored Shirts (Black Shirt, Navy Shirt, Grey Shirt)
- Household Bleach (Clorox works well)
- Rubber Bands
- Rubber Gloves
- Squeeze Bottle
- Hydrogen Peroxide (optional)
Bleach Tie Dye Patterns
Important: Bleach is a strong chemical. You should always tie dye with bleach in a very well ventilated area, or outside. Wear old clothes, because bleach can stain clothes in unintended areas.
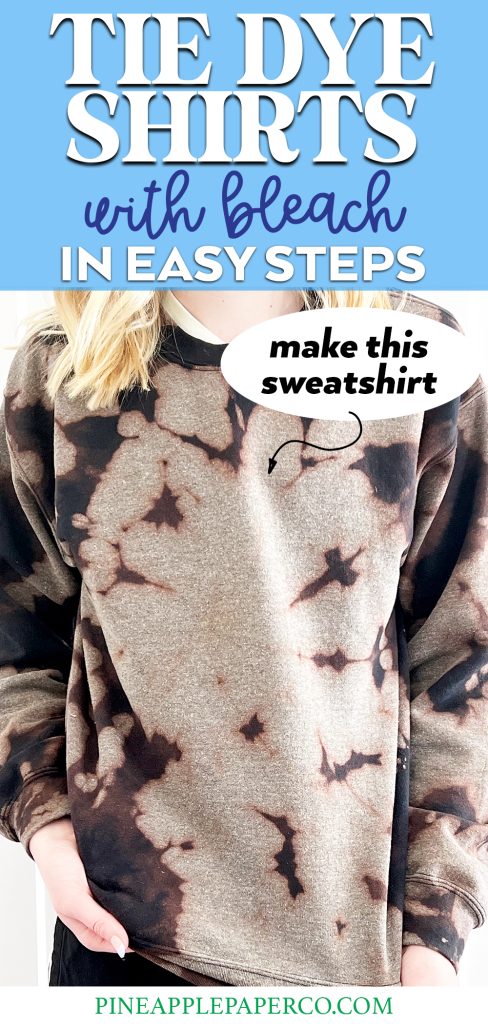
I used bleach to tie dye a few cool shirt patterns – a spiral design, crumple design, sunburst pattern, and shibori (folded squares) pattern.
For detailed instructions (and a video!) of tie dye folding patterns, check out my comprehensive Tie Dye Patterns post!

How to Reverse Tie Dye
Regardless of the tie dye pattern you choose for your bleached shirts, the steps are the same. Here’s the 5 easy steps for How to Tie Dye with Bleach:
- Fold or crumple the shirt in your desired pattern.
- Secure the shirt with rubber bands.
- Apply bleach with squirt bottle or soak shirt in a bleach solution.
- Rinse shirt completely.
- Wash in cool water.
The first step is to fold your dark color shirt – for the most contrast and best results use black, navy, or gray. You can start with a dry shirt if it is washed. If it is a brand new shirt, wet down the whole shirt and ring it out so it is damp. That will help the bleach to soak in.
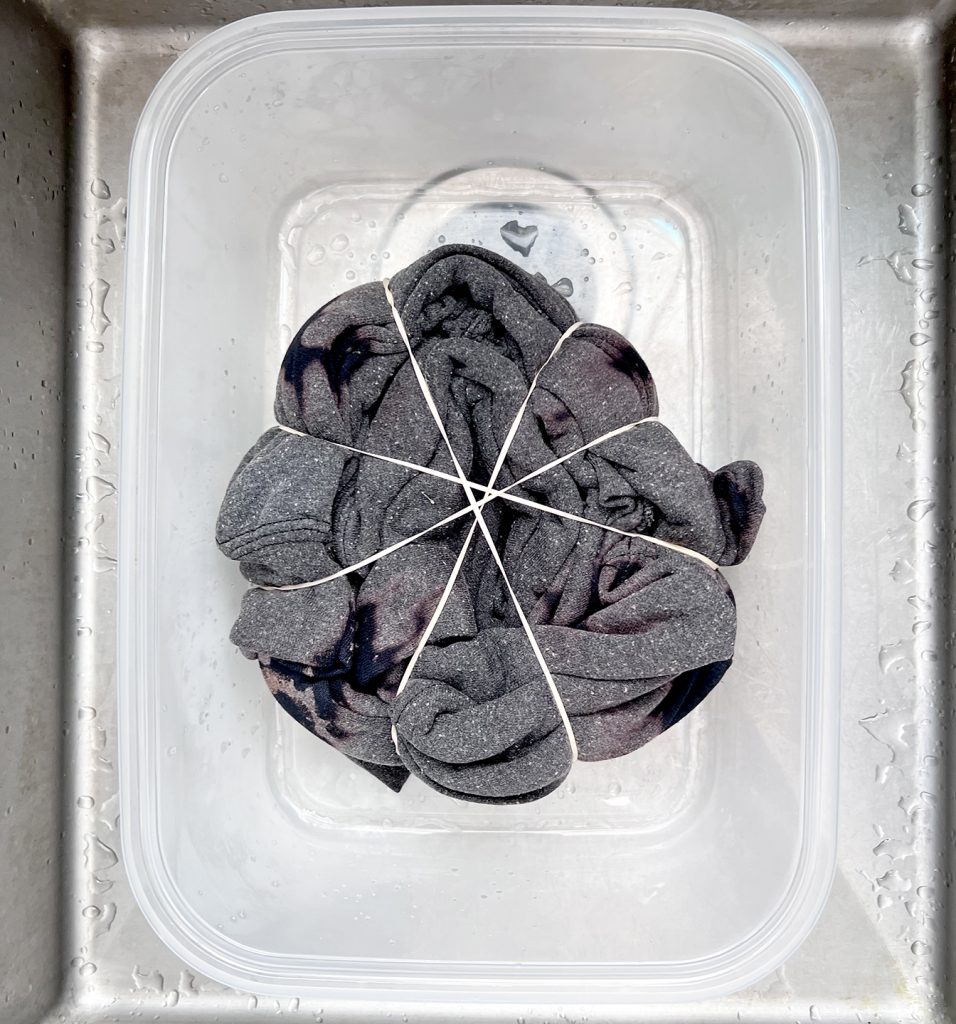
This shirt is a simple sunburst pattern that I crumpled before I secured with rubber bands:

Secure the shirt with rubber bands or string.
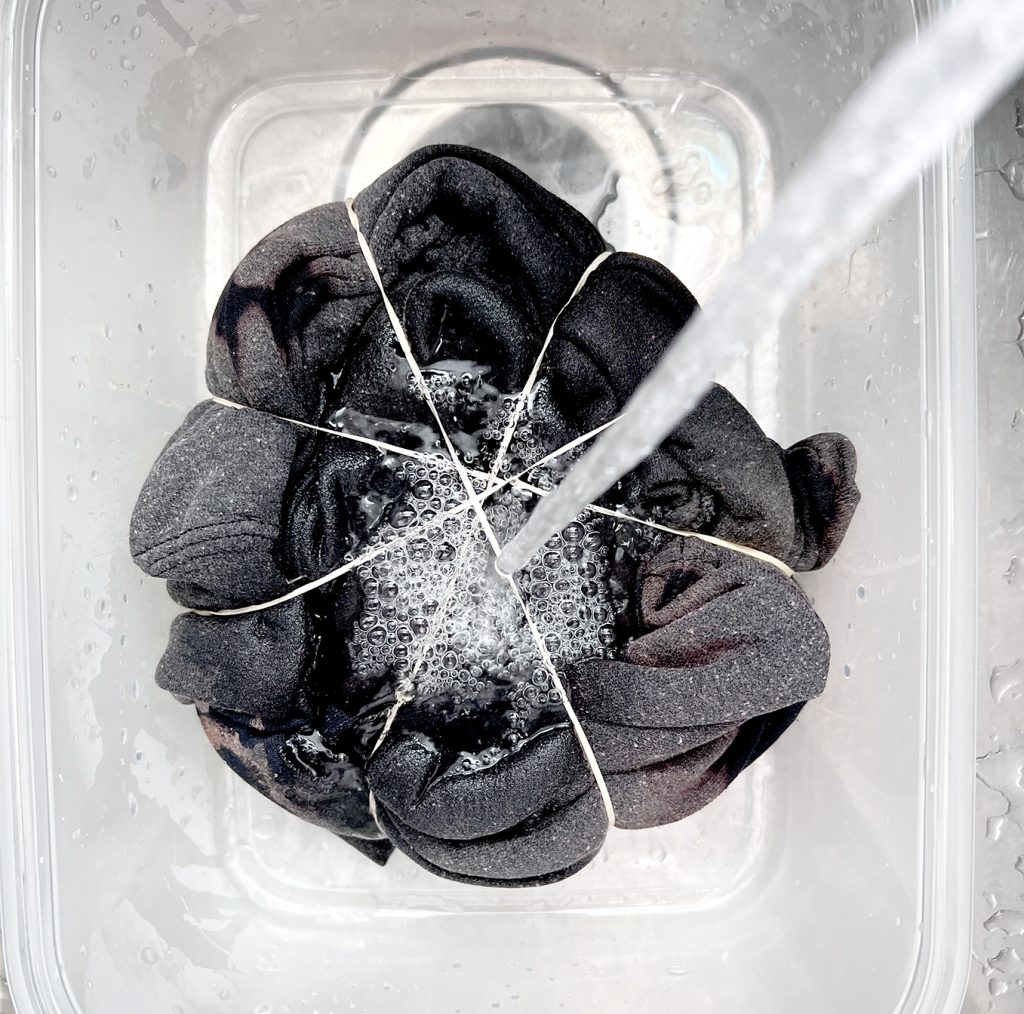
Make sure you are wearing gloves when bleach dyeing. Rubber gloves will work. There are lots of different ways to apply the bleach to your shirt. You can apply it with a squeeze bottle, a spray bottle, or soak the shirt in a bleach solution.
I use a 1 part bleach to 1 part water (1:1 ratio) to make my bleach solution. You can use less bleach if you want a slight color change, or straight bleach. You will get a different look depending on how much bleach you use!
I like to work in a large plastic container to help contain the bleach solution.
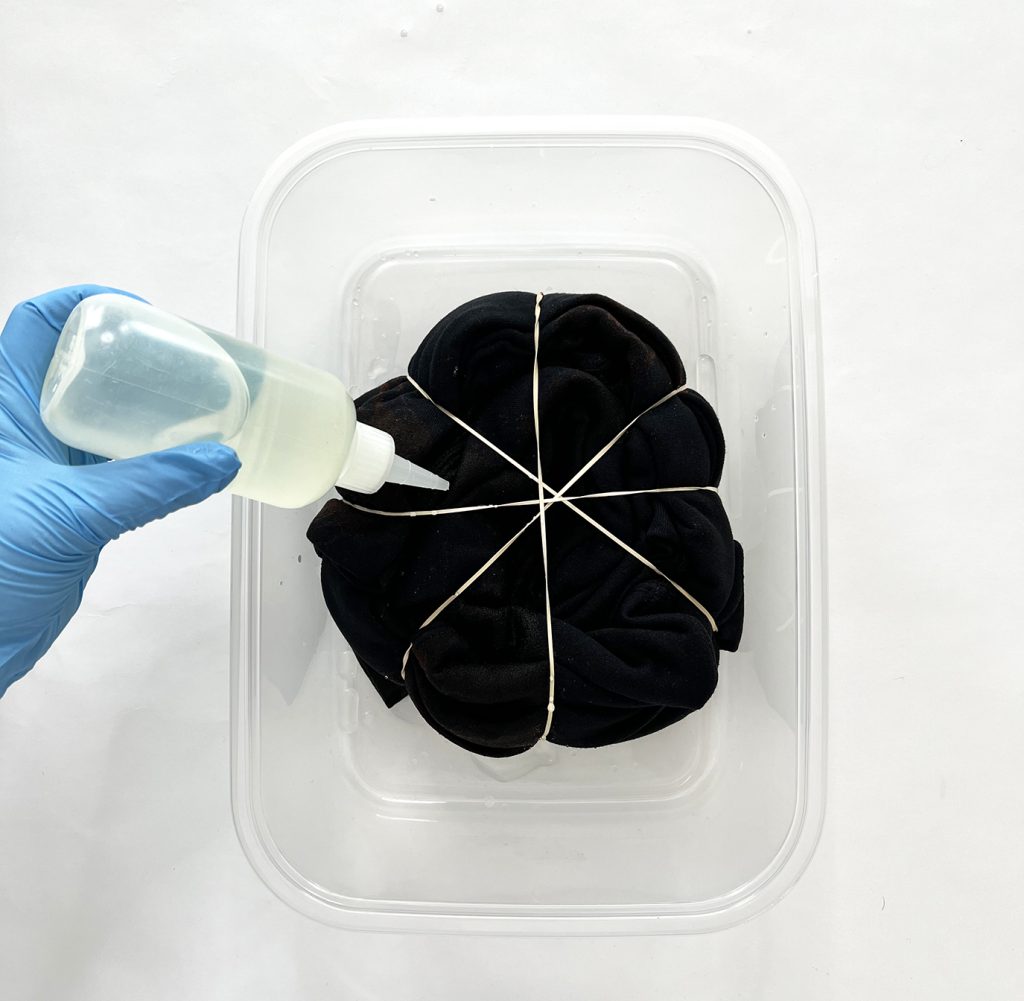
For this bleach tie dye sweatshirt, I used a squirt bottle to apply the bleach so that I could get the solution down into the folds of the sweatshirt. I applied bleach in every other section and then flipped the sweatshirt over and repeated the process on the back.
If you want to soak your shirt, mix the bleach and water in the container and place the shirt in the liquid. Flip over to cover all areas.
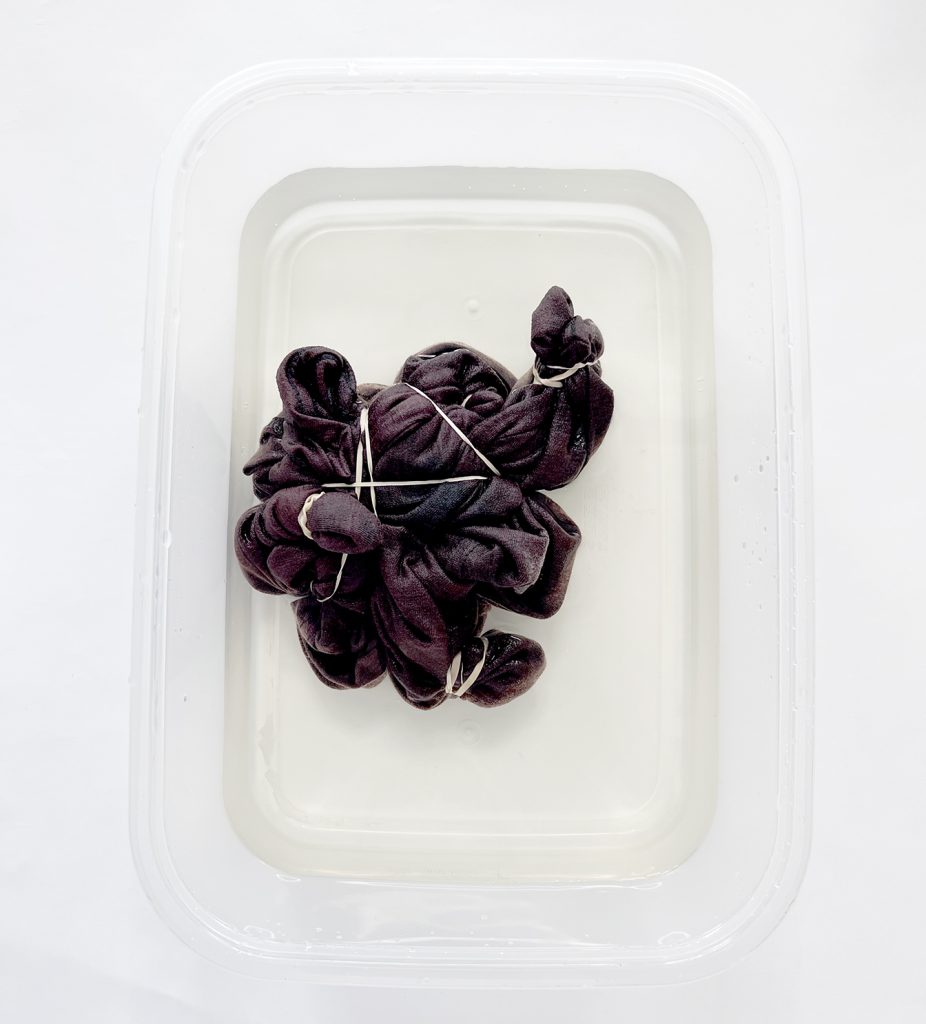
Allow the shirt to sit for 5 minutes, up to 20-30 minutes. You can watch the color change to see when you want to take it out! Don’t leave it in for more than 30 minutes, though, especially if you are using undiluted bleach. Chlorine bleach can actually destroy fabric, including cotton.
When the shirt has reached the color you would like, the next step is to rinse the shirt. The easy way is to use the kitchen sink, bath tub, or an outdoor sink. Just make sure to move surrounding objects if you’re rinsing out your bleach tie dye shirts inside!
Rinse well, then remove the rubber bands and continue to rinse and wring out the shirt for a few minutes to remove all of the bleach and excess water.
After you have rinsed the shirt, place in the washing machine and run on a wash cycle with cool or cold water.
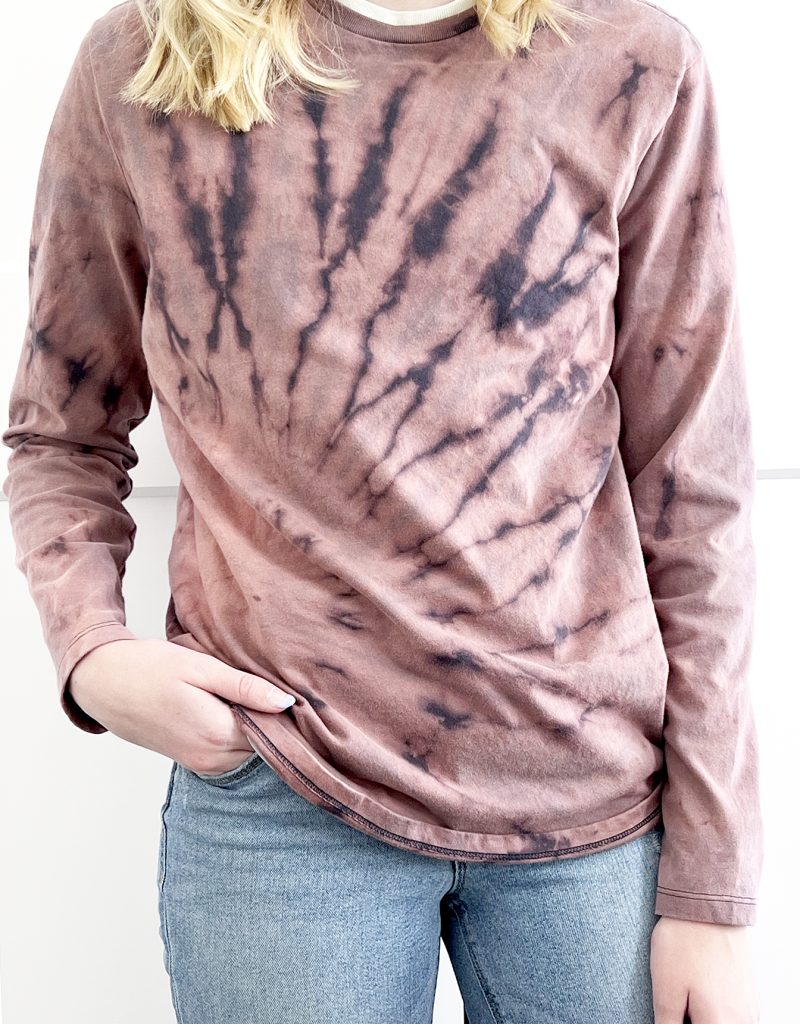
You will have unique tie-dye shirts in different designs!

Explore these other fun Tie Dye Posts:
Tips for Bleach Tie-Dying
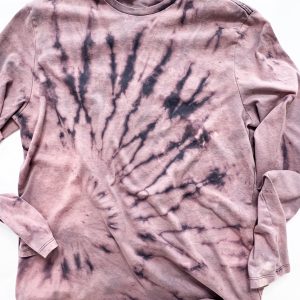
-The colors you will see after applying bleach may surprise you. That’s part of the fun of bleach tie-dyeing! Black fabric will usually turn a red color, and dark blue will usually turn a shade of pink or purple.

-Spot test fabrics to see what color will result by applying a little bit of bleach in an inconspicuous area.
-100% cotton shirts work best, but 50% cotton/50% polyester worked well for me too. The Gildan black sweatshirt I used was a 50/50 blend fabric.
-You don’t have to use Clorox liquid bleach! Other products that contain bleach, like toilet bowl cleaner or a bleach pen will work, too! I don’t have experience with those solutions, but have seen others use them with success. In theory, anything that contains bleach will work!
-Hydrogen peroxide will stop the bleach process. You can apply peroxide before rinsing if you want to stop bleaching quickly.
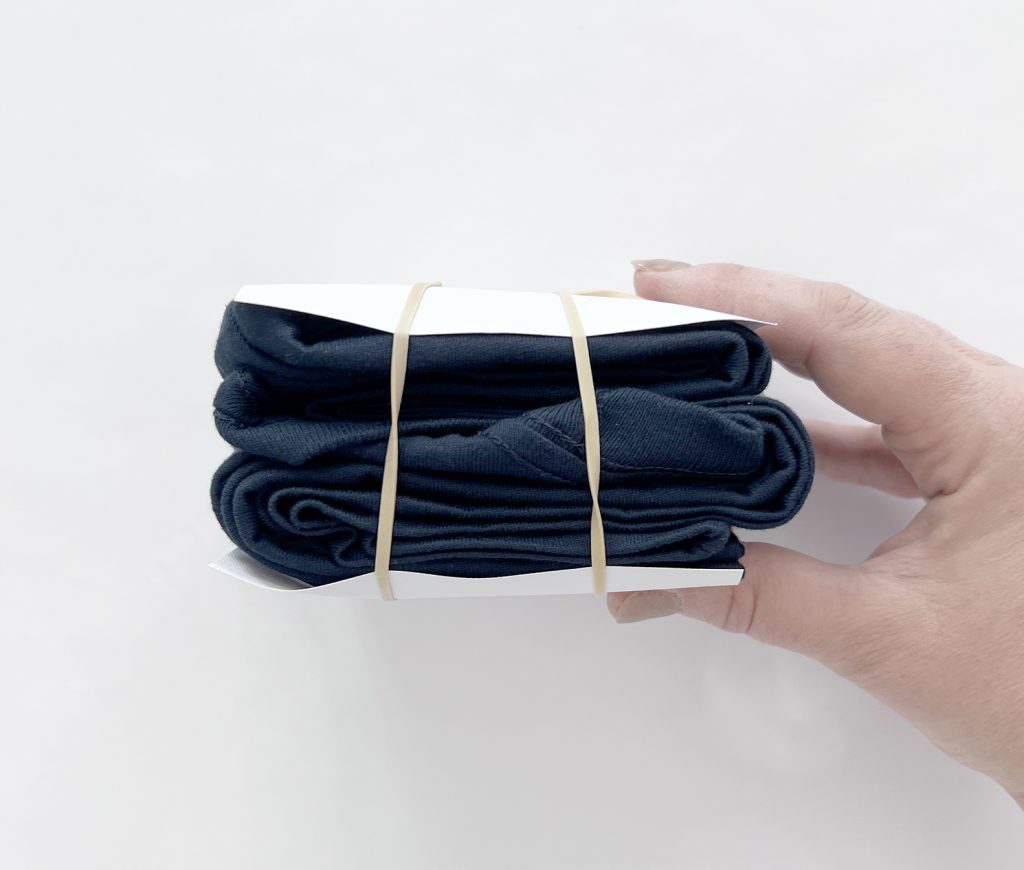
-Try cool patterns! You don’t have to make a spiral pattern to make a fun tie-dye design! I really like the Shibori method, which you get by folding your material accordian style, then securing the ends with cardboard or paper.
-Clear your work surface of EVERYTHING. Bleach has a way of splashing on things even if you don’t try. My rule of thumb is that if I leave it near me, it will probably get bleach on it. So I move everything within several feet. I have also been known to make a bleached shirt in the middle of my driveway!
-If you are using a black shirt and accidentally get bleach in an area you don’t want, use black dye to cover the mistake! Just follow regular tie-dye instructions.

Good luck! Bleach tie dyeing is such a fun technique that you won’t be able to stop! My kids and I make bleach tie dyed shirts all of the time! If you want to see some more examples of Bleach Tie Dyed Shirts, check out this Reverse Tie Dye with Bleach post from Making a Space.
This tie dye technique is also perfect for Halloween! Get Halloween Tie Dye Ideas and make some spooky shirts!
Make sure you pin an image to your favorite DIY or Craft board on Pinterest!
How to Tie Dye with Bleach
Ingredients
- Dark colored shirts
- Household Bleach
- Rubber Bands
- Squeeze Bottle
Instructions
- Fold or crumple shirt into desired pattern.
- Secure shirt pattern with rubber bands.
- Apply bleach solution with squeeze bottle or soak in a large container.
- Let sit for 5 minutes, or no more than 20-30 minutes.
- Rinse well and remove excess water.
- Wash in washing machine in cool water.


ABOUT CHARYNN
Hi, y’all! I’m Charynn, the owner and designer of Pineapple Paper Co. I’m a mom of four kids (two girls and two boys) living in Pittsburgh. I love hand lettering, anything southern, cocktails, and of course, pineapples! I am excited to share my SVG files, printables, and craft projects with you! The pineapple is a symbol of hospitality, and I welcome y’all to my little corner of the internet. Read more…