How to Ice Dye
This post and the photos within it may contain affiliate links. As an Amazon associate I earn from qualifying purchases. If you make a purchase through one or more of the links, I may receive a small commission at no extra cost to you.
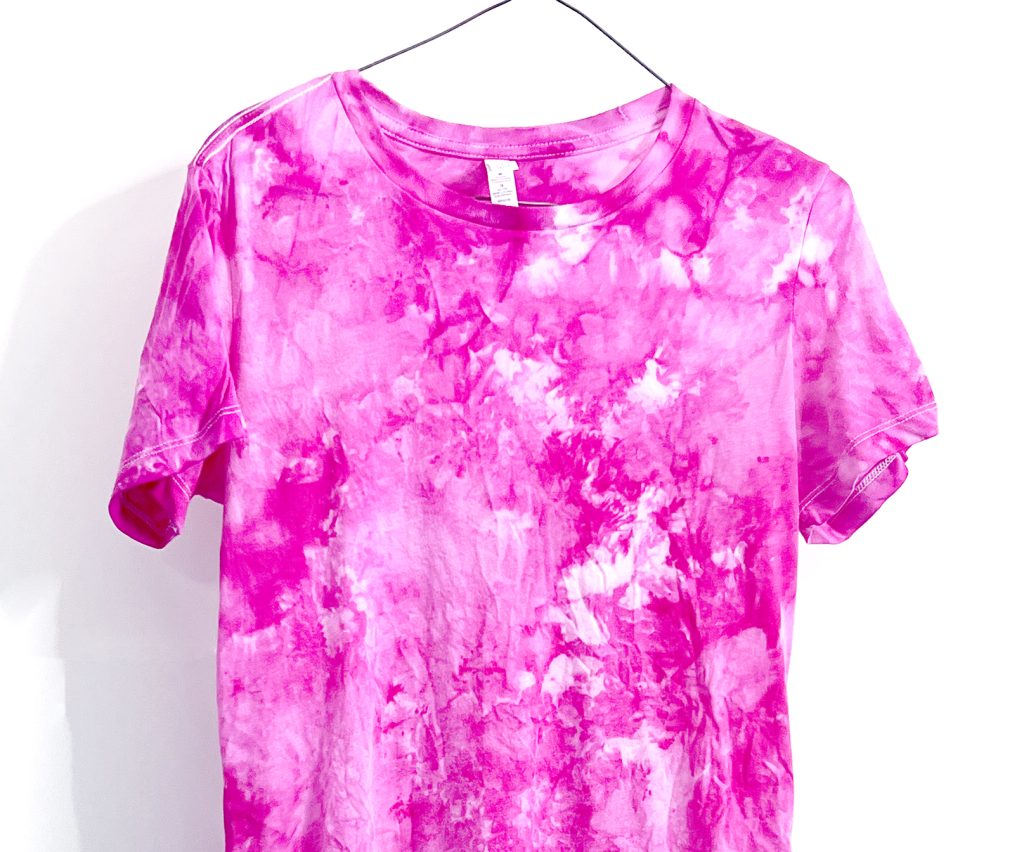
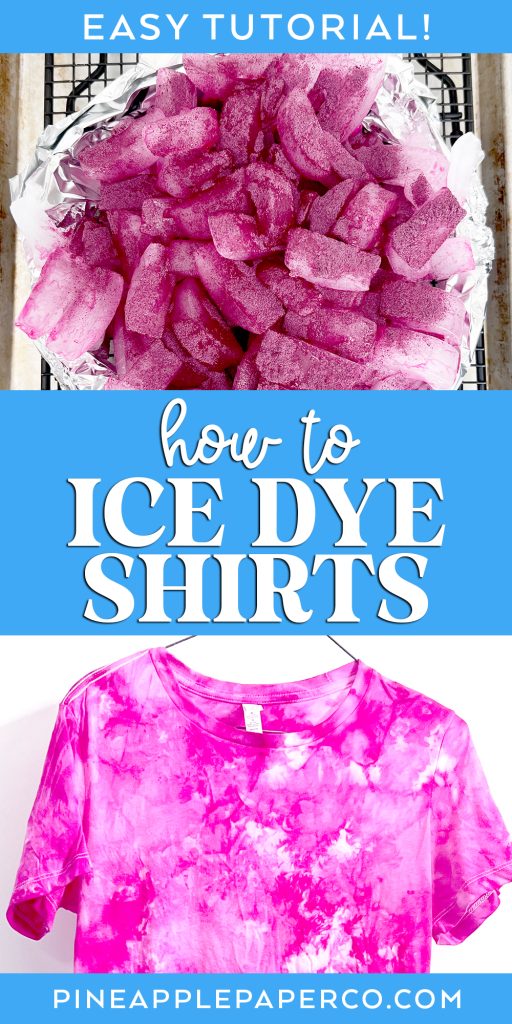
Make unique tie dye shirts with a watercolor effect! If you have wanted to try ice tie dye, you will surprised at how easy it is! Learn How to Ice Dye and get great results the first time!

How to Ice Dye – Easy Tie Dye Tutorial
When you think of tie dye, you may automatically think of colorful spiral designs or other classic tie dye patterns and techniques. Or maybe you hosted a tie dye party for your kids where they happily squeezed colored liquid dye on rubber banded shirts. But have you seen ice dyeing? It’s one of my favorite ways to tie dye, and you will love it too!
Ice dyeing is the process of placing a pile of ice on top of a shirt, then sprinkling powdered dye over the top. As the ice melts, the reactive dyes melt into the shirt with the ice! Once all of the ice has melted you are left with a unique tie dye shirt that may surprise you!
What You Need to Ice Dye a Shirt
You really don’t need a ton of stuff to start ice dyeing! If you already do regular tie dyeing, you should already have everything you need.
Ice Dye Vs. Regular Tie Dye
If you have tried traditional tie dye, you will be shocked at how easy ice dye is! There’s no mixing liquids or messing with squeeze bottles! Instead of creating a liquid dye, you let the dye powder and ice to combine to create a unique mixture. For the most part, you fold and prep your shirt in the same way and can create a ton of different patterns.
However, with ice dye projects you never quite know what you’re going to end up with! Instead of controlling the color application, you let the ice do all of the work. But honestly, that’s the best part about ice dyeing! The colors and results you get are always so much fun!

Easy Steps for Ice Dyeing
Regardless of the dye and fabric you choose to ice dye, the process is the same! Here are the simple steps for ice dyeing:
- Prep your fabric by folding, crumpling, spiraling, or whatever pattern you would like.
- Pile ice on top of the fabric.
- Sprinkle powder dye on top of the ice.
- Allow ice to melt and dye to set.
- Rinse well, and then wash in the washing machine!
I will break down all of these steps to show you how to get the best results out of your ice dye! I’ll also share tips and tricks I’ve learned along the way. Plus, I have gorgeous examples of ice dyed shirts with different colors!
What Type of Fabric is Best for Ice Dye?
In general, natural fibers will produce the best results with ice dyeing. Most fabric dyes react chemically with cotton, linen, silk, bamboo, and other natural fabrics to bond to the material and become color-fast. The dyes won’t fade from the fabric, even after several washes.
I have had incredible results with 100% cotton fabric. I have also tried it with 50% polyester/50% cotton blend shirts. Fabric blends will work, but the colors won’t be as vibrant. Most color samples of fabric dye are shown when used with 100% cotton.
You can also try to ice dye a colored shirt. Just make sure you are thoughtful about your color choices. Read my post on How to Tie Dye a Colored Shirt for ideas!
What Dyes to Use for Ice Dyeing?
Professional fiber reactive dye powder like Procion dyes are the best dyes for ice dyeing. Fiber reactive Procion dyes (also known as Procion MX dyes) are powdered dyes that will take your tie dye and ice dye shirts to a whole new level.
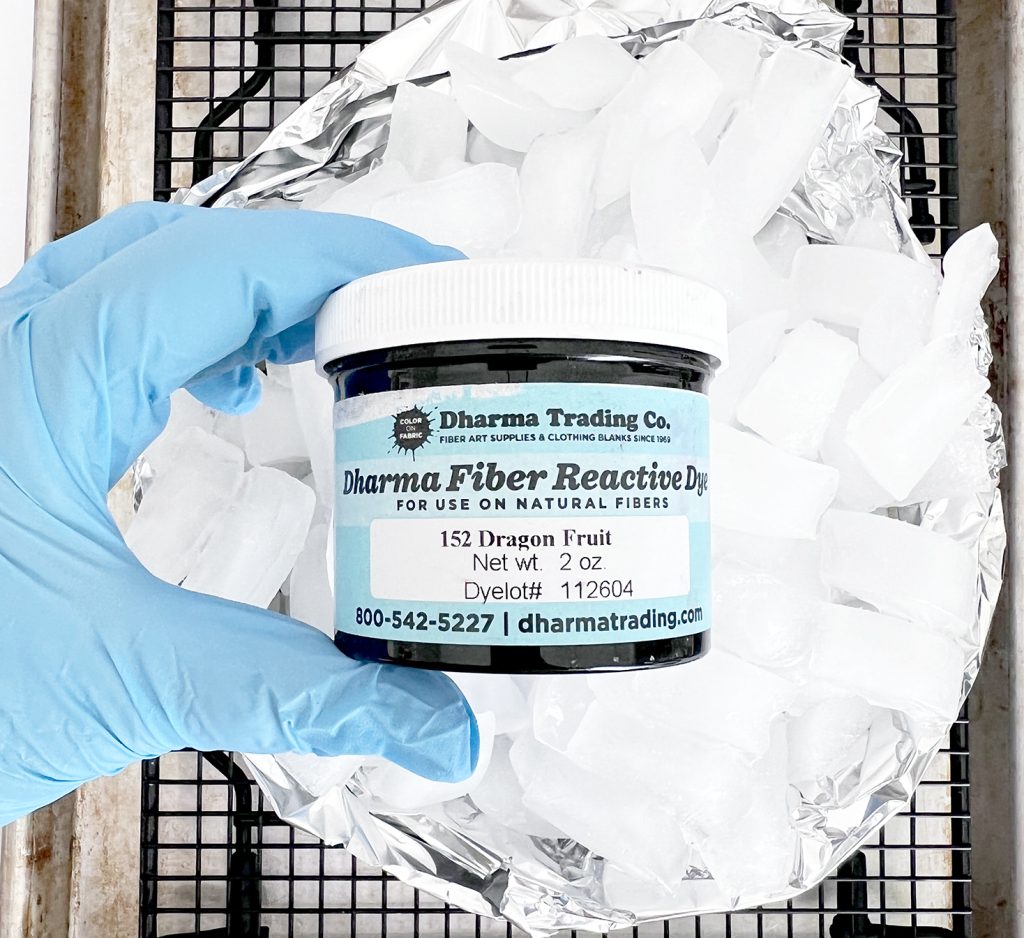
They are permanent, vibrant, and also economical! You can order a LOT of colors, and each container of dye will color a lot of fabric. A little goes a long way! They are the best dyes to achieve the organic watercolor painting effect from the component colors in the pigment. You can buy quality Procion dyes on Amazon or Dharma Trading Co.
Do You Need Soda Ash to Ice Dye?
A soda ash fixative is required for procion dye to work properly. Soda ash is a mild alkali (similar to baking soda) that can be purchased where you find tie dye supplies. The fixative creates the permanent bond with the fabric.
You will also need to use soda ash for regular tie dye. The easiest method is to pre-soak your fabric in a soda ash and water mixture. A general rule of thumb is to use 1 cup of soda ash per gallon of water, which will be enough for about 10 Adult XL shirts.
If you are dyeing a larger amount of fabric, make sure you increase the cups of soda ash to match the gallons of water for your soda ash solution.
Can You Ice Dye With Other Tie Dye Powder?
Yes, you can! Popular tie dye kits (like Tulip Tie Dye) come with powdered dye pre-measured into squeeze bottles. That powder usually contains dye AND soda ash, so you won’t need to buy soda ash separately. Look for “one step” tie dye or “all-in-one” fabric dye.
I have seen people use a tie dye kit for ice dye projects, and they turn out great! You will definitely get different results if you use professional powder dyes. You will get a brighter watercolor look and the color won’t wash out as when rinsing and washing your fabric.
Do You Need to Pre Wash Fabric for Ice Dye?
Before tie dyeing or ice dyeing, it is recommended that you pre wash your fabric. Use a mild detergent and no fabric softeners. Pre-washing will make sure there are no oils or chemicals in your shirt or fabric that will inhibit the dye from adhering to the fiber content.
How to Ice Dye
This a step-by-step tutorial for using Procion Fiber Reactive dyes. Eliminate the soda ash solution step if you are using one step dyes.
First, set up your work area. Cover your entire work space – I use a large roll of paper or a plastic table cloth. It’s important to wear gloves (rubber gloves are fine) when working with soda ash and fabric dyes. It is recommended to wear a dust mask when working with powdered dyes.
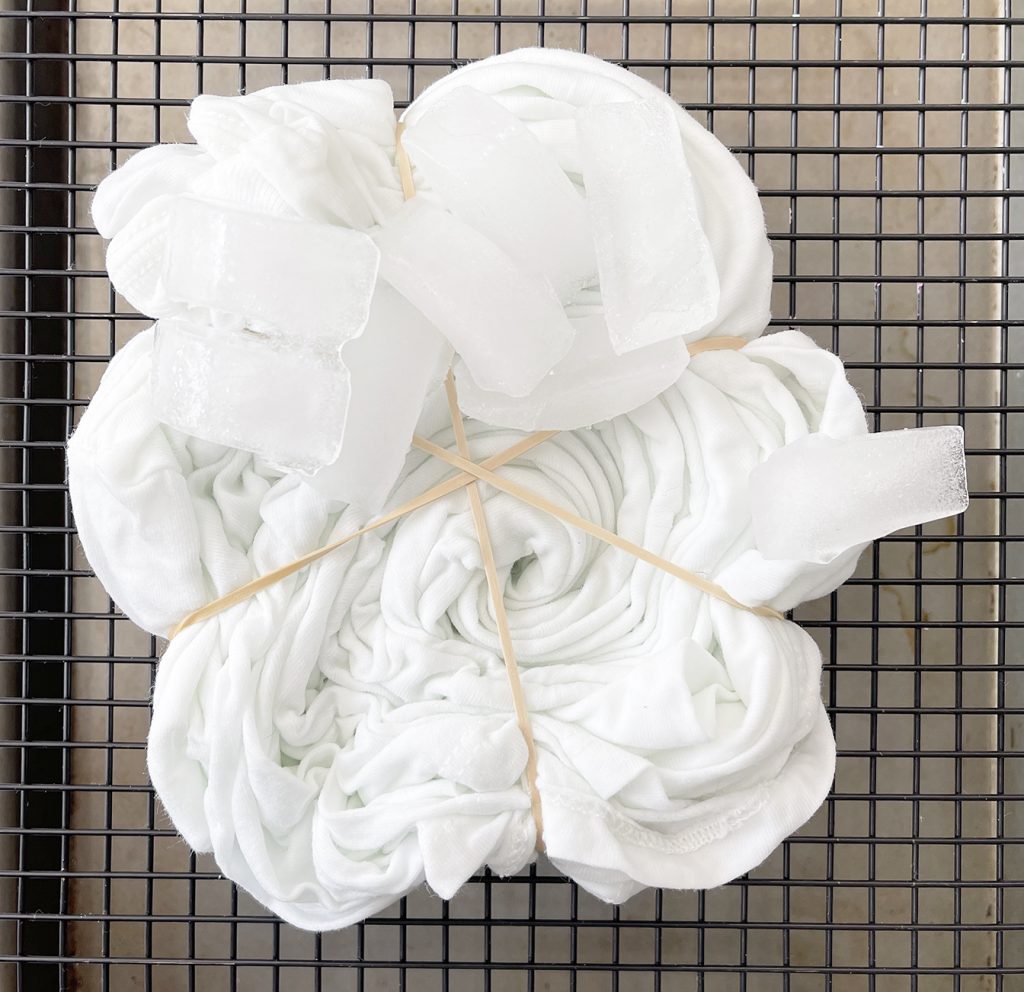
Fold or crumple your shirt in your desired pattern. Secure with rubber bands for a tight pattern. Try a spiral pattern, sunburst pattern, or one of the other patterns from my Tie Dye Patterns post.
I think it is easier to fold or create different patterns when the shirt is damp. You can pre-soak your shirt with water, or do it after you have soaked it in soda ash. Just wring out all of the excess water before you start folding.
Prep your soda ash solution by mixing the powder and hot water in a large container or plastic tub, depending on how many shirts you need to soak. Make sure all of the soda ash is completely dissolved.
I mix my solution in a large plastic bowl or large Ziploc container. If you want to soak a lot of shirts at one time, consider using a bucket or plastic bin.
Soak your shirts for at least 5 minutes in the soda ash solution, or up to 15 minutes. Wring out all of the excess solution (you can reuse the liquid for more shirts).
Set the folded shirt on top of a cooling rack (or other type of wire rack or metal rack) on a baking sheet or in a plastic tub. You just need somewhere for the water from the melted ice to drain. It will collect in the bottom of the tub or sheet pan instead of sitting in the shirt.
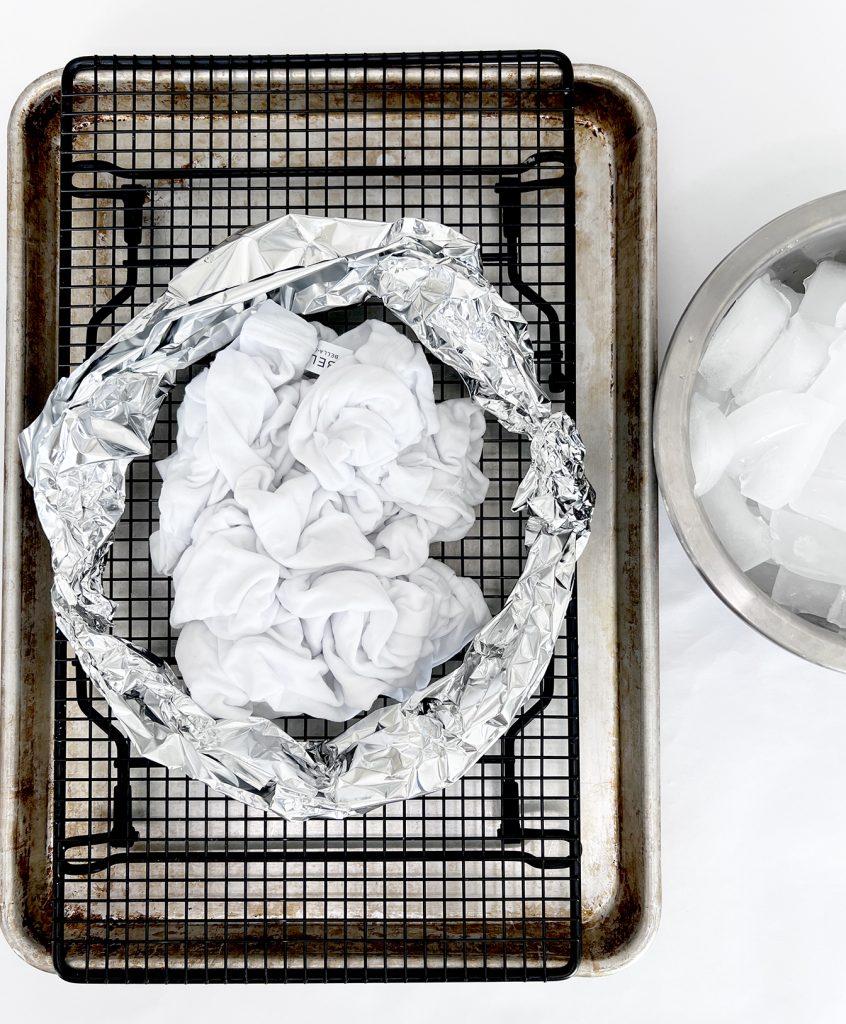
To help contain the ice while it is melting, I sometimes use aluminum foil to create a “wall” around the shirt.
Place ice on top of the shirt. Remember, the amount of ice you use is the amount of water that will soak into the shirt. More ice = more water and more distribution of color. Less ice = less water and more white areas on the shirt. I prefer to create a large pile of ice so that I know the amount of water produced during melting will soak through the shirt.

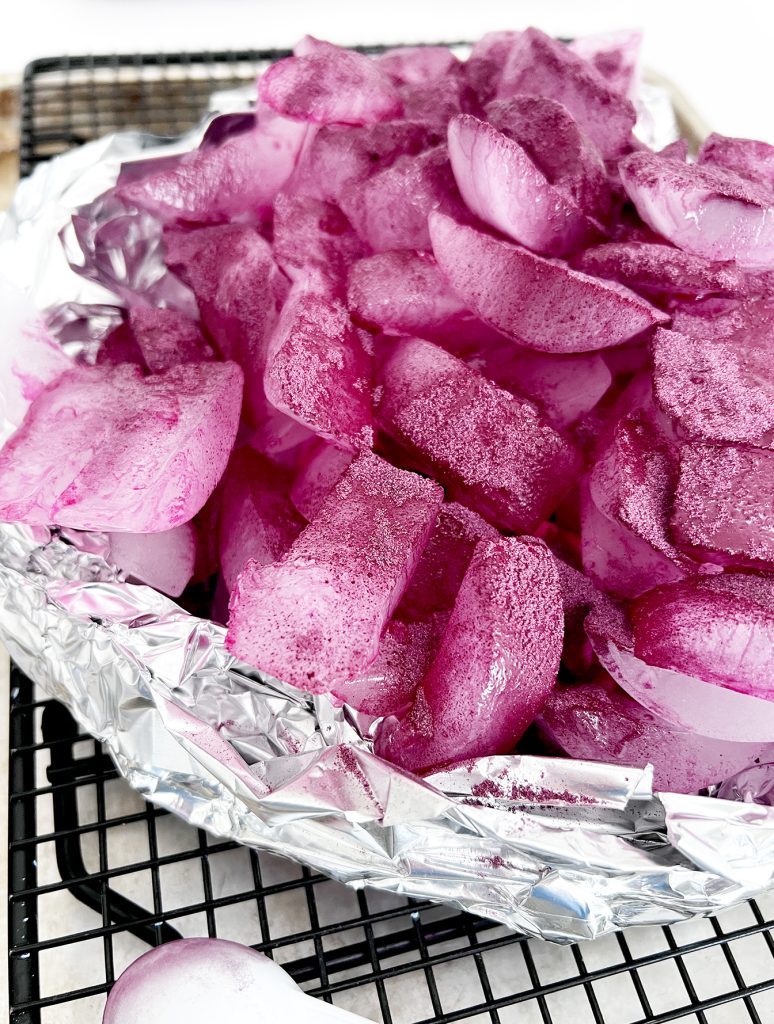
Sprinkle dye powder on top of the ice to cover.

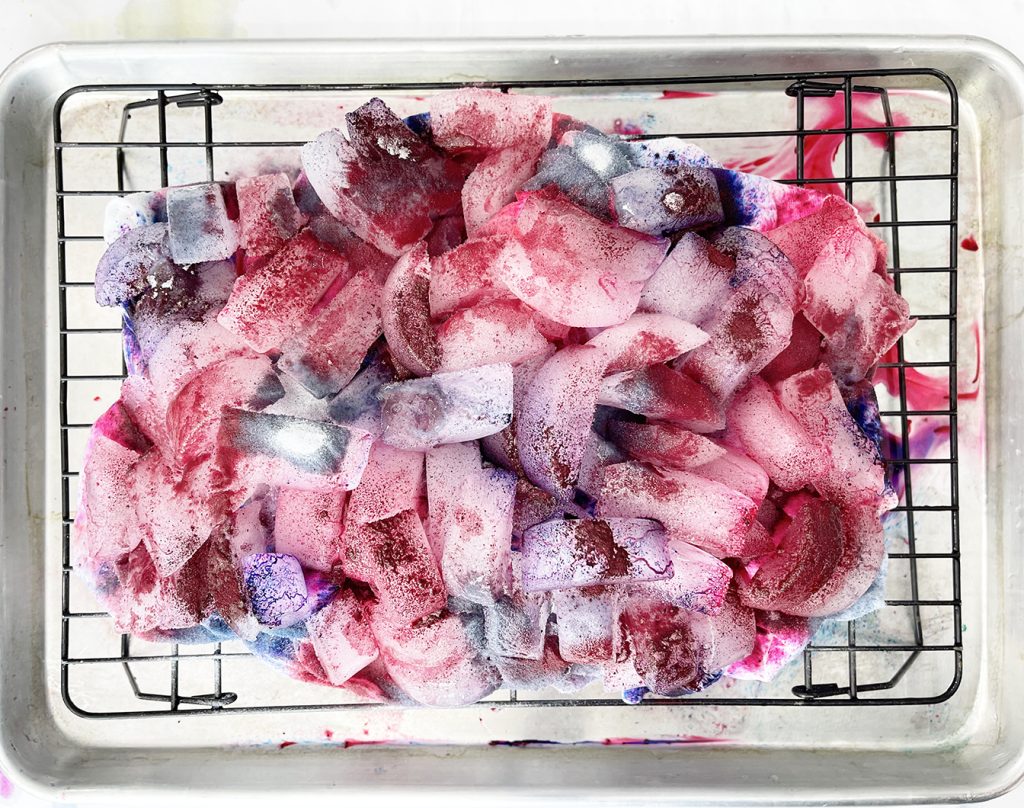
That’s it! Allow all of the ice to melt and the dye to soak into the fabric. Let sit for at least a few hours, or up to 24 hours for maximum color adherence.
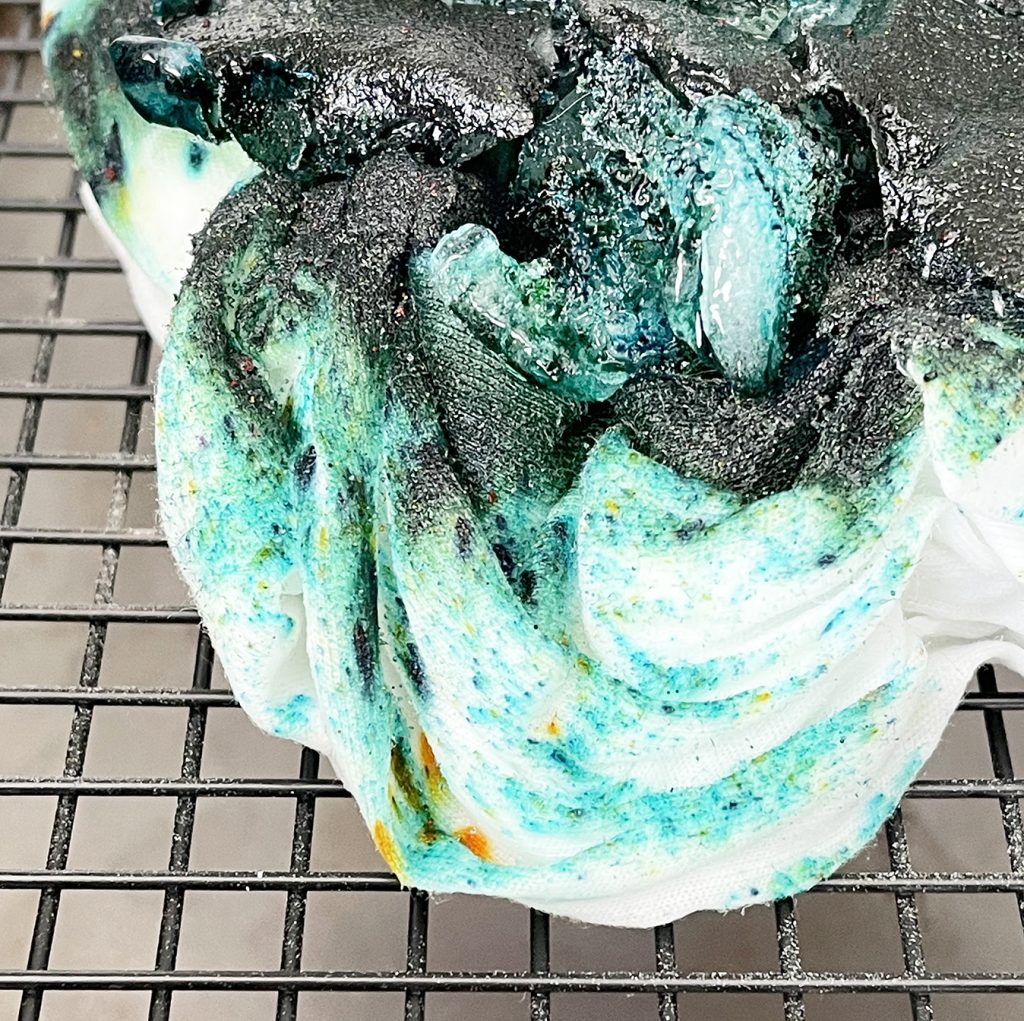
As the ice melts, you may notice new colors that appear! That is the dye colors that are combined to create the final color if you were to mix the dye with liquid.
After the color is set, rinse until all of the extra dye is washed from the shirt, or until the water runs clear. Squeeze out the excess water. Wash in the washing machine on a cold water cycle.
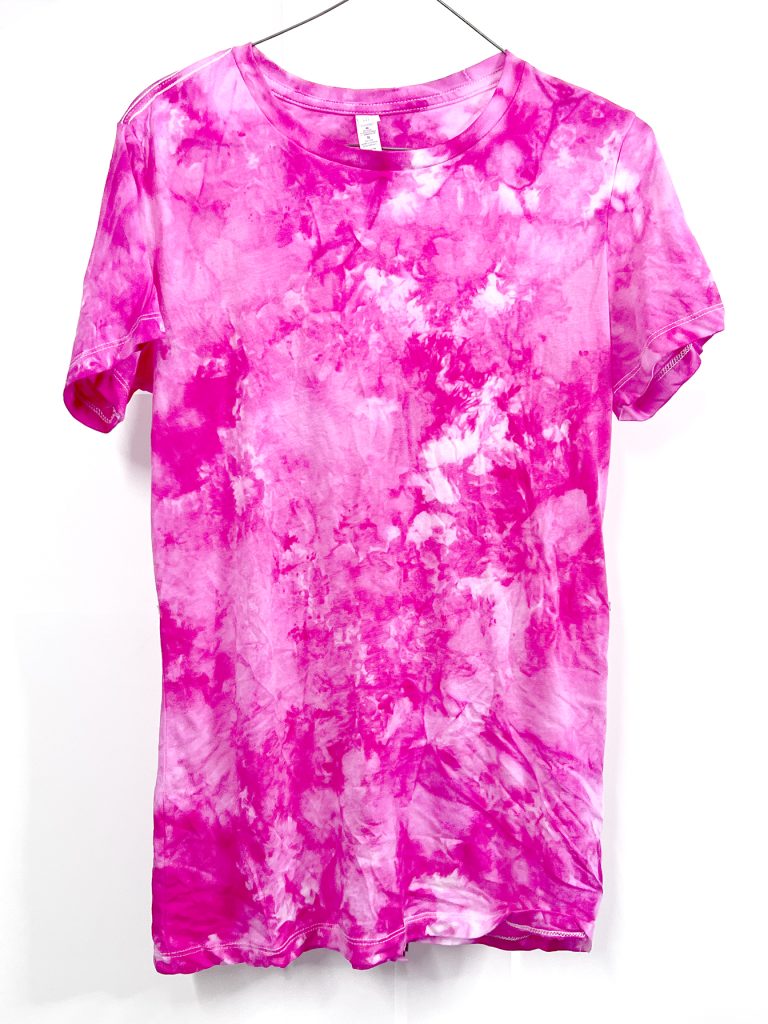
Your ice dye fabric is ready to use or wear!

Tips for Ice Dyeing Shirts and Other Fabric
Don’t worry if you see “strange” colors coming out! The colors that make up the final color may come out when ice dyeing!
Try using more than one color of powder form dye! To choose the best colors for ice dyeing, it’s a good idea to consult a color wheel to find complementary colors. You can also research the color of dyes you are using to find out the component colors.
White fabric does produce the best results with ice dye. But don’t be afraid to try a different color fabric. You might be surprised at how well a colored shirt would turn out!
Allow your ice dye to set before rinsing. This is especially important when using different dye colors than procion dyes. Some dyes may require up to 24 hours of time to fully adhere to the fabric.
If you need/want to speed up the melting process, you can squeeze warm water or heat the ice with a heat gun. It will change the final product, but can produce a cool result! Experiment with the amount of ice, heat, or amount of dye.
I have a large collection of white tees that I use for tie dyeing and ice dyeing, but you can definitely use other blanks! You can try socks, pillow cases, hats, and more!
Hopefully you are ready to try ice dye! The watercolor results are such a different look and I love it!
More Tie Dye Techniques and Posts:
Make sure to pin an image from this post to your favorite DIY or craft board on Pinterest!


ABOUT CHARYNN
Hi, y’all! I’m Charynn, the owner and designer of Pineapple Paper Co. I’m a mom of four kids (two girls and two boys) living in Pittsburgh. I love hand lettering, anything southern, cocktails, and of course, pineapples! I am excited to share my SVG files, printables, and craft projects with you! The pineapple is a symbol of hospitality, and I welcome y’all to my little corner of the internet. Read more…