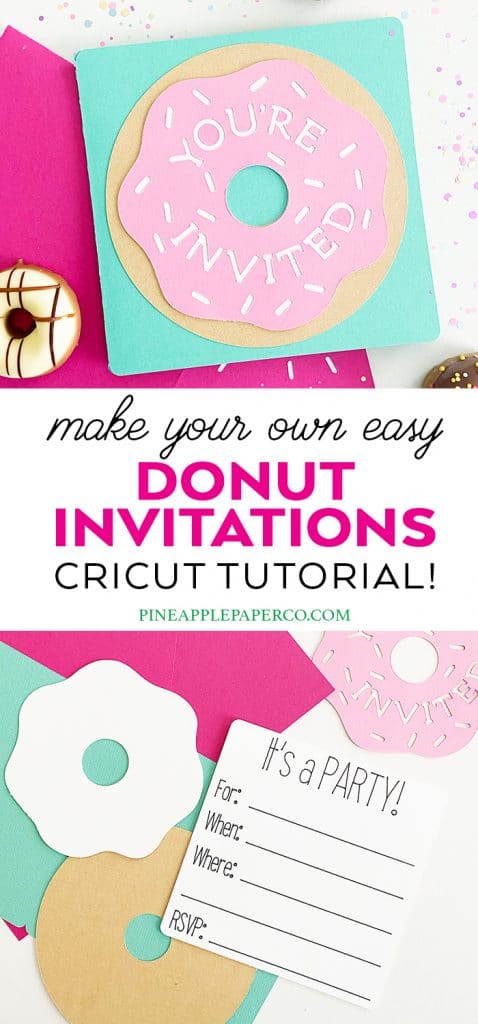
DIY Donut Invitations
This post and the photos within it may contain affiliate links. As an Amazon associate I earn from qualifying purchases. If you make a purchase through one or more of the links, I may receive a small commission at no extra cost to you.
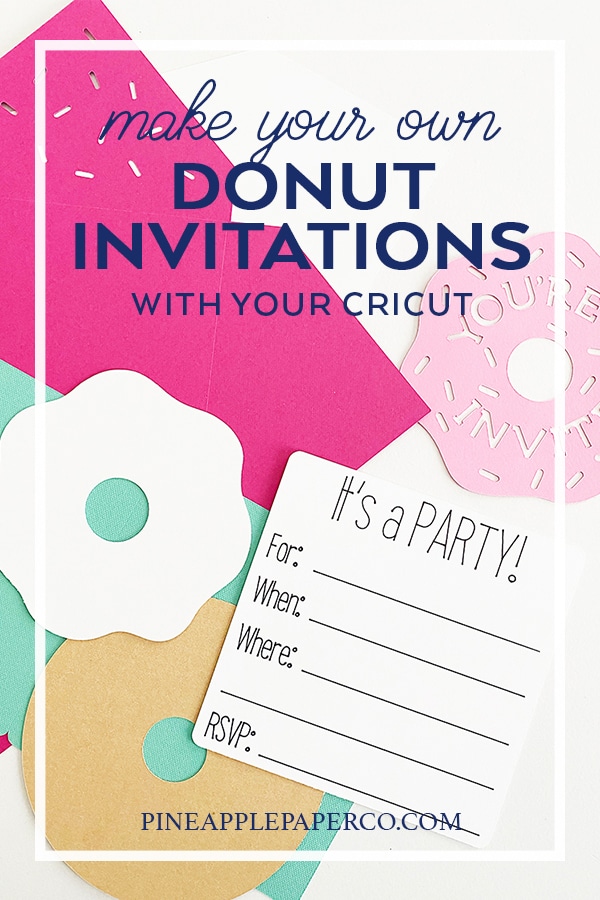
I love making cards with my Cricut, and these donut birthday invitations are so cute and easy to make! Any kid (or adult!) would love having this sweet DIY addition to their party. Keep reading to learn how to make your own DIY Donut Invitations!
Planning a donut birthday party has been at the top of my list for a while. A donut themed party is great for so many ages – toddlers (“Donut Grow Up”) the whole way up to teenagers (or adults!) I’ve seen really cute donut themed baby showers, and I’ve even made a Donut Grow Up SVG cut file perfect for baby onesies.
Making your own party invitations can be an easy addition to your DIY Donut Party Decorations. Even if you’re buying some of the party decor, consider making custom donut themed invitations to match the party colors. It will add a personalized touch to the party – and who won’t love getting a homemade card?! I even made the envelope!
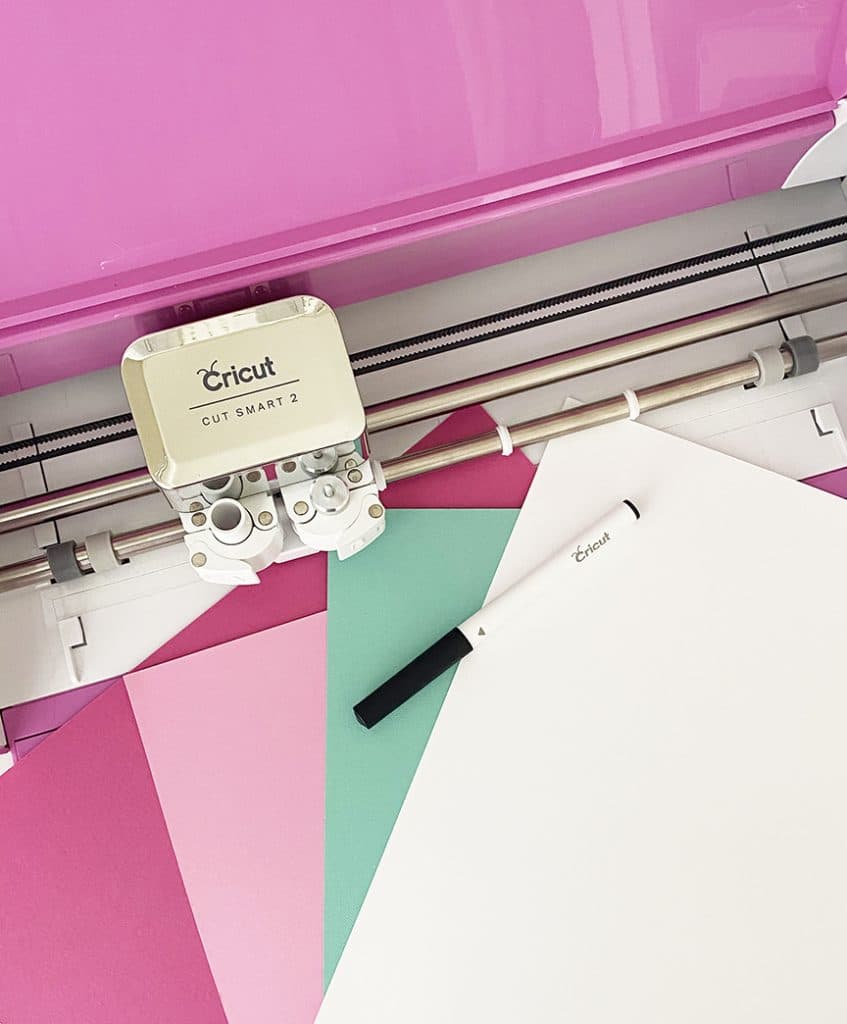
I made these donut party invitations using my Cricut Explore Air 2 machine, but you can easily use a Cricut Maker. I am joining a bunch of my blogging friends this week to share party ideas that you can make with your Cricut machines, so make sure you check out the end of the post for all of the links to the other DIY party ideas.
What You Need to Make Donut Birthday Invitations
Here are the supplies that I used. You can adjust the cardstock colors to match your party theme!
- Cricut Explore Air 2 or Cricut Maker
- Standard Grip Mat
- Fine Point Blade (comes standard with a machine)
- Cricut Pen, Black .4mm
- Cricut Scoring Stylus (or Scoring Wheel, if you’re using the Maker)
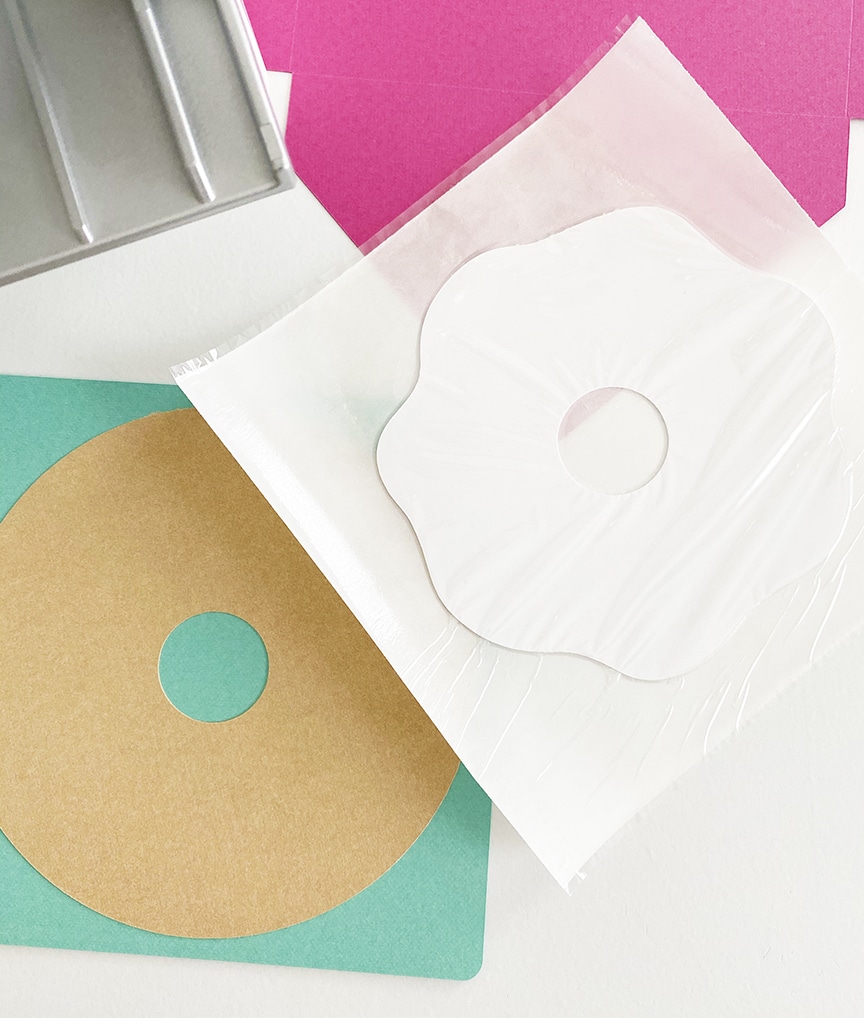
- Cardstock in White, Tan, Pink, Fuchsia, and Aqua
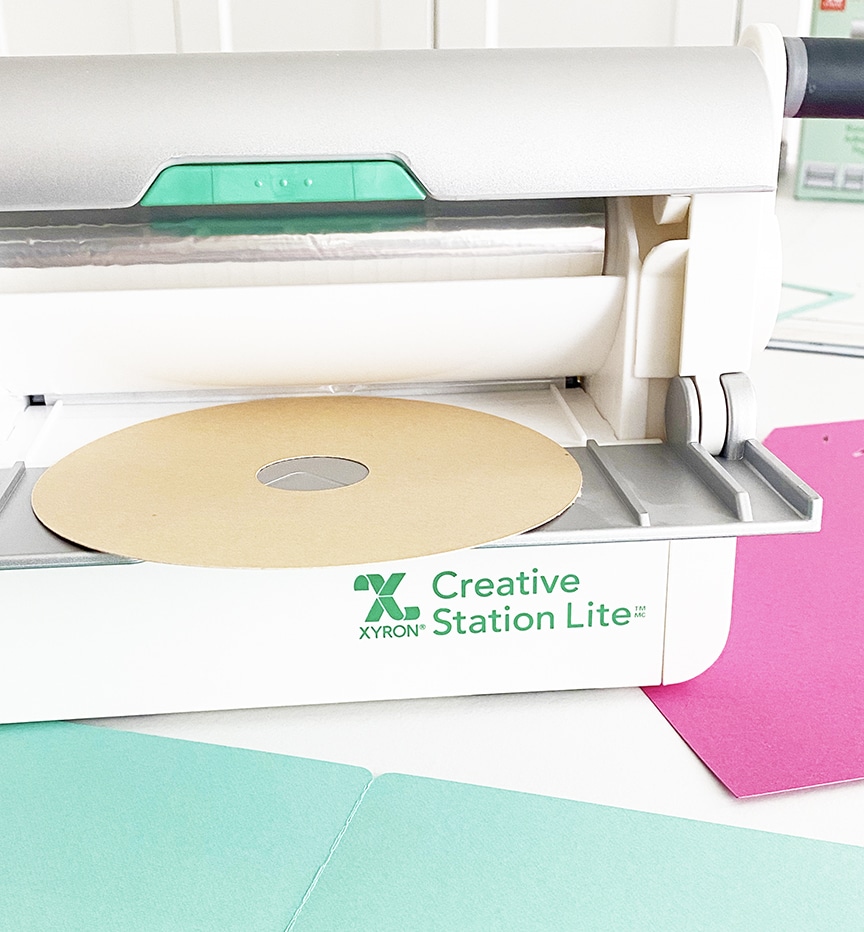
- Xyron Creative Station with Adhesive Cartridge (the easiest way to glue the pieces of the card together!)
- Glue Stick (for the small pieces) – Beacon Zip Dry is another GREAT alternative
- Permanent Adhesive Tape Runner (for the envelope)
There are many kinds of adhesives to use when you’re making a card or invitation, and I switch up what I use a lot – except for the Xyron. If you haven’ tried using a Xyron Creative Station to adhere cardstock pieces together, you are missing out! It’s a game changer!
How to Make a DIY Donut Party Invitation
I found a great donut card template already on Cricut Design Space. I edited the design to reduce the colors of paper, plus changed the wording. I used all Cricut Design Space fonts and images, so you can access and use my edited version of the invitation template using the link below:
DIY Donut Invitation in Cricut Design Space
I designed the inside of the card to include generic text that everyone can use to fill out the card after making it. Feel free to edit the text to include your specific party invitation – less writing for you! The donut invitation is otherwise sized and ready to go, so if you don’t want to make any changes, just click the green “Make It” button.
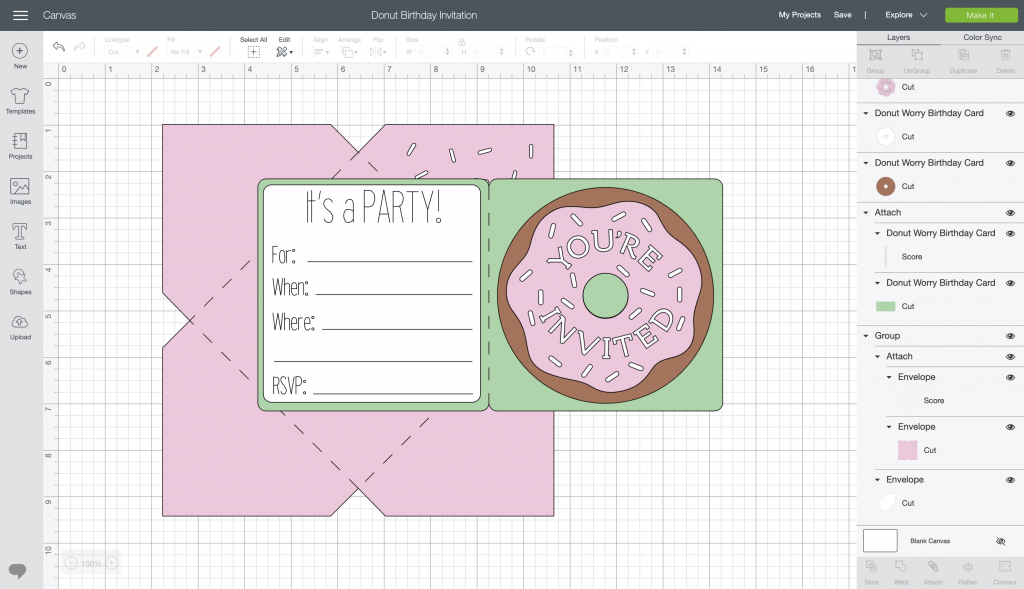
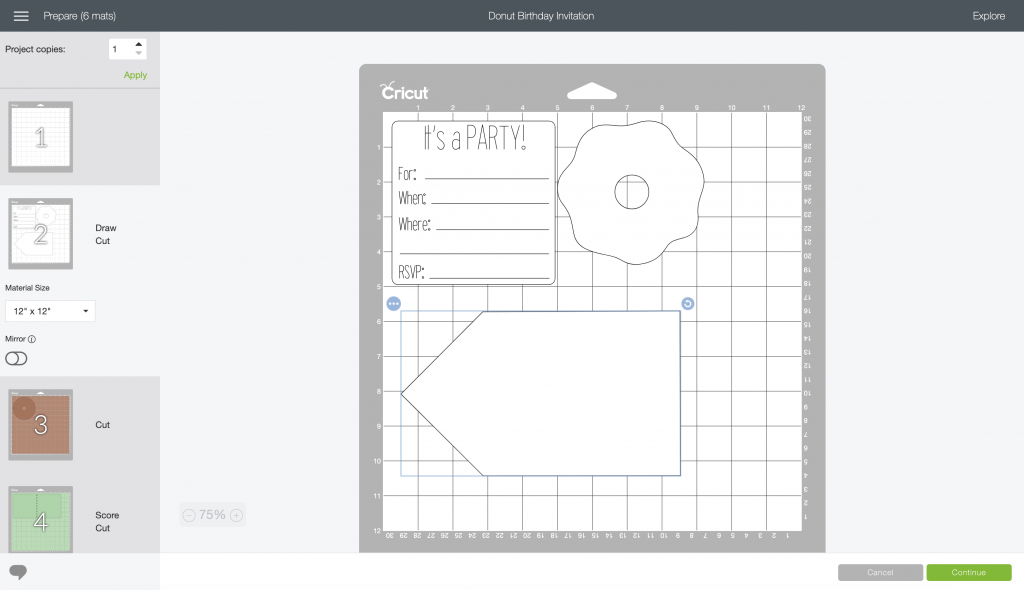
You’ll notice that here there two white cardstock mats – the envelope insert that is on the first mat will actually fit on the other white cardstock mat, so I moved it. Here’s what it look like to start – click the envelope piece, the the “…” button and select “move to another mat.”
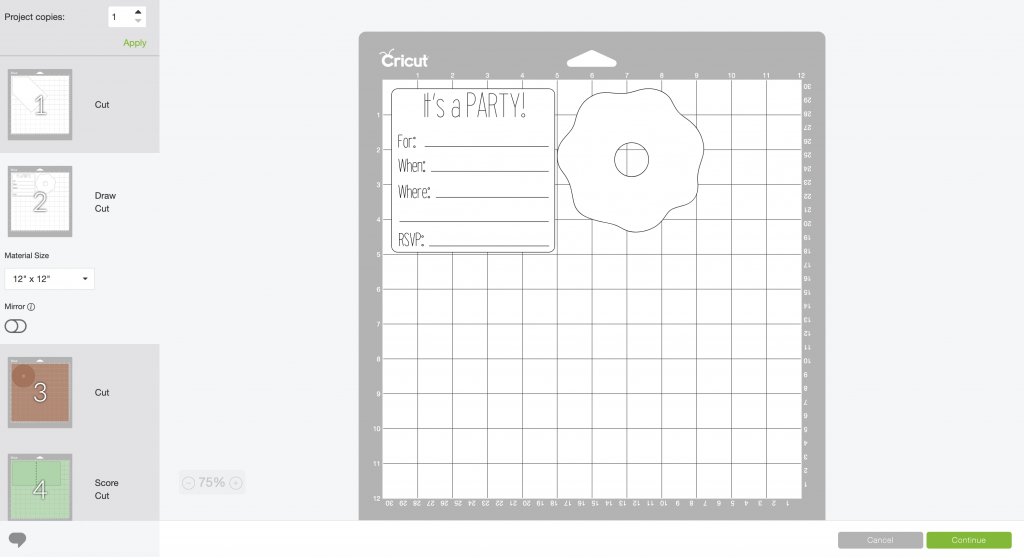
Then drag and rotate the envelope insert to the bottom of the other white mat so it fits. It will save you a piece of white cardstock for every invitation you make!
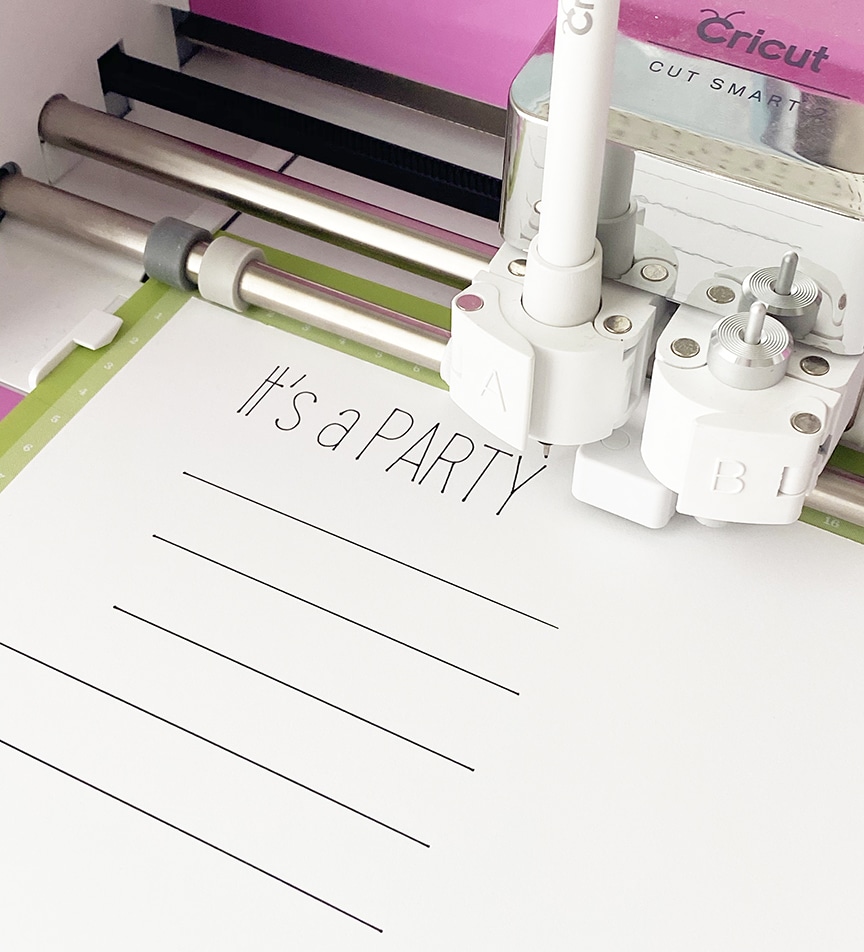
The first part of the invitation the Cricut will work on is the white cardstock, so make sure you add your Cricut pen into the “A” side of the tool holder. It will do all of the work for you!
Proceed with the rest of the mats until all of the pieces of your donut invitation are finished.
How to Assemble the DIY Donut Invitations
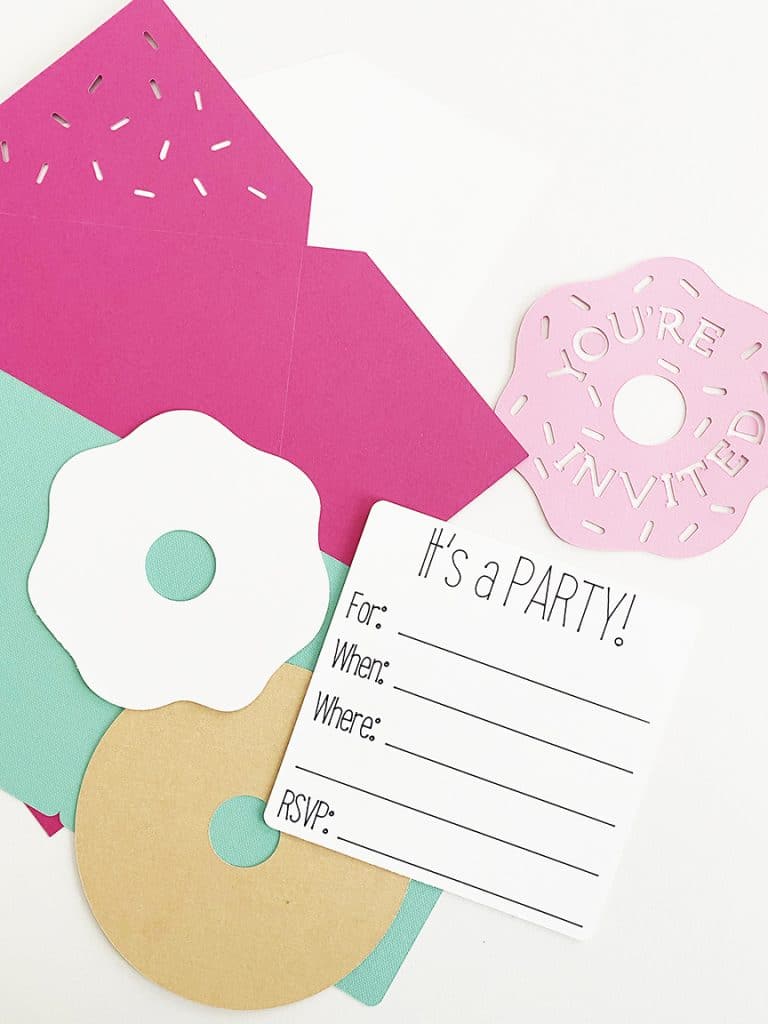
I started by assembling the donut for the front of the card. Use the Xyron Creative Station to apply adhesive to the pieces of the donut. Don’t worry, if you need to learn a little more about using the Creative Station – I have a couple of videos on my YouTube channel that show it in action!
Since the insides of the letters (O, R, and D) are really small pieces, I used a glue stick to apply them to the card.
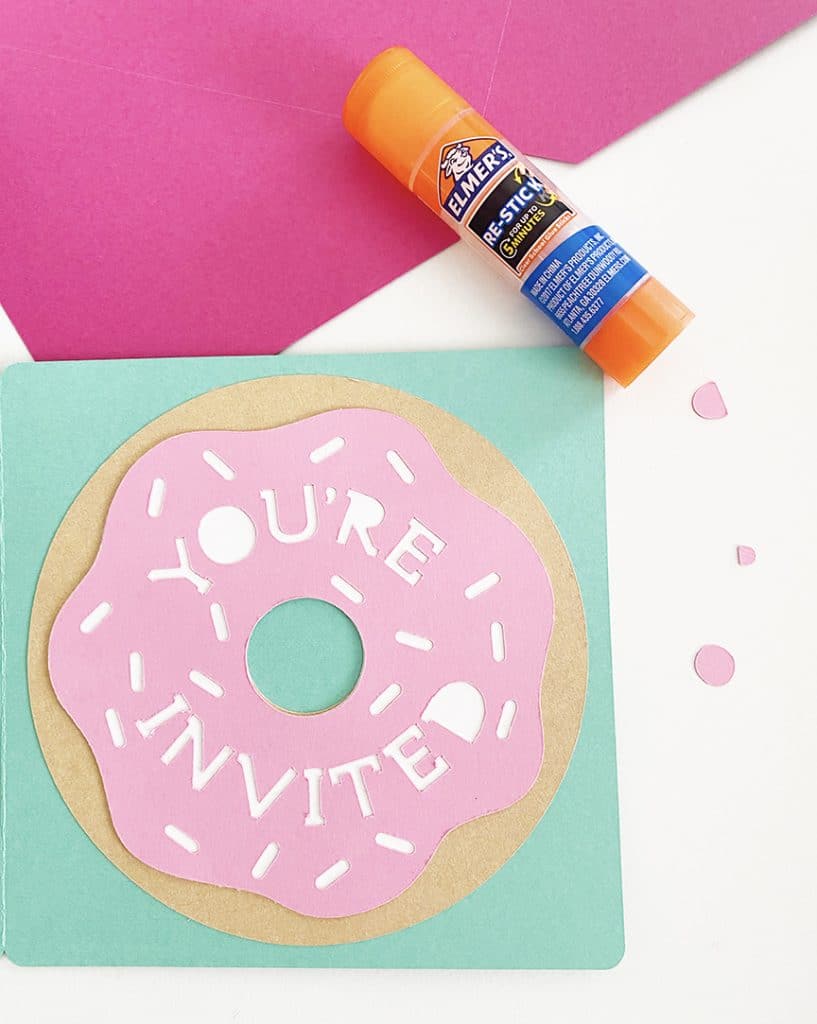
Once your donut is glued to the front of the card, apply adhesive to the white inside piece of the card (the part with the writing) and place it inside the card.
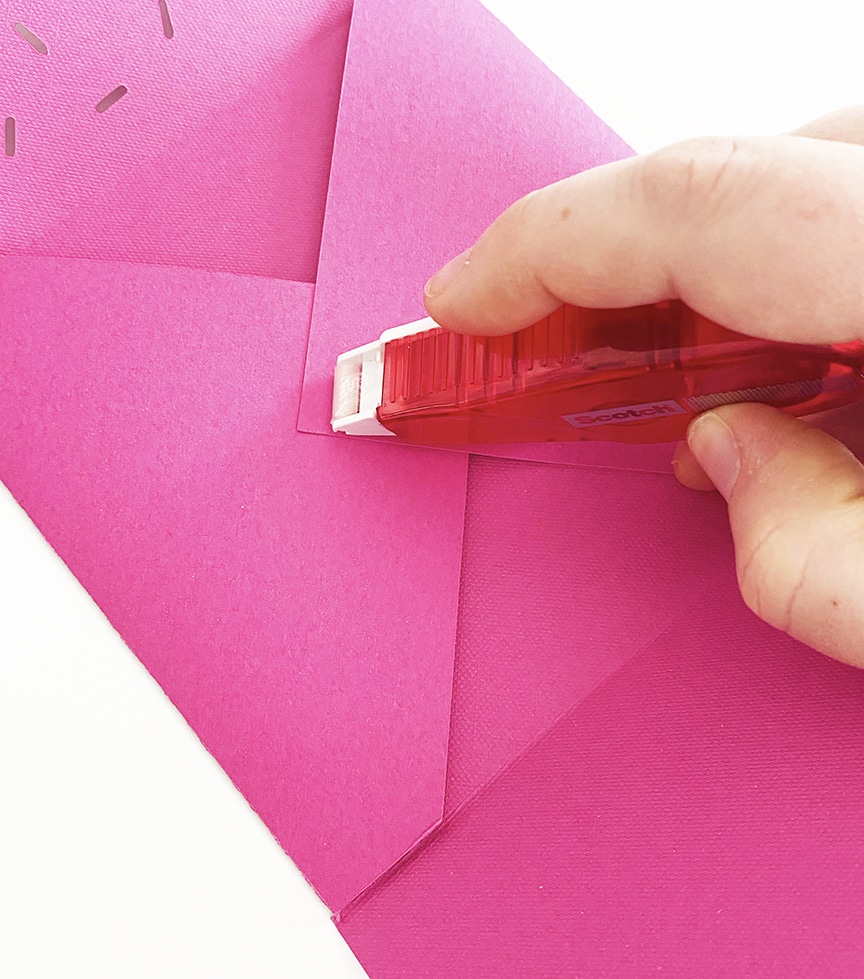
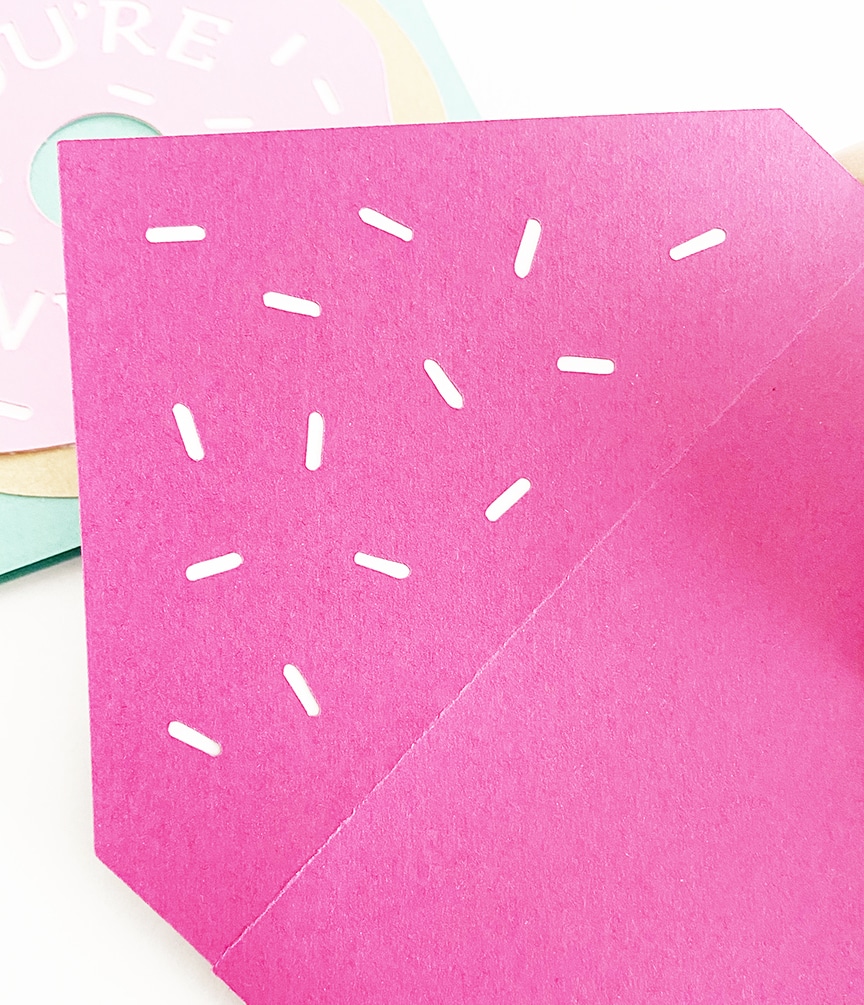
Assemble the envelope: Since the fold lines are scored, carefully fold the flaps of the envelope towards the center. Use a double sided tape runner to glue the flaps together. I like using the tape roller because there’s no drying time!
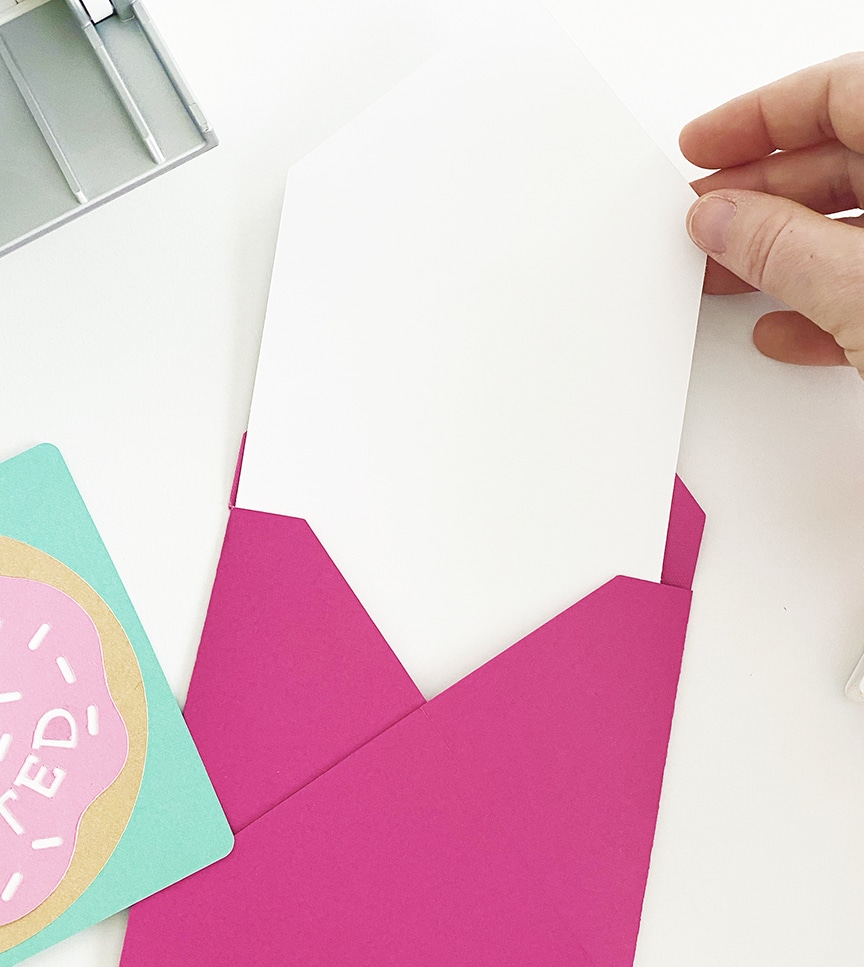
Slide the white envelope liner into the envelope and attach with the tape roller.
Look at the cute sprinkles cut into the flap!
Fill out the details of the donut card and place it in the envelope. You’re done!

I’ve made other handmade cards with my Cricut machines – get the templates and make your own!
- Handmade Christmas Cards with Cricut Explore Air 2
- DIY Christmas Cards with Cricut Maker
- Cricut Handmade Halloween Cards
- Handmade Valentine’s Day Card with the Cricut Explore Air 2
- How to Make DIY Cards with Iron On Vinyl
LATEST POSTS:
- Wicked Coloring Pages to Print for Free
- Free Thanksgiving Turkey Coloring Page Printable
- Free Printable Thanksgiving Meal Planner & Grocery List
- xTool M1 Ultra Beginner’s Guide and Review
- Free Best Dad Ever Father’s Day Coloring Page
Check out all of the Cricut Party Ideas:
Pin DIY Donut Birthday Invitations


Where do you buy those colors of cardstock?
These are from cricut.com 🙂