Cricut Joy Christmas Card SVG
This post and the photos within it may contain affiliate links. As an Amazon associate I earn from qualifying purchases. If you make a purchase through one or more of the links, I may receive a small commission at no extra cost to you.
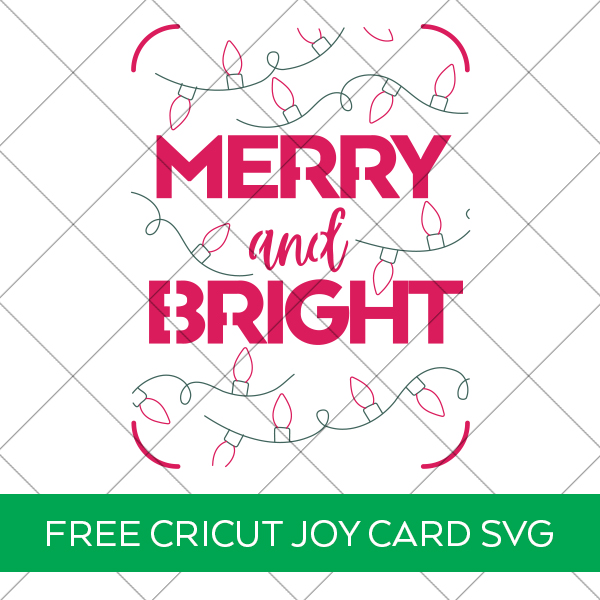
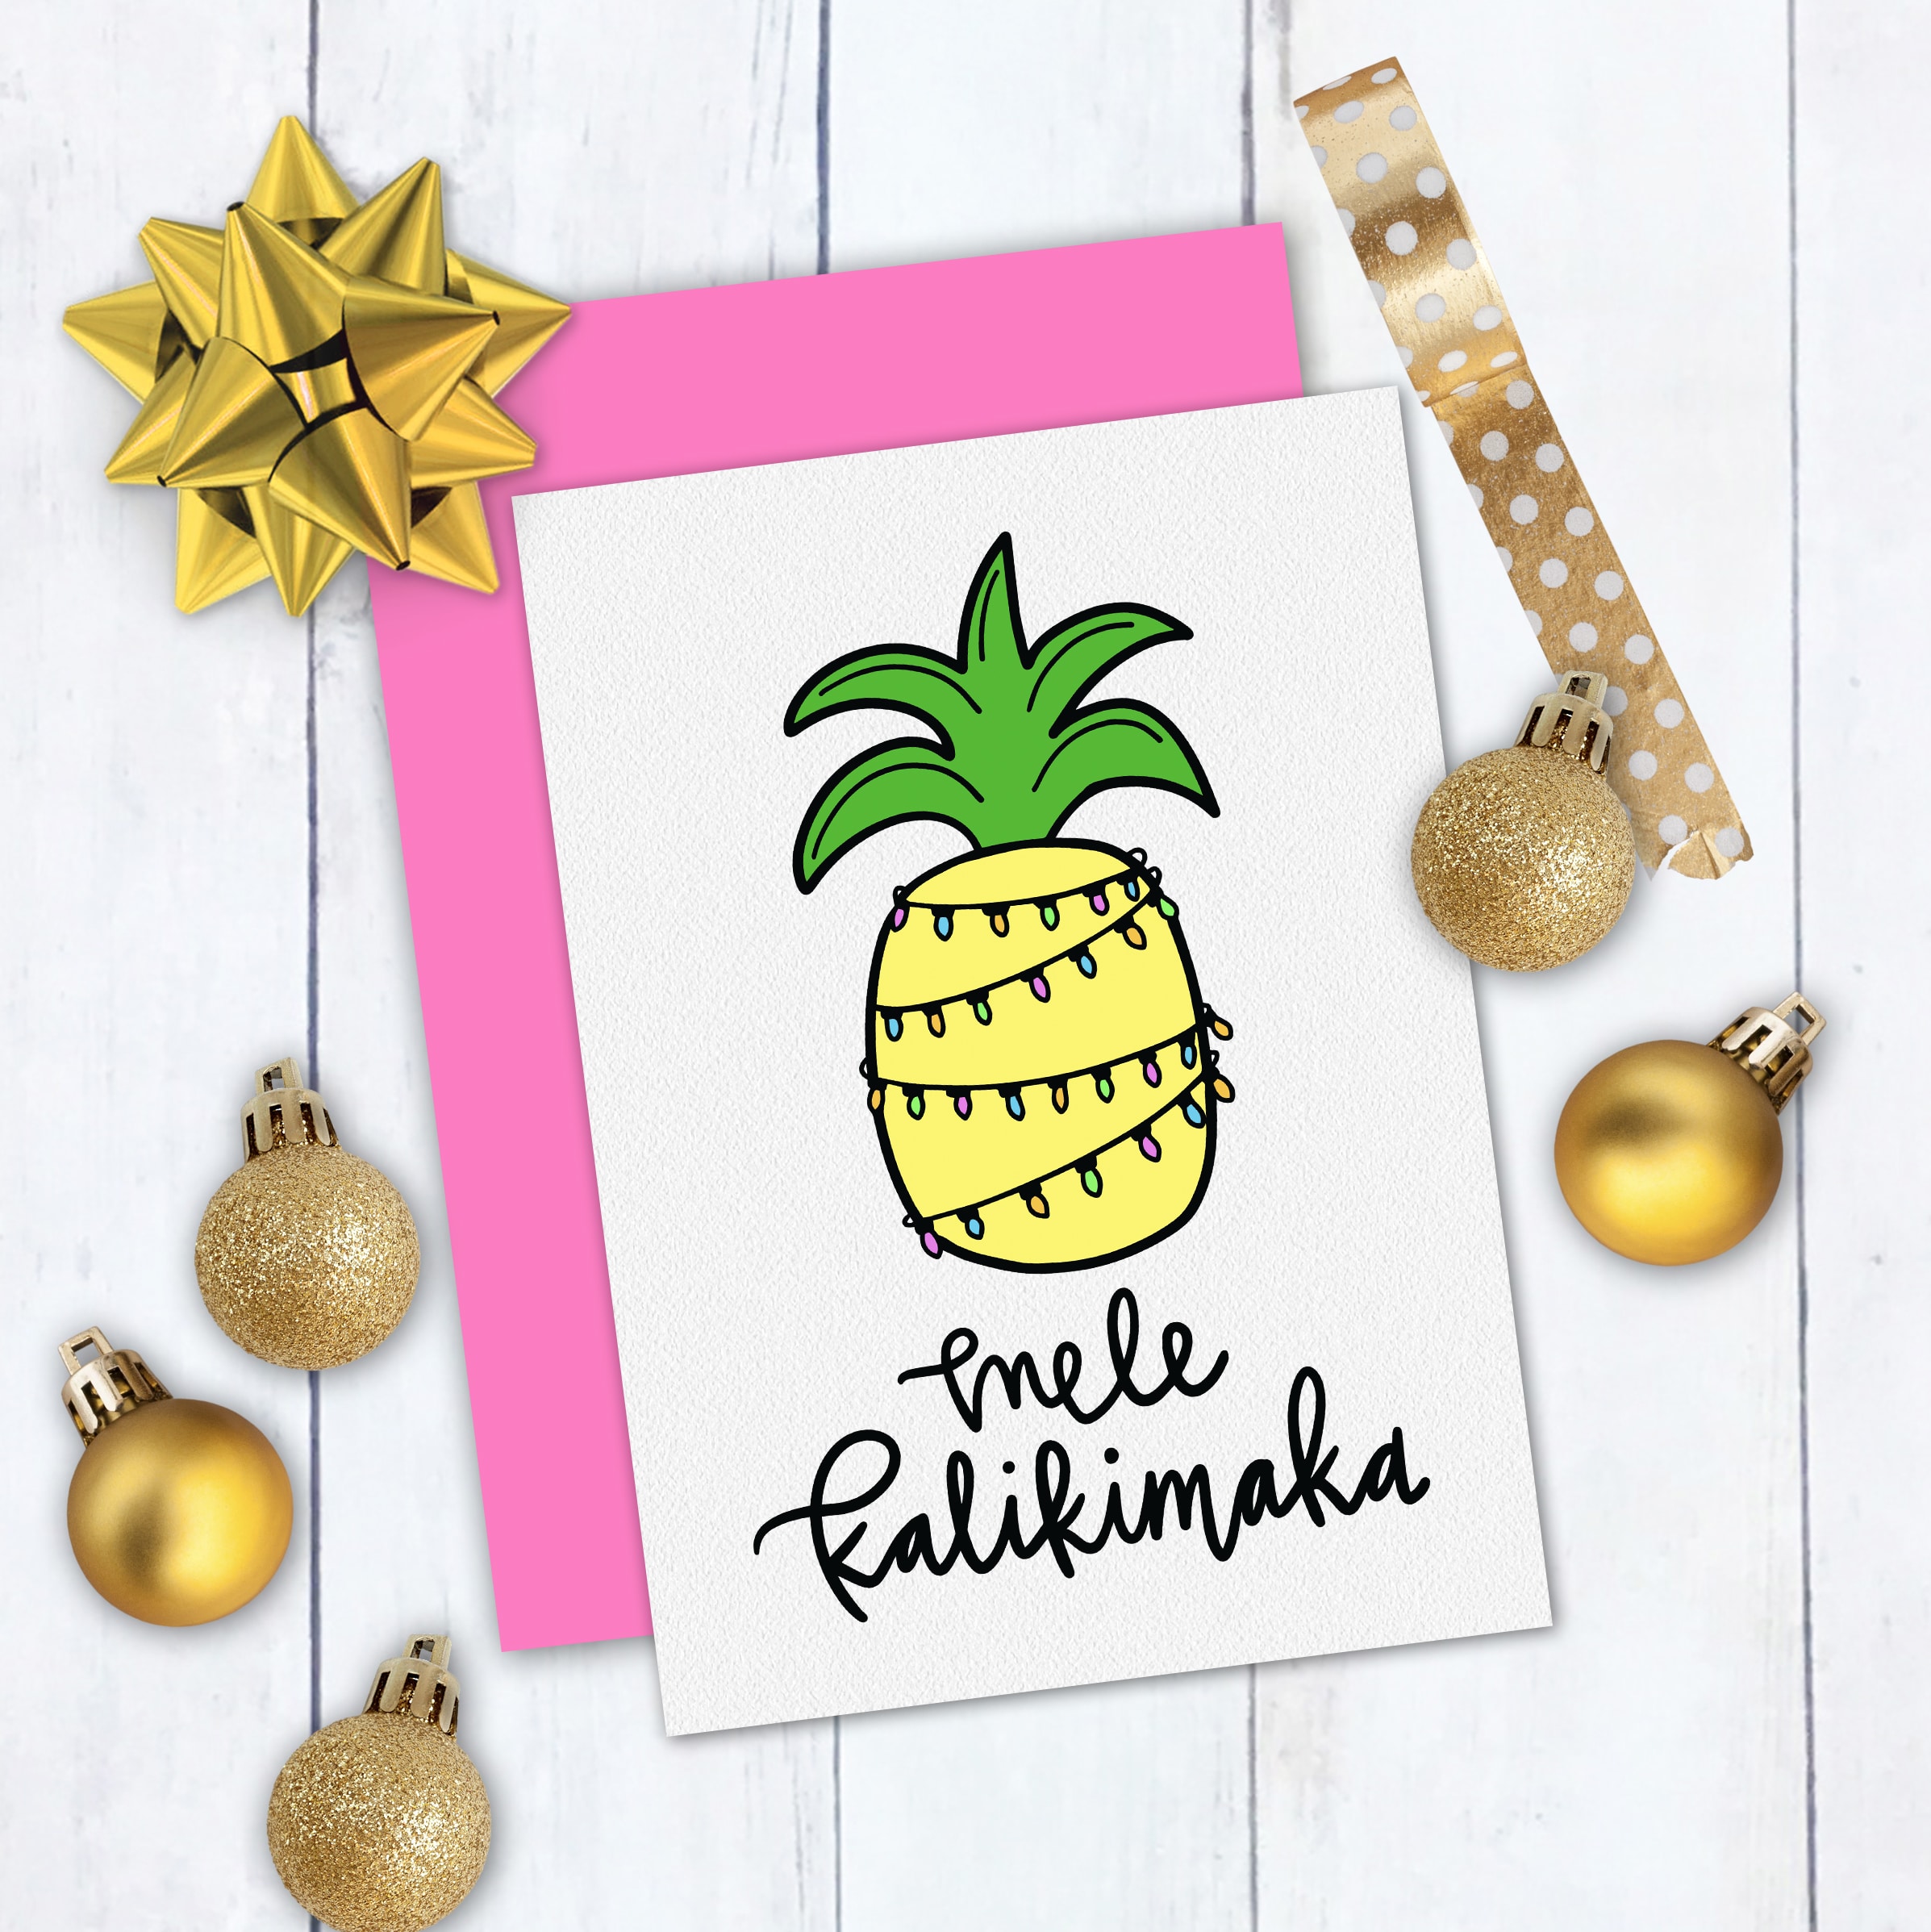
Make an easy handmade Christmas card with your Cricut Joy! Download this FREE Cricut Joy Christmas Card SVG and make a Merry and Bright Christmas card using Cricut Blank Insert Cards!
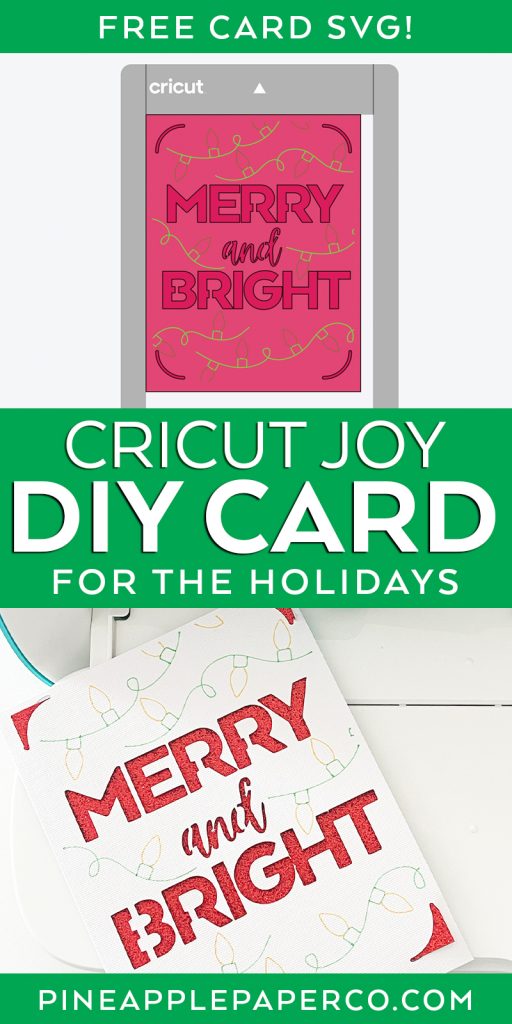
I make handmade holiday cards for some of my close family and friends every year, and my Cricut machine is my favorite card-making sidekick. In years past, I’ve made DIY Christmas cards with my Cricut Maker, Handmade Cards with my Cricut Explore Air 2, and I’ve loved them all! It’s no secret that I love using the Cricut Blank Insert Cards to make EASY cards with my Cricut Joy, so I designed a “Merry and Bright” Christmas Card SVG so you can make one too!
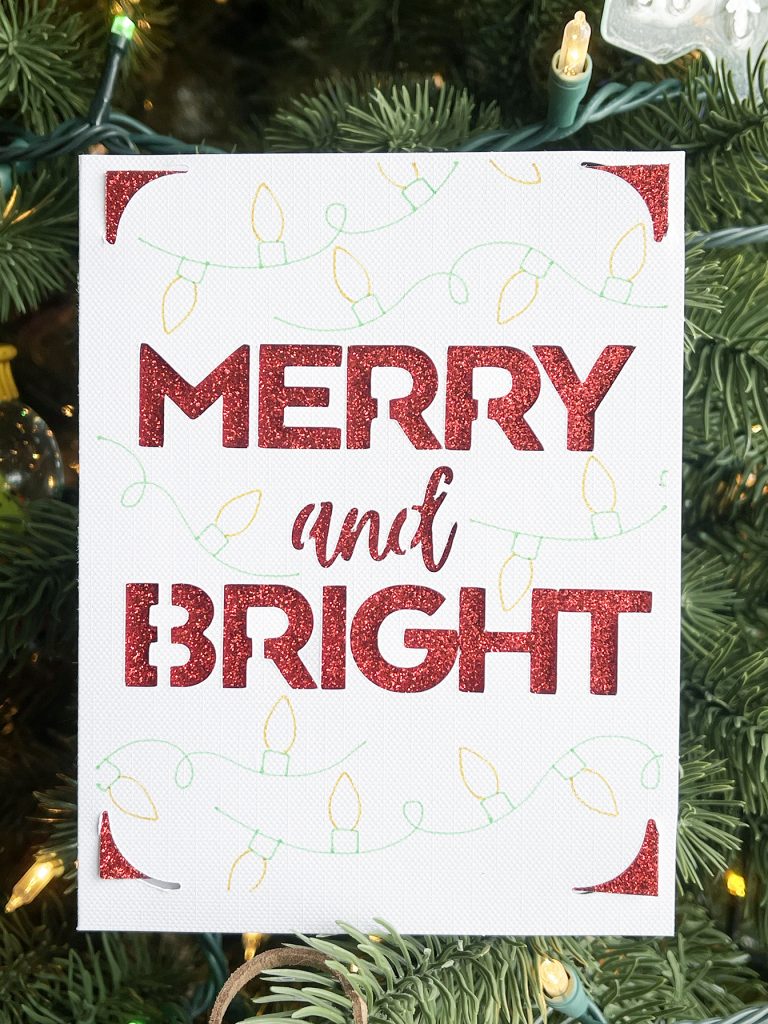
I make cards ALL of the time with my Cricut Joy machine. I use them for birthdays, anniversaries, thank you cards, and more! With the wide array of Cricut Joy Blank Insert Cards, there’s tons of options. I just picked up an insert card set that includes glitter inserts, and I knew they would be perfect for Christmas cards!
Supplies You Need to Make a Cricut Joy Christmas Card
- Cricut Joy
- Cricut Joy Card Mat
- Blank Insert Cards
- Cricut Joy Glitter Gel Pens
- Cricut Joy Fine Point Pens
What Size are Cricut Blank Insert Cards?
You can definitely use any paper you would like for the card! The blank insert cards just make it REALLY fast and easy. You can precut your own paper to size and still use it with the Cricut Joy, or use the Free Christmas Card SVG to make an insert card with the Maker or Explore Air series!
Card Size: 8.5 x 5.5″ (folded size: 4.25 x 5.5″)
Insert Size: 4 x 5.25″
How to Make a DIY Christmas Card with Cricut Joy
If you’re new to using SVG files with your Cricut machine, make sure you read my full post on How to Upload an SVG to Cricut Design Space.
If you’re a beginner, you can see the full tutorial here: DIY Cricut Joy Halloween Card. If you’re a little more experienced, you will be able to follow the highlights below!
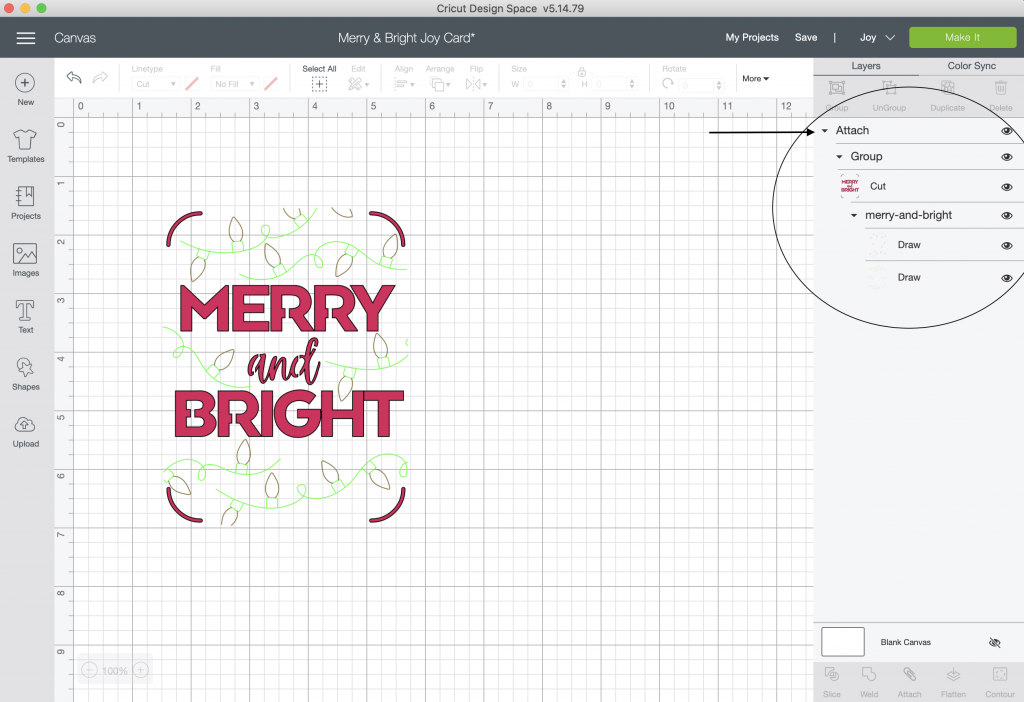
Upload the Merry and Bright Card SVG into Design Space. Make sure that you have “Joy” selected as your machine (it’s in the top right corner). That setting will make sure that your card is sized appropriately for the machine you’re using.
Double check that the size of the image is 4″ wide. That will guarantee that the image will fit on your insert card.
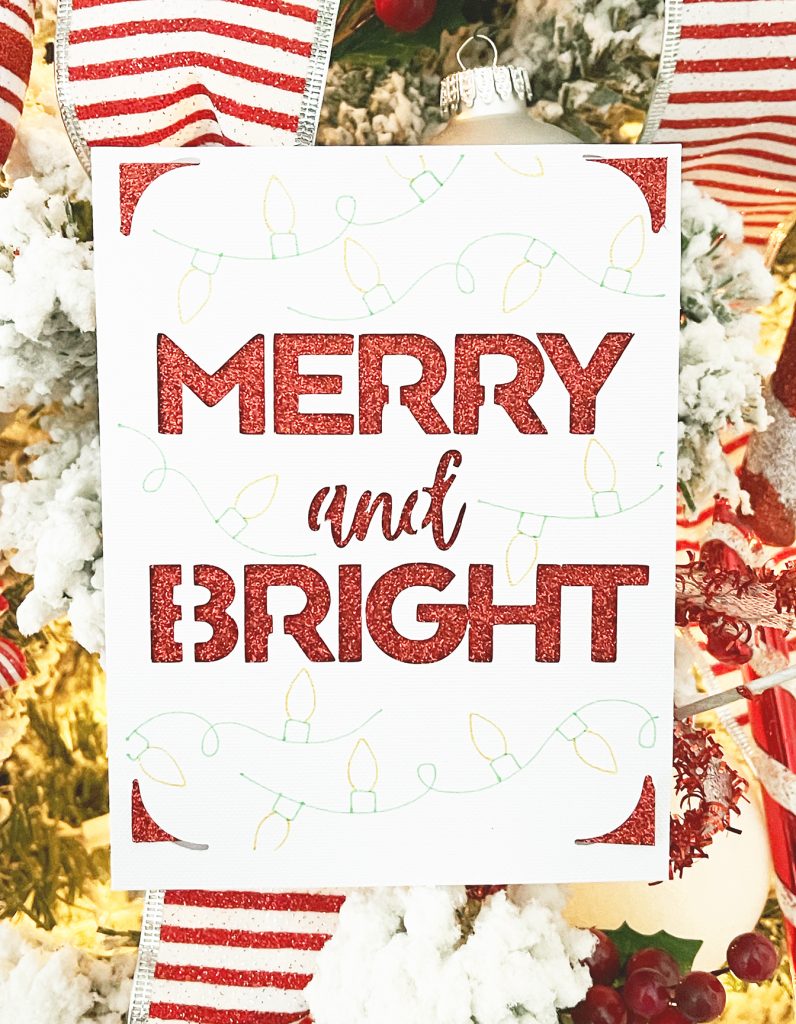
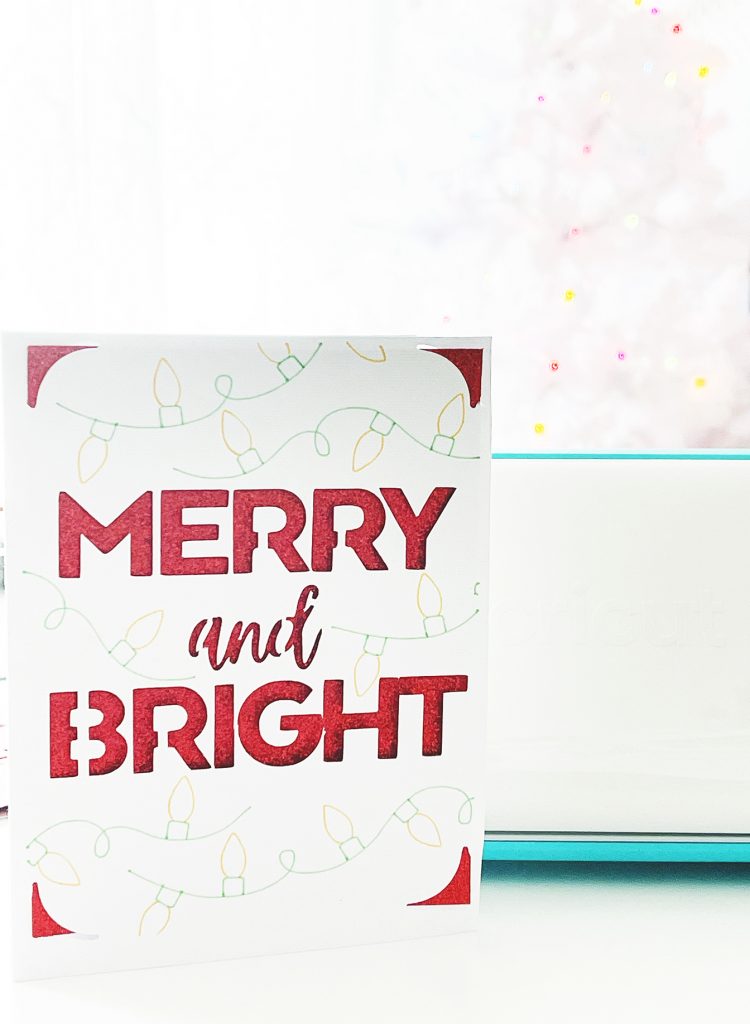
Next, change the two line layers to “Draw” instead of “Cut.” Then, select the pen colors from the dropdown for each line layer. I used a green pen for the light string, and gold glitter gel pen for the lights.
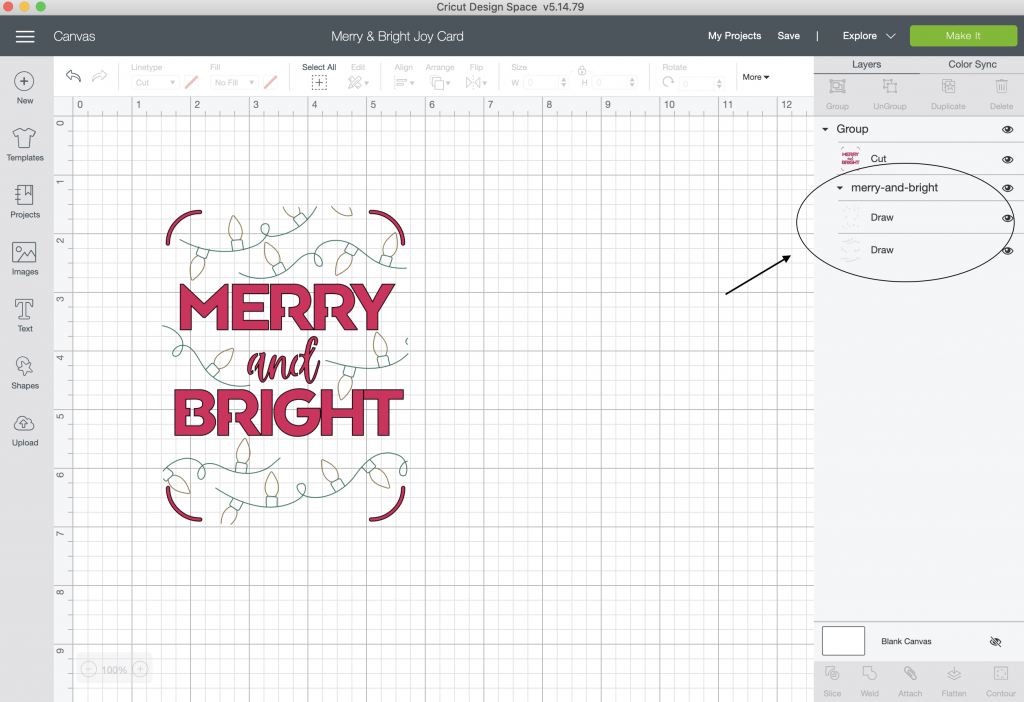
Then “ATTACH” all of the layers:
Click the green “Make It” button, and select “Card Mat” on the next screen.
Make sure that the card size is 4.25″ x 5.5″.
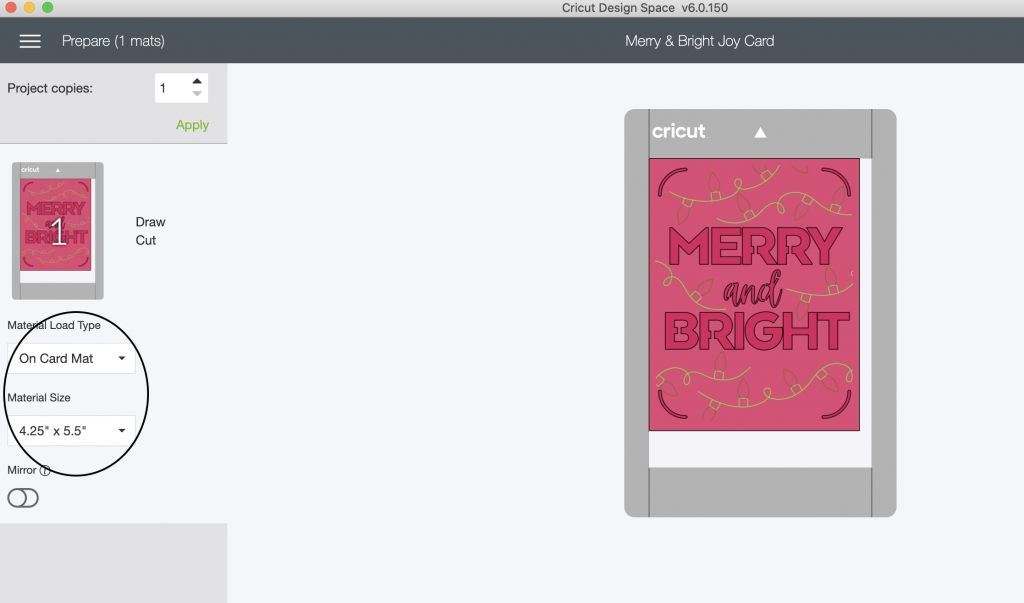
Select “Insert Card” as your material. Follow the onscreen instructions to switch between the pen colors and the fine point blade.
When the card is finished, unload the mat and carefully peel up the front of the card from the mat. Slide the insert into the slots and you’re done!
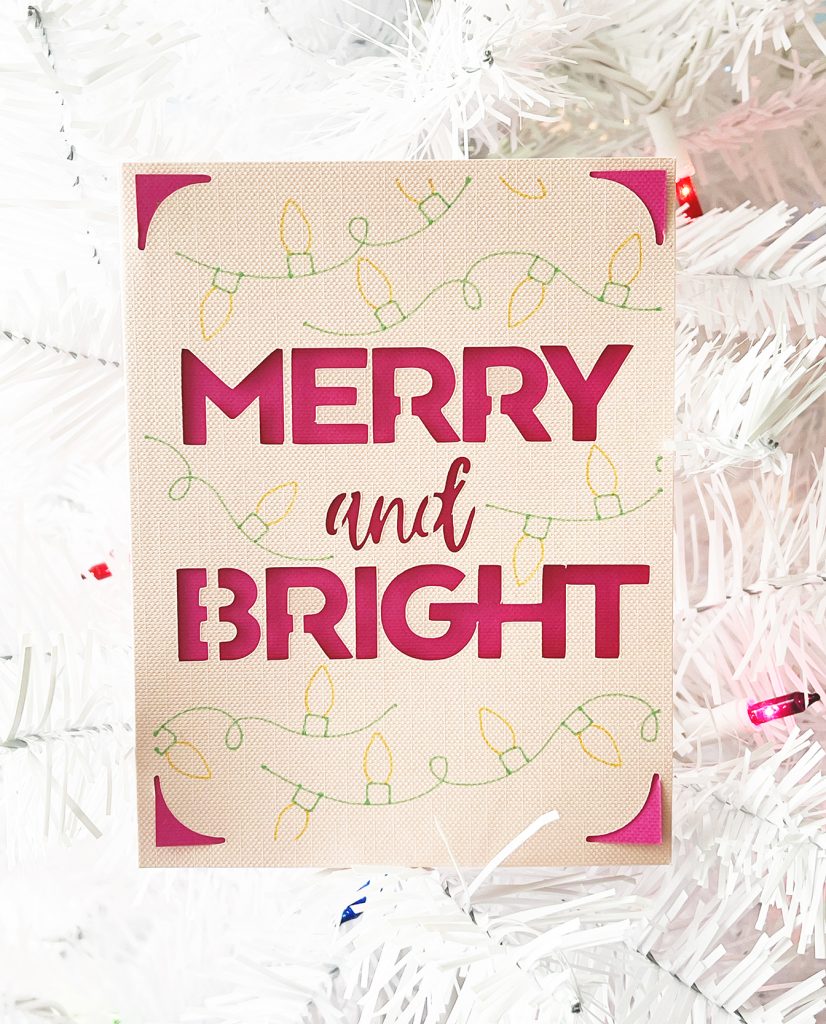
I even made it using another Cricut Insert Card set – this one is pink and I love it!
LATEST POSTS:
- Wicked Coloring Pages to Print for Free
- Free Thanksgiving Turkey Coloring Page Printable
- Free Printable Thanksgiving Meal Planner & Grocery List
- xTool M1 Ultra Beginner’s Guide and Review
- Free Best Dad Ever Father’s Day Coloring Page
Download Christmas Card Cricut Joy SVG
This file is DOWNLOAD #188 in my FREE DOWNLOADS LIBRARY.
Get the password below! (If you have the password, head over to the library to download the file.
You will NOT receive an email with the download file. SVG files can be used with Cricut Design Space and upgraded versions of Silhouette Studio.
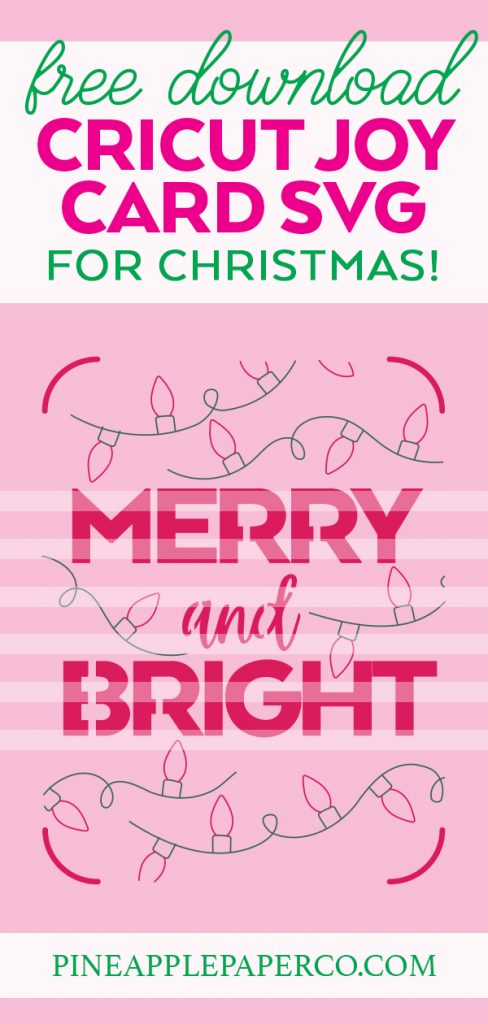
Pin Handmade Christmas Card for Cricut Joy


ABOUT CHARYNN
Hi, y’all! I’m Charynn, the owner and designer of Pineapple Paper Co. I’m a mom of four kids (two girls and two boys) living in Pittsburgh. I love hand lettering, anything southern, cocktails, and of course, pineapples! I am excited to share my SVG files, printables, and craft projects with you! The pineapple is a symbol of hospitality, and I welcome y’all to my little corner of the internet. Read more…