Tiny Dancer Wall Art (FREE with the Cricut Maker!)
This post and the photos within it may contain affiliate links. As an Amazon associate I earn from qualifying purchases. If you make a purchase through one or more of the links, I may receive a small commission at no extra cost to you.
The amazing people over at Cricut gave me resources to create this post, but all of the opinions and feelings about (how awesome) their products are our mine.
This post also contains affiliate links. If you decide to make a purchase through these links, I will receive a small commission, at no additional cost to you. These links help us to keep our blog content free, so thank you!
Happy Monday Everyone! By now you’ve seen all of my projects that I’ve made with my new Cricut Maker. Today, I’m part of a group of 50 bloggers (that I had the pleasure of participating in the Cricut Mountain Make-a-Thon with) to show you each of the 50 FREE Projects you can make when you purchase the Cricut Maker! In addition, you can ENTER TO WIN A CRICUT MAKER HSN BUNDLE at the end of the post!
I chose to make the Tiny Dancer Wall Art found in Cricut Design Space. CLICK HERE TO VIEW THE PROJECT IN DESIGN SPACE.

Here are the Materials you need to make this simple but darling project with your new Cricut (all materials and instructions also shown in Design Space):
-Cricut Vinyl (colors you can choose): skin tone, leotard/shoe color, tutu/hair band color, hair color, and black for the eyes/smile
-Cricut Transfer Tape
-Cricut Vinyl Weeding Tool
-Picture Frame (at least 8×10″ space, without resizing the project)
-Background Paper for inside frame
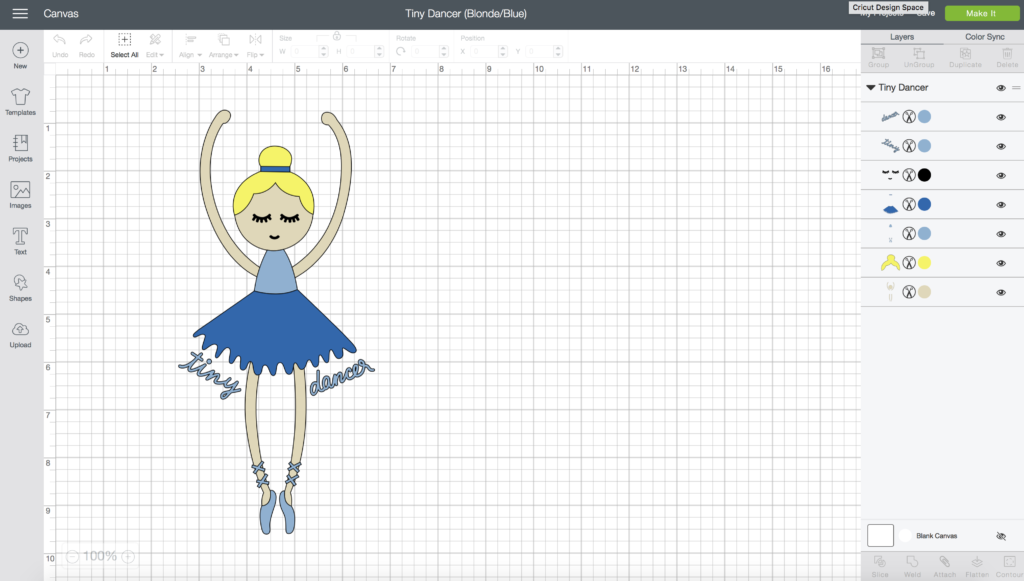
When you open this project (and most others in Design Space), you can choose to “Customize” the project. When choosing the colors and the size of your project, you’ll want to click that button, which can be found on the bottom right corner of the project description:

I didn’t want to change the size of the project, just the dancer to the colors I wanted so the Cricut would know how many mats I need for each color. You can change the colors of each of the components by clicking the colored circle next to each layer and selecting the colors you wish. When I finished, my color choices and canvas looked like this:
When the colors are set the way you would like, you just have to click “Make it” in the top right corner, and Design Space will tell you how many mats you need and which order you need to place them in the Cricut for cutting:
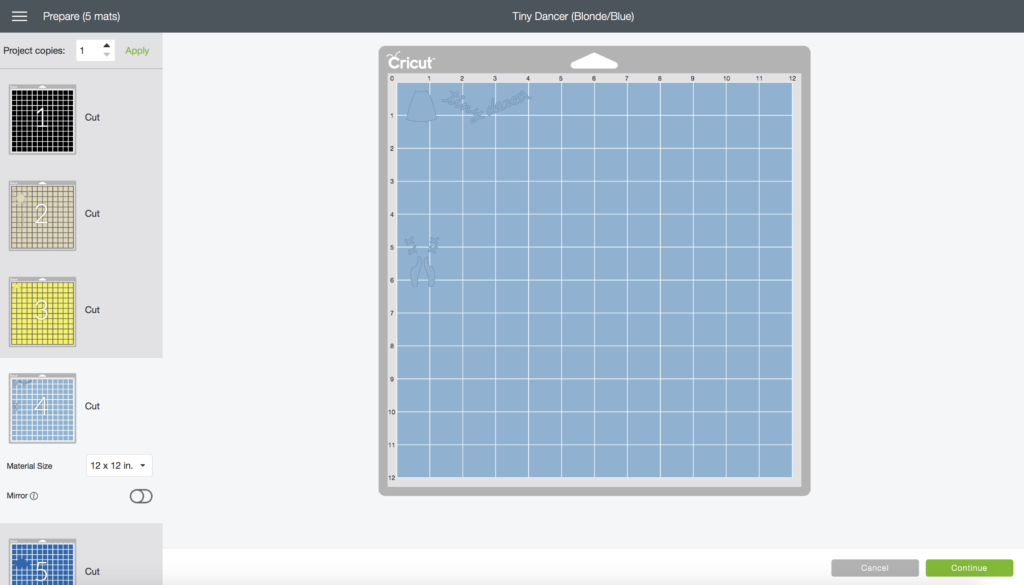
You can see that the project requires 5 mats (or to change the vinyl colors 5 times). I’ve chosen to have the light blue vinyl highlighted so you can see that Design Space knows which layers to lock in place so your placement of the pieces onto your frame is already done for you (notice the position of the leotard in comparison to the ballet shoes).
Once you have all of your pieces cut out, you just have to transfer the cut pieces to the outside glass of the frame using Cricut Transfer Tape. Place all of the pieces from bottom to top (the instructions on Design Space explain that), and then put your patterned paper in the frame. You’re done!

I also completed a secondary project–the bow and rosette cupcake toppers–that I will share with you in a later post!

Want to check out the other 49 FREE projects included with your Cricut Maker?! Click the pictures below to see how some of my blog buddies created these projects with their Maker!
![]()
Want to make these projects but don’t have a Maker yet? Enter through the widget below to not only win the new Cricut Maker but also the HSN bundle being released tonight at midnight!
Giveaway open to residents in the US and Canada ages 18 years and older. Giveaway runs from 10/2/17-10/9/17 and winner will be notified by email no later than 10/10/17. Winner will have 48 hours to respond or a new winner will be chosen.


Such a cute little project!!
This is so stinkin’ cute! My niece loves ballet and this would be such a fun birthday or Christmas gift for her! Love the colors you used!