Magnolia Inspired DIY “Gather” Sign
This post and the photos within it may contain affiliate links. As an Amazon associate I earn from qualifying purchases. If you make a purchase through one or more of the links, I may receive a small commission at no extra cost to you.
While decorating my house for the fall season, I have a tendency to head directly to Home Goods and buy a whole cart load of new decor. I’m trying very hard to avoid that this year, since we are doing some rather large renovations on our house. So in addition to repurposing things from past seasons, I’m DIYing a few things as well. First on my list was a wooden sign. I see them everywhere, but was debating on what kind of design I wanted. One of the ones I’ve seen online is this sign from Ella Claire:
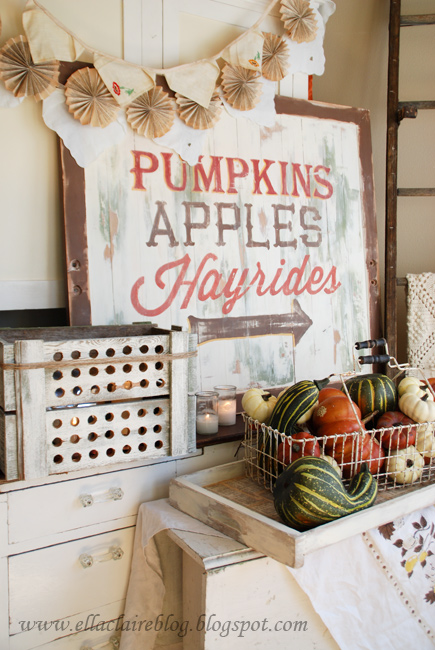
I love it, but I also wanted something that I could use year round. So, of course, I stumbled upon the “gather” signs in the farmhouse style made famous by Joanna Gaines/Magnolia Home (if you search “gather wooden sign” on Pinterest, you’ll get the idea of how many are out there). Like so many other people, I love Fixer Upper on HGTV, and I can’t. wait. for the Hearth and Hand line at Target to debut in November. My colonial home doesn’t lend itself to much in the way of farmhouse decor, but I try to sneak in a few pieces here and there. So I decided to “gather” (pun intended) my supplies and try to DIY a sign for my own home.
I decided that the easiest way for me to start was to plan on using my Cricut Maker machine. Using vinyl as a type of stencil, I would be able to paint and distress the wood as well as the lettering to give it a little bit of that rustic, farmhouse charm.
If you’d like to make your own, here’s the supplies you’ll need:
-Craft cutting machine, such as the Cricut Maker
-Black adhesive vinyl
-Vinyl Transfer Tape
-Piece of wood (mine is a piece of remnant 1×6″, cut to about 30″ long)
-White paint (acrylic or latex paint is fine)
-Black gloss enamel craft paint (I used DecoArt)
-Fine grit sandpaper
First, you need to prep your board. All I did was mix my white paint with a little bit of water and brush it on, making no attempt for totally even coverage. After all, I wanted it to look distressed. Depending on how white you’d like the sign to be, you may have to do a couple of coats with watered down paint.
Next, you need to design the lettering. Since I’m using a Cricut brand machine, I used Cricut Design Space. Since all I have at the moment is a 12×12″ cutting mat, I designed my lettering to fit on the mat, splitting “gather” into two sections of 3 letters each.
If you would like to use my exact file and lettering in Cricut Design Space, here’s the public file link:
CLICK HERE FOR GATHER DESIGN SPACE FILE
The Cricut Maker will prompt you to cut the files on two different mats, 12×12″ each. Now, there are two ways to do this next step. You can transfer the full vinyl to the board and then remove the letters, creating a stencil that you’ll leave on the wood to paint. I originally tried this method, but my vinyl kept getting stuck to itself. So I decided to use vinyl transfer tape and transfer the letters by themselves to the board. This actually turned out pretty well, that way I could position the letters exactly where I wanted them. Also, the font from design space I used makes the “g” reeeeallly low, so I used a small utility knife to slice the loop of the “g” away from itself and the “a” so I could move the “g” up and change the angle of attachment to the “a.” I wish I had a picture of this, but this is what happens when I craft at 10:30pm.
After all of my letters were positioned the way I wanted them, I traced around the letters with a pencil, and added tails to the beginning and end by hand. Then I removed the vinyl letters.
Then, with a small brush I filled in the pencil lines with the black enamel craft paint. It goes on quickly, and it was about 20-30 minutes to completely fill in the letters.
After it was completely dry (overnight), I sanded the entire piece with fine grit sand paper. I got rid of the rough corners and sanded directly over the lettering to distress it a little bit.
And that’s it! Here’s the completed sign:
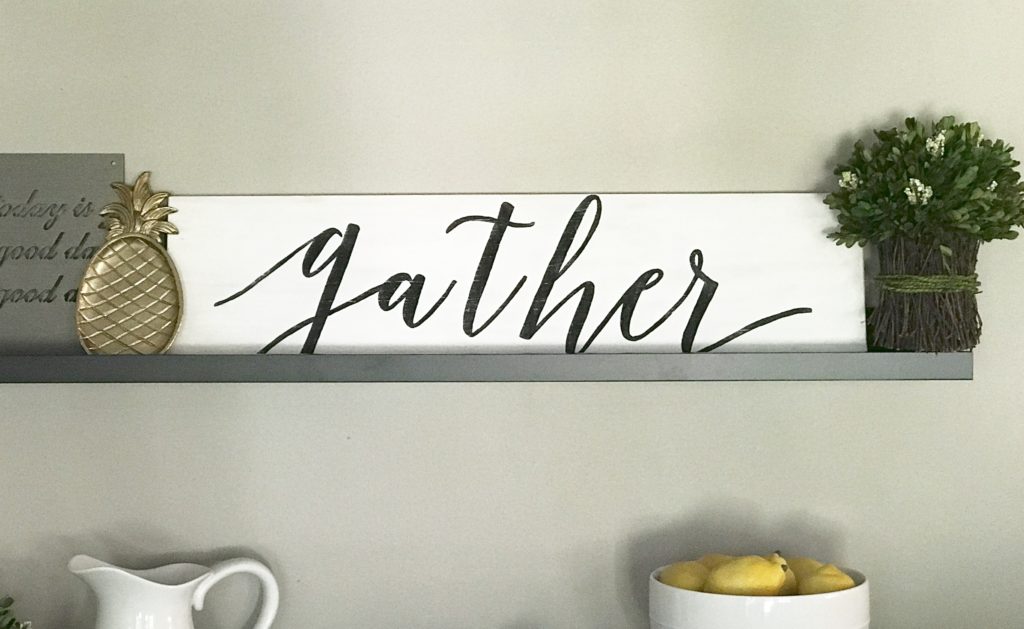
All in all, it was a super easy project, and since I had all of the supplies I needed at home, I could tell my husband that it was a $0 DIY!
This post contains affiliate links. If you choose to purchase a product through one of our links, we will receive compensation, although your purchase price will not change.


ABOUT CHARYNN
Hi, y’all! I’m Charynn, the owner and designer of Pineapple Paper Co. I’m a mom of four kids (two girls and two boys) living in Pittsburgh. I love hand lettering, anything southern, cocktails, and of course, pineapples! I am excited to share my SVG files, printables, and craft projects with you! The pineapple is a symbol of hospitality, and I welcome y’all to my little corner of the internet. Read more…