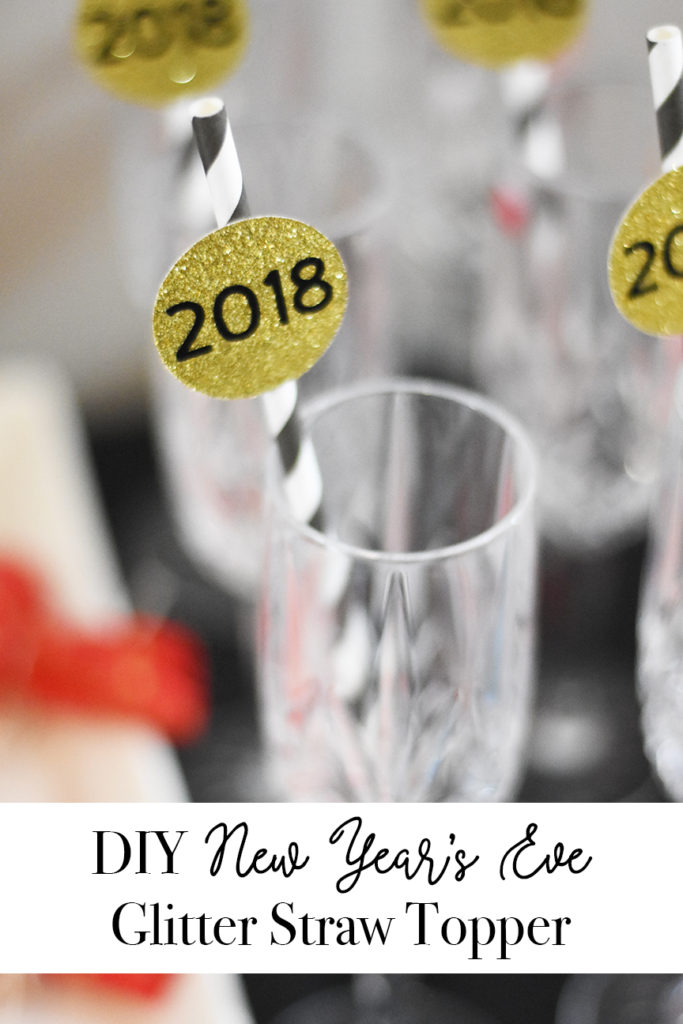
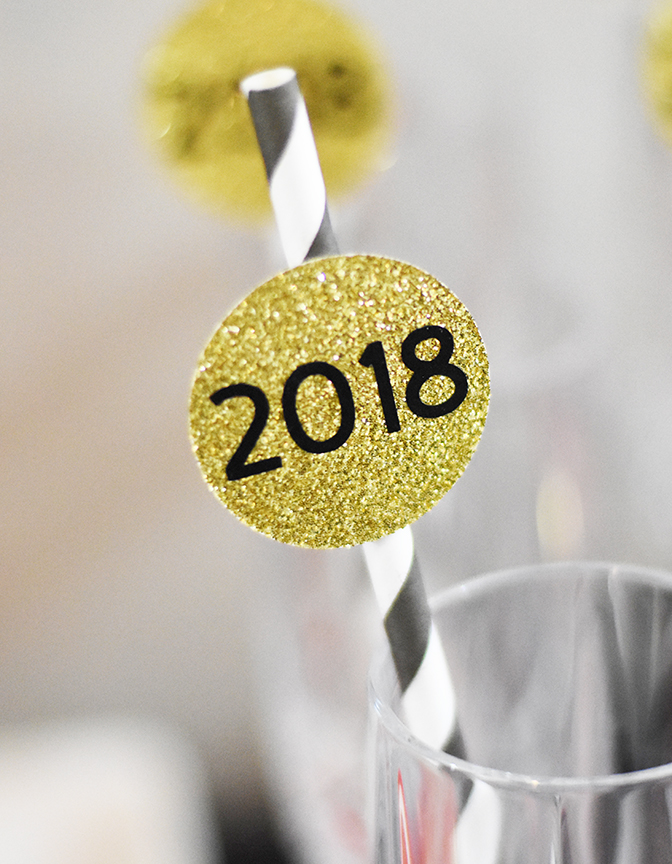
DIY New Year’s Eve Glitter Straw Topper
This post and the photos within it may contain affiliate links. As an Amazon associate I earn from qualifying purchases. If you make a purchase through one or more of the links, I may receive a small commission at no extra cost to you.
One of our favorite projects from our NYE Party for Cricut are these simple and adorable DIY New Years straw toppers that are reminiscent of the NYE “Ball” that falls every year in Times Square, New York City.
This post contains affiliate links. If you decide to make a purchase through these links, I will receive a small commission, at no additional cost to you. These links help us to keep our blog content free, so thank you!
Materials Needed for this Project:
-Cricut cutting machine or Circle Punch (We used a 1.5″ circle for our straw toppers) SHOP CRICUT MACHINES HERE.
-Glitter Cardstock
-Black Iron-On Vinyl (SHOP CRICUT IRON ON VINYL HERE)
-Cricut EasyPress or Iron (SHOP CRICUT EASYPRESS HERE)
This project literally only takes a couple of minutes from start to finish, which is perfect when you’re trying to plan a small party or a last-minute get together for New Year’s Eve.
In Cricut Design Space, you need to create the circles as well as the “2018” in your chosen font. Should you wish to make the exact size/font that we have shown, you can access the Design Space Project BY CLICKING HERE.
When you click “Make It” you’ll need 2 mats: one for the glitter card stock, and one for the iron-on vinyl:
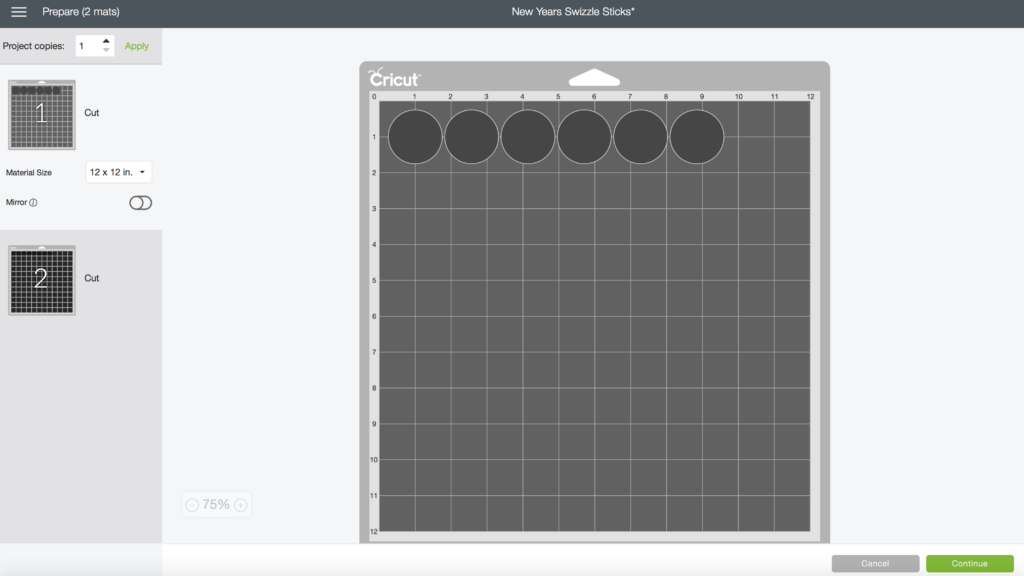
Be sure after you cut your circles that you change your material to “Iron-On” to cut your numbers!
After all of the pieces are cut, instead of using transfer tape as you would with regular vinyl, you just iron on the numbers to the paper with your Cricut EasyPress! We used the settings at 300 degrees for about 10 seconds. I’ve found that when using iron-on vinyl on certain kinds of paper, it’s easier to remove the clear backing while the project is slightly warm.
Attach to your straws with hot glue or tape and you’re done!
We look forward to sharing our other Cricut DIY projects from the full post (READ THE FULL POST BY CLICKING HERE)!


ABOUT CHARYNN
Hi, y’all! I’m Charynn, the owner and designer of Pineapple Paper Co. I’m a mom of four kids (two girls and two boys) living in Pittsburgh. I love hand lettering, anything southern, cocktails, and of course, pineapples! I am excited to share my SVG files, printables, and craft projects with you! The pineapple is a symbol of hospitality, and I welcome y’all to my little corner of the internet. Read more…