Make a Personalized Cocktail Tray and Glasses with Cricut
This post and the photos within it may contain affiliate links. As an Amazon associate I earn from qualifying purchases. If you make a purchase through one or more of the links, I may receive a small commission at no extra cost to you.
The amazing people over at Cricut sponsored this birthday party and post, but all of the opinions and feelings about (how awesome) their products are our mine.
This post also contains affiliate links. If you decide to make a purchase through these links, I will receive a small commission, at no additional cost to you. These links help us to keep our blog content free, so thank you!
Earlier this week, we shared the Strawberry Cocktail Party that we threw for our friends with the help of our Cricut Explore Air 2 machine. Today we are sharing a DIY Tutorial on how to make the Cocktail tray as well as the Mojito glasses using Cricut Adhesive Foil and Vinyl.


To make the tray as shown, you need:
-Cricut Explore Air 2
-Cocktail Tray of your choice
–Red, Green, White, and Yellow Cricut Vinyl (if adding the strawberry design as shown on the tray)
–Cricut Transfer Tape (that’s what gets your foil from the backing to the tray)

After gathering your materials, open up Cricut Design Space (it even comes as an App!). We created the “Strawberry Champagne Cocktail” text using a font from our computer and strawberry from a Cricut design that you access (and get many more!) HERE.
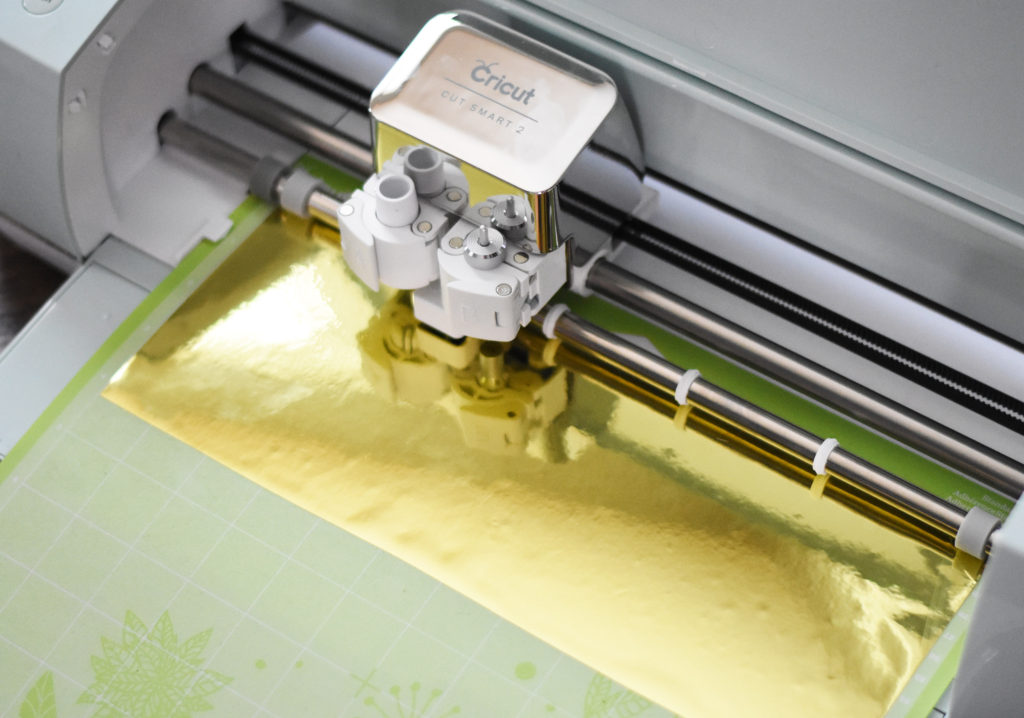
Using the 12×12″ mat and the adhesive foil, cut out your text using the “custom” setting and selecting “Adhesive Foil” in the dropdown box when prompted. Here’s a picture of our Cricut Explore Air 2 in action:
Next you want to carefully take off all of the excess foil, leaving the text only, as shown below. Cut a piece of transfer tape to match your design area, and peel off the backing and place it over your design. Press on the transfer tape to make sure everything adheres using the scraper from your Cricut tools.
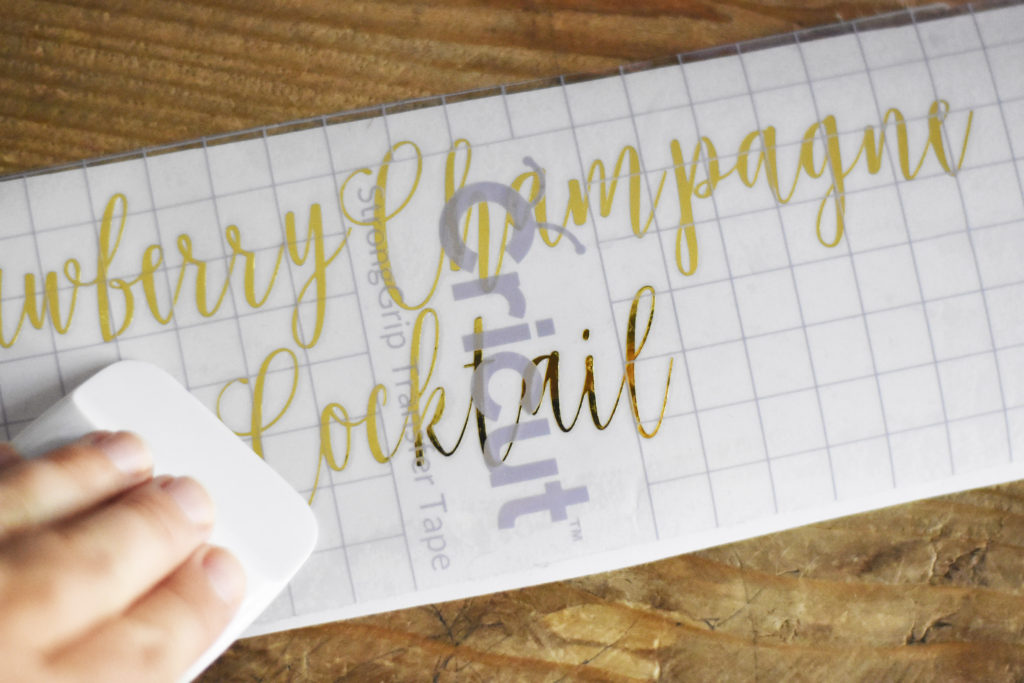
Peel the transfer tape off gently, making sure all of your foil comes with it, and place it where you want on the tray. Again, use the scraper to press the foil text onto your tray, so when you carefully pull off the transfer tape, the foil design is left behind on your tray!

Cut out the strawberry design using your machine (I place all of the design elements on one canvas and use small pieces of vinyl in the coordinating areas on the mat; one cut session, but different colors of vinyl!). Using the same transfer tape method as above, layer your strawberry pieces on the tray. After you’ve applied the strawberry design, your tray looks like this:

A personalized cocktail looks good at any party, and is so easy to make! And if you use the name of the drink, you won’t have to answer “What is this drink?” all night. Well, maybe not.
We also made custom glasses for our Strawberry Mojitos using the Gold Adhesive foil and exact same method as above. Whatever font or drink suits your party, you have instant party glasses!

To see the whole party and all of the Cricut ideas I used, check out the full party post HERE.
For more party inspiration, follow Cricut on Instagram, and Pineapple Paper Co. on Instagram, Pinterest, and Facebook.


ABOUT CHARYNN
Hi, y’all! I’m Charynn, the owner and designer of Pineapple Paper Co. I’m a mom of four kids (two girls and two boys) living in Pittsburgh. I love hand lettering, anything southern, cocktails, and of course, pineapples! I am excited to share my SVG files, printables, and craft projects with you! The pineapple is a symbol of hospitality, and I welcome y’all to my little corner of the internet. Read more…