How to Engrave with Cricut Maker to Make a Monogram Necklace
This post and the photos within it may contain affiliate links. As an Amazon associate I earn from qualifying purchases. If you make a purchase through one or more of the links, I may receive a small commission at no extra cost to you.
You can use the new Cricut engraving tool with your Cricut Maker to engrave metal, acetate, and other materials! See how to engrave with your Cricut to make a monogram necklace!

Have you been wanting to engrave jewelry with your Cricut? With the launch of the brand new QuickSwap tools, including the Cricut Engraving tip, now you can! Engraving is a feature that I’ve been hoping to see with the Cricut Maker, and I couldn’t be more excited about it.
The Cricut Maker tools that have been released so far are:
- Knife Blade (I’ve made a functional DIY cake stand with it!)
- Rotary Blade
- Scoring Wheel (which is perfect for a project like this Watermelon rosette banner)
- Engraving Tool
- Debossing Tool
- Wavy Blade
- Perforating Blade
2023 Update: What’s the best Cricut machine? I have a whole comparison post about Cricut Maker vs. Cricut Maker 3 and which one you really want!
Plus, if you’re looking for another tool for the best jewelry engraving, make sure you check out the xTool P2, xTool M1, or xTool F1! A laser machine may be your best choice! I almost exclusively use one of my laser machines for engraving!
Can you engrave with a Cricut machine?
This is a question I have been asking too, and of course the answer is now YES – depending on what Cricut machine you own. The QuickSwap housing and the Engraving tool (or tip) are only able to be used in the Cricut Maker. It will NOT work in Cricut Explore Air models or earlier versions of Cricut machines. Now’s a great time to buy a Cricut Maker – I can hardly wait to see what other tools will be released!
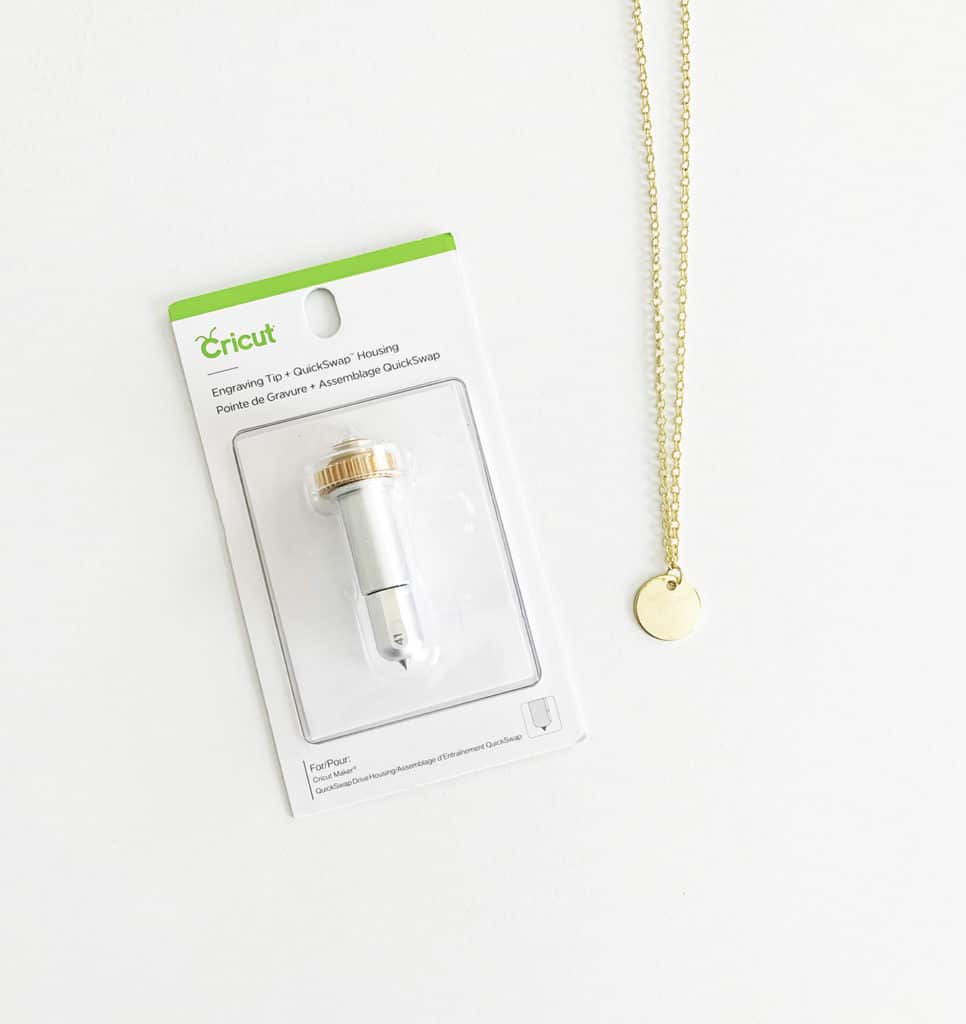
The Cricut engraving tool has a small metal point at the end that is used to engrave materials like metal, acetate, leather, cardstock, glitter paper, and more! It is placed into the “B” side of the machine, and has a little tiny “41” on it so you can tell it apart from the other QuickSwap tips.

I will monogram pretty much anything that doesn’t move, and I’ve done a huge post on how to make Personalized Gifts with your Cricut. Plus, I’ve made a Monogrammed Baby Outfit and DIY Christmas Apron. Since I’ve been practically begging to be able to make engraved jewelry with my Cricut Maker for two years, my first project is a metal monogram necklace.

Supplies You Need to Make a Monogram Necklace with the Cricut Engraving Tool
- Cricut Maker or Cricut Maker 3 (Buy a Cricut on Amazon | Cricut | Michaels)
- Blank Jewelry Stamping Round Charm or Full Necklace
- Small Pliers (if you need to remove the jump ring attaching the charm to the necklace)
- Cricut Engraving Tool with QuickSwap Housing
- Painters Tape or Masking Tape
- Lint Roller or Cloth (to remove metal fragments to finish)
- Sharpie, Craft Paint, or Enamel Metal Stamp Marker
How to Engrave Metal Jewelry with the Cricut
I designed the monogram using a Cricut Design Space font, so you can just head over to my project if you’d like to see my sizing, font choice, and how I set up the canvas!
Monogram Necklace Design in Cricut Design Space
You can also find this design on My Cricut Design Space Profile Page or by searching for “Charynn Olsheski”
Want to use one of your own fonts? Learn How to Upload Your Own Fonts into Cricut Design Space.
Setting the image you’d like to cut to “engrave” is easy – just set the “Linetype” at the top to “Engrave” in the drop down box. I “attached” the images (I also decided to test engrave a small pineapple at the same time) to the canvas so they’ll cut on the mat exactly where I have them placed.

I did a test run with the Cricut pens, just to see if where I had them attached to the canvas is where they would engrave. I just set the images to “draw” for the test, and used regular printer paper.

The test worked pretty well and offered a guide for where I should place my metal necklace charms.
I removed the charms from the necklace and placed them on a Strong Grip mat (purple) and used painters tape to secure them while using the engraver.

To engrave, you just click the green “Make It” button and follow the normal onscreen prompts. Load the engraving tool in the “B” side of the machine housing (and your Cricut machine will also run a test to detect if you’re using the proper tool.) Set the material to engrave on the “Aluminum Sheet” setting.

After the machine is done engraving, be very careful removing your jewelry from the mat – it can get warm as well as have small metal fragments on it. I used a lint roller I had on hand to remove all of the fragments before I handled them.

To finish the monogrammed necklace charm, I used a Sharpie to color in the engraved area and then wiped it with a paper towel to remove the excess. This makes your engraving more visible and professional looking!

If you don’t want to use a Sharpie, there are products on the market especially for this use – just look for an enamel metal stamp marker.
I don’t love how the pineapple came out at all – the design was weird and off center on the charm, so I’m going to scrap that particular design for future projects!

To finish the necklace, use small pliers to re-attach the monogram charm to the necklace chain. You’re done!
Check out this other awesome Cricut Engraving Tool post from my friend Heidi at Happiness is Homemade for more ways to use your Cricut Maker to engrave projects! Next up, I’m going to try some Cricut Earrings!
LATEST POSTS:
- How to Make a Spotify Code Necklace with a xTool F1
- Make Laser Engraved Jewelry with the xTool F1 Laser Machine
- Free Printable Stanley Valentine’s Day Card
- Free Printable Conversation Hearts Sticker Set
- Lover Sublimation Design for Valentine’s Day
Pin Cricut Engraving Tool Necklace:

I love how professional the result is (for a craft machine!) and I definitely plan on using it for making gifts this holiday season.


What setting for metal did you use?
oh my gosh! I used the Aluminum Sheets setting – I’m going to update the post right now!
This is very pretty! Would you mind sharing which Font you used?
It’s a Cricut font available in Design Space called “Elizabeth” 🙂
I wish I could see how you set up your canvas but the project is set to private.
Right now there’s a problem with Design Space that is creating that error (it’s a public canvas). Cricut says they’re working on fixing it 🙂
How long does it take to engrave one charm?
just a couple of minutes of engraving time!
For the sharpie, is there something else I can use to remove excess? It wouldn’t budge with just water
Try a little acetone or rubbing alcohol 🙂
Can you engrave rings on the Cricut Maker?
Yes! You just have to buy the ring blanks that are flat and then you bend after engraving.
Hi. I am new to the Cricut world. Just got the maker. Then I ordered some aluminum from Cricut. Can you actually cut out shapes with that aluminum? TY!
Unfortunately, no. Just engrave 🙁